
Learning how to boil sweet potatoes is one of those kitchen skills that seems simple but makes a real difference in your cooking. Whether you’re prepping for a weeknight dinner, meal planning for the week, or making a holiday side dish, nailing the boiling process means you’ll get perfectly tender sweet potatoes every single time—no mushy disasters, no hard centers.
I’ve boiled hundreds of sweet potatoes over the years, and I’m going to walk you through exactly what I’ve learned works best. This isn’t complicated stuff, but there are a few tricks that separate mediocre results from genuinely great ones.
Table of Contents
Choosing the Right Sweet Potatoes
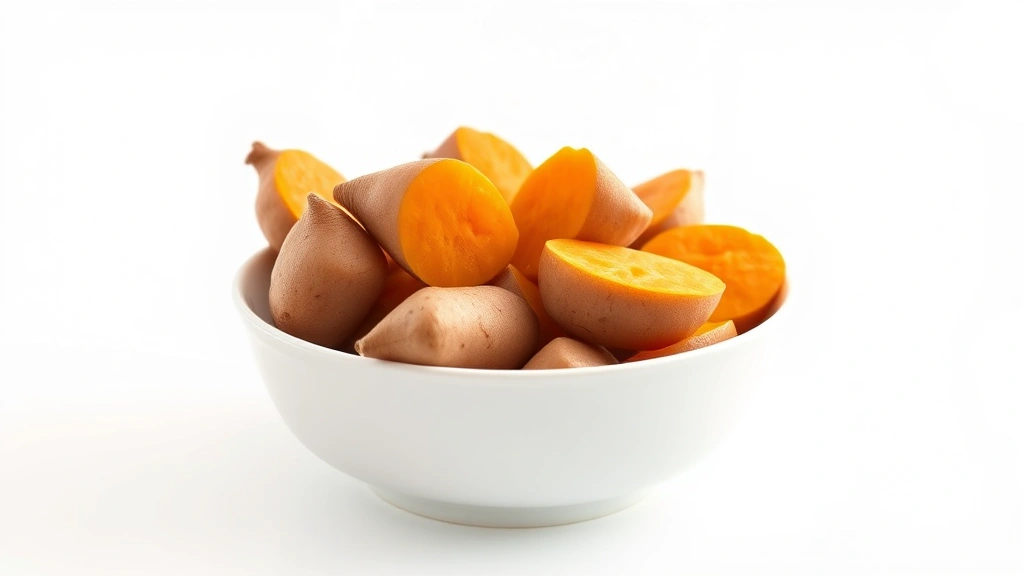
Before you even think about boiling, you need to start with quality sweet potatoes. Head to your local market and look for firm potatoes without soft spots, wrinkles, or sprouting. Size matters too—I recommend picking potatoes that are roughly the same size so they cook evenly. If you’ve got a mix of large and small ones, you’ll end up with some overcooked and some undercooked.
The orange-fleshed varieties are most common and work great for boiling. You might also find purple or white varieties at farmers markets. All of them boil beautifully, though cooking times can vary slightly depending on size and starch content. Don’t stress about the variety too much—the technique stays the same.
Store your sweet potatoes in a cool, dark place before cooking. A pantry works perfectly. Never refrigerate raw sweet potatoes; the cold actually damages the cell structure and affects flavor.
Prep Work Before Boiling
This is where most people rush, and it’s a mistake. Wash your sweet potatoes thoroughly under cold running water, scrubbing with your hands or a vegetable brush to remove all dirt. You’re going to be eating the skin (or at least handling it), so don’t skip this step. Dirt particles are never fun.
Next, decide whether you’re peeling before or after boiling. I typically boil with the skin on—it keeps the potato intact and prevents waterlogging. You can peel after cooking when they’re cool enough to handle. Just use a vegetable peeler or paring knife, and the skin slides right off.
If you’re in a hurry and want to peel beforehand, go ahead. Just know that peeled potatoes will absorb more water and cook slightly faster. Either way works fine.
The Boiling Method
Fill a large pot with enough cold water to cover your sweet potatoes by about two inches. This is important—starting with cold water ensures even cooking from the outside in. If you dump potatoes into already-boiling water, the outside gets overcooked before the inside catches up.
Place your cleaned potatoes in the cold water. Now bring the whole pot to a rolling boil over high heat. Once it’s boiling, reduce the heat to medium so you’ve got a gentle, steady boil—not a violent, aggressive rolling boil that bounces potatoes around and breaks them apart.
Add a generous pinch of salt to the water. This isn’t just for flavor; it raises the boiling point slightly and helps the potatoes cook more evenly. I use about a tablespoon per gallon of water. If you’re making crockpot recipes or other sides alongside your sweet potatoes, seasoning the boiling water gives you a head start on flavor.
Cooking Times and Sizes
Here’s where size really matters. A medium sweet potato (about 5-6 inches long) takes roughly 15-20 minutes. Small potatoes might be done in 10-12 minutes. Large ones can take 25-30 minutes or even longer if they’re really chunky.
The best approach? Cut larger potatoes into chunks before boiling. A 2-3 inch chunk cooks in about 15 minutes and gives you more control. This also means faster, more consistent results across a batch. If you’re boiling whole potatoes, try to pick medium-sized ones so they’re all roughly the same.
Don’t rely solely on time—use it as a guide, not gospel. Environmental factors like altitude, pot size, and water temperature affect cooking. That’s why testing is crucial, which I’ll cover next.
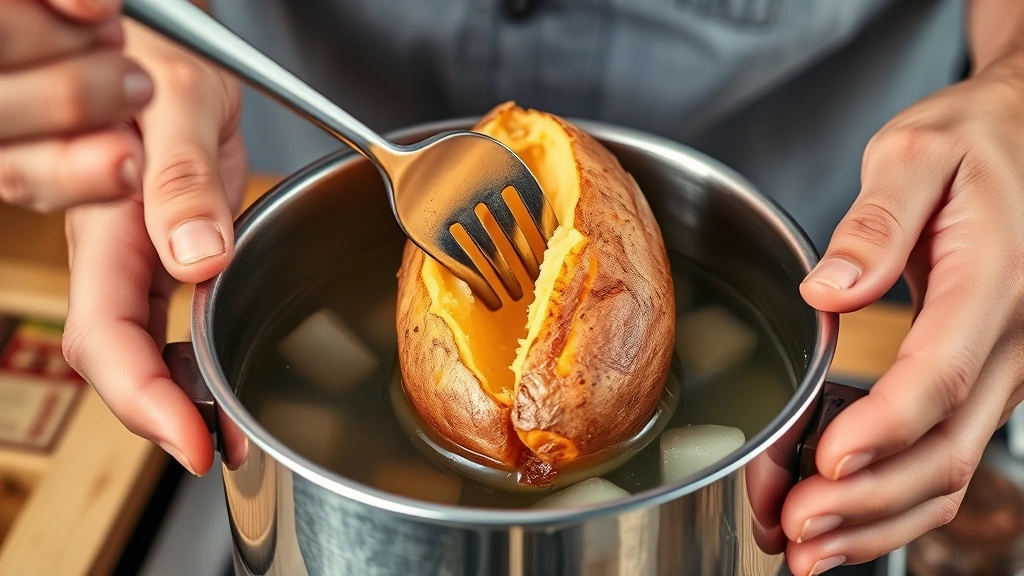
Testing for Doneness
The fork test is your best friend here. Pierce the thickest part of a potato with a fork. If it slides through with zero resistance, you’re done. If it meets any resistance, give it another couple of minutes and test again.
A properly cooked sweet potato should be fork-tender all the way through. The flesh inside should be soft and yielding, not grainy or hard. This is the difference between a mediocre result and a genuinely great one.
Don’t overcook them—overcooked sweet potatoes fall apart when you try to handle them and become waterlogged. Undercooked ones are hard and unpleasant to eat. That sweet spot in the middle is what you’re after.
Cooling and Storage Tips
Once they’re done, drain the potatoes in a colander. Let them cool for a few minutes until they’re comfortable to handle. If you’re peeling them, this is when you do it. The skin peels off easiest when they’re still warm but cool enough to touch.
If you’re storing boiled sweet potatoes, let them cool completely to room temperature first. Then refrigerate in an airtight container for up to 5 days. You can also freeze them for up to 3 months, though the texture changes slightly—they become softer and better suited for mashing or baking into recipes.
For meal prep, I like to boil a batch on Sunday and portion them out. They reheat beautifully in the microwave (about 2-3 minutes) or oven (10 minutes at 350°F). Similar to how you’d approach how long to bake pork tenderloin, timing and temperature matter for reheating.
Common Mistakes to Avoid
The biggest mistake I see is overcrowding the pot. If you jam too many potatoes in there, the water temperature drops and cooking becomes uneven. Leave some space—they should be mostly submerged but not crammed in like sardines.
Starting with hot water instead of cold is another common error. You’ll get inconsistent cooking with the outside mushy and the inside still firm. Always start cold.
Not salting the water is a missed opportunity. Salt isn’t just flavor—it’s part of the cooking chemistry. Skip it and your potatoes won’t taste as good or cook as evenly.
Finally, don’t skip the testing step. Relying purely on time and guessing is a recipe for disappointment. Spend 30 seconds with a fork and you’ll know exactly where you stand.
Adding Flavor While Boiling
The water is your flavor vehicle. Beyond salt, try adding a bay leaf, a few sprigs of fresh thyme, or a cinnamon stick. These infuse subtle flavor into the potatoes as they cook. Remove them before serving or eating.
For a more savory approach, add a splash of vegetable or chicken broth instead of plain water. This works especially well if you’re using the boiled potatoes in a savory dish. Just remember that broth has salt, so adjust your additional salt accordingly.
If you’re making a sweet preparation, a cinnamon stick and a bit of vanilla in the water adds complexity without being obvious. It’s a subtle touch that makes people wonder what makes your sweet potatoes taste so good.
You can also look into complementary cooking methods—like how how long to boil asparagus uses similar techniques, or explore Dutch oven camping recipes that use boiled vegetables as components.
Frequently Asked Questions
Can I boil sweet potatoes with the skin on?
Absolutely. In fact, I recommend it. Boiling with the skin on keeps the potato intact, prevents waterlogging, and makes peeling easier after cooking. Just scrub them clean first.
How do I know if my sweet potato is done boiling?
Use the fork test. Pierce the thickest part with a fork. If it slides through with no resistance, it’s done. If you feel firmness, give it a few more minutes.
Why are my boiled sweet potatoes watery?
Overcooking causes this. Boiled too long, the potatoes absorb excess water and become mushy. Also, peeling before boiling increases water absorption. Stick to the cooking time guidelines and test frequently.
Can I boil sweet potatoes in advance?
Yes. Boil them, cool completely, and refrigerate in an airtight container for up to 5 days. Reheat in the microwave or oven before serving.
What’s the difference between boiling and steaming sweet potatoes?
Boiling is faster (15-20 minutes for medium potatoes) and uses direct water contact. Steaming takes longer (25-30 minutes) but retains slightly more nutrients. Both work fine—choose based on your schedule.
Do I need to cut large sweet potatoes before boiling?
Not necessarily, but I recommend it. Cutting large potatoes into 2-3 inch chunks speeds cooking, ensures evenness, and gives you more control. Whole large potatoes can take 30+ minutes.
Can I add butter or oil to the boiling water?
You can, but it’s not necessary. A small amount of oil might help prevent sticking, but boiling water naturally prevents that. Save your butter for after cooking—it’ll taste better.
The Bottom Line
How to boil sweet potatoes comes down to a few core principles: start with cold water, maintain a gentle boil, use consistent sizing, test for doneness with a fork, and don’t overcook. Follow these guidelines and you’ll get perfectly tender sweet potatoes every single time.
It’s one of those skills that takes maybe five minutes to learn but pays dividends every time you cook. Whether you’re making a simple weeknight side, prepping for the week ahead, or creating something more elaborate, nailing the boiling process is your foundation.
The beauty of boiled sweet potatoes is their versatility. Serve them warm with a pat of butter and cinnamon. Mash them into a casserole. Chill them and add to salads. Use them in smoothie bowls. The cooking method stays the same; the possibilities are endless. Once you master this basic technique, you’ll find yourself reaching for sweet potatoes constantly.
For similar cooking techniques, check out our guides on how long to defrost a turkey for holiday planning, or explore how to use a French press coffee maker for other kitchen fundamentals that make everyday cooking better.


