
Learning how to wrap presents is one of those skills that looks harder than it actually is—once you know the fundamentals, you’ll be turning out gift-wrapped packages that look store-bought in no time. Whether you’re wrapping a small jewelry box or an awkwardly shaped toy, the same core techniques apply, and honestly, they’re way easier to master than most people think.
Table of Contents
Gather Your Materials First
Before you even think about wrapping, get your station set up properly. You’ll need wrapping paper (obviously), sharp scissors, clear tape, and a flat work surface. I can’t stress the sharp scissors part enough—dull scissors will tear paper and make you want to throw everything across the room. Trust me on this one.
Pick up a few rolls of quality wrapping paper. The cheap stuff tears easier and doesn’t fold as crisply. You’ll also want to have tape within arm’s reach—nothing’s worse than hunting for tape mid-wrap. Some people swear by double-sided tape for a cleaner look, and honestly, once you go double-sided, you won’t go back. It eliminates visible tape lines and makes your finished gifts look genuinely professional.
Clear your workspace completely. Wrapping paper likes to slide around, and you need room to maneuver. A dining table or large desk works perfectly. Make sure you have good lighting too—you’ll spot mistakes easier and work faster when you can actually see what you’re doing.
Measure and Cut Paper Right
This is where most people go wrong. They cut too much paper or too little, and then the whole wrap falls apart. Here’s the trick: place your gift in the center of the paper and roll it toward you. The paper should wrap around the box with just a slight overlap—not a huge gap, and not overlapping by more than an inch or two.
For the length, the paper should reach from the middle of one end of the box to the middle of the other end. Fold it in half mentally, and that’s your target. Once you’ve got the right dimensions marked, cut with one smooth motion using those sharp scissors we talked about.
The key is consistency. If you’re wrapping multiple gifts, measure the first one carefully, then use it as your template for the others. This saves time and makes sure everything looks uniform—which is honestly the mark of someone who knows what they’re doing.
Wrap the Long Sides Tight
Now for the actual wrapping. Place your gift in the center of the paper with the shiny side facing down (or up—depends on your preference, but pick one and stick with it). Fold one long side of the paper up and over the box, creasing it firmly along the edge. This crease is crucial because it’s what makes the wrap look crisp and professional.
Fold the other long side over and overlap it slightly. If you’re using regular tape, this overlap should be small enough that you can hide the tape seam on the bottom of the gift. Press down firmly as you go—no wrinkles, no gaps. This is where patience pays off. Take your time and smooth it out as you wrap.
The tension matters here. You want the paper tight enough to look smooth but not so tight that it tears or distorts the box. Think of it like wrapping a burrito—snug but not strangling. Once both long sides are secure, you’ve got the hardest part done.
Fold the Ends Perfectly
The ends are where most people’s wrapping jobs fall apart, so pay attention here. Take one end of the paper and fold it down to create a triangle point at the top. Crease this fold sharply. Then fold the two side flaps down and inward, creating a clean envelope-like fold. This is the classic method, and it works for a reason.
Press everything down firmly so the folds stay in place. The goal is a neat, symmetrical triangle at each end. If your folds look wonky, don’t panic—just unfold and try again. The paper isn’t damaged; you’ve got this.
For boxes that are slightly wider or deeper, you might need to adjust your fold angles slightly. Some people prefer the hospital corner method (similar to how you’d fold a fitted sheet), which creates super sharp edges. Either way works—pick the method that feels natural to you and practice it until it’s automatic.
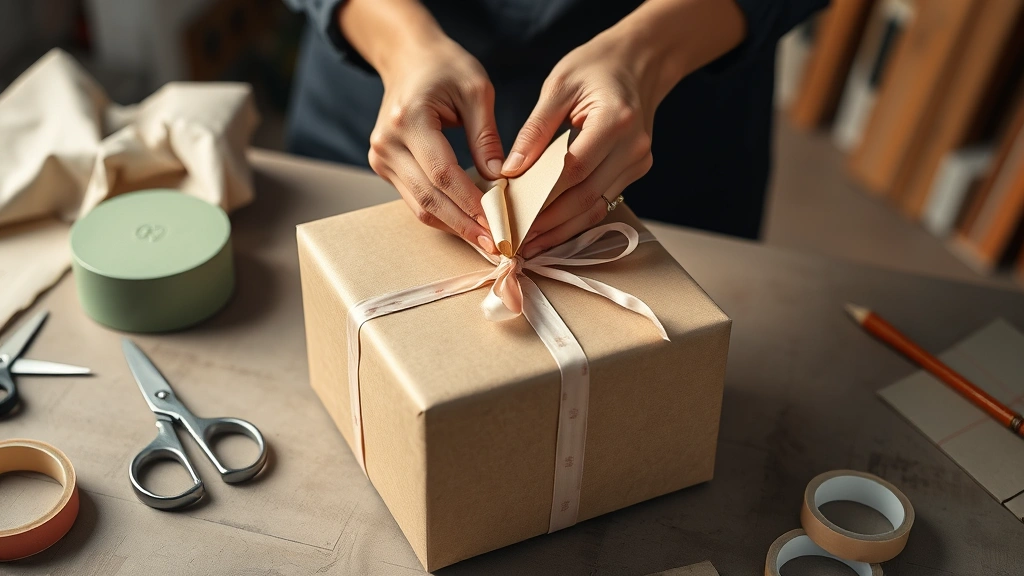
Secure with Tape Strategically
Now tape everything down. Use small pieces—about 2-3 inches each—and place them strategically. One piece along the center seam of the long sides, and one piece securing each end fold. That’s it. You don’t need to tape the entire gift; you just need enough to keep it from coming undone.
Pro tip: tear your tape pieces before you need them. Trying to unroll tape while holding wrapping paper is a recipe for frustration. Tear off 4-5 small pieces and stick them on your work surface where you can grab them quickly. This speeds up the whole process and keeps you from getting tangled up in tape.
If you’re using double-sided tape, you’ll barely see it at all. Regular tape should be hidden on the underside of the gift whenever possible. If you can’t hide it completely, make sure your pieces are small and neat—sloppy tape is the dead giveaway of amateur wrapping.
Add Finishing Touches
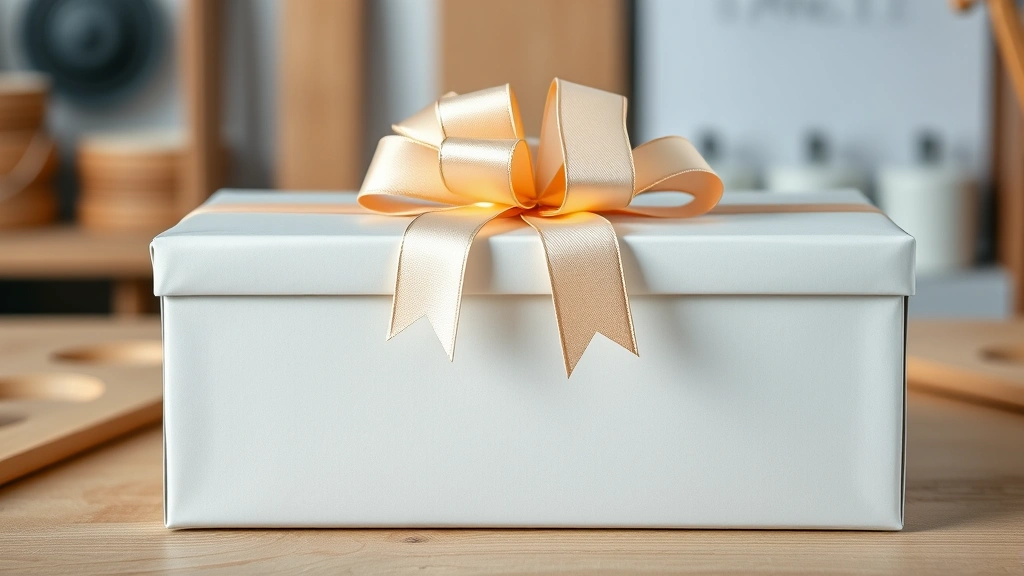
The bow or ribbon is what takes your wrapped gift from “looks okay” to “looks amazing.” This is where you can really make it shine. A simple ribbon wrapped around the gift with a bow on top instantly elevates the whole presentation. You can use traditional bows, curling ribbon, fabric ribbons, or even twine for a more rustic look.
If you want to create custom labels in Word for a personalized touch, that’s a nice addition too. A handwritten tag or custom label adds that personal element that makes gifts feel extra special.
Don’t underestimate the power of coordinating your wrapping. Use complementary colors and patterns. Solid paper with a patterned ribbon, or vice versa, usually looks better than too many competing patterns. And remember, sometimes simple is best—a single color with a quality ribbon beats busy patterns every time.
Handling Tricky Shapes
Not everything comes in a neat rectangular box. Bottles, oddly-shaped toys, and irregular items need a different approach. For bottles, the diagonal wrap method works great: place the bottle diagonally on the paper, roll it up, and secure the ends like you would a burrito. Twist the excess paper at the ends and tie it with ribbon.
For really weird shapes, consider using a gift bag. Seriously, there’s no shame in it, and they look perfectly fine. If you want to wrap it anyway, use smaller pieces of paper and overlap them more generously. Think of it like shingling a roof—each piece overlaps the previous one, creating a weatherproof seal. Same principle applies to awkward gifts.
Cylindrical items like candles or tubes can be wrapped like bottles. Just roll the paper around them, fold one end like an envelope, and twist the other end. Secure with ribbon and you’re done. The key with any tricky shape is accepting that you might need more paper and more tape than a standard box—that’s totally normal.
Pro Tips for Better Results
Here’s what separates the amateurs from the pros: they practice. Seriously, the first gift you wrap will take 15 minutes. By your tenth gift, you’ll be done in five. Your hands learn the motions, your eye learns what looks right, and the whole process becomes second nature.
Keep your workspace organized. Have paper, tape, scissors, and decorations all within reach. The more you have to hunt for things, the slower you work and the more frustrated you get. Professional gift wrappers set up stations specifically designed for efficiency.
Use quality materials. Better paper folds crisper, better tape sticks cleaner, and better scissors cut smoother. You don’t need to spend a fortune, but spending a little extra on these basics makes a huge difference in your final results.
If you want to protect your wrapped gifts, consider using a password-protected digital gift receipt stored separately if you’re shipping them. For physical delivery, just handle them carefully and they’ll arrive looking perfect.
Watch a few videos online if you’re visual learner—seeing someone else do it can click something in your brain that written instructions don’t. Then practice on a few boxes before tackling your actual gifts. There’s no penalty for practice runs.
Frequently Asked Questions
How much wrapping paper do I need per gift?
A standard roll of wrapping paper (about 2.5 feet wide and 25 feet long) covers roughly 40-45 square feet, which is enough for 8-10 medium-sized boxes. For larger items, you might only get 4-5 gifts per roll. It’s always better to have extra paper than to run short mid-wrap.
What’s the best type of tape for gift wrapping?
Double-sided tape is genuinely the best if you can find it, but regular clear tape works fine too. Avoid duct tape, masking tape, or anything too thick—it’ll show and look unprofessional. Some people use glue sticks, which work surprisingly well for small seams.
Can I wrap gifts the night before?
Absolutely. Wrapped gifts are fine sitting around for days before the big reveal. Just store them somewhere they won’t get crushed or bent. A closet or under a bed works great. Just make sure kids or curious adults can’t sneak peeks.
How do I fix torn wrapping paper?
If the tear is small and on the underside, just tape it. If it’s visible, you can try patching it with a piece of matching paper and tape, or start over with that side. Small tears can also be hidden under a bow or ribbon placement. Don’t stress—you can always rewrap if it’s really bad.
What’s the fastest way to wrap multiple gifts?
Set up an assembly line. Measure and cut all your paper first, then wrap all the long sides, then fold all the ends, then tape everything. Doing the same step repeatedly is faster than completing one gift at a time. Also, have someone else help if possible—it’s faster and more fun.


