How to Turn Off Caps Lock on Chromebook: Easy & Essential Guide

Accidentally activated Caps Lock on your Chromebook? Whether you’re typing emails, documents, or messages, unwanted all-caps text can be frustrating. The good news is that disabling Caps Lock on a Chromebook is quick and straightforward. Unlike traditional laptops with a dedicated Caps Lock key, Chromebooks use a Search key in its place, making the process unique to Google’s operating system. In this guide, we’ll walk you through multiple methods to turn off Caps Lock on your Chromebook, troubleshoot common issues, and help you customize your keyboard settings for optimal productivity.
Quick Answer
To turn off Caps Lock on a Chromebook, press the Search key + Alt simultaneously. This keyboard shortcut toggles Caps Lock on and off instantly. If you don’t see a Search key, look for a magnifying glass icon on your keyboard—that’s your Search key. You can also access Caps Lock settings through your Chromebook’s Settings menu under Keyboard options for additional customization.
Tools & Materials Needed
- Your Chromebook (any model running Chrome OS)
- A working keyboard (built-in or external USB/Bluetooth)
- Access to Chromebook Settings menu
- Optional: External keyboard for easier navigation
Understanding Caps Lock on Chromebook
Chromebooks operate differently from Windows or Mac computers when it comes to keyboard functionality. The traditional Caps Lock key has been replaced with a Search key, which serves as the primary modifier key in Chrome OS. This design choice reflects Google’s focus on web-based computing and streamlined keyboard navigation. Understanding how to turn off Caps Lock on a Chromebook requires knowing that Caps Lock is still available—it’s just accessed through keyboard combinations rather than a dedicated physical key.
The Search key is typically located in the top-left corner of your keyboard where the Caps Lock key would normally be on a traditional computer. It features a magnifying glass icon and serves multiple functions beyond Caps Lock control. When you press Search + Alt, you’re toggling the Caps Lock feature on or off. This method is the fastest way to turn off Caps Lock on a Chromebook, and it works across all Chrome OS devices, from budget models to premium Chromebook Pro machines.
Many users initially find this different from their previous computing experience, but once you understand how to turn off Caps Lock on a Chromebook using the Search key, the process becomes second nature. Chrome OS is designed to be intuitive, and the keyboard shortcuts follow logical patterns that make sense once you learn them.
Method 1: Using the Keyboard Shortcut
The fastest and most efficient way to turn off Caps Lock on a Chromebook is using the keyboard shortcut. Press and hold the Search key (magnifying glass icon) and simultaneously press the Alt key. This combination instantly toggles Caps Lock on or off. The beauty of this method is that it works immediately—no menus to navigate, no settings to adjust. You’ll notice the change take effect as soon as you release the keys.
To verify that Caps Lock is now off, try typing a lowercase letter. If the letter appears in lowercase, Caps Lock has been successfully disabled. If you still see uppercase letters appearing, press Search + Alt again to toggle it off. This keyboard shortcut is the most reliable method to turn off Caps Lock on a Chromebook because it’s built directly into Chrome OS and works consistently across all devices.
For users who frequently toggle Caps Lock, this shortcut becomes muscle memory quickly. The combination is positioned logically on the keyboard, with the Search key easily accessible in the top-left corner and the Alt key on the bottom row. Some users even create custom key mappings to make this process even faster, which we’ll explore in a later section.
Method 2: Accessing Settings Menu
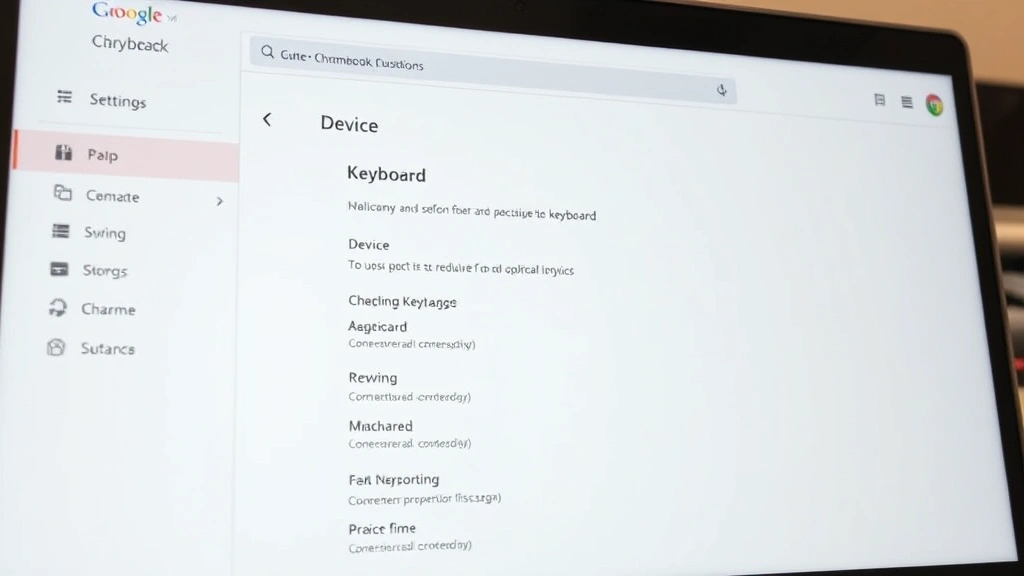
If you prefer a visual approach or want to disable Caps Lock more permanently, you can access Caps Lock settings through your Chromebook’s Settings menu. Click on the time display in the bottom-right corner of your screen to open the system menu, then select the Settings gear icon. Navigate to Device on the left sidebar, then click Keyboard. This section contains all keyboard-related settings, including Caps Lock options.
Within the Keyboard settings, you’ll find a toggle for Caps Lock functionality. You can enable or disable it entirely, or adjust how it behaves. Some Chromebooks also allow you to remap the Search key or Caps Lock to perform different functions. This method is particularly useful if you want to turn off Caps Lock on a Chromebook permanently rather than just toggling it for a single session. You can also customize other keyboard behaviors, such as key repeat rate and accent key options.
The Settings approach also allows you to see all available keyboard customization options in one place. If you share your Chromebook with family members or colleagues, you can set up different keyboard profiles for each user account, with unique Caps Lock settings for each person. This flexibility makes the Settings menu approach ideal for households or workplaces with multiple users.
Method 3: Using External Keyboards
If you’re using an external keyboard with your Chromebook, the process to turn off Caps Lock on a Chromebook may vary slightly depending on the keyboard type. Most external keyboards still work with the Search + Alt shortcut, but some specialized keyboards may have different behavior. For traditional external keyboards with a physical Caps Lock key, you can press that key directly to toggle Caps Lock on and off, just as you would on a regular computer.
When connecting an external keyboard to your Chromebook, Chrome OS typically recognizes it automatically and applies your existing keyboard settings. However, some keyboards—particularly gaming or mechanical keyboards—may have dedicated software or custom key mappings. To ensure your external keyboard works optimally, check the manufacturer’s documentation and visit your Chromebook’s Keyboard settings to verify that Caps Lock behaves as expected.
For Bluetooth keyboards, make sure your keyboard is properly paired with your Chromebook. Once paired, the keyboard should function identically to the built-in keyboard. If you’re experiencing issues with an external keyboard, try re-pairing it or visiting the WikiHow keyboard troubleshooting guide for comprehensive solutions. External keyboards offer a more traditional computing experience, and many users find they prefer having a dedicated Caps Lock key for accessibility reasons.
Remapping Keys for Custom Functionality
Advanced users who want to turn off Caps Lock on a Chromebook and customize their keyboard further can use Chrome OS’s key remapping features. This allows you to reassign the Search key or other keys to perform different functions. To access key remapping, go to Settings > Device > Keyboard > Keyboard and language settings. Look for the Modifier Keys section, where you can change what each modifier key does.
You might want to remap the Search key to Ctrl or Alt if you frequently use keyboard shortcuts in applications. Alternatively, some users disable Caps Lock entirely and remap that function to a different key combination. This is particularly useful if you never use Caps Lock and want to free up that key combination for other purposes. Chrome OS gives you granular control over these settings, making it possible to create a keyboard layout that matches your personal workflow.
If you work across multiple devices—perhaps a Chromebook and a traditional laptop—consider maintaining consistent key mappings where possible. This reduces the cognitive load when switching between devices and helps you maintain typing efficiency. According to Lifehacker’s productivity guides, customizing your keyboard layout to match your workflow can significantly improve your typing speed and reduce errors.
Troubleshooting Caps Lock Issues
Sometimes Caps Lock may seem stuck or unresponsive on your Chromebook. If you’ve tried the Search + Alt shortcut and Caps Lock won’t turn off, first try restarting your Chromebook. A simple restart often resolves temporary keyboard glitches. Power down your device completely, wait 30 seconds, and power it back on. This clears the system memory and can fix issues where Caps Lock appears stuck.
If restarting doesn’t help, check your keyboard settings to ensure Caps Lock is enabled. Some Chromebooks allow you to disable Caps Lock entirely through Settings, which might explain why the toggle isn’t working. Navigate to Settings > Device > Keyboard and verify that Caps Lock is enabled in the options. If it’s disabled, enable it and try the Search + Alt shortcut again.
For external keyboards, ensure the keyboard is properly connected. If using Bluetooth, try disconnecting and reconnecting the keyboard. For USB keyboards, try a different USB port. If you’re still experiencing issues, visit HowStuffWorks’ technology troubleshooting section for detailed diagnostic steps. You can also check the keyboard for physical damage or stuck keys, which might prevent proper Caps Lock toggling.
Best Practices for Keyboard Management
To maintain optimal keyboard functionality on your Chromebook and avoid Caps Lock-related issues, establish good keyboard habits. First, familiarize yourself with the Search key’s location and the Search + Alt shortcut for toggling Caps Lock on a Chromebook. Make this your go-to method rather than relying on settings menus. Second, clean your keyboard regularly to prevent dust or debris from interfering with key functionality. Use a soft brush or compressed air to remove particles from between the keys.
Keep your Chrome OS updated to the latest version, as Google regularly releases updates that improve keyboard functionality and fix bugs. Updates often include optimizations for input devices, so staying current ensures you have the best keyboard experience. If you use multiple keyboards, consider labeling them or keeping notes about their specific settings so you can quickly switch between them without confusion.
For accessibility, explore Chrome OS’s built-in accessibility features. If you have mobility challenges, you might benefit from sticky keys or other accessibility options that modify how Caps Lock and other keys behave. These features are found in Settings > Advanced > Accessibility and can make your Chromebook significantly easier to use. As noted by The Spruce’s tech guides, proper keyboard management is essential for long-term device health and user comfort.
Additionally, if you’re learning how to turn off Caps Lock on a Chromebook for the first time, practice the Search + Alt shortcut several times until it becomes automatic. This muscle memory will save you time and frustration in the future. Consider creating a cheat sheet or bookmark this guide for quick reference whenever you need to toggle Caps Lock or troubleshoot keyboard issues.
FAQ
What is the Search key on a Chromebook?
The Search key is a dedicated key on Chromebook keyboards, typically located where the Caps Lock key would be on a traditional computer. It features a magnifying glass icon and serves as the primary modifier key in Chrome OS. The Search key is used in combination with other keys to perform various functions, including toggling Caps Lock on or off.
Why doesn’t my Chromebook have a Caps Lock key?
Google replaced the Caps Lock key with the Search key as part of Chrome OS’s streamlined design philosophy. This change reflects the focus on web-based computing and keyboard efficiency. Caps Lock functionality is still available through the Search + Alt keyboard shortcut, so you can still turn off Caps Lock on a Chromebook whenever needed.
Can I permanently disable Caps Lock on my Chromebook?
Yes, you can disable Caps Lock entirely through your Chromebook’s Settings menu. Go to Settings > Device > Keyboard and toggle off the Caps Lock option. Once disabled, the Search + Alt shortcut will no longer toggle Caps Lock. This is useful if you never use Caps Lock and want to prevent accidental activation.
How do I turn off Caps Lock on a Chromebook with an external keyboard?
If your external keyboard has a physical Caps Lock key, you can press it directly to toggle Caps Lock on or off. Alternatively, you can use the Search + Alt shortcut on your Chromebook’s built-in keyboard, which will also affect the external keyboard’s Caps Lock status since they share the same Chrome OS settings.
What should I do if Caps Lock is stuck on my Chromebook?
If Caps Lock appears stuck, first try the Search + Alt shortcut to toggle it off. If that doesn’t work, restart your Chromebook by powering it down completely and restarting it. Check your keyboard settings to ensure Caps Lock is enabled and functioning properly. If using an external keyboard, disconnect and reconnect it to reset the connection.
Is there a way to remap the Search key on my Chromebook?
Yes, you can remap the Search key and other modifier keys through Chrome OS’s keyboard settings. Go to Settings > Device > Keyboard > Keyboard and language settings and look for the Modifier Keys section. From there, you can reassign the Search key to perform different functions based on your preferences.
Can I use Caps Lock on my Chromebook if I’m using a different language?
Yes, Caps Lock functions consistently across all languages on your Chromebook. The Search + Alt shortcut works regardless of your current language or input method. However, some languages may have different capitalization rules or behaviors, so Caps Lock might function slightly differently depending on the language you’re using.
Does turning off Caps Lock on a Chromebook affect other users on the device?
If you disable Caps Lock through the Settings menu, it affects only your user account. Other users on the Chromebook will have their own keyboard settings and can enable Caps Lock independently. This allows each user to customize their keyboard experience based on their preferences.
How can I learn more about Chromebook keyboard shortcuts?
You can view all available Chromebook keyboard shortcuts by pressing Ctrl + Alt + ? on your Chromebook. This opens a comprehensive keyboard shortcuts guide that displays all available shortcuts for your device. You can also visit Consumer Reports’ technology guides for detailed reviews and tutorials about Chromebook features.
What’s the difference between the Search key and the Ctrl key on a Chromebook?
The Search key and Ctrl key are separate modifier keys on a Chromebook. The Search key (magnifying glass) is unique to Chrome OS and serves as the primary modifier for many Chrome OS-specific shortcuts. The Ctrl key functions similarly to traditional computers and is used for standard shortcuts like Ctrl+C (copy) and Ctrl+V (paste). Both keys can be used in combination with other keys, including each other.
For additional resources on managing your Chromebook, check out our guides on how to right click on a Chromebook, which covers another essential Chromebook skill. If you’re also interested in Mac computers, you might find our article on how to right click on a Mac helpful for comparison.
Conclusion
Learning how to turn off Caps Lock on a Chromebook is a fundamental skill that enhances your typing experience and productivity. Whether you use the quick Search + Alt keyboard shortcut, access the Settings menu, or customize your keyboard through key remapping, you now have multiple methods at your disposal. The Search + Alt shortcut remains the fastest and most reliable method for most users, offering instant Caps Lock toggling without navigating menus.
Remember that Chromebooks operate differently from traditional computers, and understanding these differences—like the replacement of Caps Lock with the Search key—is key to mastering Chrome OS. By familiarizing yourself with these keyboard shortcuts and settings, you’ll work more efficiently and avoid the frustration of accidental all-caps text. Keep this guide bookmarked for future reference, and don’t hesitate to explore other Chromebook keyboard features to further optimize your workflow.
Whether you’re a new Chromebook user or an experienced one, mastering how to turn off Caps Lock on a Chromebook is an essential part of comfortable computing. With the methods outlined in this guide, you’ll never struggle with unwanted capitalization again.