
Your car won’t start. You turn the key and hear that awful clicking sound—or nothing at all. Before you panic and call a tow truck, you need to know how to test a car battery. This skill takes maybe 15 minutes and can save you hundreds of dollars in unnecessary service calls or premature battery replacement.
A dead battery is one of the most common roadside emergencies, but here’s the thing: not every battery that fails to start your car is actually dead. Sometimes it’s a corroded terminal, a bad alternator, or a parasitic drain. Knowing how to test a car battery properly means you’ll diagnose the real problem instead of guessing. This guide walks you through the safe, practical methods that mechanics use—no special degree required.
Why Battery Testing Matters
Before we dive into how to test a car battery, let’s talk about why this matters. Your car’s battery isn’t just a power source—it’s the heart of your entire electrical system. When it fails, everything fails. But here’s what most people don’t realize: a battery can show signs of weakness long before it completely dies.
Testing your battery regularly catches problems early. A battery that’s losing capacity might still crank your engine on a warm day, but it’ll leave you stranded in winter. By learning how to test a car battery now, you avoid that 2 a.m. breakdown in a parking lot.
There are three main ways to test: voltage testing with a multimeter, load testing (the gold standard), and visual inspection. Each tells you something different. Voltage testing shows you what’s happening right now. Load testing shows you what happens under stress—which is what actually matters when you’re trying to start your engine on a cold morning.
According to Family Handyman’s battery testing guide, most car batteries last 3-5 years, but testing can help you squeeze out that fifth year or catch failure before it happens.
Safety First: Gear Up Before You Start
This is non-negotiable. Car batteries contain sulfuric acid and can deliver a serious shock. Before you test anything, protect yourself.
What you need:
- Safety glasses or face shield (acid splash is rare but possible)
- Work gloves—nitrile or leather, your choice
- A multimeter (digital is easier than analog)
- A well-ventilated space or outdoors
- No smoking, sparks, or open flames nearby
Safety Warning: Never touch both battery terminals simultaneously with bare hands or metal tools. This creates a direct short circuit. Also, remove metal jewelry—rings, watches, bracelets. Metal conducts electricity, and a battery can deliver enough current to cause a serious burn.
Park your car on level ground. Turn off the engine and all electrical systems. Wait at least 5 minutes before testing—this lets the battery settle to its resting voltage. If you test immediately after running the engine, you’ll get a false high reading because the alternator is still charging.
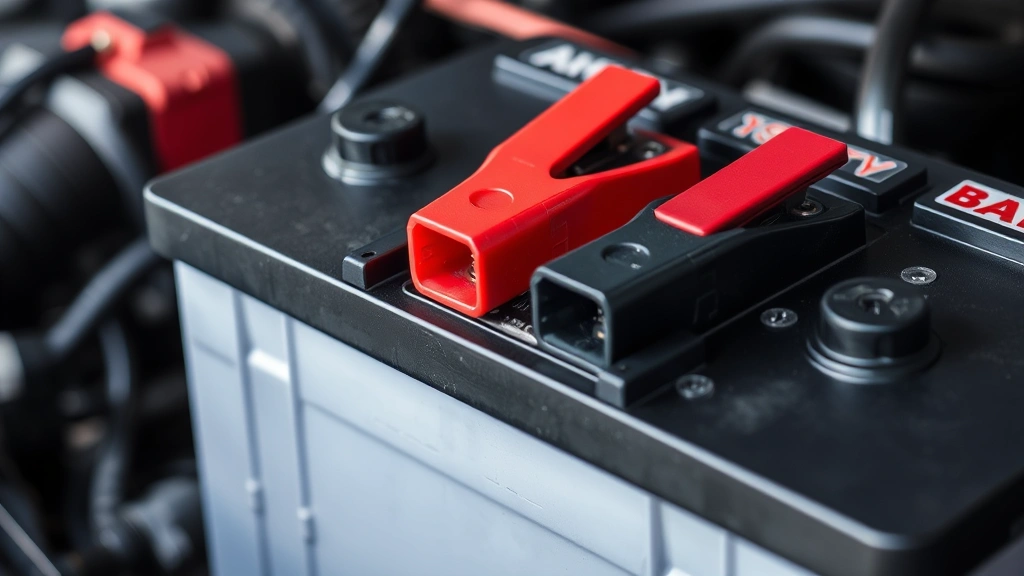
Make sure the battery terminals are visible and accessible. If they’re corroded (white, blue, or green crusty buildup), you might want to clean your battery terminals first. Corrosion can interfere with testing accuracy.
The Multimeter Method: Testing Voltage
This is the easiest way to test a car battery at home. A multimeter measures voltage, and voltage tells you if your battery has enough juice. Here’s the step-by-step process:
Step 1: Set Up Your Multimeter
Turn your multimeter to the DC voltage setting. You’re looking for a symbol that looks like a V with a line above it (DC, not AC). Set the range to 20 volts—this gives you enough headroom to read your battery safely.
Step 2: Identify the Terminals
Your battery has two terminals: positive (marked with + or red) and negative (marked with − or black). The positive terminal connects to the red probe on your multimeter. The negative terminal connects to the black probe.
Step 3: Take the Reading
Touch the red probe to the positive terminal. Touch the black probe to the negative terminal. Hold steady for 3-5 seconds. The multimeter will display a voltage reading.
What the Numbers Mean:
- 12.6V or higher: Your battery is in good shape. This is a fully charged, healthy battery.
- 12.0-12.5V: Your battery is discharged but likely still functional. Charge it and retest.
- Below 12.0V: Your battery is deeply discharged or dying. It needs replacement or professional service.
Here’s the catch: a voltage test only tells you what’s happening at rest. A battery can show 12.6V and still be unable to crank your engine. That’s why load testing is the real answer.
The Load Test: The Real Deal
A load test answers the question that actually matters: “Will this battery start my car?” It simulates what happens when your starter motor tries to turn the engine over.
There are two ways to do a load test: the professional way (at a shop with specialized equipment) and the DIY way (using a multimeter during starting).
The DIY Load Test Method:
- Set your multimeter to DC voltage mode (same as before)
- Connect the probes to the battery terminals
- Have someone crank the engine while you watch the multimeter
- Watch the voltage drop as the starter motor draws current
What You’re Looking For:
A healthy battery should stay above 10V while cranking. If voltage drops below 10V, your battery is struggling. If it drops below 9.5V, your battery is failing.
Think of it like this: voltage is your battery’s strength, but current delivery is its stamina. A tired battery might have decent voltage sitting still, but the moment you ask it to do work, it collapses. The load test catches that weakness.
According to This Old House’s automotive section, load testing is the most accurate method for determining battery health, especially for batteries over 3 years old.
Professional Load Testing:
If you want the gold standard, take your car to an auto parts store or mechanic. Many places (AutoZone, O’Reilly, NAPA) offer free load testing. They use a device that applies a specific load to the battery and measures how it responds. This is faster and more accurate than the DIY method. It takes 5 minutes, and you get a definitive answer.
Visual Inspection: Don’t Skip This

Before you start testing, look at your battery. Seriously. Half the time, the problem isn’t the battery itself—it’s what’s around it.
Check for:
- Corrosion on terminals: White, blue, or green crusty buildup. This blocks electrical connection. Clean it off with a wire brush and baking soda solution. This alone fixes many “dead battery” problems.
- Loose cable connections: Wiggle the cable clamps. They should be tight. A loose connection can prevent charging and starting.
- Cracks or leaks: If your battery case is cracked or leaking, it’s done. Time for replacement.
- Swelling or bulging: This means the battery is overcharging or has internal damage. Replace it immediately.
- Age: Look for the date code on the battery. It’s usually a letter and number (like “A” for January, then a number for the year). If your battery is over 5 years old, it’s living on borrowed time.
Corroded terminals are so common that I’d say 30% of “battery problems” are actually just dirty connections. That’s why cleaning battery terminals should be your first step before any testing.
Interpreting Your Results
You’ve tested your battery. Now what do the results actually mean?
Scenario 1: Resting voltage is 12.6V, load test stays above 10V
Your battery is healthy. If your car still won’t start, the problem is elsewhere—bad starter, alternator issue, or a parasitic drain. Get it checked by a mechanic.
Scenario 2: Resting voltage is 12.2V, load test drops to 9.8V
Your battery is weak but not dead. Try charging it fully (8+ hours on a trickle charger). Retest after charging. If it bounces back to 12.6V, you’re probably fine. If it stays low, replacement is coming soon.
Scenario 3: Resting voltage is below 12V, load test drops below 9.5V
Your battery is failing. Replace it. Don’t wait. A failing battery can leave you stranded, and it puts extra strain on your alternator.
Scenario 4: Voltage is fine, but your car still won’t start
This is the tricky one. Your battery is healthy, but something else is wrong. Could be:
- Bad starter motor
- Faulty alternator (battery charges but doesn’t stay charged)
- Parasitic drain (something drawing power while the car is off)
- Bad starter solenoid
- Corroded battery cables
At this point, you need professional diagnostics. But you’ve already ruled out the battery, which saves time and money.
When to Replace vs. When to Clean
Not every battery problem requires replacement. Sometimes a good cleaning is all you need.
Clean Your Battery If:
- Terminals are corroded but the battery is less than 3 years old
- Resting voltage is 12.4V or higher
- Load test shows voltage stays above 10V
- Cables are loose but not damaged
Replace Your Battery If:
- It’s over 5 years old and showing weakness
- Resting voltage is below 12V and won’t recover after charging
- Load test voltage drops below 9.5V
- Battery case is cracked, swollen, or leaking
- You’ve jump-started it multiple times in the past week
Replacement is straightforward. Most auto parts stores sell batteries and will install them free if you buy from them. Cost ranges from $100-$200 for a standard battery, up to $300+ for premium AGM batteries.
According to Bob Vila’s car battery recommendations, investing in a quality battery now saves headaches later. Cheap batteries fail faster and leave you stranded.
Common Testing Mistakes to Avoid
I’ve seen people test batteries wrong a hundred times. Here are the mistakes that mess up results:
Mistake 1: Testing with the engine running
If your engine is running, the alternator is charging the battery. You’re not testing the battery’s true state—you’re testing the alternator’s output. Always test with the engine off and at least 5 minutes of rest time.
Mistake 2: Not accounting for temperature
Cold batteries test lower than warm ones. If it’s 20°F outside, don’t be surprised if voltage reads 12.2V instead of 12.6V. This is normal. Retest in warmer conditions to get a true reading. Cold also affects load test results—a weak battery will show worse in winter.
Mistake 3: Testing immediately after a jump-start
A jump-start artificially boosts your battery voltage. Wait at least 30 minutes (ideally longer) before testing after a jump. The battery needs time to settle.
Mistake 4: Ignoring corrosion
Corroded terminals create resistance. Your multimeter might show good voltage, but the battery can’t deliver current properly. Clean first, then test. If you test with dirty terminals, you might get false readings.
Mistake 5: Using a cheap multimeter
A $10 multimeter from a gas station isn’t accurate enough for battery testing. Spend $20-$30 on a decent digital multimeter. You’ll use it for other projects anyway, and the accuracy is worth it.
Mistake 6: Not checking the alternator
If your battery won’t hold a charge, the problem might be the alternator, not the battery. A failing alternator doesn’t charge properly, so your battery dies even though it’s healthy. If your battery keeps dying despite testing fine, get the alternator checked. OSHA guidelines for electrical safety recommend professional service for complex electrical diagnostics.
Frequently Asked Questions
How often should I test my car battery?
– Test annually if your battery is over 3 years old. If it’s newer, test every 2 years or if you notice slow cranking. Also test before winter if you live somewhere cold—cold weather is hard on batteries.
Can I test a battery while it’s still in the car?
– Yes, absolutely. You don’t need to remove it. Just make sure the engine is off and you have good access to the terminals. This is actually safer than removing it.
What’s the difference between a load test and a cranking test?
– A load test applies a controlled electrical load to measure how the battery responds. A cranking test (DIY method) watches voltage drop while the starter actually cranks the engine. Both test the battery under stress, but a load test is more standardized and repeatable.
Is a 12-volt reading good enough?
– A 12-volt reading is the minimum, not the target. A healthy battery should read 12.6V at rest. If it’s reading exactly 12.0V, it’s discharged. If it’s reading 12.2V or below after rest, it’s weak.
Can cold weather affect battery testing?
– Absolutely. Cold reduces battery capacity and voltage temporarily. A battery that tests fine at 70°F might test weak at 20°F. This is why load testing is more accurate than voltage testing—it accounts for the stress the battery actually faces in winter.
What does it mean if voltage drops during the load test but recovers quickly?
– This is normal. Voltage should drop under load and recover when the load is removed. What matters is how far it drops and how low it stays. If it drops below 10V and struggles to recover, the battery is weak.
Should I replace my battery before a road trip?
– If your battery is over 4 years old or shows any signs of weakness, yes. Nothing ruins a trip like a dead battery 500 miles from home. A new battery costs $150. Being stranded costs thousands in towing and hotels.
Can a multimeter damage my battery?
– No. A multimeter is a passive measurement device. It draws almost no current and can’t harm your battery. The probes just touch the terminals—there’s no risk.
Why does my battery test fine but my car still won’t start?
– The battery might be fine, but something else is preventing starting. Check for corroded terminals, loose cables, bad starter, or parasitic drain. A battery that tests fine but can’t crank the engine suggests a problem with the starter, alternator, or electrical connections—not the battery itself.


