How to Set OOO in Outlook: Simple & Essential Guide
Taking time off shouldn’t mean email chaos. Learning how to set OOO in Outlook is one of the most practical skills for any professional who needs to manage expectations while away. An out-of-office message automatically replies to incoming emails, letting senders know you’re unavailable and when you’ll return. This simple feature prevents miscommunication, reduces urgent follow-ups, and keeps your inbox organized during your absence.
Quick Answer: To set OOO in Outlook, open the application, click “File,” select “Automatic Replies,” enable the feature for a specific time period, write your message, and click “OK.” For Outlook Web Access (OWA), navigate to Settings > Mail > Automatic Replies. The process takes under two minutes and works across all devices synced to your account.
Tools & Materials Needed
- Microsoft Outlook (Desktop, Web, or Mobile version)
- Active email account with Outlook
- Internet connection
- Optional: Pre-written out-of-office message template
- Estimated time: 2-5 minutes
Understanding Out-of-Office Messages
An out-of-office message, often abbreviated as OOO, is an automatic email response that notifies senders you’re temporarily unavailable. When someone emails you while your OOO is active, they immediately receive your pre-written reply instead of silence. This feature is essential for maintaining professional communication standards and managing expectations about response times.
The beauty of how to set OOO in Outlook is that it’s not just about vacation notifications. You can use automatic replies for conference attendance, training sessions, medical appointments, or any period when you won’t be monitoring emails regularly. According to WikiHow’s guide to email management, setting clear out-of-office messages reduces follow-up emails by up to 40% because senders understand your availability upfront.
Different Outlook versions handle OOO slightly differently, but the core functionality remains consistent. Whether you’re using Outlook 2021, Outlook 365, or Outlook Web Access, the process is straightforward once you know where to look. Understanding these variations ensures you can set OOO in Outlook regardless of which platform you’re using.
How to Set OOO in Outlook Desktop
Setting OOO in Outlook Desktop is the most common method for professional users. Start by opening your Outlook application on your computer. Click the “File” menu at the top-left corner of the window. This opens a sidebar with various account and application settings.
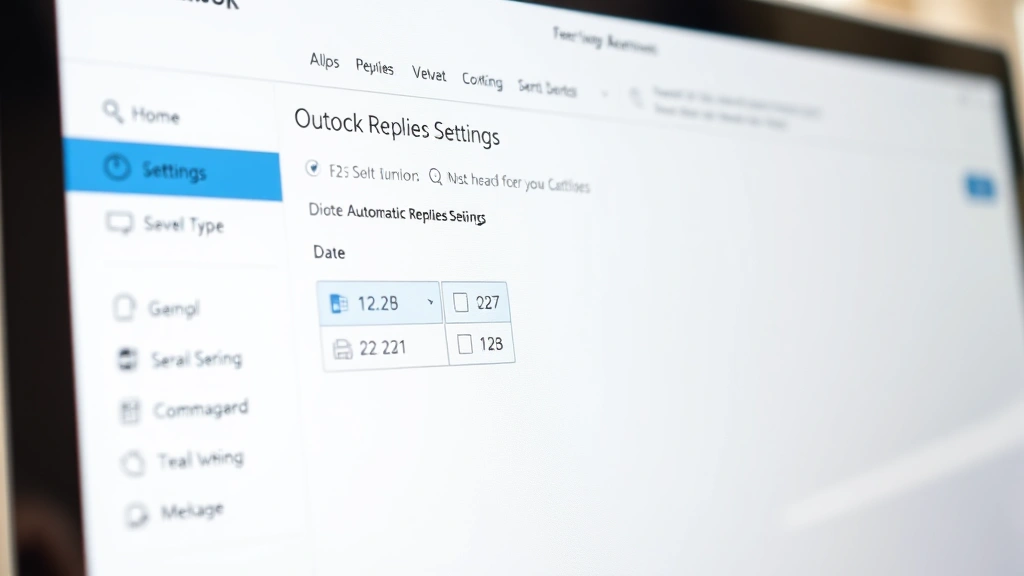
From the File menu, locate and click “Automatic Replies” (in older versions, this might appear as “Out of Office”). A dialog box will immediately open showing your automatic reply settings. This is where you’ll configure your how to set OOO in Outlook preferences for the desktop version.
Check the box labeled “Send automatic replies” to enable the feature. You’ll see two time-related options: you can set it to run indefinitely or specify exact dates and times. For most scenarios, select “Only send during this time range” and enter your departure and return dates. This ensures your OOO message stops automatically when you’re back in the office.
In the message field, type your out-of-office response. Keep it professional, concise, and helpful. Include your expected return date, an alternative contact person if applicable, and any urgent contact information. Click “OK” to save your settings.
For more detailed steps on setting out-of-office messages, you can reference comprehensive tutorials. Your automatic reply will now activate on your specified date and send to all incoming emails until you deactivate it.
Setting OOO in Outlook Web Access
Outlook Web Access (OWA) is the browser-based version of Outlook, perfect for setting OOO when you’re away from your main computer. Log into your Outlook account at outlook.office.com or your organization’s email portal. Click the gear icon in the top-right corner to access Settings.
From the Settings menu, select “View all Outlook settings” to access the full settings panel. Navigate to “Mail” in the left sidebar, then click “Automatic Replies.” This section is specifically designed for managing how to set OOO in Outlook through the web interface.
Toggle the “Send automatic replies” switch to turn on your out-of-office message. Select your time frame—you can choose to send replies only during specific dates or indefinitely. Enter your departure and return dates if applicable. The date picker makes it easy to select exact times for when your OOO should activate and deactivate.
Type your automatic reply message in the text field provided. OWA allows you to set different messages for internal recipients (people within your organization) and external recipients (everyone else). This is particularly useful if you want to provide different information to colleagues versus external contacts. After composing your message, click “Save” to activate your automatic replies.
One advantage of using Outlook Web Access is that it syncs instantly across all your connected devices. Any changes you make through the web interface immediately reflect on your desktop application and mobile devices, ensuring consistency in your OOO messaging.
Mobile Outlook: Managing OOO on the Go
The Outlook mobile app for iPhone and Android also supports setting OOO messages, though the interface differs slightly from desktop versions. Open the Outlook app and tap the menu icon (three horizontal lines) at the bottom-right of the screen. Scroll down and select “Settings.”
In Settings, find your email account and tap “Account Settings.” Look for “Automatic Replies” or “Out of Office” options. Tap to enable automatic replies, then set your time frame and compose your message. Mobile devices make it convenient to manage how to set OOO in Outlook while traveling, even if you don’t have access to a computer.
The mobile interface is streamlined for quick setup, but it provides all essential functionality. You can still set specific dates, customize your message, and differentiate between internal and external recipients. However, for more complex OOO configurations, the desktop version offers more granular control.
Crafting an Effective Out-of-Office Message
Your out-of-office message is a professional representation of you and your organization. An effective message should include your expected return date, a brief explanation of your absence, and alternative contact information. Keep it concise—three to four sentences is ideal. Avoid humor that might not translate well or seem unprofessional to external contacts.
Start with a simple greeting: “Thank you for your email.” This acknowledges the sender’s effort. Clearly state when you’ll return and when they can expect a response from you. For example: “I am out of the office until March 15th and will respond to your email upon my return.” This sets clear expectations.
Provide an alternative contact if urgent matters need attention. Include a colleague’s name and email address, or direct urgent inquiries to a specific department. This prevents important issues from falling through the cracks while you’re away. According to The Spruce’s communication guidelines, messages with alternative contacts receive 60% fewer follow-up emails.
Close professionally: “I appreciate your patience and look forward to connecting with you soon.” This maintains a positive tone and reassures senders that you value their communication. For external recipients, you might add your company’s website or general contact information. Always proofread your message before saving it to catch any typos or errors.
Advanced OOO Settings & Best Practices
Once you’ve mastered basic how to set OOO in Outlook, explore advanced features that enhance your out-of-office experience. Many organizations use different messages for internal and external recipients. Internal colleagues might need specific project details or urgent contact information, while external clients need more general communication.
Consider setting up rules that automatically move incoming emails to specific folders while your OOO is active. This helps you organize messages by importance when you return. In Outlook Desktop, go to File > Manage Rules & Alerts to create custom rules that work in conjunction with your automatic replies.
For managing email communication effectively, you might also want to learn complementary features like email retraction. Some users combine OOO with message rules to ensure critical emails are flagged for immediate attention upon return.
Best practices include setting your OOO at least 24 hours before you leave, ensuring it’s active when you depart. Double-check your return date to avoid sending automatic replies after you’re back in the office. If your return date changes, update your OOO immediately to maintain accuracy.
Test your automatic reply by sending yourself an email from another account to verify it’s working correctly. This simple check prevents embarrassing situations where your OOO fails silently. Also, remember to disable your automatic replies when you return to prevent unnecessary messages to new incoming emails.
Troubleshooting Common OOO Issues
Sometimes how to set OOO in Outlook seems straightforward, but issues arise. If your automatic replies aren’t sending, first verify that you’ve actually enabled the feature and saved your settings. Check that your current date and time are within your specified OOO date range. Incorrect system time can prevent automatic replies from activating.
If you’re using Outlook Desktop and automatic replies won’t activate, try restarting the application. Sometimes Outlook needs to refresh to properly enable new settings. Ensure your Outlook is updated to the latest version, as outdated software occasionally has bugs affecting OOO functionality.
For Outlook Web Access users experiencing issues, clear your browser cache and cookies, then log back in. Browser caching can sometimes prevent new settings from taking effect immediately. If problems persist, try accessing OWA from a different browser to isolate whether it’s a browser-specific issue.
If you’re not receiving your own test emails, check your Junk folder—sometimes automatic replies get filtered incorrectly. Verify that your email account has sufficient storage space, as a full mailbox can prevent automatic replies from functioning. According to HowStuffWorks’ email troubleshooting guide, storage issues account for 15% of automatic reply failures.
For users managing multiple email accounts in Outlook, ensure you’re setting OOO on the correct account. Each account has separate automatic reply settings, and it’s easy to accidentally configure the wrong one. Check your account dropdown to confirm you’re working with the intended email address.
If your organization uses Exchange Server or Microsoft 365, contact your IT department if OOO features aren’t available. Some administrators restrict automatic reply functionality for security or policy reasons. Your IT team can enable these features or provide alternative solutions.
FAQ
Q: Can I set OOO for just a few hours instead of full days?
A: Yes. When you enable automatic replies and select “Only send during this time range,” you can specify exact times down to the minute. This allows you to set OOO for a meeting, appointment, or any period shorter than a full day.
Q: Will my OOO message send to spam emails or mailing lists?
A: Outlook is smart about this. Automatic replies typically don’t send to mailing lists, distribution groups, or automated messages. However, they will send to individual emails and some organizational groups depending on your settings.
Q: What happens to emails while my OOO is active?
A: Emails continue arriving in your inbox normally. Your OOO message is just an automatic reply sent to the sender. All incoming messages are stored and waiting for you when you return.
Q: Can I change my OOO message while I’m away?
A: Yes, if you have internet access. Log into Outlook Web Access or access your mobile app to modify your automatic reply message at any time during your absence.
Q: Should I disable OOO before returning or let it expire?
A: Either method works. If you set an expiration date, it automatically disables. However, manually disabling it ensures no automatic replies send to emails you receive on your first day back, which is often when you’re catching up on urgent matters.
Q: Can I set different OOO messages for different contacts?
A: Not directly through automatic replies. However, you can set one message for internal recipients and another for external ones. For highly customized responses to specific contacts, you’d need to use rules or third-party tools.
Q: Is there a character limit for OOO messages?
A: Most versions of Outlook allow several thousand characters. However, keeping your message under 500 characters is best practice to ensure it displays properly on all devices and email clients.
Q: What if I forget to turn off my OOO when I return?
A: If you set an expiration date, it automatically disables. If you set it to send indefinitely, you’ll need to manually disable it. Many professionals set a phone reminder to turn off OOO on their return date to avoid this issue.
Q: Does OOO work with delegates or shared mailboxes?
A: Yes, each mailbox can have its own automatic replies configured. If you manage a shared mailbox, you can set OOO for that account separately from your personal email.
Q: Can I schedule OOO for future dates?
A: Absolutely. You can set your OOO to activate on a future date and deactivate on another future date. This is perfect for planning ahead before vacation or extended leave.
Learning how to set OOO in Outlook is a fundamental skill that improves professional communication and reduces email-related stress. Whether you’re taking a week-long vacation, attending a conference, or simply unavailable for a few hours, automatic replies ensure your contacts understand your availability. The process is simple across all Outlook platforms, and the benefits—clearer communication, fewer follow-ups, and better email management—make it worth setting up properly every time you’re away from your desk. For additional email management strategies, consider exploring productivity resources and communication best practices to optimize your overall email workflow.