
Screen recording on iPhone 16 is one of those features that sits right there in plain sight, but most people never touch it. You might need to capture a bug you’re experiencing, save a funny moment from a video call, or create a tutorial for someone. Whatever the reason, knowing how to screen record on iPhone 16 is genuinely useful—and it’s way simpler than you’d think.
The built-in screen recording tool on iPhone 16 is baked into iOS 18, and Apple made it dead simple. No third-party apps needed. No jailbreaking. Just a few taps and you’re rolling. The tricky part isn’t starting the recording—it’s knowing where to find it and what to do with it after you’re done. That’s where this guide comes in.
What Is Screen Recording and Why You Need It
Screen recording captures everything that happens on your iPhone 16 display—apps, scrolling, taps, notifications, all of it. Think of it like a video camera pointed at your phone’s screen, except it’s built right into the device and records in crystal-clear quality.
Real talk: screen recording is useful way more often than you’d expect. Maybe you’re trying to document a software glitch to send to Apple support. Maybe you’re creating a tutorial for a family member who keeps asking how to do something on their phone. Maybe you want to save a funny TikTok moment before it disappears. Or you’re demonstrating a new app feature to a colleague. Whatever it is, the feature is there and ready to go.
The quality is excellent—iPhone 16 records in up to 4K resolution, which is overkill for most uses but nice to have. Battery drain is reasonable, and the file sizes are manageable. You can record indefinitely (or until your storage fills up), and you can include audio from your microphone or just the system sounds.
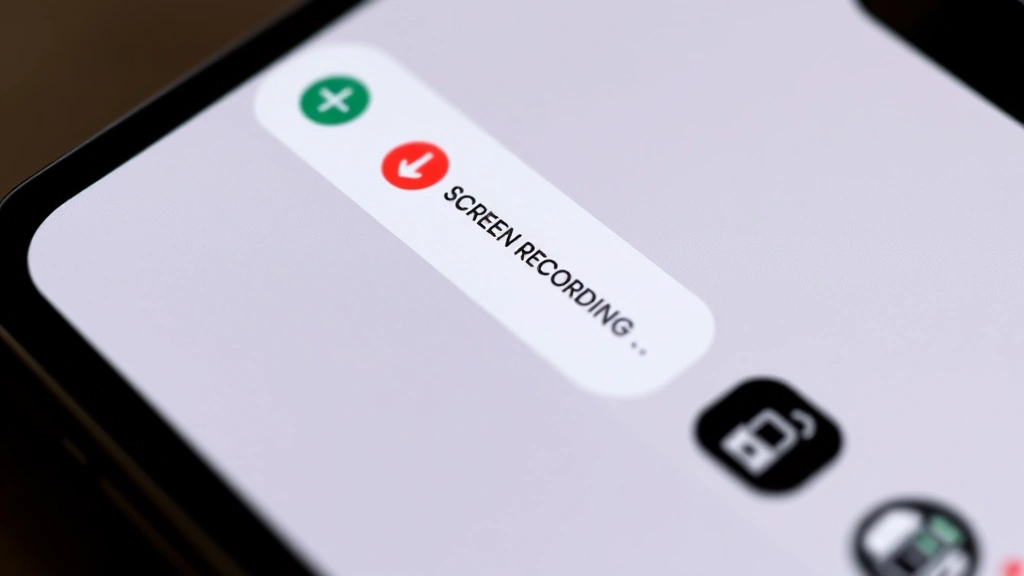
Enable Screen Recording in Control Center
Before you can record anything, you need to make sure the screen recording control is accessible from your Control Center. This is a one-time setup, and it takes about 30 seconds.
- Open Settings on your iPhone 16
- Tap Control Center
- Scroll down and look for Screen Recording
- If it’s not there, tap the green + button next to it to add it
- Now it’ll appear in your Control Center
That’s it. You’re done with setup. From here on out, screen recording is one swipe and one tap away.
If you don’t see Screen Recording in the list, make sure you’re on iOS 18 or later. iPhone 16 comes with iOS 18 out of the box, but if you’re upgrading from an older device, double-check your iOS version by going to Settings > General > About and looking at the OS version number.
Pro Tip: Customize your Control Center by dragging the Screen Recording control to the top. The higher it is in your list, the faster you can access it. If you use it frequently, move it to the very top.
How to Start Screen Recording on iPhone 16
Once you’ve added screen recording to Control Center, starting a recording is genuinely two steps.
- Swipe down from the top-right corner of your iPhone 16 screen (or swipe up from the bottom if you have an older gesture setup). This opens Control Center.
- Press and hold the Screen Recording button (it looks like a filled circle inside a circle). Don’t just tap it—press and hold for a second.
A menu will pop up with two options: Microphone Audio and Start Recording. If you want to include audio from your microphone (your voice, for example), tap the microphone icon to toggle it on. Then tap Start Recording.
Your iPhone will count down 3, 2, 1 and then start recording. You’ll see a red status bar at the top of your screen with a timer showing how long you’ve been recording. That red bar is your visual cue that recording is active.
Here’s where people mess up: they think tapping the button once starts the recording. It doesn’t. You have to press and hold. If you just tap, nothing happens (or you might accidentally pause if you’re already recording). Get comfortable with the press-and-hold motion—it becomes automatic after a few tries.
Once recording starts, your phone behaves normally. Open apps, scroll through websites, make video calls, whatever you want to capture. Everything that happens on screen gets recorded until you stop.
How to Stop Your Recording
Stopping a recording is even easier than starting one. You have two options:
- Tap the red status bar at the top of your screen. A popup will ask if you want to stop. Tap Stop.
- Swipe into Control Center and tap the Screen Recording button again (it’ll be highlighted in red). This stops the recording without a confirmation dialog.
The first method is faster and more intuitive. Just tap that red bar and you’re done. The recording saves automatically to your Photos app, usually within a few seconds.
One thing to watch: if you’re in an app that uses the status bar (like a video game or full-screen video player), that red bar might be hard to see or tap. In that case, swipe down to open Control Center and tap the button from there.
Safety Warning: Be aware that screen recording captures everything on your screen, including sensitive information like passwords, credit card numbers, or personal messages. If you’re recording to share with someone, review the footage first and make sure you’re not accidentally capturing anything private.
Audio Settings and Microphone Control
By default, screen recording captures system audio—the sounds from apps, notifications, music, video playback, all of it. But you can also include your microphone audio (your voice) or turn audio off entirely.
When you press and hold the Screen Recording button in Control Center, you’ll see the microphone icon before you hit Start Recording. Here’s what each state means:
- Microphone icon with a slash through it: No audio at all. Silent recording.
- Microphone icon without a slash: Microphone is on. You’ll record your voice plus system audio.
Tap the microphone icon to toggle between these states. Your choice sticks for the next recording, so if you always want audio, you only have to set it once.
Real-world scenario: you’re recording a tutorial and want to narrate what you’re doing. Turn the microphone on. You’re recording a bug to send to support and you want to hear the exact sounds the app makes. Leave the microphone off and just capture system audio. You’re recording a video call. The microphone will automatically be on to capture both sides of the conversation.
One gotcha: if your microphone is muted (using the physical mute switch on the side of your iPhone), the microphone won’t record even if you toggle it on in the screen recording menu. The mute switch overrides everything. If you want microphone audio, make sure the mute switch is in the on position (no red indicator showing).
Where to Find Your Screen Recordings
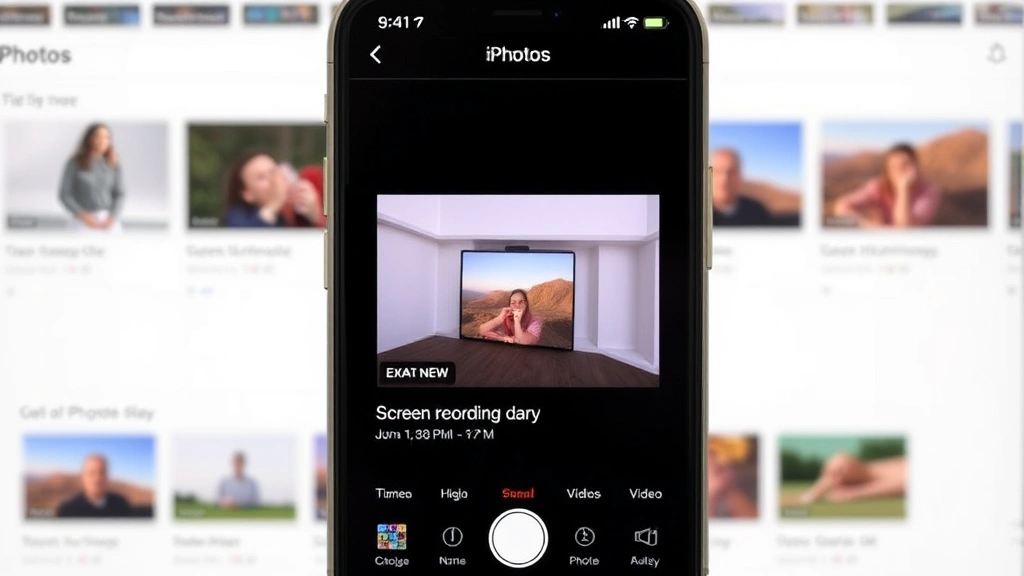
After you stop recording, your video automatically saves to the Photos app. Here’s how to find it:
- Open the Photos app
- Go to the Library tab
- Scroll down to Videos or look in All Photos
- Your newest recording will be at the top
The file will be named something like “Screen Recording [Date] at [Time].mov”. It’s a standard video file, so you can do anything with it that you’d do with a regular video—share it, edit it, upload it, whatever.
If you can’t find your recording, check a few things:
- Storage space: If your iPhone was almost full when you recorded, the video might not have saved. Screen recordings are large files (typically 100-500 MB depending on length and resolution). Make sure you have at least 1 GB of free space.
- Recently Deleted: If you accidentally deleted the recording, it goes to the Recently Deleted album first. You have 30 days to recover it. Go to Photos > Albums > Recently Deleted.
- iCloud sync: If you have iCloud Photos enabled, your recording might be syncing to the cloud. Wait a minute or two and check again.
You can also search for “Screen Recording” in the Photos search bar to find all your recordings in one place.
Edit and Share Your Recordings
Once you’ve found your recording in Photos, you can edit it right there without opening a separate app. Here’s how:
- Tap on your recording to open it
- Tap Edit in the top right
- You can now trim the video, adjust brightness/contrast, add filters, rotate it, or crop it
- Tap Done to save your changes
The trim feature is especially useful. If you started recording a few seconds early or let it run after you were done, you can cut out the unnecessary parts. Just drag the handles on the timeline to set your start and end points.
To share your recording, tap the Share button (the box with an arrow pointing up) and choose where you want to send it. You can text it, email it, AirDrop it to another device, upload it to social media, or save it to cloud storage like Google Drive or Dropbox.
Fair warning: screen recordings are big files. A 5-minute recording can be 200+ MB. If you’re texting it to someone, it might take a while to send, and they’ll need decent data or WiFi to download it. For large files, consider uploading to a cloud service and sending a link instead.
If you want to do more advanced editing (add text, music, transitions, etc.), you’ll need a video editing app. The built-in Photos editor is basic but functional for quick trims and adjustments. Apps like iMovie (free, made by Apple) or CapCut (free, third-party) give you way more control if you’re serious about editing.
Common Issues and Fixes
Screen Recording button not showing up in Control Center: Go back to Settings > Control Center and make sure you’ve added it. If it’s there and still not showing, restart your iPhone. Go to Settings > General > Shut Down, wait 10 seconds, then power it back on. Here’s a full guide on how to reboot your iPhone if you need the detailed steps.
Recording starts but immediately stops: This usually means you don’t have enough storage space. Check Settings > General > iPhone Storage and see how much free space you have. Delete some apps, photos, or videos to free up at least 1 GB. Also check if you’re in Low Power Mode—some features behave differently when battery-saving is on.
Microphone audio isn’t recording: First, check that the mute switch on the side of your iPhone is in the on position (no red showing). Second, make sure you toggled the microphone on before starting the recording. Third, check your app permissions. Go to Settings > Privacy & Security > Microphone and make sure your apps have permission to access the mic.
Recording is choppy or laggy: This happens when your iPhone is running too many things at once. Close other apps before you start recording. Restart your phone if it’s been running for a while. Also, recording in 4K is more demanding than 1080p—if you’re having performance issues, you can’t change the resolution in settings, but shorter recordings will be smoother.
Can’t find the recording in Photos: Wait 30 seconds—sometimes it takes a moment to process and appear. If it still doesn’t show up, check Photos > Albums > Recently Deleted. If it’s there, you can recover it. If not, the file might not have saved due to storage or app issues. Try recording again with more free space available.
Recording has audio but it’s really quiet: The microphone might be picking up sound from far away, or the system audio is low. If you’re narrating, speak clearly and closer to the microphone. If it’s system audio that’s quiet, adjust the volume on your iPhone before recording—the recording captures whatever volume level you have set.
Pro Tip: If you’re recording tutorials or demos, do a test recording first. Record 30 seconds, stop, and review it. Check that the audio is clear, the screen is bright enough, and the content is framed well. Then do your real recording. This saves you from wasting time on a 10-minute recording that has audio issues.
Frequently Asked Questions
Can I screen record on iPhone 16 without the microphone picking up background noise?
– Yes. When you press and hold the Screen Recording button, toggle the microphone icon to mute it (you’ll see a slash through the icon). This records system audio only, with no microphone input. If you want to eliminate background noise while keeping the microphone on, you’ll need a third-party app or video editing software to add noise reduction after recording.
How long can I screen record on iPhone 16?
– Technically, you can record until your iPhone storage is full. There’s no built-in time limit. A 5-minute recording is roughly 200-300 MB depending on what’s on screen. A 1-hour recording could be 2-3 GB. So practically, most people can record 5-10 hours before running out of storage, but it depends on your total storage capacity and how much space you have free.
Will screen recording drain my battery?
– Yes, but not dramatically. Screen recording uses more battery than normal phone use because the processor is working harder. A 10-minute recording might use 5-10% of your battery. If you’re doing long recording sessions, plug in your phone or have a charger nearby. Also, keeping your phone storage optimized can help it run more efficiently.
Can I screen record while on a video call?
– Yes. Start the recording before or during the call, and it will capture both your screen and the call audio. This is useful for recording important conversations (though check local laws about recording consent). The recording will show everything on your screen—the other person’s video, your interface, notifications, all of it.
What video format does iPhone 16 use for screen recordings?
– iPhone 16 records in MOV format (H.264 video codec). This is compatible with most devices and platforms. If you need a different format like MP4, you can convert it using video editing software or online converters, but MOV works fine for sharing and editing on most platforms.
Can I screen record apps that have copy protection or DRM?
– Some apps (like Netflix, Disney+, or banking apps) have built-in protections that prevent screen recording. When you try to record, the screen will go black or show a message saying recording isn’t allowed. This is intentional—the app developers don’t want their content recorded. You can’t bypass this without jailbreaking, which isn’t recommended. For most other apps, recording works fine.
How do I delete a screen recording?
– Open Photos, find your recording, and swipe left on it. Tap the trash icon. It goes to Recently Deleted, where it stays for 30 days before permanently disappearing. If you want to delete it permanently right away, go to Photos > Albums > Recently Deleted, find the video, and tap Delete again.
Can I edit the recording name after it’s saved?
– Not directly in the Photos app. You can rename it if you export it to Files app or share it to another service, but the easiest workaround is to create a folder in Photos (using albums) and organize your recordings there with descriptive album names. For example, create an album called “Tutorials” and move your tutorial recordings there.
Is there a way to screen record just one app instead of the whole screen?
– No, the built-in screen recording captures your entire display. If you want to record just one app window, you’d need a third-party app. But honestly, for most uses, full-screen recording is fine—you can trim it down in editing if needed.
Why is my screen recording showing in iCloud but not on my phone?
– If you have iCloud Photos enabled, your recordings might be synced to iCloud and optimized for storage on your device (meaning the full-quality version lives in the cloud, not on your phone). You can still access it in Photos, but it will download when you try to edit or share it. If you want to keep full-quality copies on your phone, go to Settings > Photos > iCloud Photos and toggle off “Optimize iPhone Storage.” This uses more space on your device but keeps everything local.
Screen recording on iPhone 16 is genuinely one of the most underrated features in iOS. Once you get comfortable with it, you’ll find yourself using it all the time. Whether it’s for work, tutorials, bug reports, or just saving funny moments, having this tool built in and ready to go is a huge advantage. The setup takes 30 seconds, and from there it’s just two taps and you’re rolling. Start with a test recording, get comfortable with the controls, and you’ll be a pro in no time.
For more detailed technical information about screen recording on Apple devices, check out Apple’s official support documentation. If you’re interested in more iPhone 16 features, Apple’s specs page has the full breakdown of capabilities. For video editing tips after you’ve recorded, FamilyHandyman.com has some solid tutorials on working with video files (though focused on home projects, the editing principles apply). And if you’re troubleshooting iOS issues, This Old House’s tech section sometimes covers device maintenance, though for phone-specific help, Apple Support is your best bet.


