
Need to know how to redact in Adobe? You’re not alone. Whether you’re handling sensitive documents, protecting client information, or preparing files for public release, redaction is a critical skill that saves you from costly mistakes. Adobe’s redaction tools are powerful, but they’re not always intuitive—especially if you’re new to the software. This guide walks you through everything you need to know, from basic redaction to advanced techniques that ensure your sensitive information stays private.
Redaction isn’t just about blacking out text. It’s about permanently removing information so it can’t be recovered. That’s the difference between a sloppy cover-up and a professional, legally defensible document. Let’s get into it.
What Is Redaction and Why It Matters
Redaction is the permanent removal of sensitive information from a document. Think of it like tearing out a page from a book and burning it—once it’s gone, it’s gone for good. This is different from simply highlighting text in black or using a marker tool, which doesn’t actually remove the underlying data.
Why does this matter? Because improperly redacted documents can expose confidential information through metadata, hidden layers, or by selecting the “black box” and revealing what’s underneath. Legal teams, government agencies, and healthcare providers deal with redaction every single day, and getting it wrong can result in:
- Legal liability and lawsuits
- HIPAA violations (healthcare)
- Data breaches and loss of client trust
- Regulatory fines and penalties
- Damage to your professional reputation
Adobe’s redaction tools are built specifically to prevent these issues. They don’t just hide information—they permanently remove it from the document’s underlying code.
Understanding Adobe’s Redaction Tools
Adobe Acrobat Pro DC (the full version, not Reader) includes dedicated redaction features that are purpose-built for this job. If you’re using a free PDF editor or an older version of Acrobat, you won’t have access to these tools. That’s important to know upfront.
The main redaction tools in Adobe Acrobat Pro DC are:
- Redact Text Tool: Permanently removes text, images, or content from specific areas
- Find & Replace Redaction: Searches for specific text across the entire document and redacts all instances at once
- Redact All Instances: Applies redaction to every occurrence of a word or phrase
- Metadata Removal: Strips document properties that might contain hidden information
These tools work by permanently deleting the selected content and replacing it with a black or colored rectangle. The original data is removed from the PDF’s code, making it unrecoverable.
Basic Redaction: Step-by-Step
Let’s walk through the most common redaction scenario: removing specific text or sensitive information from a PDF document.
Step 1: Open Your Document in Adobe Acrobat Pro DC
Launch Adobe Acrobat Pro DC and open the PDF file you need to redact. If you don’t have Acrobat Pro DC yet, you’ll need to subscribe—the redaction features aren’t available in the free Reader version.
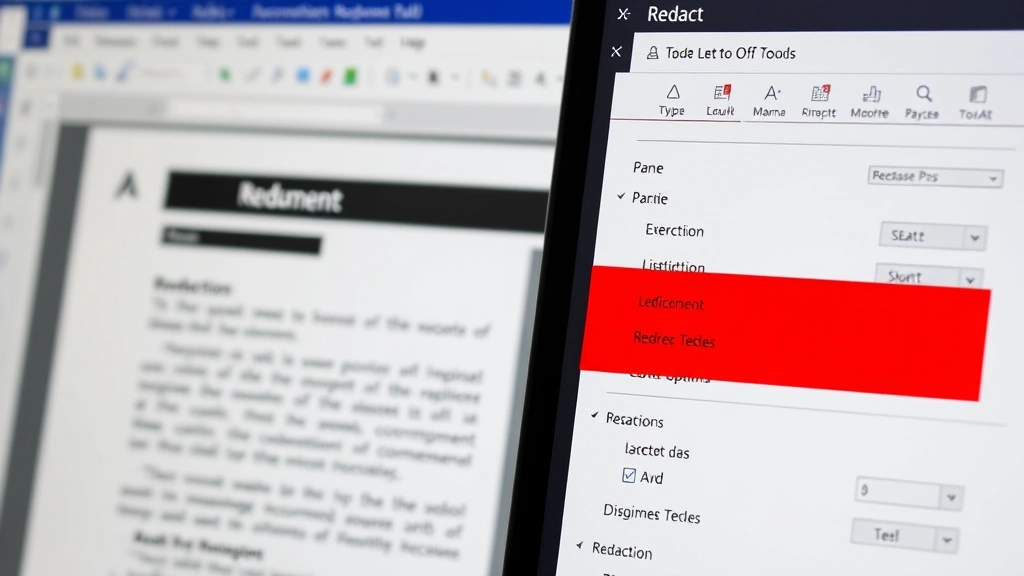
Step 2: Access the Redaction Tool
Click on Tools in the top menu bar. Look for Redact in the list. If you don’t see it, click All Tools and search for “Redact.” Click on it to open the Redact panel on the right side of your screen.
Step 3: Select the Content to Redact
You have two options here:
- Manual Selection: Click and drag to select the text or area you want to redact. A red rectangle will appear around your selection. You can adjust the size by dragging the corners.
- Text-Based Selection: If you know the exact text you want to remove, use the Find & Replace option (we’ll cover this in the advanced section).
Step 4: Mark for Redaction
Once you’ve selected the content, click Mark for Redaction (or simply press Enter). A red box will appear over your selection, indicating it’s marked for redaction. You can mark multiple areas before applying the redaction.
Step 5: Apply the Redaction
After marking all the content you want to remove, click Apply Redactions in the Redact panel. Adobe will prompt you to confirm—this is your last chance to undo. Once you confirm, the redaction is permanent and cannot be undone.
Step 6: Save Your Redacted Document
Save the document with a new filename (e.g., “document_redacted.pdf”) to preserve the original. Use File > Save As to create a copy.
That’s the basic workflow. Sounds simple, right? But there are several things that can go wrong if you’re not careful, which we’ll address in the advanced section.
Advanced Redaction Techniques

Using Find & Replace Redaction
If you need to redact the same word or phrase multiple times throughout a document, manually selecting each instance is tedious and error-prone. That’s where Find & Replace Redaction comes in.
- Open the Redact tool (Tools > Redact)
- Click Find & Replace Text Redaction
- Enter the text you want to find in the search field
- Click Mark All to mark every instance for redaction
- Review the marked instances to ensure accuracy
- Click Apply Redactions to finalize
This approach is much faster and ensures you don’t accidentally miss an instance hidden on page 47.
Removing Metadata and Hidden Information
Here’s where people mess up: they redact the visible text but leave metadata intact. Metadata includes document properties like author name, creation date, revision history, and comments. This hidden information can expose sensitive details even after you’ve redacted the main content.
To remove metadata in Adobe:
- Go to File > Properties
- Review all tabs (Description, Initial View, Custom, Security)
- Clear any sensitive information from these fields
- Click OK
- Alternatively, use Tools > Redact > Remove Hidden Information to let Adobe scan and remove metadata automatically
According to Adobe’s official documentation, the Remove Hidden Information tool scans for comments, form data, hidden text, and revision history—all of which can compromise your redaction.
Redacting Images and Graphics
Text isn’t the only thing that needs redacting. Sometimes you need to remove faces, logos, or sensitive diagrams. The process is the same:
- Use the Redact tool and click and drag over the image area
- Mark for Redaction
- Apply Redactions
One caveat: if the image is embedded as a single object, redacting part of it will redact the entire image. If you need surgical precision, you might need to edit the image in Photoshop first, then import it into the PDF.
Batch Redaction for Multiple Documents
If you’re dealing with dozens of documents that need the same redaction pattern (e.g., removing all SSNs or account numbers), Adobe’s Action Wizard can automate this. It’s a bit advanced, but it saves enormous amounts of time:
- Go to Tools > Action Wizard > Create New Action
- Set up a Find & Replace Redaction rule for your target text
- Save the action with a descriptive name
- Run the action on your batch of documents
This is a game-changer if you’re processing high volumes of documents regularly.
Common Redaction Mistakes to Avoid
Using Highlight or Drawing Tools Instead of Redaction
This is the #1 mistake. Many people think they can just draw a black rectangle over sensitive text using the drawing tools. Wrong. The underlying text is still there in the PDF code—anyone with basic technical knowledge can select and copy it.
Always use the dedicated Redact tool, not the drawing tools.
Forgetting to Remove Metadata
You redacted all the visible text, but the author’s name, file history, and comments are still embedded in the document. This is a classic oversight that undermines your entire redaction effort.
Make metadata removal part of your redaction workflow, every single time.
Not Checking for Hidden Layers or Comments
PDFs can contain hidden layers, comments, and annotations that don’t appear in the normal view. Before you redact, check:
- Comments Panel: Tools > Comments to see all annotations
- Layers Panel: View > Show/Hide > Navigation Panes > Layers to check for hidden content
- Form Fields: If the PDF has interactive forms, check if sensitive data is stored in field values
Redacting Only One Copy While Sharing the Original
This sounds silly, but it happens. You create a redacted version, but then accidentally email the original unredacted document. Always:
- Save the redacted version with a clear filename (e.g., “_REDACTED”)
- Delete or archive the original in a secure location
- Double-check the filename before sending
Not Verifying Redaction Success
You applied the redaction, but did it actually work? Many people skip this step and later discover that the redaction was incomplete or failed. We’ll cover verification in detail in the next section.
How to Verify Your Redaction Was Successful
Verification is non-negotiable, especially for legally sensitive documents. Here’s how to confirm your redaction worked:
Visual Inspection
Open the redacted PDF and visually inspect every page. Look for:
- Black or colored boxes where sensitive text should be
- No visible text peeking out from behind the redaction
- Consistent redaction appearance (all boxes should look similar)
Try to Select the Redacted Area
Click on the redacted area and try to select or copy text. If you can select or copy anything, the redaction failed. If you get nothing but the red box, you’re good.
Check the File Size
A properly redacted PDF should be slightly smaller than the original because content has been removed. If the file size is identical or nearly identical, redaction may not have been applied correctly.
Use Adobe’s Redaction Report
After applying redactions, Adobe generates a report showing what was redacted. Check this report to confirm all intended content was marked and removed. Go to Tools > Redact > Generate Report.
Open in a Different PDF Reader
Open your “redacted” PDF in a different application (Preview on Mac, Edge on Windows, or a third-party PDF reader). If the text magically reappears, your redaction wasn’t truly permanent. This is a good final sanity check.
Best Practices for Secure Redaction
Create a Redaction Checklist
Before you redact any document, create a checklist of what needs to be removed. For example:
- ☐ Social Security Numbers
- ☐ Bank Account Numbers
- ☐ Medical Information
- ☐ Attorney-Client Communications
- ☐ Author and Revision History
- ☐ Comments and Annotations
- ☐ Embedded Metadata
This prevents you from accidentally leaving something behind.
Use Consistent Redaction Appearance
Keep all your redaction boxes the same color and size. This makes the document look professional and makes it easier to verify that redaction was applied consistently. You can set your preferred redaction color in the Redact tool settings.
Document Your Redaction Process
For legal or compliance purposes, keep a record of:
- What was redacted and why
- Who performed the redaction
- When the redaction was applied
- What verification steps were completed
This documentation proves you took reasonable steps to protect sensitive information.
Store Originals Securely
Keep the original unredacted documents in a secure location with restricted access. If you ever need to refer back to the unredacted version, you’ll have it. But make sure it’s protected with strong passwords and access controls. For guidance on document security, check Adobe’s security best practices.
Train Your Team
If multiple people are redacting documents, make sure everyone understands the process and the risks. One person making a mistake can compromise your entire organization’s security. Consider creating a training document or video for your team.
Consider Third-Party Verification
For high-stakes documents, have someone other than the person who performed the redaction verify it. Fresh eyes catch mistakes that the original redactor might miss. This is standard practice in legal firms and government agencies.
Keep Adobe Acrobat Updated
Adobe regularly releases security patches and improvements to the redaction tool. Make sure you’re running the latest version of Acrobat Pro DC. Check for updates regularly via Help > Check for Updates.
Use Secure File Transfer Methods
After redacting, don’t just email the PDF to anyone. Use secure file transfer methods like:
- Password-protected file sharing services
- Encrypted email
- Secure client portals
- VPN connections for file transfers
The redaction is only as secure as the method you use to send it.
Frequently Asked Questions
Can I redact in Adobe Acrobat Reader (the free version)?
– No. Redaction tools are only available in Adobe Acrobat Pro DC, the paid subscription version. Acrobat Reader is a viewer and doesn’t include redaction capabilities. If you only have Reader, you’ll need to upgrade to Pro DC or use a third-party tool.
What’s the difference between redaction and just covering text with a black box?
– A black box drawn with the drawing tool doesn’t remove the underlying text—it just hides it visually. Anyone can select and copy the text underneath. True redaction permanently removes the text from the PDF’s code, making it unrecoverable. Always use the Redact tool, not drawing tools.
Can redaction be undone if I make a mistake?
– No. Once you click “Apply Redactions,” the process is permanent and cannot be undone. This is why it’s critical to review your marked redactions before applying them. Always work on a copy of the original document, never the original itself.
Does redaction remove metadata automatically?
– No. Redacting visible text does not automatically remove metadata like author names, creation dates, and revision history. You must manually remove metadata using File > Properties or Tools > Redact > Remove Hidden Information. Make this a standard part of your redaction workflow.
How do I redact an entire page or section?
– Use the Redact tool and click and drag to select the entire area you want to remove. For multiple pages, you’ll need to mark each page individually. There’s no single-click “redact entire page” button, but you can mark multiple areas before applying redactions all at once.
Can I redact PDFs that are scanned images?
– Yes, but with limitations. If your PDF is a scanned image (like a photograph of a document), you can still use the Redact tool to cover sensitive areas. However, the redaction will cover the image, not the underlying text. For best results, use OCR (Optical Character Recognition) to convert the image to searchable text first, then redact. Adobe can do this automatically—go to Tools > Recognize Text.
Is redaction reversible with special software or hacking?
– Proper redaction using Adobe’s dedicated Redact tool is permanent and irreversible. The content is deleted from the PDF’s code, not just hidden. However, if you use drawing tools or other workarounds, technically skilled individuals might recover the hidden text. This is why using the proper Redact tool matters.
Can I redact text in PDFs created from Word or Excel?
– Yes. Redaction works the same way regardless of the PDF’s source. If you need to make a copy of a Word document and then convert it to PDF for redaction, that works fine. The redaction process is identical.
What if I need to redact multiple documents at once?
– Use Adobe’s Action Wizard to create an automated redaction action, then apply it to a batch of documents. This is much faster than manually redacting each file. Go to Tools > Action Wizard > Create New Action and set up your redaction rules.
How do I know if my redaction is truly secure?
– Test it by trying to select or copy text from the redacted area. If nothing comes up, it worked. You can also check the file size (redacted files should be slightly smaller) and open the file in a different PDF reader to confirm the text doesn’t reappear. For high-stakes documents, have someone else verify your work.
Are there legal requirements for how redaction should be done?
– It depends on your jurisdiction and industry. Healthcare (HIPAA), law (attorney-client privilege), and government (FOIA) have specific redaction standards. For example, OSHA has guidelines for redacting workplace documents. Always check your industry’s compliance requirements before redacting sensitive documents. When in doubt, consult with a legal professional.
Can I redact text that’s part of an image or logo?
– Yes, but you’ll redact the entire image or the area containing it. If the sensitive text is embedded in a graphic or logo, you can still use the Redact tool to cover it. However, if you need to preserve the rest of the image, you might need to edit it in Photoshop first, then import it into the PDF.
What’s the best way to communicate to recipients that a document has been redacted?
– Include a cover note or header stating “REDACTED VERSION” and explaining why redaction was necessary (e.g., “This document contains redacted attorney-client communications” or “Personal information has been removed for privacy protection”). This sets clear expectations and demonstrates that redaction was intentional, not accidental.
Mastering how to redact in Adobe takes practice, but it’s a skill that protects your organization and clients. The key is treating redaction as a serious, irreversible process—because it is. Use the proper tools, verify your work, and never skip the metadata removal step. Your future self (and your legal team) will thank you.


