
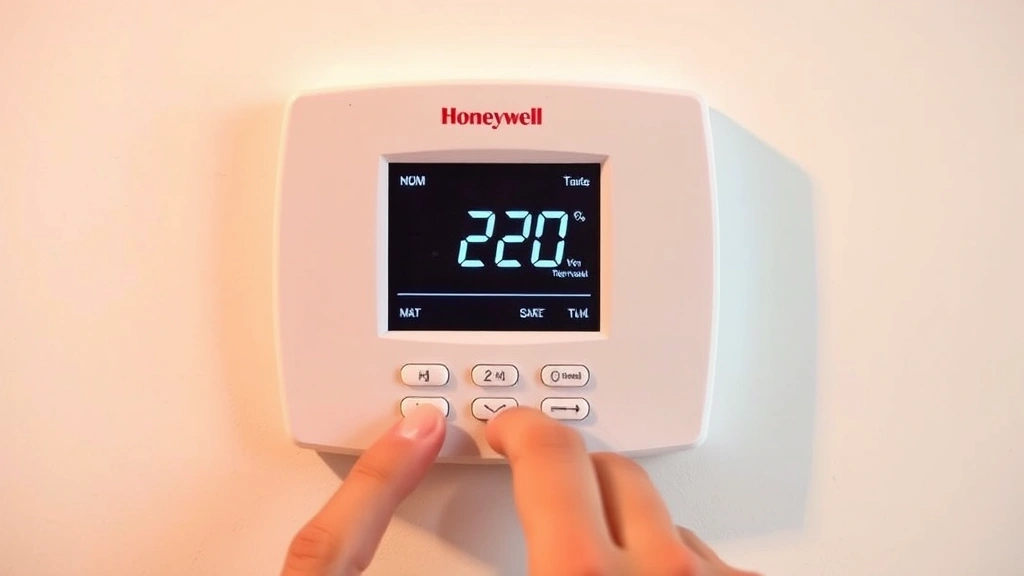
Your Honeywell thermostat is sitting there on the wall, and you’re staring at it like it’s written in a foreign language. You know it can save you money on energy bills, but the buttons feel intimidating. Here’s the real talk: programming a Honeywell thermostat is way easier than you think once you know the basics. Whether you’ve got a digital model, a smart WiFi version, or an older programmable unit, we’re going to walk through this step-by-step so you can actually use the thing instead of just letting it run on default settings.
Learning how to program Honeywell thermostat models doesn’t require a technician’s degree. Most homeowners can handle this in under 15 minutes. The key is understanding what settings matter for your lifestyle and climate. Let’s get into it.
Identify Your Honeywell Thermostat Model
Before you start programming anything, you need to know what you’re working with. Honeywell makes dozens of thermostat models, and they don’t all work the same way. The good news? The model number is usually right on the front of the unit.
Look for a model number that starts with letters like T6, T9, RTH, or RoomSense. Common models include:
- Honeywell T6 Pro – Digital, programmable, common in older homes
- Honeywell T9 Smart – WiFi-enabled, smartphone control, newer construction
- Honeywell RTH9585WF – WiFi touchscreen model
- Honeywell Home T5 – Budget-friendly, basic programming
Once you’ve got the model number, check the back of the thermostat or the manual (usually a QR code on the device itself) to confirm. If you’re still unsure, Honeywell’s official product pages let you search by model.
The reason this matters: a T6 Pro and a T9 Smart have completely different programming interfaces. One uses physical buttons and a small screen; the other uses a touchscreen and an app. Mixing them up will just frustrate you.
Basic Setup and Initial Configuration
Out of the box (or if your unit has been sitting idle), you’ll need to do some initial setup before you can program anything meaningful. This is the foundation.
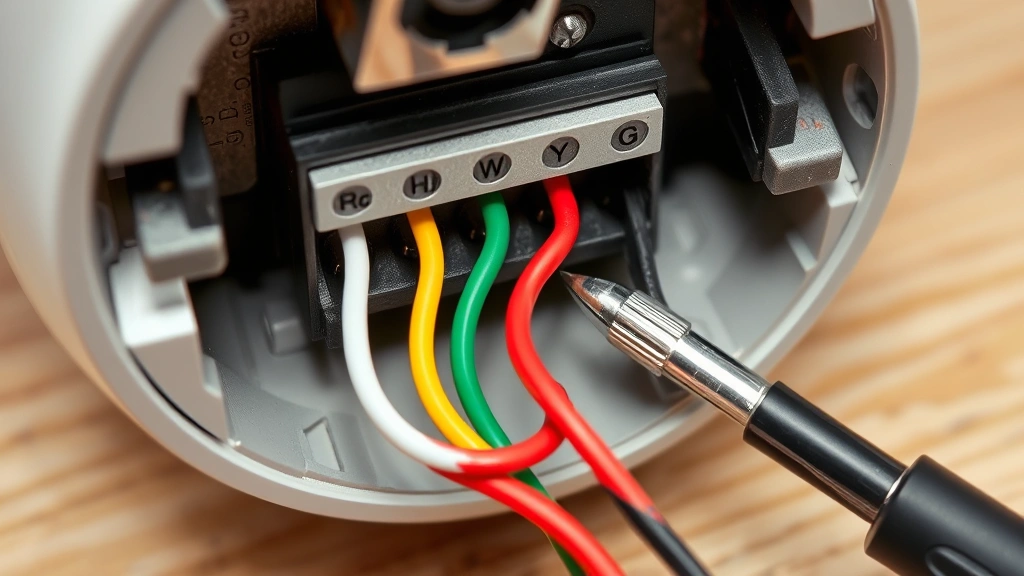
Step 1: Power and Wiring Check
- Turn off power at your breaker box to the HVAC system. Safety first – this isn’t optional.
- Remove the thermostat cover (usually just snaps off).
- Check that wires are securely connected to their terminals. You should see labels like W (heat), Y (cooling), G (fan), Rc (cooling power), Rh (heating power).
- If wires are loose, turn off power and reconnect them firmly. Don’t force them.
Step 2: Set the Time and Date
This is crucial for programming to work correctly. If your thermostat doesn’t know what time it is, your heating and cooling schedule will be completely off.
- On a digital model: Press the “Menu” or “Settings” button, navigate to “Time” or “Date”, and use the arrow buttons to adjust.
- On a WiFi model: Use the app or the touchscreen to set time automatically (usually syncs with your WiFi router).
- Double-check that AM/PM is correct. This sounds obvious, but I’ve seen people program everything for 6 AM when they meant 6 PM.
Step 3: Select Your System Type
Your thermostat needs to know if you’re heating only, cooling only, or both (heat/cool).
- Go to “Settings” → “System” or “Mode”.
- Choose “Heat”, “Cool”, or “Auto” depending on your HVAC setup.
- If you’re unsure, check your furnace or air conditioning unit – the manual will tell you what you’ve got.
This step prevents your thermostat from trying to cool when you only have a furnace, which would be like asking your car to fly.
Programming Your Weekly Schedule
This is where the real energy savings happen. Instead of running your system 24/7 at the same temperature, you create a schedule that matches your actual life.
Understanding the Schedule Structure
Most Honeywell thermostats use a 7-day schedule with up to four programmable periods per day:
- Wake – Early morning, when you’re getting ready (typically 6–7 AM)
- Leave – When you go to work or school (typically 8–9 AM)
- Return – When you come home (typically 5–6 PM)
- Sleep – Bedtime (typically 10 PM–midnight)
Think of these as your daily rhythm. You don’t need to use all four – some people only program “Wake” and “Sleep”.
How to Enter a Schedule (T6 Pro Example)
- Press “Menu” on the main screen.
- Select “Scheduling” or “Programs”.
- Choose the day of the week (or “All Days” if your schedule is the same Monday–Friday).
- Select the time period (Wake, Leave, Return, Sleep).
- Use the arrow keys to set the time. The screen will show hours and minutes separately.
- Confirm the time, then set your desired temperature for that period.
- Press “Save” or “Done”.
- Repeat for each period and day.
Real-World Example Schedule
- Wake (6:30 AM): 70°F – You’re getting up, want it comfortable.
- Leave (8:30 AM): 62°F – Nobody’s home, save energy.
- Return (5:30 PM): 70°F – You’re back, warm it up before you arrive.
- Sleep (11:00 PM): 65°F – Cooler for better sleep, plus energy savings.
For WiFi-enabled models like the T9, you can set all this from your phone app, which honestly makes it less tedious.
Pro Tip: Start conservative with your schedule. You can always adjust temperatures up or down once you see how it affects your comfort and bills. Most people don’t get it perfect on the first try, and that’s fine.
Setting Temperature Setpoints and Deadband
This is where people get confused, so let’s break it down clearly.
Setpoint is the temperature you want. Simple enough.
Deadband is trickier. It’s the temperature difference between when your heat turns on and when your cooling turns on. This prevents your system from fighting itself (heat running while cooling runs).
For example, if your deadband is set to 2°F:
- You set the thermostat to 70°F in “Auto” mode.
- Heat will turn on when the temperature drops to 69°F.
- Cooling will turn on when the temperature rises to 71°F.
Most Honeywell models have a default deadband of 1–3°F, which is fine for most homes. You don’t need to change this unless your house feels uncomfortable.
How to Adjust Deadband (if needed)
- Go to “Settings” or “Preferences”.
- Look for “Deadband” or “Differential”.
- Adjust in 1°F increments. Wider = less frequent cycling, narrower = more precise temperature control.
- Save and test for a few days.
If your thermostat is constantly switching between heat and cooling, increase the deadband. If you feel temperature swings, decrease it slightly.
Fan Settings
Your thermostat also controls whether your fan runs continuously or only when heating/cooling is active.
- Auto: Fan runs only when the system is heating or cooling. Energy-efficient.
- On: Fan runs 24/7. Good for circulation and air quality, but higher energy use.
- Circulate: Some Honeywell models have a “Circulate” mode that runs the fan periodically throughout the day.
For most people, “Auto” is the sweet spot.
Using Smart and Advanced Features
If you’ve got a WiFi-enabled Honeywell thermostat (T9, RTH9585WF, or similar), you’ve got some powerful features beyond basic programming.
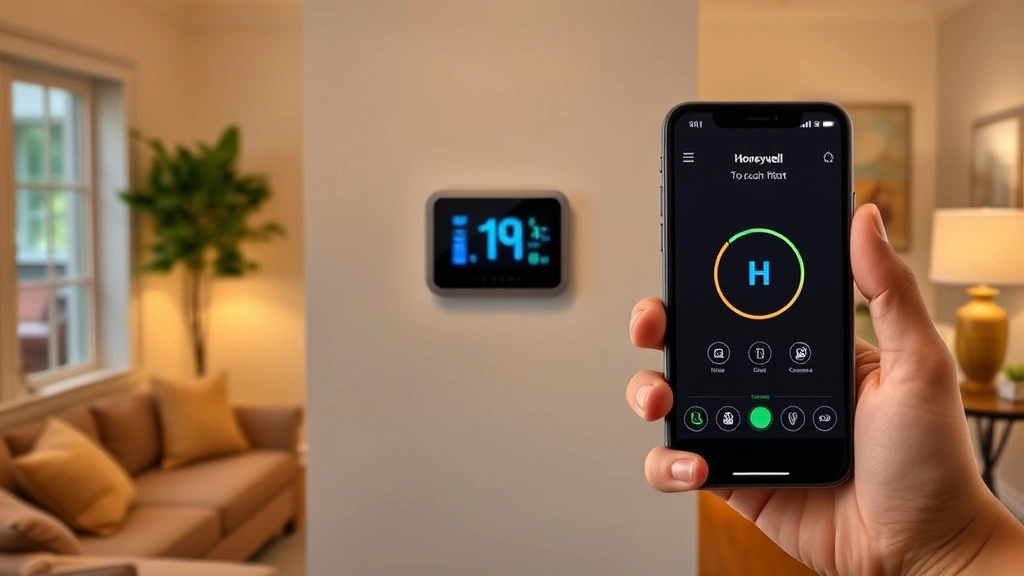
Smartphone App Control
Download the “Honeywell Home” app from your phone’s app store. You’ll need to:
- Create a Honeywell account (or link an existing one).
- Add your thermostat by scanning the QR code on the device or entering the serial number.
- Connect to your home WiFi network (2.4 GHz recommended – some models don’t like 5 GHz).
- Once paired, you can adjust temperature, view schedules, and check energy usage from anywhere.
This is genuinely useful. If you’re stuck in traffic and realize you forgot to adjust the thermostat before leaving, you can do it from your car.
Geofencing (Location-Based Control)
Many WiFi models can detect when you leave home and automatically switch to “Away” mode, then switch back to your normal schedule when you return. Set this up in the app under “Home” or “Away” settings. It’s not perfect (sometimes it triggers early if you’re just running errands nearby), but it’s a nice convenience.
Energy Reports
The Honeywell app shows you how much energy your HVAC system is using. This is valuable data. If your usage spikes suddenly, something might be wrong with your system. According to ENERGY STAR guidelines, a programmable thermostat can save you 10–15% on heating and cooling costs annually.
Voice Control (Some Models)
If your Honeywell thermostat is compatible with Alexa or Google Home, you can adjust temperature with voice commands. Setup varies by model, but generally you’ll enable the skill/action in your voice assistant’s app and link your Honeywell account.
Safety Warning: If your WiFi goes down, your thermostat still works – it just falls back to manual mode. You won’t have remote access, but your heating/cooling schedule continues normally. This is important to know if you rely on geofencing.
Common Programming Issues and Fixes
Even when you follow the steps perfectly, things sometimes go sideways. Here are the most common problems and how to fix them.
Issue 1: Schedule Not Triggering at the Right Time
Cause: Incorrect time or date on the thermostat, or the schedule wasn’t saved properly.
Fix:
- Check that the time and date are correct (go to Settings → Time/Date).
- Verify you actually saved the schedule (look for a “Save” confirmation on screen).
- Power cycle the thermostat: turn off the breaker for 30 seconds, then turn it back on.
- Re-enter the schedule and confirm each step.
Issue 2: Thermostat Won’t Connect to WiFi
Cause: Wrong WiFi password, incompatible network band (5 GHz instead of 2.4 GHz), or too far from the router.
Fix:
- Double-check your WiFi password – spaces and capitalization matter.
- Make sure you’re connecting to a 2.4 GHz network. Many routers broadcast both 2.4 and 5 GHz; you need the 2.4 GHz band.
- Move your router closer to the thermostat temporarily, or move the thermostat closer to the router to test.
- Restart your router (unplug for 30 seconds, plug back in).
- If still stuck, reset the thermostat to factory settings (hold the reset button for 10 seconds) and start WiFi setup again.
Issue 3: “Low Battery” Warning Keeps Appearing
Cause: The thermostat has backup batteries that are dying, or your HVAC system isn’t providing enough power.
Fix:
- Replace the batteries (usually AA or AAA, check the manual for specifics).
- If you just replaced batteries and the warning persists, your thermostat may not be getting enough power from your HVAC system. This usually means a wiring issue – call an HVAC tech.
Issue 4: System Runs Constantly or Won’t Turn On
Cause: System mode is set wrong, or there’s a wiring problem.
Fix:
- Check that “System” is set to “Heat”, “Cool”, or “Auto” (not “Off”).
- Verify that the fan mode is set to “Auto” (not stuck on “On”).
- If the system still won’t respond, turn off the breaker, wait 30 seconds, and turn it back on.
- If it still doesn’t work, check the wiring at the thermostat (see Basic Setup section) – a loose wire is the most common culprit.
Issue 5: Can’t Find the Settings Menu
Cause: Different models have different menu structures.
Fix:
- Look for a button labeled “Menu”, “Settings”, or a gear icon.
- If your model has a touchscreen, swipe or tap the screen to see menu options.
- Check your specific model’s manual on the Honeywell website or via the QR code on the thermostat.
Maintenance Tips for Optimal Performance
Once your thermostat is programmed correctly, a little maintenance keeps it running smoothly.
Monthly Tasks
- Check the display: Make sure it’s showing the correct temperature and no error codes.
- Verify the schedule: Make sure your programmed times still match your routine (especially after daylight saving time).
- Look at energy reports: If you’ve got a WiFi model, glance at your energy usage to spot unusual spikes.
Seasonal Tasks
- Before heating season (fall): Test your furnace by setting the thermostat below room temperature and listening for the furnace to kick in. This tells you everything is connected properly.
- Before cooling season (spring): Same test, but set the thermostat above room temperature to test the AC.
- Daylight saving time: If your thermostat doesn’t auto-update, manually adjust the time (most WiFi models handle this automatically).
Keep It Clean
Dust and debris can affect temperature sensors. Every few months, gently wipe the thermostat screen and cover with a soft, dry cloth. Don’t use water or cleaning spray – that can damage the electronics.
According to Family Handyman’s guide on thermostat maintenance, keeping your unit dust-free can improve accuracy by up to 2°F.
When to Call a Professional
If you’re seeing error codes, the system won’t respond to programming, or you’ve done all the troubleshooting above and nothing works, it’s time to call an HVAC technician. Don’t try to force it – a professional can diagnose wiring issues or hardware failures that are beyond DIY territory.
Frequently Asked Questions
Can I program different schedules for weekdays and weekends?
– Yes, absolutely. Most Honeywell thermostats let you set separate schedules for each day of the week. Some have a “Weekday/Weekend” shortcut that applies one schedule to Monday–Friday and another to Saturday–Sunday, which saves time.
What’s the best temperature to set when I’m away for an extended period?
– In winter, set heating to around 62–65°F to prevent pipes from freezing without wasting energy. In summer, set cooling to 78–80°F. If you’re gone for more than a few days, consider setting the thermostat to “Hold” mode at these temperatures so your schedule doesn’t interfere. You can always adjust remotely if you have a WiFi model.
How often should I update my thermostat schedule?
– Review your schedule seasonally and whenever your routine changes significantly (new job, kids’ school schedule, etc.). Most people adjust once in fall and once in spring. If you’ve got a WiFi model with geofencing, you may not need to adjust as often.
Does programming a thermostat actually save money?
– Yes, but the savings depend on how much you adjust temperatures and for how long. This Old House reports that most homeowners save 10–15% on heating and cooling costs with a properly programmed thermostat. That’s roughly $10–20 per month for the average household.
What happens if I accidentally delete my entire schedule?
– Don’t panic. Most Honeywell thermostats have a factory reset option that restores a default schedule (usually 68°F all day). Go to Settings → Reset or Factory Reset, confirm, and you’re back to square one. Then reprogram. You haven’t broken anything.
Can I program my thermostat to turn off completely?
– Yes, set the system mode to “Off”. However, this is risky in winter because you risk frozen pipes. In summer, “Off” means no cooling, which could damage electronics or make your home uninhabitable. It’s safer to set a very high temperature in summer (like 85°F) or a very low temperature in winter (like 55°F) if you want minimal system use.
Why does my thermostat show a different temperature than my wall thermometer?
– Thermostats can be off by 2–3°F due to sensor drift, placement (sunlight, drafts, or near vents), or calibration issues. If the difference is more than 3°F, the thermostat sensor may need cleaning or replacement. For minor differences, you can usually adjust the “Offset” in settings to compensate.
Is it safe to program my thermostat to very low temperatures in winter?
– No. Never program your heating below 55–60°F, even if you’re away for extended periods. Frozen pipes can burst and cause thousands in damage. If you’re traveling, use “Hold” mode or “Vacation” mode (if available) instead of programming extreme temperatures.
Do I need to reprogram my thermostat after a power outage?
– It depends. Most modern Honeywell thermostats have battery backup, so your schedule survives a brief power outage. However, if the power is out for more than a few hours, you may need to reset the time and date. Your schedule should still be there – just the clock might be wrong.
Can I control my Honeywell thermostat from multiple phones?
– Yes, with WiFi models. Multiple people can download the Honeywell Home app and log in with the same account. They’ll all see and control the same thermostat. Some models also let you set different access levels (e.g., adults can change schedules, kids can only view temperature).
Learning how to program Honeywell thermostat units gives you real control over your comfort and energy costs. Start with the basics – set your time, choose your system mode, and program a simple four-period schedule. Once that’s working, you can experiment with geofencing, energy reports, and voice control. Most importantly, don’t be afraid to adjust things. Your first schedule probably won’t be perfect, and that’s fine. Give it a week or two, then tweak based on how you feel and what your energy reports show. You’ve got this.


