

Nothing’s more frustrating than slicing into an apple for lunch, only to find it’s already turned brown and mushy by the time you’re ready to eat it. Whether you’re prepping fruit for a packed lunch, making a salad, or just want your apple slices to look fresh at a picnic, knowing how to prevent apples from browning is a game-changer in the kitchen. The good news? It’s not complicated. Browning happens because of oxidation—a natural chemical reaction that occurs when apple flesh is exposed to air. But there are several proven methods to slow it down or stop it entirely.
In this guide, I’ll walk you through the science behind why apples brown, then show you the easiest, most reliable techniques to keep your apple slices looking crisp and white. Some methods take seconds. Others require a bit more planning. By the end, you’ll know exactly which approach works best for your situation.
Why Do Apples Brown in the First Place?
Before we talk about solutions, let’s understand the enemy. When you cut an apple, you’re breaking down the cell walls and exposing the flesh to oxygen. Inside the apple are enzymes called polyphenol oxidases (PPOs) and compounds called polyphenols. When these come into contact with oxygen in the air, they react and create a brown pigment called melanin—the same stuff that colors your skin when you tan.
This process is called enzymatic browning, and it’s completely natural. It’s not a sign the apple is spoiled (though it will eventually soften if left too long). The browning is purely cosmetic at first, though the texture will degrade over time if you don’t stop it.
Here’s the real talk: you can’t prevent this reaction entirely without removing oxygen or deactivating the enzymes. But you can slow it down dramatically—sometimes for hours—using simple kitchen ingredients you probably already have.
Pro Tip: Different apple varieties brown at different rates. Granny Smith apples brown slower than Honeycrisp or Gala apples. If you’re planning ahead and want minimal browning, choose your apple type strategically.
The Lemon Juice Method: Fastest & Easiest
This is the method I use almost every time, and honestly, it’s hard to beat. Lemon juice works because of its acidity—the low pH environment slows down the enzymatic browning reaction dramatically. Plus, lemon juice adds almost nothing to the flavor profile if you use it sparingly.
Here’s how to do it:
- Slice your apples as usual.
- Pour fresh lemon juice (bottled or fresh-squeezed) into a shallow bowl or container.
- Toss the apple slices gently in the lemon juice for about 30 seconds, making sure each slice gets coated.
- If you want to reduce the lemon flavor, drain the apples on a paper towel after coating.
- Store in an airtight container or sealed bag in the refrigerator.
The result? Your apple slices will stay bright white for 3-5 hours, sometimes longer. I’ve had success keeping them fresh overnight in the fridge.
One thing to note: if you’re using bottled lemon juice, it works fine, but fresh-squeezed is slightly more effective. The citric acid concentration is higher in fresh juice. That said, don’t stress about it—bottled juice gets the job done.
For more on food preservation techniques, Family Handyman has a solid breakdown of produce storage methods that covers the science behind why acidic solutions work.
Salt Water Solution: The Budget Hack
If you’re out of lemon juice or just want to save a few cents, salt water is your backup plan. This method is less well-known than lemon juice, but it’s surprisingly effective. Salt inhibits enzymatic browning by changing the osmotic pressure around the apple cells, which slows down the enzyme activity.
How to make it:
- Mix 1/4 teaspoon of salt into 1 cup of cold water.
- Stir until the salt dissolves completely.
- Submerge your sliced apples in the salt water for 5-10 minutes.
- Remove and drain on a paper towel.
- Store in an airtight container.
Salt water keeps apples fresh for about 2-4 hours. It’s not quite as long as lemon juice, but it’s close enough for most situations. The downside? You might notice a very slight salty taste if you don’t rinse the apples well. Rinsing them briefly under cool water removes the salt without undoing the anti-browning effect.
Here’s a pro move: combine salt water with our detailed guide on keeping apples from turning brown for maximum storage time. Layer your techniques for best results.
Vinegar Water: Surprisingly Effective
Vinegar is another acidic solution that works well for preventing apple browning. White vinegar, apple cider vinegar, or even rice vinegar all work. The acidity level is what matters, not the type.
The formula:
- Mix 1 tablespoon of vinegar (any type) into 1 cup of water.
- Submerge apple slices for 5-10 minutes.
- Drain and pat dry with a paper towel.
- Store in the refrigerator in an airtight container.
Effectiveness: 3-5 hours of browning prevention, similar to lemon juice.
The catch? Vinegar leaves a more noticeable taste than lemon juice, especially if you don’t rinse the apples thoroughly. If you’re using the apples in a salad or for a snack where the taste matters, lemon juice is the better choice. But if you’re making applesauce, apple pie filling, or a smoothie, vinegar water is perfect—the flavor will blend in anyway.
For a scientific breakdown of how acids affect enzymatic browning, This Old House’s food preservation section has some solid explanations, though their primary focus is home improvement.
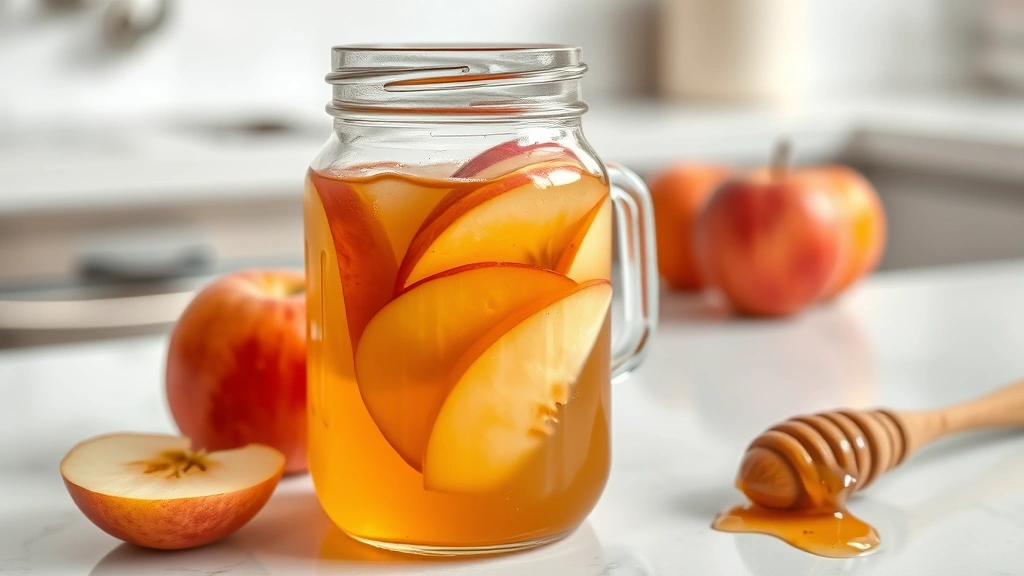
Honey Water: Best for Sweetness
If you’re making a fruit platter or want to add a subtle sweetness to your apples, honey water is the move. Honey has natural antimicrobial and antioxidant properties that help slow browning, and it adds a light sweetness that works well with apple slices.
How to prepare it:
- Mix 1 tablespoon of honey into 1 cup of warm water (warm water helps the honey dissolve).
- Let it cool to room temperature.
- Submerge apple slices for 5 minutes.
- Drain and store in an airtight container.
Browning prevention time: 2-4 hours.
Honey water doesn’t work quite as well as lemon juice or vinegar because the acidity level is lower. But the trade-off is worth it if you like the flavor. The apples will have a subtle honey taste that actually complements the natural apple flavor.
One important note: don’t use honey water if you’re serving apples to children under one year old. Raw honey can contain botulism spores, which are harmless to older kids and adults but risky for infants.
Plastic Wrap & Airtight Storage
Sometimes the simplest solution is just removing oxygen from the equation. If you don’t want to use any liquids, you can rely on airtight storage to slow browning.
Here’s the approach:
- Slice your apples and place them in a single layer on a plate or cutting board.
- Press plastic wrap directly onto the surface of the apples, making sure there are no air pockets.
- Alternatively, use a vacuum-seal bag if you have one.
- Store in the refrigerator.
Without any liquid treatment, this method gives you about 1-2 hours before noticeable browning starts. It’s not the best option if you need long-term storage, but it works fine for a quick snack or if you’re planning to eat the apples within an hour or two.
The real magic happens when you combine this method with one of the liquid treatments above. Coat your apples in lemon juice, then wrap them tightly in plastic wrap. You’ll get 5+ hours of freshness.
Safety Warning: When storing cut apples in the refrigerator, keep them separate from raw meat and poultry to avoid cross-contamination. Store them on a shelf above any raw proteins.
Commercial Anti-Browning Products
If you want to go the convenience route, there are commercial anti-browning products on the market. The most common is Fruit-Fresh or similar brands, which contain calcium ascorbate (a form of vitamin C) and dextrose.
How they work:
Vitamin C (ascorbic acid) works like lemon juice—it’s acidic and inhibits enzymatic browning. These products are convenient because they’re already measured and packaged, and they often don’t add much flavor.
How to use them:
- Follow the package instructions (typically you mix a packet with water).
- Submerge apple slices in the solution for 5-10 minutes.
- Drain and store in the refrigerator.
Effectiveness: 4-6 hours of browning prevention, sometimes longer.
Are they worth it? Honestly, no. Lemon juice and salt water are cheaper, work just as well, and you probably already have them at home. But if you’re buying them anyway for other purposes, they’re a solid backup option.
For more on food storage and preservation, Bob Vila’s food storage guide covers various preservation methods beyond just apples.
Frequently Asked Questions
Can I prevent browning by keeping apples in the freezer?
– Yes, freezing works, but it changes the texture significantly. Frozen apples become mushy when thawed because ice crystals rupture the cell walls. Freezing is great if you’re planning to use the apples in smoothies, applesauce, or baking, but not ideal if you want to eat them fresh. For short-term storage (a few hours to overnight), refrigeration with one of the methods above is better.
Does the type of apple matter for browning speed?
– Absolutely. Granny Smith and Pink Lady apples brown slower than Honeycrisp, Gala, or Fuji apples. If you’re prepping apples in advance and browning is a concern, choose slower-browning varieties. The difference can be 1-2 hours in some cases.
Is it safe to eat apples that have started to brown?
– Completely safe. Browning is purely cosmetic and caused by oxidation, not bacterial growth or spoilage. The apples are fine to eat. That said, they will start to soften and lose crispness after several hours, so while they’re safe, the texture won’t be as good.
Can I use orange juice instead of lemon juice?
– Yes, orange juice works because it’s also acidic, though it’s slightly less effective than lemon juice and will add more flavor. If you’re out of lemon juice and have orange juice on hand, it’s a solid backup. The browning prevention time is usually 2-4 hours instead of 3-5.
How long can I store treated apple slices in the refrigerator?
– Most treated apple slices stay fresh for 3-5 days in an airtight container in the refrigerator, though browning will eventually start. After 24 hours, even treated apples may begin to brown slightly. For best quality, use them within 1-2 days.
Does washing apples before slicing help prevent browning?
– Washing removes dirt and surface bacteria, but it doesn’t prevent browning. You still need to use one of the methods above (lemon juice, salt water, etc.) after slicing. Washing before slicing is a good food safety practice, but it won’t solve the browning problem on its own.

Can I use lime juice instead of lemon juice?
– Yes. Lime juice has a similar acidity level to lemon juice and works just as well. The main difference is flavor—lime is more tart and distinctive, so use it only if you like the taste. For a neutral flavor, lemon juice is the better choice.
What’s the fastest way to prevent browning if I’m in a hurry?
– Lemon juice is the fastest. Slice your apples, toss them in lemon juice for 30 seconds, and you’re done. The entire process takes less than a minute. If you don’t have lemon juice, salt water is the next quickest option—also about a minute of prep time.


