
Listen, if you’ve ever stood over a roasting pan after pulling out a turkey or prime rib and thought, “Now what?” – you’re not alone. Making gravy from drippings intimidates a lot of home cooks, but here’s the real talk: it’s actually one of the easiest sauces you can master. The drippings are already packed with flavor. You’re not starting from scratch. You’re just organizing what’s already there into something silky and delicious.
The secret to learning how to make gravy from drippings isn’t fancy technique or expensive equipment. It’s understanding three simple things: fat, flour, and liquid. Get those ratios right, and you’ll nail it every single time. This guide walks you through the entire process, from saving those precious pan drippings to serving a gravy that makes people ask for your recipe.
Save Your Drippings (Don’t Waste That Liquid Gold)
The moment your meat comes out of the oven, you’ve got a window of opportunity. The pan is hot, the drippings are loose, and you haven’t lost a drop yet. Here’s what to do:
- Let the meat rest. Don’t touch that roasting pan yet. Your meat needs 10–20 minutes to relax (depending on size). This isn’t just for the meat – it gives you time to prep.
- Pour off the drippings carefully. Tilt the pan toward a heat-safe measuring cup or bowl. You want both the liquid and the browned bits (called fond). If there’s a lot of fat, you can skim some off with a spoon or use a fat separator pitcher – basically a gravy pitcher with a spout that pours from the bottom, leaving the fat behind.
- Measure what you have. You typically need about 2–3 tablespoons of fat per cup of liquid for a proper gravy. If you have mostly liquid and not enough fat, you’ll add butter. If you’re drowning in fat, skim it down.
Pro tip: Don’t throw away that fat. Rendered meat fat is gold in the kitchen. Save it for cooking vegetables or making other sauces. If you’re using poultry drippings, that fat is especially valuable for roasting potatoes or making pie crusts.
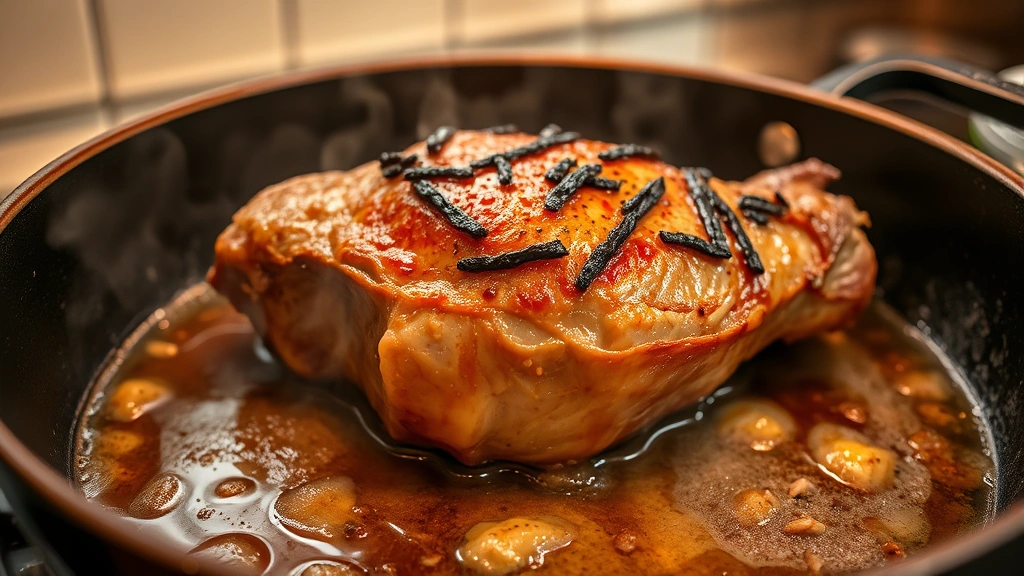
Deglaze the Pan to Release Stuck Bits
Those brown, crusty bits stuck to the bottom of the pan? That’s where the real flavor lives. This is called fond, and deglazing is how you unlock it.
Here’s the process:
- Place the roasting pan on the stovetop over medium-high heat. Don’t worry about the residual fat – you need it.
- Pour in your liquid. This could be beef broth, chicken stock, wine, or even water. Use about 1 cup to start. You’ll hear it sizzle immediately.
- Scrape the bottom with a wooden spoon or spatula. Work it gently but firmly, breaking up those stuck bits. They should dissolve into the liquid within 1–2 minutes. If they’re really stubborn, let the liquid simmer for another minute and scrape again.
- Pour everything into your measuring cup or bowl. You now have liquid that’s infused with all that deep, savory flavor. This is your gravy base.
If you’re making pan sauces for other proteins like swordfish, this same deglazing technique applies. The principle is universal.
Safety Warning: That pan is hot. Use oven mitts, work carefully, and keep your face back from the steam. If you’re using wine, be aware that it can flare up on a gas stove. Pour slowly and keep a lid nearby just in case.
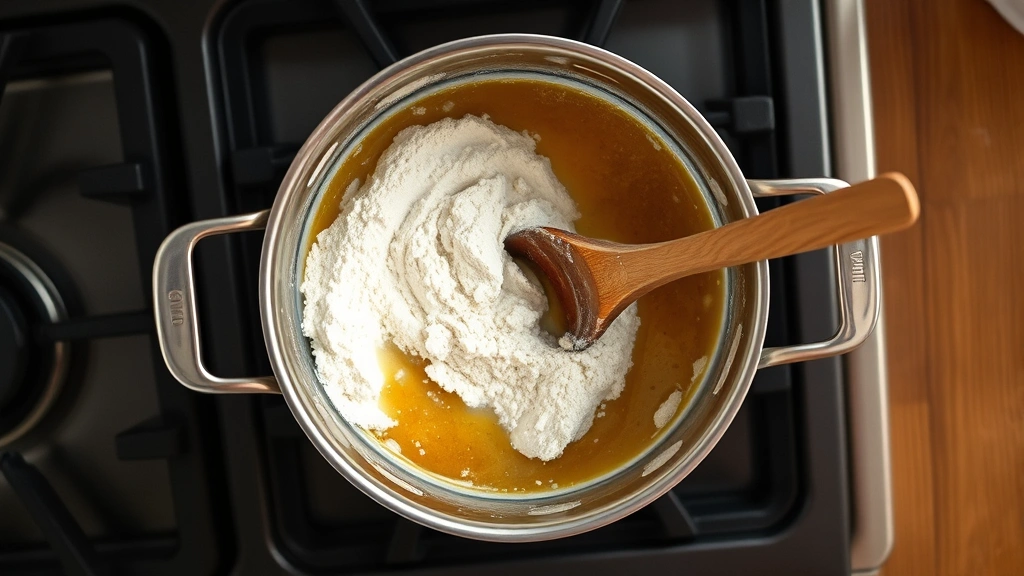
Make a Roux: The Fat-and-Flour Foundation
This is where gravy comes together. A roux is just fat and flour cooked together. It’s the thickening agent that transforms your drippings into actual gravy. Think of it like a sponge – it absorbs the liquid and creates body.
The ratio: For every 1 cup of liquid, use 2 tablespoons of fat and 2 tablespoons of flour. This makes a standard gravy. Want it thicker? Add a bit more flour. Want it thinner? Add more liquid later.
Here’s the step-by-step:
- Return the roasting pan to medium heat. If you don’t have enough fat (you need at least 2 tablespoons per cup of final gravy), add butter now. Let it melt completely.
- Sprinkle in your flour. Do this slowly, stirring constantly. You don’t want lumps. The flour should absorb the fat and create a paste-like consistency. This takes about 1 minute.
- Cook the roux for 1–2 minutes. Stir constantly. This step cooks out the raw flour taste and helps the roux thicken more effectively. You’ll notice it smells a bit nutty – that’s good. That’s flavor developing.
- Watch the color. For poultry or light gravies, keep it pale (barely golden). For beef or darker gravies, let it brown a bit more. The darker the roux, the deeper the flavor, but also the less thickening power it has.
Common mistake: people rush this step or add the flour all at once. Slow and steady wins. You’re building an emulsion here, and it needs time.
Strain and Add Your Liquid
Now comes the moment of truth. You’re going to add your deglazing liquid to the roux, and if you do it right, you’ll get silky gravy. If you rush it, you’ll get lumps.
The technique:
- Strain your drippings first (optional but smart). Pour them through a fine-mesh sieve to catch any bits of meat, bone fragments, or excess fat. This makes for a cleaner, more refined gravy. You can skip this if you like rustic, chunky gravy – totally valid.
- Add the liquid slowly. Pour it in while whisking constantly. Start with about half your liquid. The roux will absorb it and thicken. Keep whisking until it’s smooth.
- Add the rest of the liquid. Once the first half is incorporated and smooth, add the remaining liquid. Keep whisking. You’re looking for a smooth, pourable consistency with no lumps.
- Bring it to a simmer. Let it bubble gently for 1–2 minutes. This finishes the cooking process and ensures the flour is fully cooked through.
If you do end up with lumps (it happens), strain the gravy through a fine-mesh sieve. Or use an immersion blender for 10–15 seconds. Both work.
Thicken, Season, and Taste as You Go
At this point, you have gravy. But is it the right thickness? Is it seasoned properly? This is where you fine-tune.
Thickness adjustments:
- Too thin? Make a slurry: mix 1 tablespoon cornstarch with 2 tablespoons cold water until smooth. Whisk it into the simmering gravy. It thickens almost instantly. Alternatively, let it simmer uncovered for a few minutes – it will reduce and thicken naturally.
- Too thick? Add more stock, broth, or even water, a splash at a time. Whisk and taste between additions.
Seasoning: Now taste it. Be honest. Most gravies need:
- Salt (start with ½ teaspoon, taste, add more if needed)
- Black pepper (freshly ground, about ¼ teaspoon)
- A pinch of dried thyme or sage (optional but classic)
- A dash of Worcestershire sauce or soy sauce (adds depth)
Season gradually. You can always add more, but you can’t take it out. Stir after each addition and taste.
Pro Tip: If your gravy tastes flat or one-dimensional, it’s usually missing salt or acid. A tiny splash of vinegar or lemon juice can wake it up. Just a teaspoon – you’re not making it tangy, just brightening the flavors.
According to Family Handyman’s kitchen guides, the best approach to seasoning is incremental tasting. Same principle applies here – don’t dump everything in at once.
Troubleshooting Common Gravy Disasters
Gravy is lumpy: Strain through a fine-mesh sieve, or use an immersion blender for 15 seconds. If it’s still grainy after straining, it might be burnt flour. Start over – it happens.
Gravy is too greasy: Use a fat separator pitcher to pour off the fat before making the roux. Or, refrigerate the gravy overnight. The fat will solidify on top and you can lift it off. Reheat and serve.
Gravy broke (separated into greasy puddles): This usually happens if the heat was too high or you added cold liquid to a very hot roux. Whisk in a tablespoon of cold water or broth and lower the heat. Whisk constantly until it comes back together. If it doesn’t, start a new roux in a clean pan and slowly whisk in the broken gravy.
Gravy tastes like raw flour: You didn’t cook the roux long enough. Make a new roux, cook it for 2–3 minutes, then slowly add your gravy back in while whisking. This re-cooks it properly.
Gravy is too salty: Add more liquid (unsalted broth or water) to dilute it. Or add a diced potato, simmer for 5 minutes, then remove the potato. Potatoes absorb salt.
Gravy is bland: Taste it again and add salt gradually. If salt doesn’t help, add a splash of Worcestershire sauce, soy sauce, or a pinch of garlic powder. Sometimes a tiny bit of mustard powder works wonders too.
Storage and Reheating Tips
Made too much gravy? Good news – it keeps well.
Refrigerator: Pour into an airtight container and refrigerate up to 3 days. The fat may solidify on top – that’s normal and fine. Just reheat gently.
Freezer: Gravy freezes beautifully for up to 3 months. Use ice cube trays for portions, or freeze in a flat container so you can break off what you need. Thaw in the refrigerator overnight, then reheat.
Reheating: The gentle approach works best. Pour into a saucepan over low to medium heat, stirring occasionally. If it’s too thick after reheating, whisk in a splash of broth or water. If it’s separated or grainy, whisk in a tablespoon of cold water and keep stirring over low heat until it smooths out.
Never microwave gravy in a regular container – it heats unevenly and can break. A microwave-safe bowl works, but stir every 30 seconds.
When you’re ready to serve side dishes like steamed green beans, having gravy ready makes the whole meal come together faster.
Frequently Asked Questions
Can I make gravy without drippings?
– Yes. Make a roux with butter and flour, then whisk in beef, chicken, or vegetable broth. It won’t have the same depth as gravy made from drippings, but it’s still good. Add a splash of Worcestershire sauce or soy sauce for extra flavor.
What if I have no fat in my drippings?
– Add butter. Use 2 tablespoons of butter per cup of liquid. Melt it in the pan, add flour, cook the roux, then add your liquid. You’ll get the same result.
Can I use cornstarch instead of flour?
– Yes, but the technique is different. Mix cornstarch with cold water (1 tablespoon cornstarch to 2 tablespoons water) to make a slurry. Whisk it into simmering gravy. It thickens faster and creates a glossier texture, but it doesn’t brown like flour does. For a roux-based gravy, flour is better.
Should I use the fat from the meat or add butter?
– Use the fat from the meat if you have enough (at least 2 tablespoons per cup of liquid). It has better flavor. If you’re short, add butter to make up the difference. Never use oil – it doesn’t emulsify the same way.
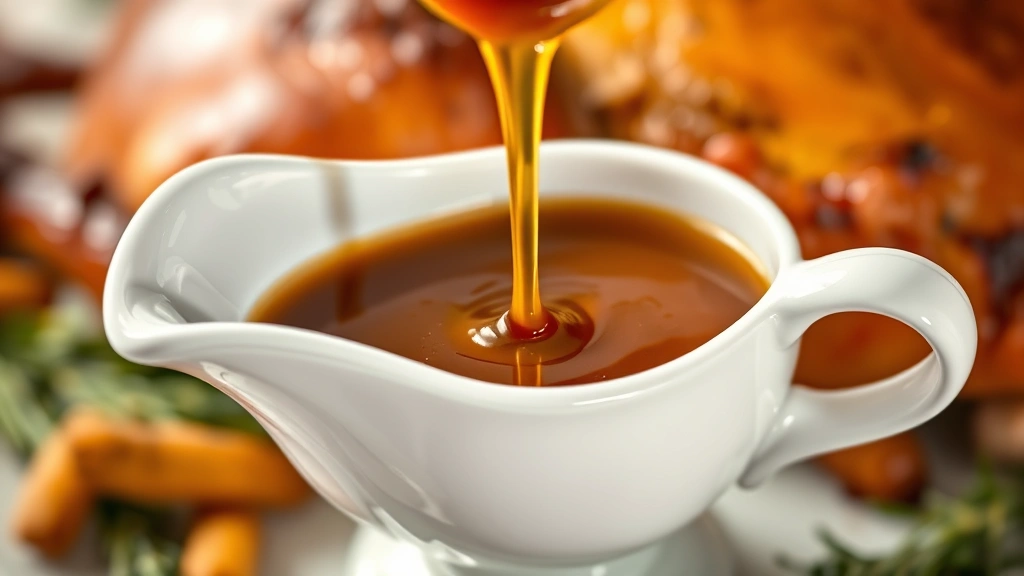
How do I know when the gravy is done?
– When it coats the back of a spoon and you can draw a line through it with your finger, it’s the right thickness. It should pour smoothly but not be watery. The flavor should be savory and well-seasoned with no raw flour taste.
Can I add cream to gravy?
– Absolutely. Add ¼ to ½ cup heavy cream at the very end, off the heat, stirring gently. This makes it richer and lighter in color. Don’t boil it after adding cream – just heat through.
What’s the best liquid to use for deglazing?
– For beef: beef broth or red wine. For poultry: chicken broth or white wine. For pork: chicken broth or apple cider. Water works in a pinch, but broth is better because it adds flavor. If using wine, let it simmer for 1 minute to cook off the alcohol.
Why is my gravy separating?
– Usually because the heat was too high, or you added cold liquid to a very hot roux. Lower the heat to medium-low and whisk constantly. If it’s already separated, whisk in a tablespoon of cold water and keep whisking over low heat. Patience is key.
Can I make gravy ahead of time?
– Yes. Make it up to 2 hours before serving and keep it warm in a slow cooker on low, or in a covered saucepan over very low heat. Stir occasionally. If it thickens too much as it sits, whisk in a splash of broth to loosen it.
Is there a way to make thicker gravy without flour?
– Yes. Use cornstarch slurry (mentioned above), or reduce the gravy by simmering uncovered until it reaches the right consistency. You can also use arrowroot powder (1 tablespoon mixed with 2 tablespoons cold water) – it works like cornstarch but creates a clearer gravy.
Making gravy from drippings is genuinely one of the most rewarding skills in the kitchen. You’re not just using every part of your roasted meat – you’re creating something that elevates the entire meal. The first time you nail it, you’ll understand why people get excited about gravy. It’s not complicated. It’s just fat, flour, liquid, and attention. Master those, and you’re golden.
For more detailed cooking techniques, check out This Old House’s kitchen section, which covers foundational cooking skills. And if you ever need to troubleshoot food safety or storage questions, FoodSafety.gov is an excellent resource backed by USDA guidelines.


