

You’ve spent hours building a spreadsheet. Headers are perfect. Data is clean. Then someone opens the file and accidentally deletes a critical formula row, or worse—edits your header labels. Nightmare scenario, right? That’s where how to lock rows in Excel comes in. Locking rows isn’t just about preventing accidents; it’s about protecting your work and maintaining data integrity in shared files.
Here’s the real talk: most people don’t realize Excel has built-in protection features that are surprisingly straightforward once you understand them. You don’t need to be a spreadsheet wizard to lock rows and keep your data safe. In this guide, I’ll walk you through exactly how to lock rows in Excel—whether you want to protect specific rows, freeze them for easy scrolling, or lock entire sheets with password protection.
The Difference Between Freezing and Locking Rows
Before we dive into how to lock rows in Excel, let’s clear up the confusion that trips up most people: freezing and locking are not the same thing. Think of freezing like pinning a note to your monitor—it stays visible while you scroll. Locking is like putting that note in a safe—nobody can change it without the key.
Freezing rows keeps them visible on screen as you scroll down through your data. You’ll still see your headers even when you’re looking at row 500. This is purely a visibility feature.
Locking rows prevents anyone from editing, deleting, or moving those rows without unprotecting the sheet first. It’s a security feature.
Most people actually want to freeze their header rows (which we’ll cover), but some need both freezing AND locking for maximum control. Understanding the difference saves you from implementing the wrong solution.
How to Lock Rows in Excel: The Basic Method
Locking rows in Excel involves two steps: first, you mark which cells should be locked (they’re locked by default, but you need to be intentional), then you protect the sheet. Here’s the process:
Step 1: Select the Rows You Want to Lock
- Open your Excel spreadsheet
- Click on the row number on the left side to select the entire row. For example, click on “1” to select row 1
- If you want multiple non-consecutive rows, hold Ctrl and click on additional row numbers
- If you want consecutive rows (like rows 1-3), click row 1, then hold Shift and click row 3
Pro tip: Most of the time, you’ll want to lock your header row (row 1) and maybe a few rows of important metadata below it. Locking too many rows can be frustrating for users who need to edit data.
Step 2: Format Those Cells as Locked
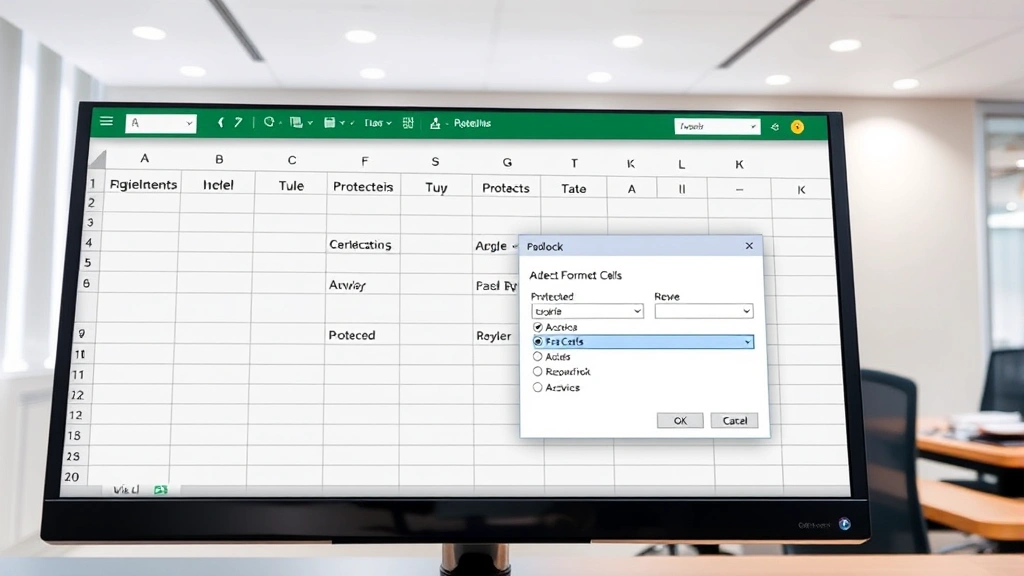
- Right-click on your selected rows and choose “Format Cells” (or press Ctrl+1)
- Click the “Protection” tab
- Make sure the “Locked” checkbox is checked (it usually is by default)
- Click OK
Step 3: Protect the Sheet
This is the critical step. Without sheet protection, the “locked” formatting means nothing.
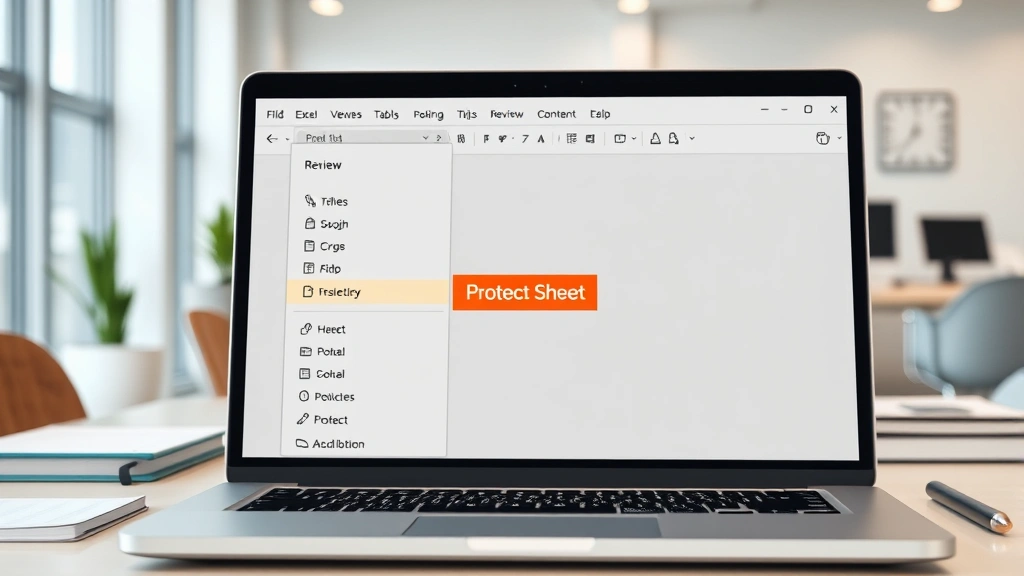
- Go to the “Review” tab in the ribbon (or “Tools” if you’re on Mac)
- Click “Protect Sheet” (some older versions say “Protect Worksheet”)
- A dialog box appears. You can optionally enter a password—this prevents anyone from unprotecting the sheet without the password
- Make sure “Protect sheet and contents of locked cells” is checked
- Review the options below (usually you want users to be able to “Select locked cells” but NOT “Edit objects” or “Edit scenarios”)
- Click OK and confirm your password if you set one
That’s it. Your rows are now locked. Anyone who tries to edit them will see a message: “The cell you are trying to change is protected and therefore read-only.”
Safety Warning: If you forget your password, you cannot unprotect the sheet. Excel doesn’t have a “forgot password” recovery option. Write it down somewhere safe, or don’t use a password if you’re the only user.
How to Freeze Rows (Not Lock Them)
Now, here’s what most people actually want: they want to freeze their header rows so they stay visible while scrolling. This is different from locking, but it’s equally important. Check out our detailed guide on how to freeze panes in Excel for a complete walkthrough, but here’s the quick version:
- Click on the row immediately below the rows you want to freeze. For example, if you want to freeze rows 1-3, click on row 4
- Go to the “View” tab
- Click “Freeze Panes” → “Freeze Panes” again
- Now rows 1-3 will stay visible as you scroll down
You can also use how to freeze cells in Excel for more granular control if you need to freeze both rows and columns.
The beauty of freezing is that it’s purely visual—it doesn’t prevent editing. Users can still modify frozen rows; they just stay on screen. This is perfect for headers that you want visible but don’t necessarily need to protect.
Protecting Your Entire Sheet with a Password
Sometimes you need more than just locking specific rows. You want to protect the entire sheet so nobody can accidentally mess with anything without your permission.
Protect the Entire Sheet (All Cells Locked)
- Select all cells by pressing Ctrl+A (or clicking the cell selector box in the top-left corner)
- Right-click and choose “Format Cells”
- Go to the “Protection” tab and ensure “Locked” is checked
- Click OK
- Now go to “Review” → “Protect Sheet”
- Enter a password (optional but recommended for sensitive data)
- Click OK
Now every cell on the sheet is protected. Users can view data but cannot edit anything.
Protect Sheet But Allow Specific Edits
This is where it gets powerful. You can lock most of your sheet but allow users to edit specific cells (like data entry fields). Here’s how:
- First, select ALL cells (Ctrl+A)
- Right-click → “Format Cells” → “Protection” tab
- Check “Locked” and click OK
- Now select only the cells you WANT users to edit
- Right-click → “Format Cells” → “Protection” tab
- UNCHECK “Locked” and click OK
- Go to “Review” → “Protect Sheet”
- Enter a password and click OK
Now users can edit only the unlocked cells. Everything else is read-only. This is perfect for templates where you want people to fill in specific data but not touch formulas or headers.
Unlocking Specific Cells While Protecting Others
Let’s say you have a budget spreadsheet. You want to lock all the formulas and headers, but you want team members to be able to input their department expenses in specific cells. This requires a two-step approach:
The Setup Process
- Select the cells you want users to edit (let’s say B5:B20 for expense entries)
- Right-click → “Format Cells” → “Protection” tab
- UNCHECK the “Locked” checkbox
- Click OK
- Now select all cells (Ctrl+A)
- Right-click → “Format Cells” → “Protection” tab
- Ensure “Locked” is checked for everything else
- Click OK
- Go to “Review” → “Protect Sheet”
- Set a password if desired
- In the protection dialog, make sure “Select unlocked cells” is checked but “Edit objects” is unchecked
- Click OK
Now when the sheet is protected, users can click and edit cells B5:B20, but everything else is locked. They can still select locked cells (to see what’s there), but they can’t change them.
Pro Tip: Use cell comments or data validation to guide users on which cells they should edit. This prevents confusion and reduces mistakes. For more on formatting, see our guide on how to wrap text in Excel.
Common Mistakes When Locking Rows
I’ve seen people lock rows and then get frustrated when it doesn’t work. Here are the most common mistakes:
Mistake #1: Formatting Cells as Locked But Not Protecting the Sheet
You can format cells as locked all day long, but if you don’t protect the sheet, those cells are still editable. The “Locked” property only matters when the sheet is protected. It’s like setting a burglar alarm but never turning it on.
Mistake #2: Locking Too Many Rows
I’ve seen people lock 50 rows thinking they’re protecting important data, but then nobody can work with the spreadsheet. Lock only what you truly need to protect. Usually, that’s just the header row and maybe one or two metadata rows.
Mistake #3: Forgetting Your Password
You set a complex password to protect your sheet, then six months later you need to make changes and can’t remember it. There’s no “forgot password” option in Excel. Either write it down, use a password manager, or don’t use a password if you’re the primary user.
Mistake #4: Not Testing Before Sharing
Always test your locked sheet before sending it to others. Open it in a fresh Excel session, try to edit a locked cell, try to edit an unlocked cell, and verify everything works as intended. Nothing’s worse than sending out a “protected” file that doesn’t actually protect anything.
Mistake #5: Mixing Up Freeze and Lock
You freeze rows to keep them visible while scrolling. You lock rows to prevent editing. They serve different purposes. Many people need BOTH—freeze for visibility, lock for protection.
Advanced Locking Techniques
Hiding Rows and Locking Them
Sometimes you have rows with sensitive information or formulas you don’t want users to see at all. You can hide these rows and lock them:
- Select the rows you want to hide
- Right-click and choose “Hide”
- Format those rows as locked (right-click → “Format Cells” → “Protection” → check “Locked”)
- Protect the sheet with a password
Now those rows are invisible AND locked. Users can’t unhide them without the password.
Locking Rows in Shared Workbooks
If you’re using Excel’s “Share Workbook” feature (older versions) or OneDrive collaboration, sheet protection still works, but there are some limitations. According to Microsoft’s official documentation, you cannot use certain protection features in shared workbooks. For modern collaboration, use OneDrive or SharePoint with co-authoring instead of the older Share Workbook feature.
Using VBA for Advanced Protection
If you’re comfortable with macros, you can use VBA to lock/unlock sheets programmatically. For example:
Sub ProtectSheet()
ActiveSheet.Protect Password:="YourPassword", UserInterfaceOnly:=True
End Sub
This is overkill for most users, but it’s useful if you’re building sophisticated templates.
Locking Rows in Different Excel Versions
The basic process is the same across Excel 2016, 2019, 2021, and Excel Online, but the ribbon locations vary slightly. In Excel Online, go to “Review” → “Protect Sheet.” On Mac, it’s usually “Tools” instead of “Review.” The fundamentals remain identical.
For detailed guidance on related tasks, check out how to move columns in Excel if you’re reorganizing your sheet structure before locking it.
Protecting Multiple Sheets at Once
If you have a workbook with 10 sheets and want to protect all of them, you’ll need to protect each sheet individually. There’s no “protect all sheets” button. However, you can use the same password for all sheets to make it easier to manage.
Removing Protection from a Sheet
To unprotect a sheet:
- Go to “Review” → “Unprotect Sheet”
- If you set a password, enter it
- Click OK
Now all cells are editable again, regardless of their locked/unlocked status.
Frequently Asked Questions
Can I lock rows without protecting the entire sheet?
– No. The “Locked” cell property only takes effect when the sheet is protected. If you want to lock rows, you must protect the sheet. However, you can choose which cells are locked and which are unlocked before protecting the sheet.
What’s the difference between locking rows and freezing rows?
– Freezing rows keeps them visible on screen while you scroll down. Locking rows prevents them from being edited without unprotecting the sheet. They serve different purposes, and you can do both simultaneously.
If I forget my password, can I recover it?
– No. Excel does not have a password recovery feature for sheet protection. If you forget the password, you cannot unprotect the sheet without using third-party tools (which may or may not work depending on your Excel version and security settings). Always write down your password or use a password manager.
Can I lock rows in Excel Online?
– Yes. The process is similar: select rows, format as locked, then go to “Review” → “Protect Sheet.” Excel Online supports sheet protection, though some advanced features may be limited.
Will locked rows prevent someone from deleting the entire sheet?
– No. Sheet protection only protects the cells within the sheet. Someone can still delete the entire sheet tab. If you need to prevent that, you’d need to protect the entire workbook (File → Info → Protect Workbook → Protect Current Sheet).
Can I allow users to sort or filter data if rows are locked?
– Yes, if you configure the protection settings correctly. When you protect the sheet, you can check “Allow users to sort” and “Allow users to use AutoFilter.” This lets users interact with data without editing locked cells.
Is sheet protection secure?
– Sheet protection is NOT encryption. It’s a deterrent against accidental changes, not a security feature against determined attackers. If someone really wants to bypass it, they can. For truly sensitive data, use Excel’s file encryption (File → Info → Encrypt with Password) in addition to sheet protection.
Can I lock rows and still allow formulas to calculate?
– Yes. Locking rows doesn’t prevent formulas from calculating. The formulas still work; users just can’t edit them. The locked cells remain read-only.
How do I know if a sheet is protected?
– Try to edit a cell. If you get a message saying “The cell you are trying to change is protected,” the sheet is protected. You can also look at the “Review” tab—if “Protect Sheet” is grayed out and “Unprotect Sheet” is available, the sheet is protected.
Can I protect a sheet in older Excel versions like Excel 2010?
– Yes. The process is nearly identical. Go to “Review” → “Protect Sheet” and follow the same steps. The interface might look slightly different, but the functionality is the same.


