
How to Lock a Row in Excel: Simple & Essential Guide
Protecting your data in Excel is crucial, especially when working with shared spreadsheets or sensitive information. Learning how to lock a row in Excel ensures that critical headers, totals, or reference data remain visible and protected from accidental changes. Whether you’re managing a budget, tracking inventory, or collaborating with a team, understanding row locking techniques will save you time and prevent costly mistakes.
Quick Answer: To lock a row in Excel, first select the row below the one you want to lock, then go to the View tab and click “Freeze Panes.” For cell-level protection, select your row, right-click, choose “Format Cells,” check the “Locked” option, then protect the sheet via the Review tab. This dual approach—combining freezing and protection—gives you complete control over how to lock a row in Excel for both visibility and security.
Tools & Materials You’ll Need
- Microsoft Excel (2016 or later, or Excel Online)
- A spreadsheet with data you want to protect
- Basic understanding of Excel navigation
- Optional: Password for sheet protection (recommended)
- Admin access to your computer (for some protection features)
Understanding Row Locking vs. Freezing in Excel
Before diving into the specifics of how to lock a row in Excel, it’s important to distinguish between two related but different concepts: freezing and locking. Many users confuse these terms, but they serve distinct purposes in data management.
Freezing a row keeps it visible on your screen as you scroll through your spreadsheet. This is primarily a visual convenience feature—it doesn’t prevent edits or changes. When you freeze the top row containing headers, that row stays visible even when you scroll down to view data hundreds of rows below. According to WikiHow, freezing is the most common method for managing large datasets where headers must remain visible.
Locking a row, on the other hand, involves protecting cells from being edited or deleted. This requires sheet protection to be enabled. When you lock cells and protect the sheet, users cannot modify the locked content without entering a password. This is critical when working with shared spreadsheets where data integrity is paramount.
Most effective spreadsheet management uses both techniques together. You might freeze your header row to keep it visible while also locking it to prevent accidental modifications. Understanding this distinction helps you choose the right approach for your specific needs when learning how to lock a row in Excel.
Method 1: Freeze Panes to Lock Rows in Place
Freezing panes is the quickest way to keep rows visible while scrolling, making it an essential skill for how to lock a row in Excel from a visibility standpoint. This method works across all Excel versions and doesn’t require password protection.
Step-by-step process:
- Open your Excel spreadsheet and identify which row you want to freeze. Typically, this is your header row containing column titles.
- Click on the row number of the row immediately below the one you want to freeze. For example, if you want to freeze row 1, click on the row 2 header.
- Navigate to the View tab in the Excel ribbon at the top of your screen.
- Click “Freeze Panes” and select “Freeze Panes” from the dropdown menu. Excel will insert a visible line indicating where the freeze point is located.
- Test your freeze by scrolling down. Your header row should remain visible at the top.
To freeze multiple rows, follow the same process but click on the row number below all the rows you want to freeze. For instance, if you want to freeze rows 1-3, click on row 4 before selecting Freeze Panes. This flexibility makes freezing an excellent foundational technique for understanding how to lock a row in Excel.
According to Family Handyman, using freeze panes is particularly valuable when managing complex spreadsheets with numerous columns and rows. The visual boundary created by freezing helps users maintain context while working with large datasets.
Method 2: Protect Cells and Lock the Sheet
For true protection that prevents editing, you need to combine cell locking with sheet protection. This is the definitive answer to how to lock a row in Excel when security is your priority.
Step 1: Format cells as locked
- Select the entire row you want to protect by clicking its row number on the left side.
- Right-click on the selected row and choose “Format Cells” from the context menu.
- Navigate to the Protection tab in the Format Cells dialog box.
- Check the “Locked” checkbox if it isn’t already selected. This marks the cells as locked.
- Click OK to apply the formatting.
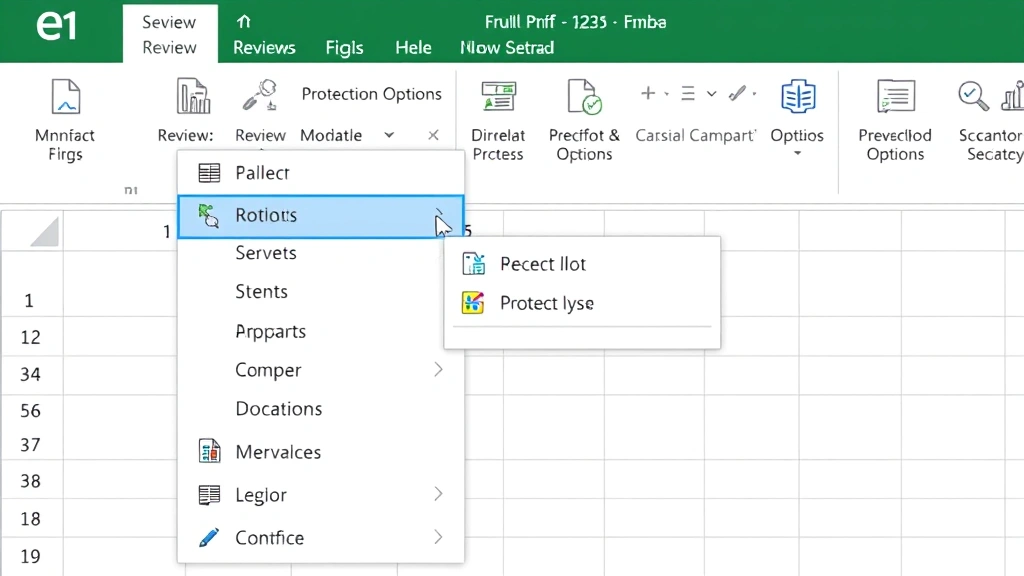
Step 2: Protect the sheet
- Go to the Review tab in the Excel ribbon.
- Click “Protect Sheet” in the Changes group.
- Enter a password (optional but recommended) to prevent others from unprotecting the sheet.
- Confirm your password and click OK.
Once sheet protection is active, the locked row cannot be edited, deleted, or modified without first removing the protection. This two-step approach is the most comprehensive method for how to lock a row in Excel when working with sensitive data.
Method 3: Lock Multiple Rows at Once
When managing complex spreadsheets, you often need to protect multiple rows simultaneously. Learning this technique streamlines your workflow for how to lock a row in Excel at scale.
Selecting multiple non-consecutive rows:
- Click the first row number you want to lock.
- Hold Ctrl (Windows) or Command (Mac) and click additional row numbers to select multiple non-consecutive rows.
- Right-click and select “Format Cells.”
- Ensure the “Locked” checkbox is checked on the Protection tab.
- Click OK and then protect the sheet as described above.
Selecting consecutive rows:
- Click the first row number in your range.
- Hold Shift and click the last row number you want to include.
- Follow the same formatting and protection steps as the single-row method.
This batch approach saves considerable time when you need to protect header rows, summary sections, or reference data. As noted in resources from Instructables, bulk operations are essential for professional spreadsheet management, especially when dealing with templates used across your organization.
How to Unlock Rows and Remove Protection
Understanding how to lock a row in Excel also means knowing how to reverse the process when needed. Whether you made a mistake or need to modify protected content, these steps will help you regain access.
To unfreeze panes:
- Go to the View tab in the Excel ribbon.
- Click “Freeze Panes” and select “Unfreeze Panes.”
- The freeze will be removed immediately, and all rows will scroll normally.
To remove sheet protection:
- Navigate to the Review tab.
- Click “Unprotect Sheet” in the Changes group.
- If a password was set, enter it in the dialog box that appears.
- Click OK to remove protection.
Once you’ve unprotected the sheet, the locked formatting remains on those cells, but they become editable. You can then modify content, delete rows, or make other changes as needed. If you want to remove the locked formatting entirely, select the cells again and uncheck the “Locked” option in Format Cells.
Best Practices for Row Locking in Excel
Mastering how to lock a row in Excel goes beyond knowing the mechanics—it requires understanding when and how to apply these techniques effectively.
Use freezing for headers: Always freeze your header row in data-heavy spreadsheets. This keeps column titles visible and prevents confusion when scrolling through hundreds of rows. Most professional spreadsheets employ this standard practice.
Protect critical data: Lock and protect rows containing formulas, totals, or reference data that shouldn’t be altered. For example, in a budget spreadsheet, protect the row containing total calculations to prevent accidental modifications.
Set strong passwords: When protecting sheets, use passwords that are difficult to guess. Include a mix of uppercase and lowercase letters, numbers, and special characters. Document passwords securely, as Excel cannot recover forgotten protection passwords.
Test before deploying: Before sharing a protected spreadsheet, test it thoroughly. Ensure that users can still edit unprotected cells while locked rows remain secure. This prevents frustration and support requests.
Combine freezing and locking: For maximum effectiveness, use both techniques together. Freeze your header row for visibility and lock it for protection. This creates a professional, secure spreadsheet environment.
Document your approach: In shared workbooks, include instructions or comments explaining which rows are locked and why. This helps collaborators understand the spreadsheet’s structure and reduces confusion.
Troubleshooting Common Row Locking Issues
Even experienced users encounter challenges when working with how to lock a row in Excel. Here are solutions to the most common problems:
Issue: Frozen rows are not visible after scrolling
Solution: Check the View tab to confirm that Freeze Panes is still active. Sometimes, accidentally clicking Unfreeze Panes removes your freeze. Re-apply the freeze by selecting the appropriate row and clicking Freeze Panes again.
Issue: Users can still edit locked cells
Solution: Verify that sheet protection is actually enabled. Go to the Review tab—if you see “Protect Sheet,” protection is not active. Click it to enable protection. If you see “Unprotect Sheet,” protection is already on, and locked cells should be uneditable.
Issue: Cannot unprotect the sheet without a password
Solution: If you forgot the password, unfortunately Excel cannot recover it. You’ll need to contact your IT department or the person who protected the sheet. As a preventive measure, always maintain a secure record of protection passwords.
Issue: Frozen panes appear in unexpected locations
Solution: Unfreeze all panes first by going to View > Freeze Panes > Unfreeze Panes. Then, carefully select the correct row (the one below the rows you want to freeze) and reapply Freeze Panes. This resets your freeze point accurately.
Issue: Some rows are locked while others aren’t
Solution: This occurs when you’ve selectively locked certain rows before protecting the sheet. Unprotect the sheet, then select all cells using Ctrl+A, right-click, and choose Format Cells. On the Protection tab, check “Locked,” then protect the sheet again. This ensures consistent locking across all cells.
According to Consumer Reports, understanding these troubleshooting steps is essential for anyone managing spreadsheets professionally. Taking time to learn these solutions prevents workflow disruptions and data integrity issues.
FAQ
Q: What’s the difference between freezing and locking rows in Excel?
A: Freezing keeps rows visible while scrolling but doesn’t prevent editing. Locking (combined with sheet protection) prevents edits and deletions. You can use both techniques together for optimal spreadsheet management.
Q: Can I lock a row without protecting the entire sheet?
A: No. The locked formatting on cells only takes effect when sheet protection is enabled. Without protection, anyone can edit locked cells. However, you can protect specific ranges instead of the entire sheet in some Excel versions.
Q: Will frozen rows remain frozen when I share the spreadsheet?
A: Yes. Freeze Panes settings are saved with the file and will appear for anyone who opens it. Sheet protection settings are also preserved, though users may be able to unprotect if they know the password.
Q: How many rows can I freeze in Excel?
A: You can freeze multiple rows simultaneously. Select the row below all the rows you want to freeze and apply Freeze Panes. There’s no strict limit, but freezing too many rows reduces your visible data area.
Q: What happens if I accidentally delete a frozen row?
A: If the row is locked and the sheet is protected, you cannot delete it. If it’s frozen but not locked, you can delete it. After deletion, you may need to reapply your freeze settings to the new row structure.
Q: Can I lock rows in Excel Online?
A: Yes. Excel Online supports both freezing and sheet protection. The steps are similar to desktop Excel, though the interface layout may differ slightly. Access these features through the View and Review tabs.
Q: Is there a way to lock rows without using passwords?
A: Yes. When you protect the sheet, the password field is optional. You can leave it blank to enable protection without a password. However, anyone can then unprotect the sheet, so passwords are recommended for sensitive data.
Q: How do I know which rows are locked in my spreadsheet?
A: There’s no visual indicator in the spreadsheet itself. You can check by selecting a cell, right-clicking, choosing Format Cells, and checking the Protection tab. Alternatively, refer to your documentation about which rows you locked.
Q: Can I lock rows in a shared workbook?
A: Yes, but be aware that shared workbooks have limitations. Some protection features may not work as expected in shared mode. Test thoroughly before relying on protection in collaborative environments.
Q: What’s the best way to communicate row locking to other users?
A: Add a comment or note at the top of your spreadsheet explaining which rows are locked and why. Include instructions for contacting you if they need access to locked content. This improves user experience and reduces confusion.
For more information on related Excel techniques, check out our guides on how to freeze a row in Excel, how to lock cells in Excel, and how to freeze panes in Excel. You might also find it helpful to learn about how to freeze cells in Excel and how to create a dropdown in Excel for advanced data management. Additionally, understanding how to find duplicates in Excel complements your data protection strategy.
Learning how to lock a row in Excel is a fundamental skill that protects your data and improves spreadsheet management. Whether you’re using freezing for visibility or protection for security, these techniques ensure your critical information remains safe and accessible. Start with the method that best fits your needs, and don’t hesitate to combine approaches for comprehensive spreadsheet control.


