How to Install Ring Doorbell: The Complete Easy Guide
Installing a Ring doorbell is easier than you think—most homeowners complete the job in under 30 minutes without professional help. Whether you’re upgrading your home security or installing your first smart doorbell, this comprehensive guide walks you through every step of how to install Ring doorbell systems, from preparation to final setup. We’ll cover everything you need to know to get your Ring doorbell working perfectly.
Quick Answer: To install a Ring doorbell, turn off power at your breaker, remove your old doorbell, disconnect the wires, connect them to the Ring (or use the battery pack), secure the device to your door frame, and complete the app setup. Most installations take 20–40 minutes and require only basic tools like a screwdriver and wire stripper.
Tools and Materials You’ll Need
- Screwdriver (Phillips and flathead)
- Wire stripper or utility knife
- Drill with bits (if mounting new holes)
- Level tool
- Voltage tester (recommended for safety)
- Ring doorbell unit
- Ring mounting bracket and screws
- Power drill or impact driver (optional, for easier drilling)
- Smartphone with Ring app installed
- Wi-Fi network information
Before You Begin: Safety First
Safety is paramount when learning how to install Ring doorbell units, especially since you’ll be working with electrical wiring. Always turn off power at your circuit breaker before touching any wires—this prevents electrical shock and damage to your Ring device. Use a voltage tester to confirm that power is completely off before proceeding with any work.
Check your existing doorbell setup to determine if you have a traditional wired system or a battery-powered doorbell. Wired doorbells require transformer connections, while battery-only models skip this step entirely. Understanding your current setup helps you prepare for the installation process and avoid costly mistakes.
Review the Ring doorbell specifications and your home’s electrical system. If you’re uncomfortable working with electricity, consider consulting a licensed electrician—it’s a small investment for peace of mind. According to Family Handyman, many homeowners successfully complete smart doorbell installations by following manufacturer guidelines carefully.
Preparing Your Existing Doorbell Setup
Before you can install how to install Ring doorbell hardware, you need to understand your current system. Locate your doorbell’s power source—this is typically a transformer located in your basement, attic, or electrical panel. The transformer converts household voltage to the low voltage needed for doorbells (usually 16–24 volts AC).
Turn off the breaker controlling your doorbell circuit and verify it’s off using a voltage tester. Take a photo of your existing doorbell wiring setup before disconnecting anything—this serves as a reference during installation. Most doorbells have two wires: one from the transformer and one neutral/return wire.
Check the transformer’s voltage rating to ensure it meets Ring’s requirements (typically 16–24V AC, 30VA minimum for wired models). If your transformer is underpowered, you may need to upgrade it or use Ring’s battery-only option. Document the wire colors and their connections—this information is invaluable when connecting your Ring doorbell.
Removing Your Old Doorbell
With the power off, remove your existing doorbell by unscrewing it from the door frame or wall. Gently pull the old doorbell away from the mounting surface to expose the wires behind it. Most doorbells are held in place with two to four screws—keep these in a safe location in case you need them later.
Carefully disconnect the wires from your old doorbell by loosening the terminal screws or gently pulling them free. Use a voltage tester one more time to confirm no power is present before fully disconnecting the wires. If the wires are short, you can leave them connected to the transformer for now—you’ll reconnect them to your Ring doorbell.
Inspect the mounting area for damage or debris. Clean the surface thoroughly and use a level to ensure your mounting bracket will be perfectly straight. A properly leveled doorbell looks professional and functions optimally. If you’re mounting on a new location, mark the holes with a pencil and drill pilot holes to prevent splitting.
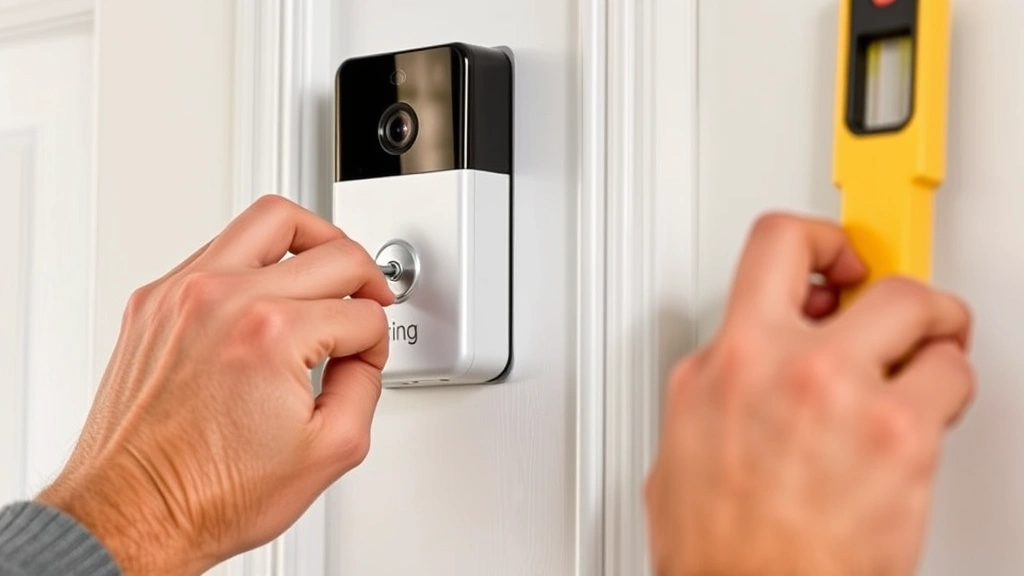
Installing the Ring Doorbell Hardware
Now comes the main step of how to install Ring doorbell hardware on your door frame. Position the Ring mounting bracket exactly where you want the doorbell to sit—typically 48 inches from the ground for optimal viewing angles. Use your level to ensure the bracket is perfectly straight before marking the screw holes.
Drill pilot holes if needed, then secure the mounting bracket with the provided screws. Tighten the screws firmly but don’t over-tighten, as this can crack the bracket or strip the holes. The bracket should feel solid and immovable when you push on it. For brick or stone surfaces, use appropriate anchors or hire a professional to ensure secure mounting.
Slide the Ring doorbell unit onto the mounting bracket until it clicks into place. Most Ring doorbells have a satisfying click that confirms they’re properly seated. Give the unit a gentle tug to verify it’s secure. The mounting bracket typically has a small release button or tab that you’ll need to press to remove the doorbell later if needed.
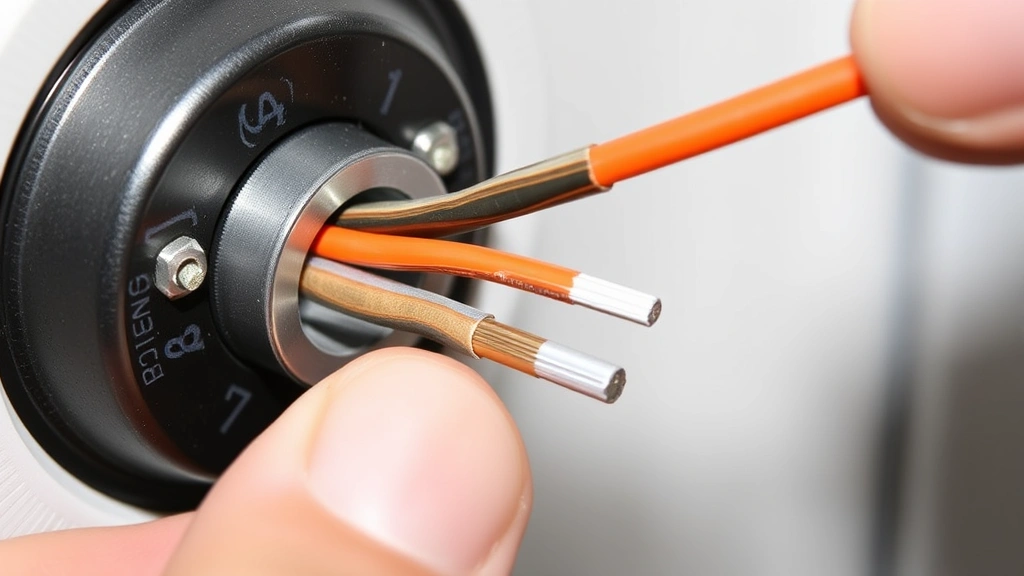
Connecting the Wiring
For wired installations, you’ll connect the existing doorbell wires to the Ring’s terminal screws. Strip about 1/4 inch of insulation from each wire using a wire stripper. Loosen the terminal screws on the back of the Ring doorbell and insert the wires, then tighten the screws securely. The wire order typically doesn’t matter for doorbells, but consult your Ring manual for specific guidance.
If your wires are too short to reach the Ring terminals, you can extend them using 18-gauge electrical wire and wire connectors. Twist the wires together tightly, then secure them with wire nuts—this prevents loose connections that could cause malfunction. Ensure all connections are inside the Ring unit’s enclosure for weather protection and safety.
For battery-only Ring doorbells, skip the wiring step entirely and simply insert the rechargeable battery pack into the unit. Battery-only models offer flexibility if you don’t have existing doorbell wiring, though they require periodic recharging. Many homeowners prefer battery models for their ease of installation and flexibility. As noted by Instructables, battery-powered smart doorbells are increasingly popular for renters and those avoiding electrical work.
Setting Up the Ring Doorbell App
After physically installing your Ring doorbell, the final step is configuring it through the Ring app. Download the Ring app on your smartphone and create an account if you don’t already have one. Open the app and select “Set Up a Device,” then choose “Doorbell” from the available options.
The app will guide you through connecting your Ring doorbell to your Wi-Fi network. Ensure your Wi-Fi signal is strong near your doorbell location—weak signals cause connectivity issues and missed notifications. The Ring doorbell will enter setup mode automatically, and you’ll see a QR code on the device or in the app to scan for faster setup.
Follow the app’s prompts to name your doorbell, adjust motion detection settings, and customize notification preferences. Test the doorbell by pressing the button and confirming you receive a notification on your phone. Take a test video to ensure the camera quality meets your expectations and adjust the angle if needed. You can also set up two-factor authentication for enhanced security and enable features like person detection and package detection if available on your model.
Testing and Troubleshooting
Test your Ring doorbell thoroughly before considering the installation complete. Press the doorbell button multiple times and verify that notifications arrive on your phone within a few seconds. Check the live video feed to ensure the camera is clear and properly focused. Test motion detection by walking past the doorbell and confirming that motion alerts trigger correctly.
If your Ring doorbell isn’t working properly, check these common issues: insufficient Wi-Fi signal, incorrect wiring connections, or low battery (for battery models). Restart the doorbell by turning off the power for 30 seconds, then turning it back on. If problems persist, consult the Ring support documentation or contact customer service for assistance. According to CNET, most Ring doorbell issues can be resolved through app troubleshooting or simple reconnection procedures.
Verify that your transformer is providing adequate power if you chose a wired installation. A weak transformer can cause intermittent connectivity or poor video quality. If you suspect transformer issues, a licensed electrician can test and upgrade it if necessary. Document your final setup with photos for future reference if you need to troubleshoot or make adjustments.
Battery-Only Ring Doorbell Installation
For those installing a battery-only Ring doorbell, the process is significantly simpler than wired installations. Simply mount the bracket, slide the doorbell into place, and insert the rechargeable battery pack. No electrical work is required, making this option ideal for renters or those without existing doorbell wiring. If you’re learning how to install Ring doorbell models with batteries, you can skip the electrical safety precautions entirely.
Battery Ring doorbells typically last 6–12 months per charge, depending on usage and weather conditions. Set phone reminders to check battery levels monthly and recharge as needed. The app will notify you when the battery is running low, so you won’t miss any alerts. Most users find battery maintenance minimal compared to the convenience of avoiding electrical installation.
If you’re considering upgrading to a wired system later, you can easily convert by turning off power and connecting the wires—the physical installation remains identical. Battery-only models provide a low-commitment way to test Ring doorbells before investing in wired integration. Many homeowners start with battery models and upgrade later, making this an excellent entry point for smart home security.
FAQ
Q: Can I install a Ring doorbell without existing doorbell wiring?
A: Yes! Battery-only Ring doorbells require no wiring at all. You simply mount the bracket and insert the battery pack. This makes installation incredibly easy for renters or homes without doorbell infrastructure.
Q: How long does it take to install a Ring doorbell?
A: Most installations take 20–40 minutes for wired models and 10–15 minutes for battery-only models. The time depends on your comfort level with electrical work and whether you need to drill new mounting holes.
Q: What if my doorbell wires are too short?
A: You can extend doorbell wires using 18-gauge electrical wire and wire connectors. Twist the wires together securely and cover with wire nuts for a safe, weatherproof connection.
Q: Do I need a professional electrician to install a Ring doorbell?
A: Most homeowners can install Ring doorbells themselves by following the instructions carefully. However, if you’re uncomfortable working with electricity, hiring an electrician is a reasonable option. For additional guidance, The Spruce offers detailed smart home installation resources.
Q: What’s the ideal height to install a Ring doorbell?
A: Mount your Ring doorbell approximately 48 inches (4 feet) from the ground for optimal viewing angles and to prevent it from being at eye level, which some security experts recommend.
Q: Can Ring doorbells work with any Wi-Fi network?
A: Ring doorbells work with 2.4GHz Wi-Fi networks. Some newer models support 5GHz, but always check your specific model’s specifications. Ensure your Wi-Fi signal is strong near the doorbell location.
Q: What should I do if my Ring doorbell keeps disconnecting from Wi-Fi?
A: Try restarting the doorbell by turning off power for 30 seconds. Verify your Wi-Fi signal is strong, check that your router is functioning properly, and ensure you’re using the correct Wi-Fi password. If problems persist, reinstall the device through the Ring app.
Q: Is it safe to install a Ring doorbell myself?
A: Yes, if you follow safety precautions like turning off power at the breaker and using a voltage tester. Always confirm power is completely off before touching wires. If you’re unsure about any step, consult a professional electrician.
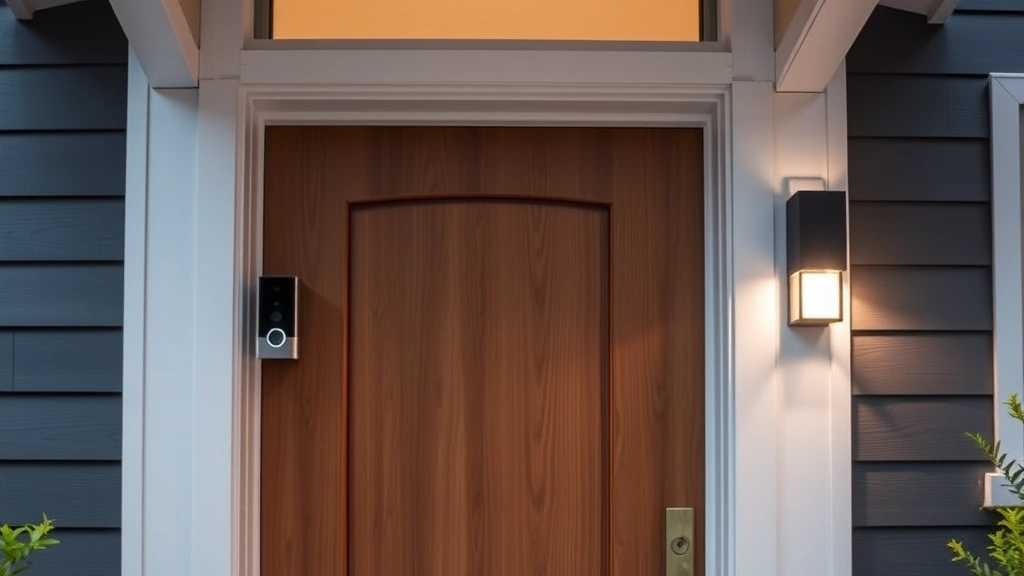
Learning how to install Ring doorbell units empowers you to upgrade your home security with minimal hassle. Whether you choose a wired or battery-only model, following these steps ensures a professional installation that works reliably for years. For additional smart home security tips, check out Good Housekeeping‘s comprehensive home technology guides. You can also explore related projects like how to reset Firestick remote or how to pair Firestick remote to build a complete smart home ecosystem. With your Ring doorbell installed, you’ll enjoy enhanced security and the convenience of monitoring your front door from anywhere.