
Artificial grass is one of those projects that looks deceptively simple until you’re halfway through and realize you missed a critical step. The truth? How to install artificial grass properly requires patience, the right tools, and an honest understanding of what can go wrong. This guide walks you through everything—from prep work that actually matters to safety considerations most DIYers skip.
Fake turf isn’t just rolled out and called a day. Poor installation leads to wrinkles, drainage disasters, seams that separate, and weeds creeping through. But done right, artificial grass can transform your yard into a low-maintenance oasis that lasts 15+ years. Let’s get into it.
Assess Your Yard and Measure Everything
Before you buy a single square foot of artificial turf, walk your yard like you’re inspecting a crime scene. Look for drainage patterns. Where does water pool after rain? Where are the low spots? Artificial grass doesn’t absorb water like real grass—it channels it. If your yard has poor drainage, you’ll end up with a swamp under the turf, and that’s a nightmare to fix later.
Measure your space twice. Seriously. Use a measuring tape, not your eye. Sketch out your yard on graph paper and account for:
- Square footage of the area you’re covering
- Any slopes or uneven terrain
- Obstacles like trees, pavers, or hardscaping
- Seams (you’ll need to plan where they go for aesthetic and functional reasons)
Check for underground utilities before you dig. Call 811 or your local utility locating service—this is non-negotiable. Gas lines, electric cables, and water pipes are waiting to ruin your day if you’re careless.
Think about foot traffic patterns. High-traffic areas will show wear faster, so you might need slightly thicker, more durable grass in those zones. Also note sun exposure. Some artificial grasses fade in intense UV, so if your yard bakes in full sun, invest in UV-resistant turf.
Remove Existing Grass and Debris
This is where the real work begins. You have two main options: kill the existing grass chemically, or remove it physically. Chemical removal takes 2-3 weeks but requires less labor. Physical removal is faster but exhausting.
Chemical removal: Apply a non-selective herbicide (like glyphosate) according to label directions. Wait for the grass to brown and die completely. Then rake it out. This method is gentler on your back but requires patience and proper safety precautions—wear gloves, eye protection, and follow all label warnings.
Physical removal: Rent a sod cutter (usually $50-75 per day) or do it manually with a flat shovel. Cut the sod into strips, roll it up, and haul it away. Manual removal is doable for small yards but becomes soul-crushing on anything larger than 500 square feet.
Once the grass is gone, remove all debris: rocks, roots, sticks, and old edging material. Dig out any weeds completely—their roots will push through the base layer and undermine your installation. Rake the area smooth. You’ll feel like you’re done, but you’re not even close.
Prepare the Base Layer
This is where most DIYers cut corners, and it’s a mistake. The base layer determines everything: drainage, stability, and longevity. A weak base means your artificial grass will shift, wrinkle, and fail prematurely.
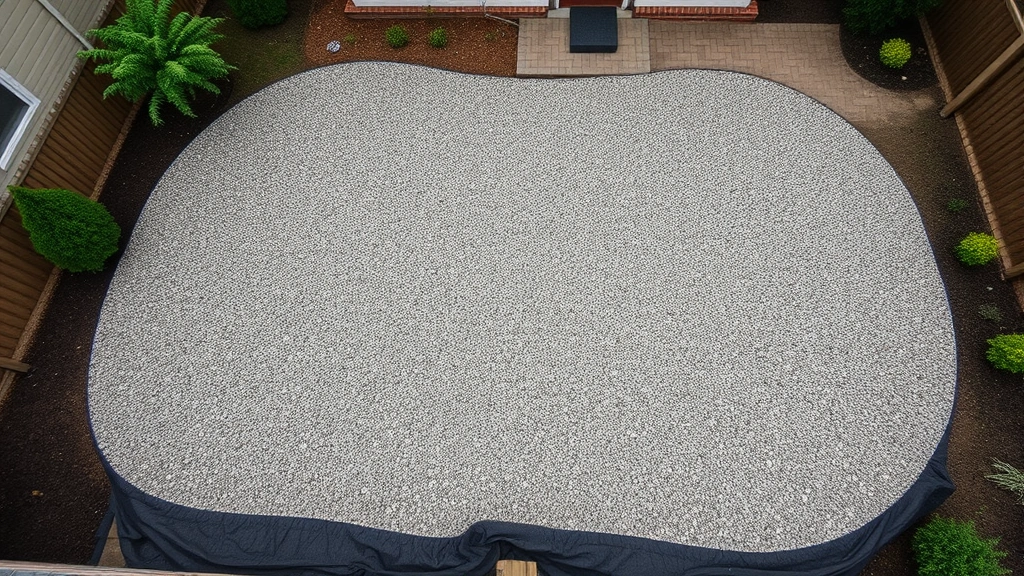
You’ll need a compacted base of crushed stone or gravel, typically 2-4 inches deep depending on your climate and soil type. Family Handyman recommends using crushed limestone or recycled asphalt because it compacts well and provides excellent drainage.
Here’s the process:
- Spread the crushed stone evenly across your prepared area
- Use a plate compactor (rent one for $40-60 per day) to compress the base. This is critical. Don’t skip it or use a hand tamper for large areas—you need that compactor
- Make multiple passes until the base is firm and doesn’t shift under your feet
- Check for high spots and low spots. The surface should be relatively level (slight slope for drainage is fine, but no dips)
- Add a landscape fabric barrier on top of the compacted base. This prevents weeds from pushing through and helps with drainage
If you’re in a wet climate or have clay soil, consider adding a drainage layer (perforated drain pipe) under the crushed stone. This is extra insurance against water pooling.
The base layer is tedious and doesn’t look impressive when you’re done, but it’s the foundation of your entire project. Skimp here, and you’ll be redoing this work in three years.
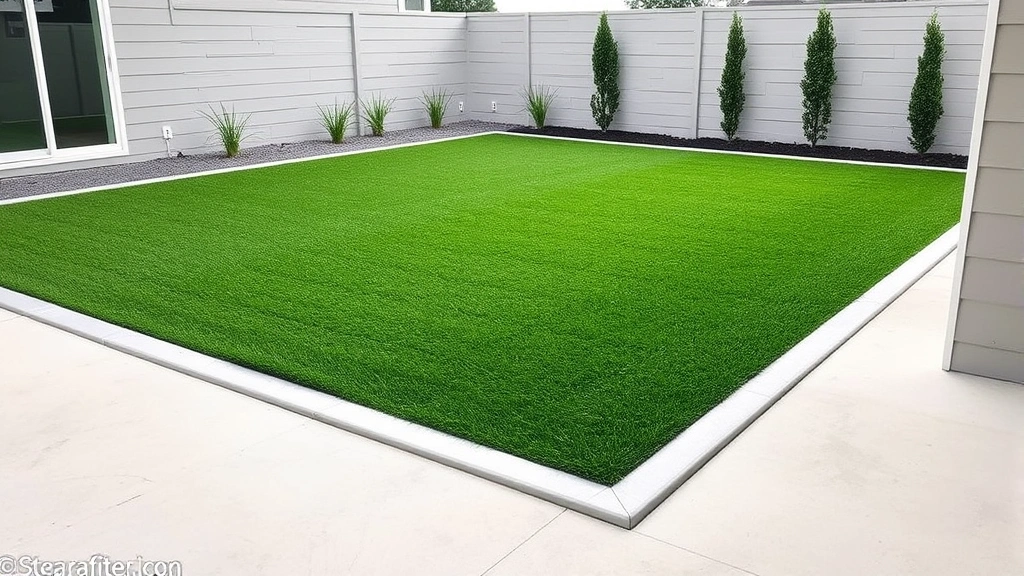
Install Edging and Borders
Edging serves two purposes: it contains the infill (those rubber pellets we’ll talk about later) and it creates a finished, professional look. Without proper edging, your infill will migrate into flower beds and driveways.
Options include:
- Aluminum or steel edging: Durable, looks clean, costs $1-3 per linear foot
- Plastic landscape edging: Budget-friendly ($0.50-1 per foot), but less rigid and prone to warping
- Wooden borders: Aesthetic but require treatment to prevent rot, and they degrade over time
- Paver or hardscape integration: If you’re adjoining pavers or concrete, match the height of the artificial grass to these surfaces
Install edging around the entire perimeter and around any obstacles (trees, pavers). Use landscape spikes or fasteners every 12-18 inches to keep it secure. The top of the edging should be slightly higher than the final grass height—this keeps infill contained.
Lay Out and Secure the Artificial Grass
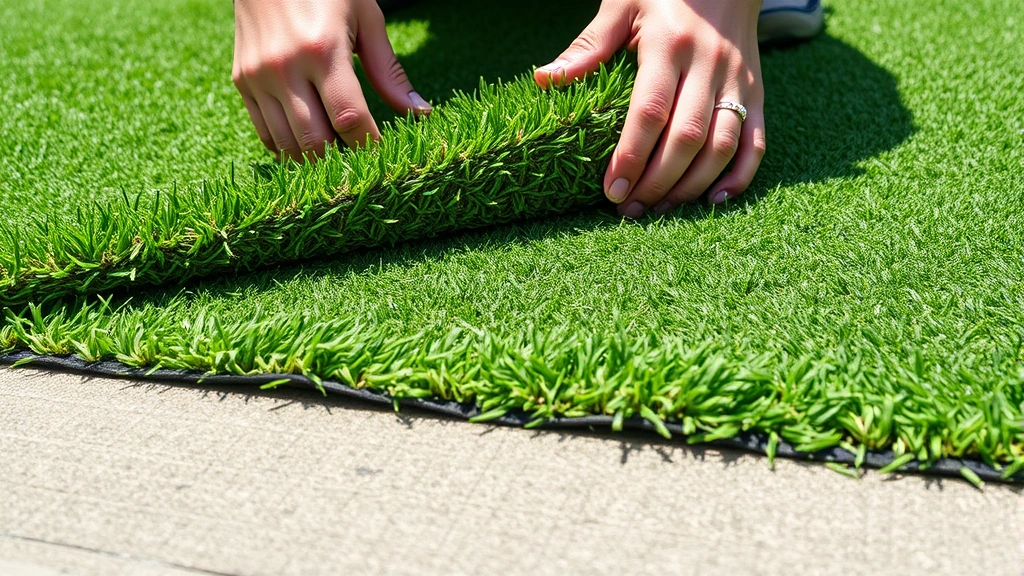
Now comes the moment you’ve been waiting for. Roll out your artificial grass and let it sit for 24 hours if the weather is cool. If it’s hot, 4-6 hours is fine. The turf will naturally relax and flatten. This matters more than you’d think—laying out cold, stiff grass leads to wrinkles.
Start in one corner and unroll toward the opposite corner. If you have multiple sections, plan your seams carefully. Seams should run in the direction of foot traffic (so they’re less noticeable) and should be staggered if possible.
Trim excess grass with a utility knife. Keep the blade sharp and make long, smooth cuts. A dull blade tears the backing and creates an ugly edge.
Secure the grass using landscape staples or adhesive. This Old House suggests using a combination of both methods for maximum security. Staple every 6-12 inches around the perimeter and along seams. For high-traffic areas or slopes, add extra staples.
Pro tip: If you’re using adhesive for seams, use a polyurethane-based product designed for artificial grass. Regular construction adhesive won’t flex with temperature changes and will crack.
Check for wrinkles as you go. Small wrinkles can be worked out by lifting the grass slightly and re-securing. Large wrinkles might require removing staples, pulling the grass taut, and re-securing. It’s tedious but worth it.
Handle Seams and Add Infill
Seams are the weak point of artificial grass installations. Done poorly, they separate, collect dirt, and look terrible. Done well, they’re nearly invisible.
If you have seams, use a seaming tape designed for artificial grass. The process:
- Clean both edges of the seam with a stiff brush
- Apply seaming adhesive to the tape according to product instructions
- Press the tape down firmly, working out air bubbles
- Hold or clamp for the time specified (usually 24 hours before walking on it)
Now for the infill. This is the rubber or sand material that sits on top of the grass and between the blades. Infill serves critical functions: it provides cushioning, helps the grass stand upright, and improves drainage.
Common infill materials:
- Rubber (crumb): Made from recycled tires, provides good cushioning, can get hot in direct sun
- Sand: Budget-friendly, natural appearance, but compacts over time and requires raking
- Silica sand: Finer than regular sand, better performance, mid-range cost
- Recycled plastic: Newer option, eco-friendly, moderate cost
Calculate how much infill you need: multiply your square footage by the recommended depth (usually 1-2 inches). Spread it evenly and rake it into the grass fibers. Use a power broom or specialized infill rake to work it in thoroughly. This takes time, but proper infill distribution is essential for safety and performance.
Safety Warning: Rubber infill can reach 140-160°F in direct sun, which is hot enough to cause burns, especially for children. Consider shade solutions (umbrellas, shade sails) in high-sun areas, or opt for alternative infill materials if you have young kids or pets.
Safety Considerations During Installation
Installing artificial grass involves tools and physical labor. Don’t skip safety steps—they’re not inconvenient, they’re essential.
Personal protective equipment:
- Work gloves (leather for handling sharp edges, nitrile for chemical work)
- Safety glasses (dust from base material, debris from removal)
- Dust mask or respirator (especially when removing old grass or working with crushed stone)
- Steel-toed boots (compactors and heavy tools can crush feet)
- Sunscreen and a hat (you’ll be outside for hours)
Tool safety:
- Rent equipment from reputable suppliers. A plate compactor in bad condition can jump and cause injury
- Read all equipment manuals before using. Seriously. That compactor rental place isn’t being paranoid
- Never operate a compactor alone. Have someone nearby in case of emergency
- Keep bystanders and pets away from work areas, especially when using power tools
- Inspect your utility knife blade regularly. A dull blade requires more pressure and is more likely to slip
Chemical safety: If using herbicides, follow all label instructions. Wear appropriate PPE, avoid breathing fumes, and never apply on windy days. OSHA provides guidance on chemical handling that applies to residential use as well.
Proper lifting: Crushed stone is heavy. Bend at the knees, not your back. Don’t try to be a hero—ask for help or make multiple smaller loads.
Heat exhaustion: Working in sun and heat can sneak up on you. Drink water constantly, take breaks in shade, and watch for dizziness or nausea. Heat exhaustion is no joke.
Compactor operation: Bob Vila’s guide emphasizes proper compactor technique—keep both hands on the handles, maintain firm footing, and don’t compactor near edges or slopes where it could tip.
Maintenance After Installation
Your installation isn’t truly done until you understand ongoing maintenance. Artificial grass requires less work than real grass, but it’s not zero-maintenance.
First month: Keep foot traffic light while seams cure (if you used adhesive). Infill may shift slightly as people walk on it—rake it back into place as needed.
Ongoing maintenance:
- Raking: Rake the grass every 2-4 weeks to keep fibers upright and distribute infill evenly. Use a stiff-bristled rake or power broom
- Debris removal: Remove leaves, sticks, and organic debris promptly. These trap moisture and can promote mold or mildew
- Spot cleaning: For pet accidents or spills, rinse with water. For stubborn stains, use a mild detergent and rinse thoroughly
- Infill replenishment: Over 3-5 years, infill compacts and migrates. You’ll need to add fresh infill annually or as needed
- Weed prevention: While the landscape fabric helps, weeds can still appear at seams or edges. Pull them promptly or use a targeted herbicide
Properly maintained artificial grass lasts 15-20 years. Neglected grass deteriorates in 5-7 years. The difference is consistency, not complexity.
Frequently Asked Questions
How long does it take to install artificial grass?
– For a typical residential yard (500-1000 sq ft), expect 2-4 days if working alone, or 1-2 days with help. The base preparation takes the longest. Actual grass installation is faster once the foundation is ready. Large or complex yards take proportionally longer.
Can I install artificial grass on a slope?
– Yes, but slopes require extra staples and careful attention to seams. Aim for slopes no steeper than 1:4 (rise 1 foot for every 4 feet of run). Steeper slopes are possible but increase the risk of grass shifting. Use more frequent stapling and consider using adhesive in addition to staples.
What’s the difference between residential and commercial-grade artificial grass?
– Commercial grass is thicker, denser, and more durable. It costs more but lasts longer and handles heavy foot traffic better. For residential yards, mid-range residential grass is usually sufficient unless you have very high traffic or pets that are tough on grass.
Do I need a professional, or can I DIY this?
– You can DIY if you’re comfortable with physical labor and renting equipment. The technical skills are straightforward. The challenge is the sheer amount of work, especially base preparation. If your yard is over 2000 sq ft or has complex obstacles, hiring professionals might be worth it. Budget $5-15 per square foot for professional installation.
How do I prevent weeds from growing through artificial grass?
– Proper base preparation and landscape fabric are your main defenses. Remove all weeds and roots before installation. Use high-quality landscape fabric. Even so, some weeds may appear at seams or edges—pull them immediately. A targeted herbicide at seams is acceptable if used carefully.
Is artificial grass safe for dogs and kids?
– Yes, with caveats. Rubber infill can get very hot in direct sun—consider shade solutions. Some dogs may have sensitivities to rubber, though this is rare. Watch for signs of discomfort. Ensure infill is properly installed so it doesn’t compact into hard spots. Most families find artificial grass excellent for pets because it’s durable and easy to clean.
What’s the cost of artificial grass installation?
– Materials run $2-8 per square foot depending on grass quality. Installation labor (if hired) adds $3-7 per square foot. A 1000 sq ft yard might cost $5,000-15,000 installed, or $2,000-8,000 if you DIY. Prices vary by region and grass quality.
Can I remove artificial grass later if I change my mind?
– Yes. Remove staples, cut the grass into manageable sections, and roll them up. The landscape fabric and base layer can stay or be removed. If you used adhesive on seams, removal is messier. Most people recycle the grass or donate it. The base layer can be repurposed or left in place if you plan to replant natural grass later.


