
How to Install a Toilet: Easy & Complete Guide
Installing a new toilet might seem intimidating, but with the right preparation and tools, how to install a toilet becomes a manageable DIY project that saves you hundreds in plumber fees. Whether you’re replacing an old fixture or installing one in a new bathroom, this comprehensive guide walks you through every step to ensure a leak-free, properly functioning toilet. Most homeowners can complete this project in 1-2 hours with basic plumbing knowledge and the right materials on hand.
Quick Answer: To install a toilet, shut off the water supply, remove the old toilet by unbolting it from the flange, install a new wax ring on the flange, position the new toilet over the bolts, tighten the bolts evenly, reconnect the water supply line, and test for leaks. The entire process typically takes 1-2 hours for someone with moderate DIY experience.
Tools & Materials You’ll Need
- Adjustable wrench or socket set
- Screwdriver (Phillips and flathead)
- Plunger
- Bucket or towels
- Wax ring (new)
- Toilet bolts and caps
- Caulk and caulking gun
- Hacksaw (for cutting bolts if needed)
- Sponge or cleaning cloth
- Measuring tape
- New toilet (bowl and tank)
- Fill valve and flush valve (usually included)
- Water supply line
- Shims (if floor is uneven)
Prepare Your Workspace and Shut Off Water
Before you begin the how to install a toilet process, proper preparation prevents costly mistakes and water damage. Locate the water shut-off valve beneath the toilet tank and turn it clockwise until it stops. If you can’t find an individual valve, shut off the main water supply to your home. Flush the toilet to empty the tank and bowl, then use towels or a bucket to absorb any remaining water.
Clear the bathroom of unnecessary items and lay down towels around the toilet base to protect your flooring. Turn off the water supply completely and verify by attempting to flush—no water should enter the bowl. This step is crucial for how to install a toilet safely and prevents water damage during the removal process.
Remove the Old Toilet
Removing the old toilet is straightforward once the water is shut off. Disconnect the water supply line by turning the connection nut counterclockwise with an adjustable wrench. Have a bucket ready to catch any remaining water. According to WikiHow’s home improvement guides, the next step is unbolting the toilet from the floor.
Locate the bolts on either side of the toilet base—they’re typically covered with decorative caps. Pop off these caps using a flathead screwdriver. Use your wrench to loosen the nuts on these bolts, working alternately between sides to avoid cracking the porcelain. Once loose, gently rock the toilet side to side to break the wax seal, then lift straight up and set it aside on a tarp or in the bathtub.
The old wax ring will stick to the bottom of the toilet or remain on the flange. Scrape away all old wax and debris using a putty knife, ensuring the flange is completely clean. This cleanliness is essential for how to install a toilet to work properly and prevent future leaks.
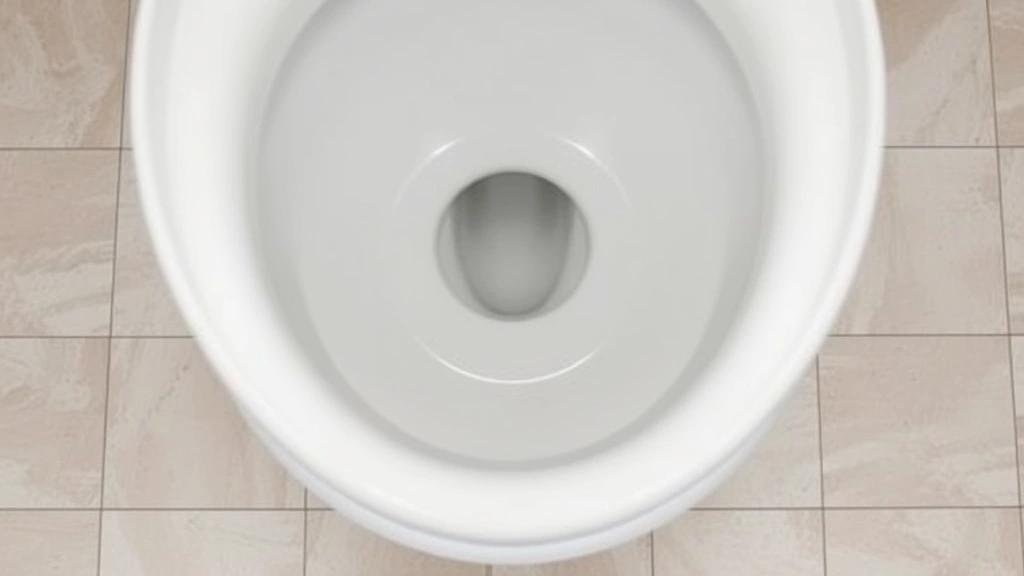
Clean and Inspect the Flange
The toilet flange is the ring-shaped fitting that connects your toilet to the drainpipe. Inspect it carefully for cracks or damage—a damaged flange will cause persistent leaks. Use a clean cloth to wipe away all wax residue, dust, and debris. If the flange is cracked or broken, you’ll need to replace it before proceeding with how to install a toilet.
Check that the flange sits level with or slightly above the finished floor. If it’s recessed below the floor level, you may need a flange extension kit. For uneven floors, you’ll use shims later during installation. Verify that the bolts are properly seated in the flange slots and can move freely—these will guide your new toilet into position.
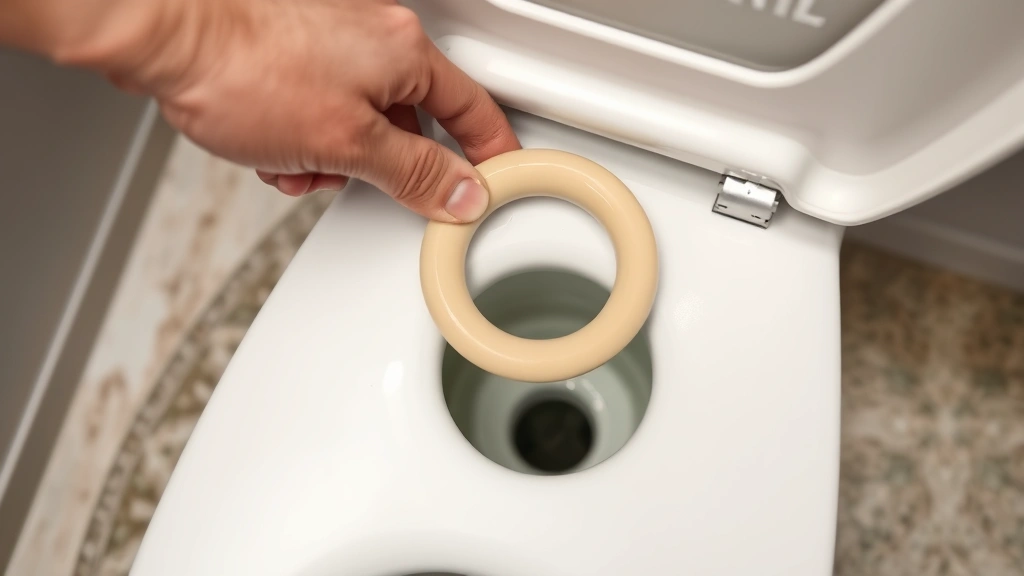
Install the Wax Ring
The wax ring creates a watertight seal between the toilet and the flange. This is one of the most critical steps in how to install a toilet correctly. Remove the wax ring from its packaging—it should be soft and pliable. If it’s hard or cracked, it won’t seal properly. Press the wax ring firmly onto the flange opening, centering it over the drain hole. The ring should stick to the flange and create a complete seal around the opening.
Some professionals prefer warming the wax ring slightly by holding it near (not over) a heat source to make it more pliable. Ensure the ring sits flat and even on the flange with no gaps or air pockets. As reviewed by Family Handyman experts, a properly installed wax ring is the foundation of a leak-free toilet installation.
Position and Secure the New Toilet
Carefully lift the new toilet bowl and align the mounting holes with the bolts sticking up from the flange. Lower the toilet slowly and evenly, allowing the bolts to pass through the mounting holes. Press down gently but firmly—you should feel the toilet settling as the wax ring compresses. Don’t force it; if there’s resistance, lift up slightly and reposition.
Once seated, hand-tighten the nuts on both bolts, alternating between sides to maintain even pressure. This prevents cracking the porcelain and ensures proper wax ring compression. Use your wrench to tighten further, but avoid over-tightening—this is a common mistake in how to install a toilet installations. The bolts should be snug but not cranked down with maximum force. Tighten until you feel resistance, then add just a quarter turn more.
If the toilet rocks or feels unstable, use shims under the base to level it. Slide shims under the front or sides as needed until the toilet sits firmly without movement. Trim excess shim material with a hacksaw and caulk around the base with silicone caulk for a finished appearance and to prevent water from seeping under the toilet.
Connect the Water Supply
Now that the toilet is secured, reconnect the water supply. Attach the fill valve to the tank opening if it isn’t already installed—your new toilet kit usually includes this. Connect the water supply line to the fill valve, hand-tightening the connection nut first, then using a wrench for a final snug fit. Turn the water shut-off valve counterclockwise slowly to restore water pressure.
As the tank fills, listen for any unusual sounds and watch for leaks around the connection. The tank should fill completely within 3-5 minutes. If water sprays or drips from connections, turn off the water immediately and tighten the fittings further. Test the flush mechanism by pressing the handle—water should flow smoothly into the bowl and the tank should refill properly.
Check under the tank for leaks around the fill valve. Minor weeping might stop after a few flushes as seals settle, but persistent dripping indicates a problem that needs immediate attention. For comprehensive guidance on water connections, HowStuffWorks provides detailed plumbing explanations.
Test and Seal Your Installation
Flush the toilet multiple times and observe for any leaks. Check under the toilet base, around the flange connection, and at the water supply line. Look for water on the floor or ceiling below if this is an upstairs bathroom. A small amount of condensation on the outside of the bowl is normal, but any active dripping is a sign of problems with your how to install a toilet installation.
If you notice leaks around the base, the wax ring may not have sealed properly. This requires removing the toilet and reinstalling with a new wax ring. Leaks at the water connection usually mean the fitting needs tightening. Let the toilet run through several fill and flush cycles to ensure everything operates smoothly.
Once you’ve confirmed no leaks, apply a bead of silicone caulk around the base where the toilet meets the floor. This prevents water from seeping under the toilet and causing hidden damage. Use a caulk tool to smooth the bead for a professional appearance. Allow the caulk to cure per manufacturer instructions (typically 24 hours) before using the toilet heavily.
Common Mistakes to Avoid
The most frequent mistake when learning how to install a toilet is over-tightening the bolts, which cracks the porcelain and creates expensive problems. Another common error is failing to clean the flange thoroughly before installing the wax ring, leading to leaks. Don’t reuse old wax rings—they lose effectiveness and won’t seal properly on new installations.
Avoid installing the toilet on an uneven floor without shims, as this creates rocking and stress on the wax seal. Don’t forget to turn off the water supply before starting removal—this causes unnecessary water damage and mess. Finally, many DIYers skip caulking around the base, allowing water to seep underneath and cause subfloor damage over time. Taking time to do each step carefully ensures your how to install a toilet project succeeds the first time.
For additional bathroom fixture guidance, check out our article on home improvement projects and learn about maintaining other household systems. If you’re tackling bathroom updates, you might also benefit from knowing how to maintain your washing machine for a completely updated space.
FAQ
How long does it take to install a toilet?
Most homeowners complete toilet installation in 1-2 hours. Experienced DIYers may finish in 45 minutes, while first-timers might need 2-3 hours. Complications like damaged flanges or uneven floors can extend the timeline.
Do I need a plumber to install a toilet?
No, how to install a toilet is an achievable DIY project for most homeowners with basic tools and mechanical aptitude. However, if you encounter a damaged flange, persistent leaks, or feel uncomfortable with any step, hiring a professional is always an option.
What’s the cost of installing a toilet yourself?
DIY installation costs $150-400 depending on the toilet quality. Professional installation typically runs $200-500 in labor alone, plus the toilet cost. By doing it yourself, you save significant labor expenses.
Can I install a toilet without a wax ring?
No, the wax ring is essential for creating a watertight seal. Without it, sewage gases escape into your home and water leaks under the toilet. Always use a new wax ring for each installation.
Why is my new toilet leaking at the base?
Leaks at the base usually indicate a failed wax ring seal. This typically happens if the flange wasn’t clean, the wax ring wasn’t pressed firmly enough, or the toilet wasn’t seated properly. You’ll need to remove the toilet and reinstall with a new wax ring.
Should I caulk around the toilet base?
Yes, caulking prevents water from seeping under the toilet and damaging the subfloor. Use silicone caulk for durability. Leave a small gap at the back for drainage if water somehow gets behind the toilet.
What if the toilet rocks after installation?
A rocking toilet indicates an uneven floor. Use shims under the base to level it, then caulk around the perimeter. This prevents stress on the wax ring and ensures proper operation.
For more bathroom and home maintenance tips, explore how to keep your home systems running smoothly. You can also learn about maintaining other household fixtures to extend their lifespan. Additionally, understanding home pest prevention helps protect your investment in your bathroom renovation.
According to The Spruce’s bathroom renovation guides, proper toilet installation is fundamental to bathroom functionality and longevity. With this comprehensive guide, you now have the knowledge and confidence to tackle how to install a toilet as a successful DIY project. Take your time with each step, verify your work at every stage, and don’t hesitate to consult professional resources if complications arise. Your newly installed toilet will provide years of reliable service when installed correctly.


