
You just finished a 1,000-piece puzzle. Your kitchen table looks like a crime scene. Now what? You’ve got two choices: box it up and forget about it, or turn that accomplishment into something worth hanging on your wall. Framing a puzzle is way easier than most people think, and honestly, it’s one of the most satisfying DIY projects you can tackle in an afternoon. This guide walks you through every step—from choosing the right frame to protecting your masterpiece so it lasts decades, not weeks.
The truth? How to frame a puzzle doesn’t require fancy tools or expert skills. You need basic supplies, patience, and a willingness to learn a few tricks that professional framers won’t tell you. Let’s get into it.
Choosing the Right Frame and Materials
Before you even touch your puzzle, you need to understand what you’re working with. Framing a puzzle isn’t like framing a poster—the puzzle itself is the art, and it’s fragile. Your frame needs to protect it while showing it off.
Frame Size and Style
Standard puzzle sizes are usually 24″ x 30″, 20″ x 27″, or smaller (500-piece range). Measure your completed puzzle before buying a frame. Pro move: add about 1-2 inches to your measurements to give yourself breathing room. You don’t want to force a puzzle into a frame that’s too tight—that’s how pieces fall off.
For style, keep it simple. A basic wooden frame in natural, black, or white works for almost every puzzle. Avoid ornate frames with deep bevels or textured surfaces—they make it harder to seal and protect your work. According to Family Handyman’s framing guide, simple frames also let the puzzle be the star, not the frame itself.
Glass vs. Acrylic
This is critical. Glass is heavier, clearer, and more professional-looking. Acrylic is lighter, won’t shatter, and costs less. For a puzzle, I lean toward acrylic—especially if you’re hanging it anywhere near a bed or seating area. Acrylic won’t hurt anyone if it falls. Plus, acrylic is easier to clean without scratching.
Get UV-protective glass or acrylic if you can. Puzzles fade under direct sunlight, and UV protection buys you years of color retention. It costs maybe $10-15 more, and it’s worth every penny.
Matting Decisions
A mat serves two purposes: it creates visual breathing room around your puzzle, and it keeps the glass from touching the puzzle pieces directly. Think of the mat like double-sided tape—it’s the middleman between your art and the frame.
Use acid-free mat board. Regular mat board contains lignin and acids that yellow over time and can damage your puzzle. You can buy pre-cut mats at craft stores, or have them custom-cut. Custom is worth it if your puzzle is an odd size.
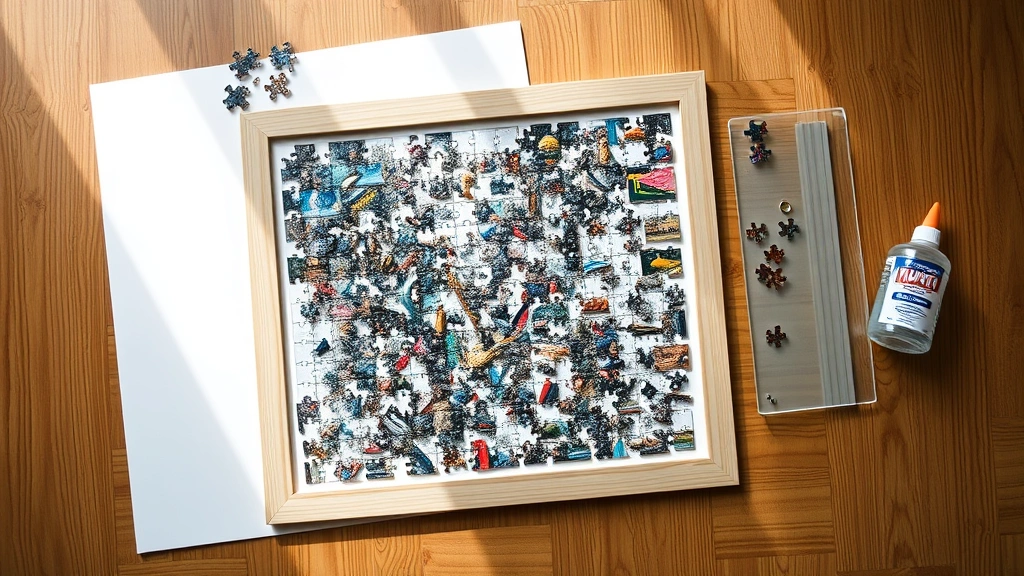
Preparing Your Puzzle for Framing
This is where most people mess up. They just glue the puzzle together and shove it in a frame. That’s a recipe for loose pieces and disaster.
Securing the Pieces
You have three main options: puzzle glue, spray adhesive, or a clear acrylic sealer. Let me break down each:
- Puzzle Glue: Brands like Cobble Hill or Eurographics make puzzle glue specifically for this. It’s thin, dries clear, and doesn’t warp the cardboard backing. Apply it with a brush or roller on the back side of the puzzle. This is the safest bet for beginners.
- Spray Adhesive: Fast and even coverage. The downside? It’s messy, and overspray can stick to your table. Use it outdoors or in a well-ventilated space. 3M Super 77 works well for puzzles.
- Clear Acrylic Sealer: Think of this as insurance, not the main glue. Use it after your puzzle is already secured to lock everything in place.
Here’s the process: lay your puzzle face-down on a clean surface. Apply your adhesive to the back in thin, even coats. Let it dry completely—usually 2-4 hours, depending on the product. Don’t rush this step. Wet glue + framing = warped puzzle.
Backing Board Preparation
Your puzzle needs something solid to sit on. Foam board, mat board, or hardboard all work. I prefer foam board because it’s lightweight and won’t warp. Cut it to fit inside your frame, leaving a tiny gap (1/8 inch) for expansion.
Seal the backing board with a coat of acrylic sealer before attaching your puzzle. This prevents moisture from seeping in and warping everything. It sounds paranoid, but moisture is the silent killer of framed puzzles.
The Assembly Process: Step by Step
Now we’re putting it all together. This is where precision matters.
- Lay out your frame components: frame, glass/acrylic, mat (if using), backing board, and your dried puzzle. Check that everything fits before you commit to assembly.
- Clean the glass: Use a microfiber cloth and glass cleaner. Any dust or smudges will be visible forever, so be thorough. Wipe in one direction, not circles.
- Place the mat: If you’re using a mat, lay it in the frame first. The mat should sit flat against the glass. No bubbles, no wrinkles.
- Position your puzzle on the backing board: Center it. Use a ruler if you need to. You want equal spacing on all sides. This is the moment where it matters.
- Secure the puzzle to the backing board: Use small dots of acid-free glue or foam adhesive tabs at the corners and edges. Don’t glue the entire back—you want some flexibility for expansion and contraction with humidity changes. Think of it like anchoring a ship, not cementing it.
- Insert the backing board into the frame: Slide it in carefully. Make sure the puzzle is facing the glass, not facing the wall.
- Seal the back: This is the final step. Use small tabs or dots of acid-free glue to secure the backing board to the frame. Some frames have tabs built in—use those.
Pro Tip: If your puzzle has a cardboard backing, reinforce it with a thin layer of acid-free tape on the back before framing. Cardboard is weak, and tape adds support without adding weight.
Adding Backing and Support
The backing of your frame is just as important as the front. It protects your puzzle from dust, insects, and moisture.
Dust Cover
Most frames come with a paper dust cover on the back. Replace it with something better. Use acid-free kraft paper or museum-quality backing paper. Tape it to the back of the frame with acid-free tape. This creates a barrier that lets the puzzle breathe while keeping contaminants out.
Humidity Control
If you live somewhere humid (hello, Florida and Seattle), consider adding a small silica gel packet behind the dust cover. Silica absorbs moisture and prevents mold. Replace it every 6-12 months. It costs almost nothing and adds years to your puzzle’s life.
Frame Backing Board
The backing board should be at least 1/8 inch thick. If it’s too thin, it flexes, and your puzzle moves around inside the frame. Use foam board or mat board—both are acid-free and won’t deteriorate. Avoid particle board or regular plywood; they’re acidic and will yellow your puzzle over time.
Sealing and Protecting Your Puzzle
Sealing is the difference between a puzzle that looks great for 2 years and one that looks great for 20 years.
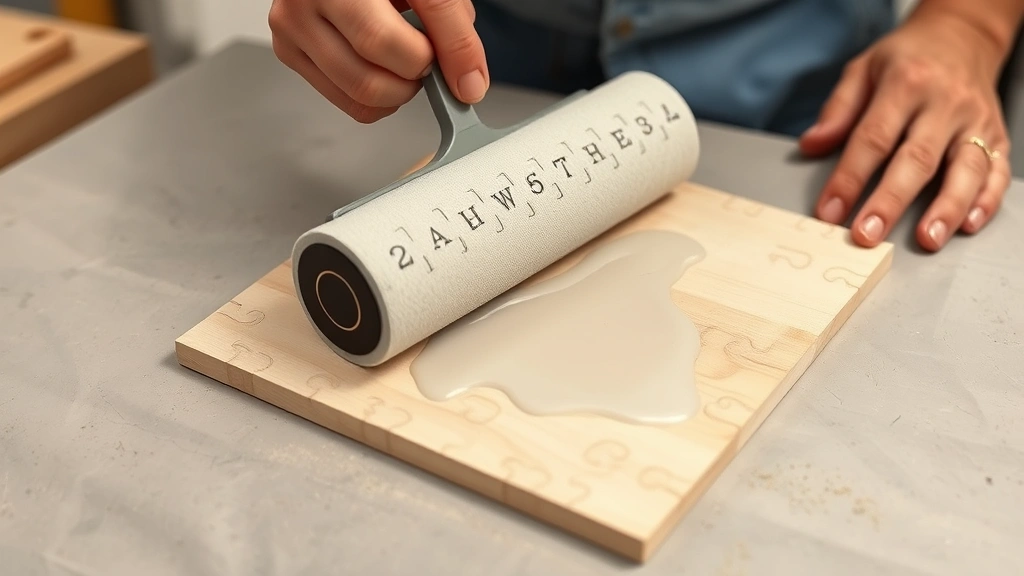
Clear Acrylic Sealer
After your puzzle is glued and dry, apply a thin coat of clear acrylic sealer to the front. Use a foam roller or brush to apply it evenly. This does three things: it locks pieces in place, it protects against dust, and it adds a subtle sheen that makes colors pop.
Brands like Mod Podge or Minwax Polycrylic work fine. Spray sealers are faster but messier. Brush-on sealers give you more control. Either way, apply thin coats—thick coats look plastic-y and can yellow over time.
UV Protection
As mentioned earlier, UV glass or acrylic is essential if your puzzle will hang in sunlight. If you can’t afford UV glass, use a UV-blocking acrylic sealer on the front of your puzzle. It won’t be as good as UV glass, but it helps.
Avoid hanging puzzles directly in front of windows or in rooms with strong afternoon sun. Even with UV protection, fading happens. Think of it like sunscreen for your art—it helps, but you still need to limit exposure.
Safety Warning: Some older puzzle glues and sealers contain harmful chemicals. Use products in a well-ventilated space or outdoors. If you’re sensitive to fumes, wear a respirator mask. Your health is worth more than a puzzle, no matter how cool it is.
Hanging and Displaying Your Framed Puzzle
Your framed puzzle is done. Now you need to hang it without destroying your walls.
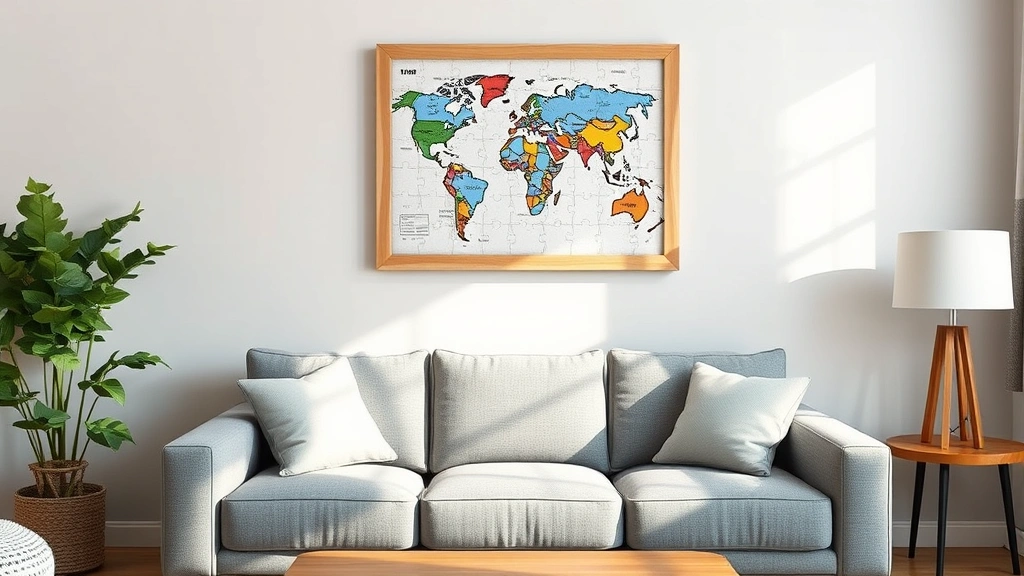
Finding the Right Spot
Choose a wall that’s visible but not in direct sunlight. Above a couch, in a hallway, or in a bedroom all work great. Avoid kitchens and bathrooms—humidity and cooking fumes will degrade your work faster than you’d think.
Avoid hanging it above a heat source (fireplace, heating vent) or near an air conditioner. Temperature fluctuations cause the frame to expand and contract, which stresses the glass and can crack it.
Hanging Hardware
Use quality picture hangers rated for the weight of your frame. A 24″ x 30″ framed puzzle with glass weighs 15-20 pounds. Don’t cheap out with nails. Use a stud finder to locate wall studs, or use heavy-duty anchors if you’re hanging between studs.
According to This Old House’s guide on hanging pictures, proper hardware is the difference between a frame that stays up and one that ends up on your floor at 3 AM.
Height and Spacing
Hang your puzzle at eye level—roughly 57-60 inches from the floor to the center of the frame. If you’re hanging multiple frames, space them 2-3 inches apart. Use a level to make sure it’s straight. Crooked frames drive people crazy.
Common Mistakes to Avoid
These are the things I see people mess up, and they’re all preventable.
Mistake #1: Using Non-Acid-Free Materials
Regular mat board, tape, and glue contain acid that yellows and deteriorates over time. Spend the extra $5-10 and get acid-free everything. Your puzzle will outlast your house.
Mistake #2: Gluing the Entire Back of the Puzzle
If you glue every inch of the back, the puzzle can’t breathe. Humidity changes cause the cardboard to expand and contract, and if it’s fully glued, it warps and cracks. Use glue dots or spray adhesive lightly. Leave room for movement.
Mistake #3: Skipping the Sealer
A puzzle without sealer is a puzzle waiting to fall apart. Dust settles on the pieces, humidity loosens the glue, and pieces shift. A thin coat of acrylic sealer takes 10 minutes and adds years to your puzzle’s life.
Mistake #4: Using Regular Glass Without UV Protection
Puzzles fade. It happens. UV glass costs a little more but prevents 80-90% of fading. Regular glass is a false economy.
Mistake #5: Hanging in Direct Sunlight
Even with UV glass, direct sun fades puzzles. Hang it in a spot with indirect light. Your puzzle will thank you by staying vibrant for decades.
Mistake #6: Forcing the Puzzle Into a Too-Small Frame
Tight frames put pressure on the edges of the puzzle. Pieces pop out, the cardboard bends, and the whole thing falls apart. Measure twice, buy the frame once. A slightly larger frame is always better than a tight one.
Frequently Asked Questions
How long does it take to frame a puzzle?
– If you’re buying pre-made frames and materials, 2-3 hours of actual work spread over 2-3 days (accounting for drying time). If you’re having custom mats cut or frames built, add a week for production. The glue and sealer need time to dry, so you can’t rush it.
Can you frame a puzzle without gluing it?
– Technically, yes, but it’s risky. Without glue, pieces shift over time, especially if the frame is moved or bumped. A thin coat of puzzle glue or spray adhesive takes 10 minutes and prevents 90% of problems. It’s worth doing.
What’s the best glue for framing puzzles?
– Puzzle-specific glue (Cobble Hill, Eurographics brands) is safest because it’s designed not to warp cardboard. Spray adhesive (3M Super 77) works fast but is messier. Acrylic sealer isn’t a glue, but it’s a good second layer of protection after your main adhesive dries.
How do you protect a framed puzzle from fading?
– Use UV-protective glass or acrylic, apply a UV-blocking sealer to the front, and hang it away from direct sunlight. If your puzzle is in a sunny room, consider using a sheer curtain to filter harsh afternoon light. Fading is slow but inevitable under direct sun, even with protection.
Can you frame a 3D puzzle?
– 3D puzzles are trickier because they have height. You need a deeper frame (shadow box style) to accommodate the depth. Use the same sealing and protection methods, but make sure your backing board is sturdy enough to support the weight. Test it before fully assembling.
How much does it cost to frame a puzzle?
– DIY framing: $30-80 depending on frame quality and whether you buy custom mats. Professional framing: $150-400+. DIY is totally doable and gives you more control. Professional framers are worth it if you have a rare or expensive puzzle, but for most puzzles, DIY saves money and is just as good.
What if your puzzle is damaged during framing?
– Loose pieces can be re-glued before sealing. Bent cardboard can be flattened under weight overnight. Small tears in the cardboard backing won’t show once it’s framed. If a piece is missing or severely damaged, you have two options: leave the gap and accept it, or order a replacement puzzle and swap pieces (if the brand is still in production). Most damage is preventable with careful handling.
Should you frame a puzzle face-up or face-down?
– Always face-up (the picture facing the glass). You glue the back side, then flip it into the frame. Never frame a puzzle backwards—that defeats the whole purpose of displaying it.
How do you clean a framed puzzle?
– Use a microfiber cloth and gentle pressure on the glass. For dust inside the frame, you’re out of luck—the frame is sealed. Prevention is key: use a dust cover on the back and keep it away from dusty areas. If dust gets in before you seal it, carefully remove the backing and use a soft brush to clean the back of the puzzle, then re-seal.
Can you remove a puzzle from a frame after it’s been framed?
– Technically, yes, but it’s destructive. The glue and sealer bond the pieces together, and removing them will damage the puzzle. Frame your puzzle with the intention of it staying there permanently. If you think you might want to change it later, use minimal glue and no sealer—but that’s riskier for preservation.


