How to Forward Calls on iPhone: Simple & Essential Guide

Missing important calls while you’re away from your primary phone is frustrating. Fortunately, learning how to forward calls on iPhone takes just minutes and can save you from missed opportunities. Whether you’re traveling, working from multiple locations, or simply need calls redirected to another device, iPhone’s call forwarding feature makes it seamless. This guide walks you through every method to set up call forwarding on your iPhone, troubleshoot common issues, and maximize this powerful feature.
Quick Answer: To forward calls on iPhone, open Settings → Phone → Call Forwarding → toggle it on → enter the forwarding number. You can also use your carrier’s call forwarding codes (*72 to activate, *73 to deactivate) or enable Wi-Fi Calling for automatic routing. The process takes under two minutes and works across all iPhone models running iOS 12 or later.
Tools & Materials Needed
- iPhone (any model with iOS 12+)
- Active cellular plan with call forwarding support
- Wi-Fi connection (optional, for Wi-Fi Calling setup)
- Phone number where you want calls forwarded
- Access to iPhone Settings app
- Your carrier’s customer service number (if needed)
Method 1: Using iPhone Settings for Call Forwarding
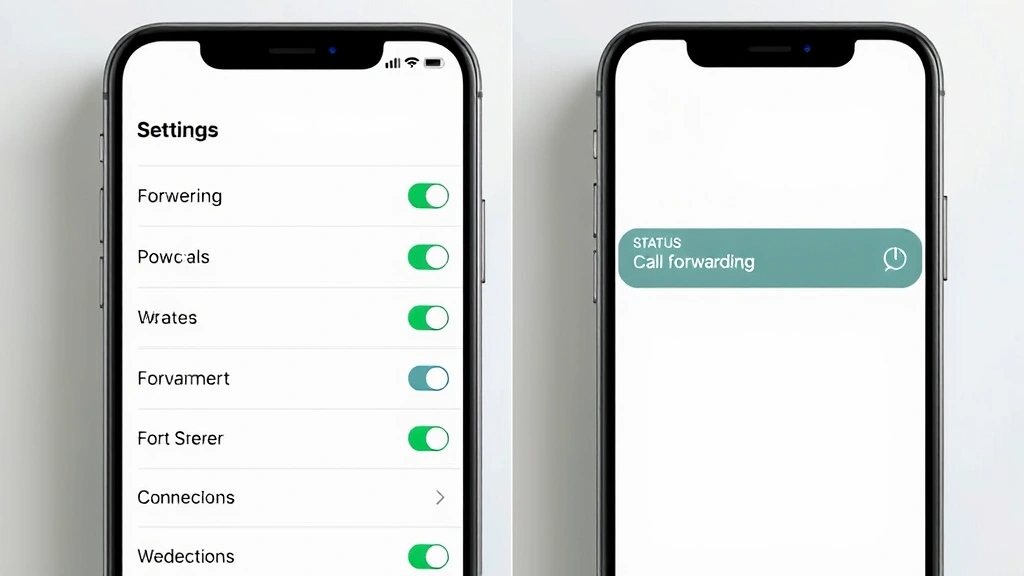
The most straightforward way to set up how to forward calls on iPhone is through the native Settings application. This method works with all major carriers and doesn’t require any special codes or external apps. Open your iPhone and navigate to the Settings app, then tap Phone to access calling features. Look for the Call Forwarding option—it’s typically located near the top of the Phone settings menu alongside options like Silence Unknown Callers and Call Waiting.
Once you’ve found Call Forwarding, toggle the switch to turn it on. Your iPhone will prompt you to enter the phone number where you want incoming calls redirected. This can be another mobile number, a landline, or even a business phone. Enter the complete number including the area code, then tap the back arrow to confirm. A confirmation message will appear indicating that call forwarding is now active. You’ll notice a small arrow icon appears next to the signal strength indicator at the top of your screen, confirming the feature is enabled.
It’s important to note that this method requires your carrier to support call forwarding on your specific plan. Most carriers include this feature at no extra cost, but some budget plans or international carriers may charge a small monthly fee. If you don’t see the Call Forwarding option in your Phone settings, contact your carrier to verify it’s enabled on your account. According to WikiHow, this remains the most reliable method for iPhone users across all iOS versions.
Method 2: Carrier-Based Call Forwarding Codes
Many carriers allow you to manage call forwarding directly through USSD codes, which are special commands you dial like phone numbers. These codes work independently of your iPhone’s settings and can be useful if you’re experiencing issues with the native Settings method. To activate call forwarding using carrier codes, open the Phone app and dial *72, followed by the 10-digit number where you want calls forwarded. Press the call button and wait for confirmation—you’ll typically hear a voice message or see a notification confirming the setup.
To deactivate call forwarding through codes, simply dial *73 and press call. This instantly turns off all forwarding without needing to navigate through Settings. Some carriers also offer *71 for selective call forwarding (forwarding only specific numbers) and *67 for blocking your caller ID on outgoing calls. These codes vary by carrier, so check your provider’s support page for the exact codes available on your plan. The advantage of using codes is that they work from any phone, making them perfect for emergencies or when you’re away from home.
According to Family Handyman’s technology resources, USSD codes remain one of the most universally compatible methods across different carriers and phone models. However, remember that code-based forwarding may take several minutes to activate, and you won’t see visual confirmation in your Settings until the next time you check. If you’re unsure about your carrier’s specific codes, call their customer service line—most representatives can activate forwarding for you over the phone.
Method 3: Wi-Fi Calling and Continuity Features
Apple’s Continuity feature offers a sophisticated alternative to traditional call forwarding, especially if you own multiple Apple devices. With Wi-Fi Calling enabled, your iPhone can route calls through your Wi-Fi connection, and with Continuity features activated, you can receive and make calls from your Mac, iPad, or Apple Watch. This doesn’t technically forward calls in the traditional sense, but it ensures you never miss a call regardless of which Apple device you’re using.
To enable Wi-Fi Calling, go to Settings → Phone → Wi-Fi Calling and toggle it on. You’ll need to confirm your emergency address for 911 purposes. Then, enable Continuity by going to Settings → General → AirPlay & Handoff and ensuring “Calls on Other Devices” is toggled on. This allows your Mac and iPad to receive calls intended for your iPhone number. The beauty of this approach is that calls ring simultaneously on all your connected devices, and you can answer from whichever device is most convenient.
This method is particularly useful for professionals who work across multiple devices throughout the day. If you’re at your desk working on your Mac, incoming calls will ring there automatically. When you step away and grab your iPad, calls follow you seamlessly. This creates a unified communication experience without traditional forwarding delays. According to HowStuffWorks, Continuity features represent the modern evolution of call forwarding, offering real-time flexibility that traditional methods can’t match.
Setting Up Conditional Call Forwarding
Beyond basic call forwarding, many carriers support conditional forwarding, which automatically redirects calls based on specific scenarios. These conditions include: when your iPhone is busy (Call Forwarding Busy), when you don’t answer (Call Forwarding No Answer), when your phone is unreachable (Call Forwarding Not Reachable), or when you’re out of the service area. This granular control lets you customize exactly how calls are handled in different situations.
To set up conditional forwarding, you typically need to use carrier-specific codes or contact your provider directly. For example, *67 followed by a phone number sets up forwarding when you’re busy, while *61 sets up forwarding when you don’t answer within a specified number of rings. The flexibility of conditional forwarding means you can keep your primary number active while ensuring calls don’t go unanswered. Many business professionals use this setup to maintain availability while managing multiple communication channels.
Some carriers offer apps or web portals where you can configure these conditions visually without memorizing codes. Check your carrier’s website or contact their support team to explore conditional forwarding options on your specific plan. This advanced setup requires more initial configuration but provides unmatched control over your incoming calls. If you’re managing client communications or running a business, conditional forwarding can significantly improve your responsiveness and professionalism.
Disabling and Managing Call Forwarding
Disabling how to forward calls on iPhone is just as simple as enabling it. Open Settings → Phone → Call Forwarding and toggle the switch off. The forwarding icon will disappear from your status bar, and calls will return to ringing on your primary iPhone. If you set up forwarding using carrier codes, dial *73 to deactivate it instantly. It’s good practice to disable call forwarding when you return to your normal routine or when you no longer need calls redirected.
If you’ve set up multiple forwarding rules or conditional forwarding through your carrier, managing them requires a bit more attention. Keep a list of which forwarding numbers you’ve activated and through which method (Settings vs. codes). This prevents confusion and helps you quickly identify which rules are currently active. You can also check your carrier’s online account portal to see all active forwarding rules at a glance. Many carriers send confirmation texts or emails when call forwarding is activated or deactivated, providing an audit trail of changes.
For frequent travelers or professionals who regularly switch between locations, consider creating a system for managing forwarding. You might have a work forwarding number, a home number, and a travel number, rotating them based on your current location. Some users set calendar reminders to disable forwarding after trips, ensuring they don’t accidentally miss calls intended for their primary number. This proactive management prevents the common mistake of forgetting forwarding is still active weeks after it’s no longer needed.
Troubleshooting Common Call Forwarding Issues
If you’re having trouble setting up call forwarding on your iPhone, the first step is verifying that your carrier supports the feature on your specific plan. Contact your carrier’s customer service to confirm call forwarding is provisioned on your account—some older plans or international carriers may not include it. Ask them to manually activate it if needed, and request confirmation once it’s active. This eliminates the possibility that your carrier hasn’t enabled the feature on their end.
If call forwarding appears enabled in Settings but calls aren’t forwarding, try restarting your iPhone completely. Press and hold the power button, slide to power off, wait 30 seconds, then power back on. This refreshes your connection to the carrier’s network and often resolves temporary glitches. If the issue persists, try toggling call forwarding off and on again through Settings. If you’re still experiencing problems, try the carrier code method (*72 followed by your forwarding number) as an alternative to Settings-based forwarding.
Another common issue occurs when the forwarding number itself is incorrect or unreachable. Double-check that you’ve entered the complete phone number including the area code. If you’re forwarding to an international number, ensure you’ve included the country code. Test the forwarding number by calling it directly from another phone to verify it’s active and working. If the number is temporarily unavailable, calls will fail to forward and may go to voicemail instead. You can also check your carrier’s coverage maps to ensure the forwarding destination is in a service area.
For Wi-Fi Calling issues, ensure all your Apple devices are signed into the same iCloud account and that Wi-Fi is properly connected. Restart your Wi-Fi router and toggle Wi-Fi Calling off and on in Settings. If Continuity features aren’t working, verify that Bluetooth is enabled, all devices are on the same Wi-Fi network, and Handoff is enabled in General settings. Sometimes these features require a few seconds to sync after first enabling them, so give them a moment before troubleshooting further.
Best Practices and Security Considerations
When managing call forwarding on your iPhone, security should be a priority. Never share your phone number or forwarding destination with untrusted sources, as this could enable call interception or social engineering attacks. Be especially careful if you’re forwarding to a business number—ensure the number belongs to a verified contact before activating forwarding. If you suspect unauthorized forwarding has been set up on your account, contact your carrier immediately to review your account activity and reset any compromised settings.
For business users, consider using a separate business line or forwarding to a dedicated business number rather than a personal device. This maintains professional boundaries and protects your personal privacy. If you’re forwarding to another person’s phone, ensure they understand they’ll be receiving your calls and have agreed to this arrangement. This prevents confusion and ensures the forwarding number owner isn’t caught off guard by unexpected incoming calls.
Regularly review your active forwarding rules to ensure they’re still necessary. Outdated forwarding rules can cause missed calls or create confusion about which number is receiving your calls. If you’re traveling internationally, be aware that forwarding to an international number may incur additional charges depending on your carrier and plan. Check your carrier’s international rates before activating forwarding to an overseas number. You can also check your carrier’s website or the Consumer Reports technology section for guidance on managing international calling features.
Lastly, inform key contacts about your call forwarding setup if it affects their ability to reach you. If you’re forwarding to a different number, let important callers know they might reach you at a different phone temporarily. This prevents confusion and ensures critical calls don’t get lost due to miscommunication. For businesses, update your voicemail greeting to mention any temporary forwarding, and consider setting up a vacation auto-reply if you’re away for extended periods.
If you’re looking to enhance your iPhone management beyond call forwarding, you might want to explore related features. For instance, understanding how to see blocked numbers on iPhone helps you manage unwanted callers alongside your forwarding setup. Additionally, you can learn about how to find hidden apps on iPhone to ensure your device is running optimally. For iPad users managing similar features, how to clear cache on iPad provides useful maintenance tips. While not directly related, how to retrieve deleted text messages on Android offers insights for those managing multiple platforms.
FAQ
Q: Does call forwarding on iPhone work internationally?
A: Yes, you can forward to international numbers, but check with your carrier about potential charges. International forwarding may incur additional fees depending on your plan and the destination country. Some carriers offer international call forwarding as part of premium plans at no extra cost.
Q: Will I be charged for incoming calls when call forwarding is active?
A: This depends on your carrier and plan. Most carriers don’t charge for incoming calls on your primary number, but forwarding to an international number might incur long-distance charges. Contact your carrier to clarify billing for forwarded calls on your specific plan.
Q: Can I set up call forwarding without using Settings?
A: Yes, you can use carrier codes like *72 to activate forwarding without accessing Settings. This method works from any phone and is useful if you’re experiencing technical issues with the native Settings feature.
Q: What happens to my voicemail when call forwarding is active?
A: Voicemail settings remain independent of call forwarding. If the forwarding number doesn’t answer, calls will typically go to that number’s voicemail rather than your iPhone’s voicemail. You can adjust this behavior through conditional forwarding settings.
Q: Can I forward calls to multiple numbers simultaneously?
A: Standard call forwarding forwards to one number at a time. However, using Continuity features allows calls to ring on multiple Apple devices simultaneously. For non-Apple devices, you’d need to use conditional forwarding with different rules for different situations.
Q: Is there a way to know if call forwarding is currently active?
A: Yes, an arrow icon appears next to your signal strength indicator when call forwarding is active. You can also check Settings → Phone → Call Forwarding to see the forwarding number and status at any time.
Q: What should I do if call forwarding isn’t working?
A: First, verify your carrier supports the feature on your plan. Restart your iPhone, toggle forwarding off and on, or try using carrier codes (*72). If issues persist, contact your carrier’s technical support for assistance.
Q: Can I use call forwarding on a prepaid iPhone plan?
A: This depends on your carrier and specific prepaid plan. Some prepaid plans include call forwarding, while others may require a higher-tier plan or charge a monthly fee. Check with your carrier to confirm availability on your prepaid plan.