
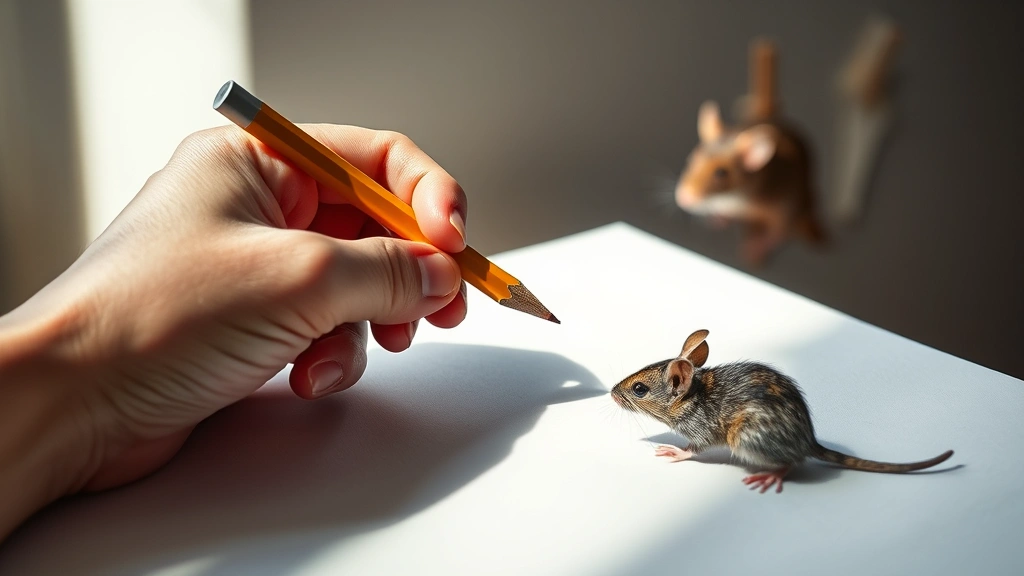
Learning how to draw a mouse might seem intimidating if you’ve never done it before, but here’s the truth: mice are actually one of the easiest animals to sketch. Their simple shapes, minimal features, and forgiving proportions make them perfect for beginners and a great warm-up for more complex animal drawings. Whether you’re creating illustrations for a children’s book, designing a character, or just want to improve your drawing skills, this guide will walk you through the exact process I use every time.
The real challenge isn’t the mouse itself—it’s understanding the underlying structure and proportions that make a mouse look like a mouse and not just a blob with a tail. Once you nail those fundamentals, you can draw a convincing mouse in under five minutes, and you’ll have the confidence to tackle other small animals too.
Gather Your Drawing Supplies
Before you start learning how to draw a mouse, let’s talk tools. You don’t need anything fancy—seriously. A pencil, paper, and an eraser will get you 95% of the way there. But if you want to level up, here’s what I recommend keeping in your kit:
- Pencils: A standard HB pencil for sketching, an H pencil for light guidelines, and a 2B or 4B for darker lines and shading
- Paper: Smooth drawing paper or sketch paper works best. Avoid printer paper—it tears easily when you erase
- Eraser: A kneaded eraser is your friend. It’s gentle, reusable, and won’t damage your paper like a hard rubber eraser
- Blending tools: Tissue, a blending stump, or even your finger can help smooth out pencil marks
- Ruler: Optional, but helpful for measuring proportions if you’re still building confidence
- Reference images: Print or pull up photos of real mice or cartoon mice, depending on your style
The investment here is minimal—you can grab everything at a local art supply store or online for under $20. The real investment is time and practice. Think of these tools like a carpenter’s hammer and saw; they’re not fancy, but they work.
Pro Tip: Keep a sketchbook dedicated to drawing mice. Do one or two every day for a week, and you’ll be shocked at how much your skill improves. Repetition is the real secret sauce here.
Understand Basic Mouse Anatomy
Here’s where most beginners stumble: they try to draw a mouse without understanding what makes a mouse look like a mouse. Let me break down the key anatomical features you need to know.
A mouse’s body is roughly divided into three main parts: the head (which is round or slightly oval), the body (which is elongated and tubular), and the tail (which is long, thin, and tapered). The head takes up about one-third of the total body length, and the tail is typically as long as or longer than the body itself.
The proportions matter here. A mouse’s ears are large relative to its head—they’re almost as wide as the head itself. The eyes are dark, round, and positioned on the sides of the head. The nose is small and pointed, and the mouth is a simple curved line. The legs are short and thin, with tiny feet that barely show when the mouse is standing still.
According to Family Handyman’s guide to observation and detail work, paying attention to real-world proportions is what separates amateur sketches from professional-looking artwork. The same principle applies to drawing animals—study the real thing before you try to recreate it stylized.
One more thing: mouse fur has direction. Even in a simple drawing, suggesting fur direction with light pencil strokes makes the mouse look three-dimensional and alive, not flat and cartoon-y.
Start with Simple Shapes
This is the foundation of learning how to draw a mouse. Before you draw a single detailed line, you’re going to build your mouse from basic geometric shapes. This approach removes the pressure and gives you a solid structure to work from.
Here’s the process:
- Draw a circle for the head. Make it light and loose—this is a guideline, not the final line. Position it roughly in the upper-left or center of your page
- Draw an oval or elongated circle for the body. Position it to the right and slightly below the head. The body should be about 1.5 times the size of the head
- Sketch a long, thin curved line for the tail. Start it at the back of the body and let it curve naturally across the page. Tails rarely go straight back; they usually curve or drape
- Add four small circles or ovals for the legs. Two in front (under the head area) and two in back (under the body). These should be much smaller than the head and body
- Add a small circle or triangle for the nose. Position it at the front-left of the head circle, slightly protruding
At this stage, your mouse looks like a collection of blobs. That’s exactly right. Don’t overthink it. These shapes are a roadmap—they tell you where everything goes. Once you’re comfortable with this basic structure, you can add detail without worrying about proportions.
Safety Tip for Your Workspace: Make sure your drawing area is well-lit and your posture is comfortable. Poor lighting strains your eyes, and bad posture leads to hand cramps. Invest in a decent desk lamp and take breaks every 20-30 minutes.
Sketch the Head and Facial Features
Now we’re getting to the fun part. This is where your mouse starts to look like an actual mouse.
Step 1: Define the head shape. Using your circle as a guide, sketch a more defined head shape. Mice have slightly pointed snouts, so the front of the head should taper a bit. Keep the back of the head round.
Step 2: Add the ears. Draw two large ovals or rounded triangles on top of the head, positioned toward the back. Leave some space between them. Ears are one of the most recognizable features of a mouse, so don’t skimp here. They should be prominent.
Step 3: Place the eyes. Draw two small, dark circles on either side of the head, positioned roughly in the middle vertically. Leave space between them for the nose. Eyes should be shiny, so leave a tiny white dot (highlight) in each one. This makes the mouse look alive.
Step 4: Draw the nose. Using your small circle or triangle as a guide, draw a small pointed nose at the front of the head. It should be proportionally tiny—don’t make it bigger than the eyes.
Step 5: Add the mouth. A simple curved line below the nose suggests a mouth without being overly detailed. You can add a couple of whiskers extending from the cheeks for extra character.
The key here is restraint. Beginners often add too much detail to the face, which makes it look cluttered. A mouse’s face is simple—eyes, nose, mouth, ears. That’s it. Everything else is implied through shading and line work.
Draw the Body and Limbs
With the head in place, the body comes next. This is where you transform those basic ovals into an actual mouse shape.
Step 1: Refine the body outline. Using your oval as a guide, sketch a more defined body shape. The belly should be slightly rounded, and the back should have a gentle curve. Don’t make it perfectly symmetrical—real mice have slight irregularities that make them look natural.
Step 2: Connect the head to the body. Sketch a short neck area connecting the head circle to the body oval. Mice have short necks, so this should be subtle—just a slight narrowing where they connect.
Step 3: Draw the front legs. These are short and thin. Position them under the front of the body. Each leg should be roughly the same width as a pencil line. Add small feet at the bottom—just a tiny oval or rounded shape. Mice’s front feet are often raised slightly, suggesting they’re standing on their hind legs or in a natural walking pose.
Step 4: Draw the back legs. These are positioned under the back of the body. Back legs are usually slightly longer than front legs, but not by much. Again, add small feet at the bottom.
Step 5: Suggest the belly. A light curved line down the center of the body suggests the belly is lighter than the back. This adds dimension without requiring full shading.
At this point, you have a recognizable mouse. The proportions are right, the features are in place, and it actually looks like something. This is a huge milestone in learning how to draw a mouse. Celebrate this moment before moving on.
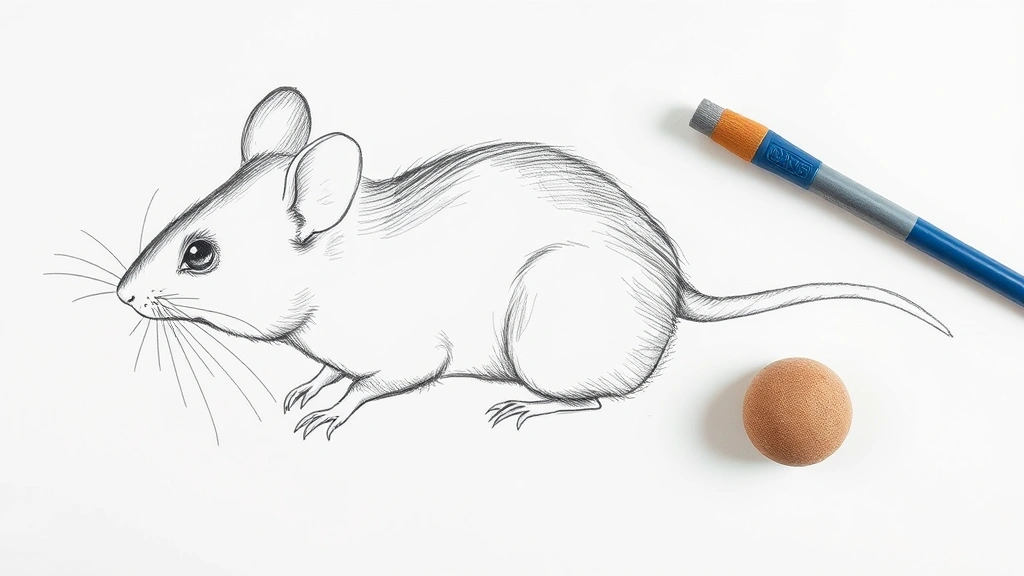
Add the Tail and Fine Details
The tail is what separates a decent mouse drawing from a great one. It’s the most expressive part of the mouse, and it’s where you can add personality.
Step 1: Define the tail outline. Using your curved line as a guide, sketch a more defined tail. The tail should start thick (roughly the same width as the body) and taper to a point. A mouse’s tail is rarely perfectly straight; it usually has a gentle S-curve or spiral. This makes it look natural and dynamic.
Step 2: Add tail texture. Light pencil strokes along the length of the tail suggest scales or texture. You don’t need to draw every scale—just enough to break up the solid line and make it look three-dimensional.
Step 3: Add whiskers. Whiskers extend from the cheeks and add character. Draw 3-5 thin lines on each side of the snout, angling slightly upward and outward. Whiskers should be delicate, not heavy.
Step 4: Refine the ears. Add a small inner ear line to suggest depth. A thin curved line inside each ear makes them look three-dimensional.
Step 5: Erase guidelines. Now that the main structure is in place, gently erase all your construction lines. Use a kneaded eraser so you don’t damage the paper. Be patient here—this step determines how clean your final drawing looks.
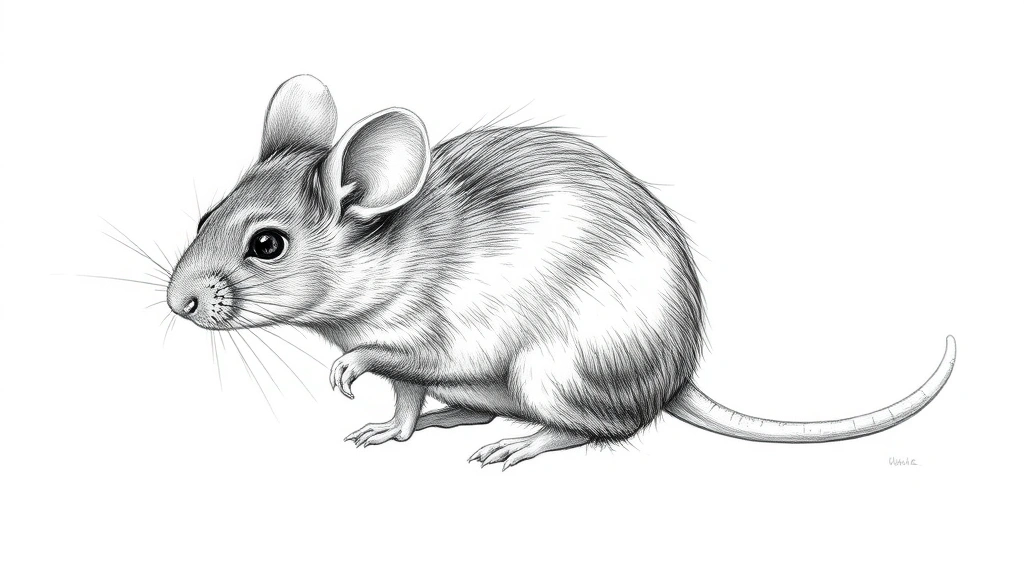
Refine Lines and Add Shading
This is where your mouse goes from a sketch to a finished drawing. Refining lines and adding shading brings it to life.
Step 1: Darken the final outline. Using a 2B or 4B pencil, go over your main lines with confident, smooth strokes. Don’t trace mechanically—let your hand flow naturally. Vary the line weight slightly; make lines darker where shadows would naturally occur (under the body, around the legs) and lighter where light hits (the top of the head, the belly).
Step 2: Shade the body. Using light, directional pencil strokes, add shading to suggest form. The back of the mouse should be darker than the belly. The underside of the tail should be darker than the top. Use your blending stump or tissue to smooth out harsh transitions. Think of where light would naturally hit the mouse—typically from above and to one side—and shade accordingly.
Step 3: Darken the eyes. Fill in the pupils completely, leaving that tiny white highlight. This makes the eyes pop and gives the mouse personality. A dark eye is the difference between a cute mouse and a dead-looking one.
Step 4: Add fur texture. This is optional but makes a huge difference. Using short, directional pencil strokes that follow the direction of hair growth, suggest fur texture across the body. On the head, strokes should radiate from the nose. On the body, they should follow the contours. Don’t overdo it—subtle texture is more effective than heavy cross-hatching.
Step 5: Define the feet and nose. Add a bit of shading to the feet to make them look three-dimensional. The nose should be darker than the surrounding snout. A tiny line under the nose suggests the mouth opening.
Pro Tip: Step back from your drawing every few minutes. Viewing it from a distance helps you spot proportional issues and shading inconsistencies that are invisible up close. This is the same principle carpenters use when checking their work—distance gives perspective.
Common Mistakes When Learning How to Draw a Mouse
After teaching dozens of people how to draw a mouse, I’ve seen the same mistakes over and over. Here’s what to avoid:
Mistake 1: Making the head too big. Beginners often draw a head that’s almost as large as the body. Remember: the head should be about one-third the total body size. A disproportionately large head makes the mouse look like a caricature, not a realistic (or even stylized) mouse.
Mistake 2: Forgetting the tail. Some people draw a tiny tail or skip it entirely. The tail is crucial. It’s as long as or longer than the body, and it’s one of the most recognizable features. A mouse without a proper tail is like a car without wheels.
Mistake 3: Making the legs too thick. Mouse legs are spindly. They should be thin—almost like pencil lines. Thick legs make the mouse look like a hamster or a rat, not a delicate mouse.
Mistake 4: Placing the ears incorrectly. Ears should be positioned toward the back of the head, not the very top. They should also be large—almost as wide as the head itself. Small ears positioned on top of the head make the mouse look wrong.
Mistake 5: Overdoing the shading. More shading doesn’t equal better drawing. In fact, heavy, uncontrolled shading makes mice look muddy and undefined. Light, directional shading is more effective. You should still see the paper in many areas.
Mistake 6: Not using reference images. This is the biggest mistake. Even professional artists use references. Pull up a real photo or a cartoon mouse you admire and study it before you draw. Understanding what you’re drawing is half the battle.
According to This Old House’s guide to precision and measurement, accuracy comes from observation, not guessing. The same applies to drawing. Look more than you draw, and your drawings will improve exponentially.
If you’re interested in digital drawing, you might also want to explore how to insert a text box in Google Docs if you’re documenting your artistic progress, or check out how to find and replace in Word for organizing your art notes and references. For those who like to document their work with measurements, how to add error bars in Excel can help you track your drawing progress over time.
Another creative avenue is exploring mixed media. If you want to combine your mouse drawing with 3D art, how to make paper mache opens up possibilities for creating sculptural mice based on your drawings.
Here’s the real talk: learning how to draw a mouse isn’t about talent. It’s about understanding structure, practicing consistently, and being willing to mess up. Every professional artist started exactly where you are now—staring at a blank page, uncertain if they could pull it off. The difference is they kept drawing.
Your first mouse won’t be perfect. Your tenth won’t be either. But by your fiftieth, you’ll have muscle memory, confidence, and a genuine understanding of mouse anatomy. You’ll be able to draw a mouse in different poses, from different angles, in different styles. That’s when drawing becomes fun instead of frustrating.
Frequently Asked Questions
What’s the best pencil for learning how to draw a mouse?
– An HB pencil is your best bet for general sketching. It’s not too hard (which makes heavy marks difficult to erase) and not too soft (which smudges easily). Once you’re comfortable, experiment with H pencils for light guidelines and 2B or 4B pencils for darker final lines and shading. The variety gives you more control over line weight and shading intensity.
How long does it take to learn how to draw a mouse well?
– If you practice daily for 15-20 minutes, you’ll see significant improvement in about two weeks. A solid, confident mouse drawing is achievable in about 5-10 minutes once you’ve internalized the process. Mastery—being able to draw mice in different poses and styles—takes a few months of consistent practice. The timeline depends on how often you practice, not how talented you are.
Should I use a reference image when learning how to draw a mouse?
– Absolutely. Reference images are essential, not a crutch. Even professional illustrators use references. A photo of a real mouse or a cartoon mouse you admire gives you concrete information about proportions, anatomy, and details. Without a reference, you’re relying on memory and guessing, which leads to mistakes. Keep a reference visible while you draw.
Can I draw a mouse digitally instead of on paper?
– Yes, the principles are identical. A stylus and tablet work just like a pencil and paper, though the feel is different. Many beginners find it easier to learn on paper because the feedback is more immediate and tactile. Once you understand the fundamentals on paper, transitioning to digital is straightforward. The structure, proportions, and shading principles remain the same.
What’s the difference between drawing a realistic mouse and a cartoon mouse?
– The fundamentals are the same, but the emphasis changes. A realistic mouse prioritizes accurate proportions and anatomy, with careful shading and detail. A cartoon mouse exaggerates certain features (larger eyes, bigger ears, more expressive posture) while simplifying others (less fur detail, bolder lines). Start with realistic proportions, then stylize from there. This approach gives you flexibility and a solid foundation.
Why does my mouse look flat and two-dimensional?
– You’re likely missing shading and line weight variation. A flat mouse has uniform line weight throughout and little to no shading. To add dimension, vary your line weight (darker, thicker lines in shadow areas; lighter, thinner lines in light areas) and add directional shading that follows the contours of the body. Even light shading makes a huge difference. Also, make sure your eyes have highlights and your shadows have direction.
Is there a faster way to learn how to draw a mouse?
– Not really. There’s no shortcut to skill. What matters is consistent, focused practice. Fifteen minutes a day beats three hours once a week. Quality practice (with reference images, paying attention to proportions) beats mindless repetition. If you want to speed up the process, practice daily, use references, and study other artists’ mouse drawings to understand different styles and approaches.


