
Paper mache intimidates a lot of people. They think it’s messy, unpredictable, or requires some secret artist gene. Real talk: it’s none of those things. How to do paper mache is actually one of the most forgiving crafts you can tackle. Whether you’re building a piñata for your kid’s birthday, creating a sculpture, or just looking for a rainy-day project, paper mache works. It’s cheap, it’s tactile, and honestly? It’s kind of fun once you get past the first layer.
The basic concept is simple: tear up paper, mix it with paste, slap it on a form, and let it dry. Repeat until you’ve got something solid. That’s the entire process. The variations come down to what you want to build and how refined you want the final product to be. This guide walks you through everything—from choosing your materials to finishing touches—so you can confidently tackle any paper mache project.
Materials You Need to Get Started
Before you start tearing paper into strips, gather what you actually need. This isn’t a long list, which is part of why paper mache is so accessible.
Paper: Newspaper is the classic choice, and it works great. You can also use paper towels (they’re stronger but more expensive), magazine pages (they look nicer but don’t adhere as well), or even brown packing paper. The key is that it tears easily and isn’t too thick. Avoid glossy magazine covers for your base layers—save those for decoration if you want.
Paste: This is where people get hung up. You can buy pre-made paper mache paste, but you don’t need to. A simple flour-and-water mixture works perfectly. Some people swear by a flour paste with a bit of salt (prevents mold). Others use a mix of white glue and water. We’ll cover how to make paste in detail below.
Water: You’ll need clean water for mixing your paste and potentially for dampening paper. Have a bowl or bucket ready.
Base or Armature: This is what you’re building on top of. A balloon, a plastic bottle, a wire frame, a cardboard box—whatever matches your project. More on this below.
Tools: You’ll want scissors or a craft knife for cutting paper, a brush or sponge for applying paste, and something to work on (newspaper or a plastic sheet to protect your surface). A bowl for paste mixing is essential. Some people like using their hands to apply paste directly; others prefer a brush. Both work.
Optional but helpful: Plastic wrap or cling film (makes cleanup easier), a spray bottle (for dampening), and sandpaper (for smoothing the final product).
Choosing Your Base or Armature
The foundation of your paper mache project matters. Your base needs to be sturdy enough to hold the weight of wet paper and paste, but it also needs to be something you’re comfortable working with.
Balloons: Perfect for round projects like piñatas, masks, or ornaments. Blow them up to the size you want, and you’re set. The downside? They eventually pop, which can be startling if you’re not expecting it. That’s actually fine—once your paper mache is dry and strong enough, the balloon is just dead weight inside anyway.
Cardboard and Boxes: Great for angular projects, houses, or anything with structure. You can cut and tape cardboard into whatever shape you need. This is the most versatile option for custom shapes.
Wire Frames: If you want to build something more sculptural, you can create a frame from wire or even pipe cleaners. This requires a bit more planning but gives you total control over the final shape.
Plastic Bottles and Containers: Lightweight, ready-made, and perfect for vases, animals, or anything cylindrical. They’re stable and won’t degrade like cardboard.
Newspaper Balls: Crumple newspaper into a ball, tape it together, and you’ve got a base. This works for smaller projects and is incredibly cheap.
The rule of thumb: choose something that’s stable, won’t absorb too much moisture, and matches the shape you’re trying to create. If you’re unsure, cardboard is your safest bet.
Making the Perfect Paste
This is where most people overthink things. Paper mache paste doesn’t need to be complicated.
The Flour Paste Method (Most Common):
- Mix 1 part flour with 2 parts water in a bowl or pot.
- Stir until you’ve got a smooth, lump-free mixture. It should look like pancake batter—thin enough to soak paper but thick enough to stick.
- If you want to prevent mold (good idea for projects that might sit around), add a tablespoon of salt per cup of flour.
- Some people cook the paste on a stove to thicken it and kill any bacteria. Heat it gently while stirring until it thickens slightly, then let it cool. This isn’t necessary, but it does make the paste more durable.
The White Glue Method:
- Mix 1 part white glue (like Elmer’s) with 1 part water.
- Stir well.
- This paste dries faster and creates a stronger bond, but it’s more expensive than flour paste.
The Hybrid Method:
- Mix equal parts flour paste and white glue.
- You get the cost-effectiveness of flour and the strength of glue.
Real talk: all three methods work. Flour paste is cheapest and fine for most projects. If you want something that dries faster and holds up better to handling, go with glue. The difference isn’t huge.
Pro Tip: Make your paste in a shallow bowl or tray rather than a deep pot. It’s easier to dip paper strips and wring them out. If your paste gets too thick as it sits, add a bit more water.
One thing to know: flour paste can develop a smell if it sits around for days. It’s not dangerous, just unpleasant. If you’re doing a multi-day project, make fresh paste each day or store it in the fridge.
The Layering Technique That Actually Works
This is the core of how to do paper mache. Get this right, and everything else falls into place.
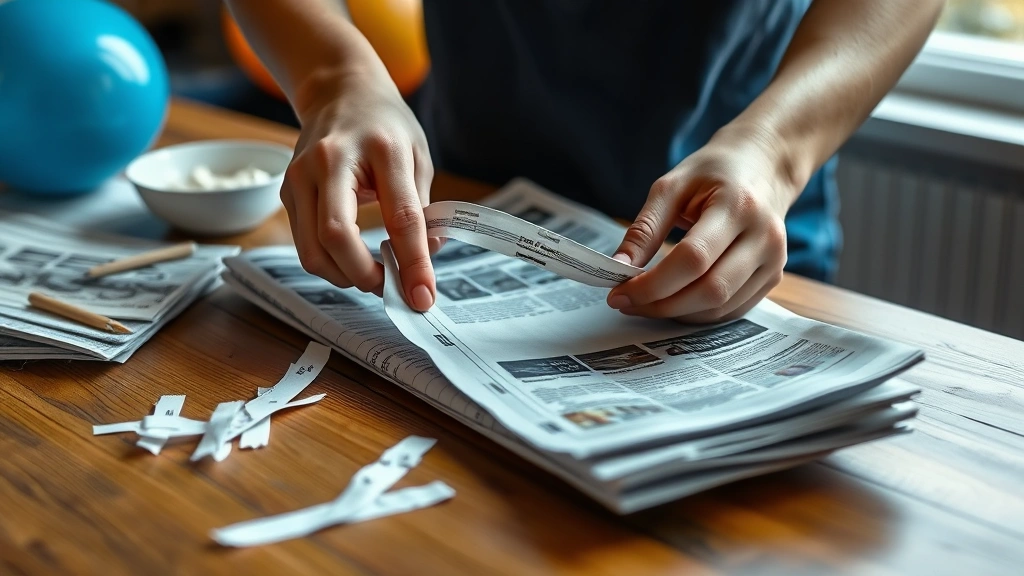
Step 1: Prepare Your Paper
Tear your newspaper (don’t cut—torn edges blend better) into strips about 1-2 inches wide and 4-6 inches long. The exact size doesn’t matter as much as consistency. Aim for roughly the same size so they layer evenly. Have a pile ready before you start.
Step 2: Apply the First Layer
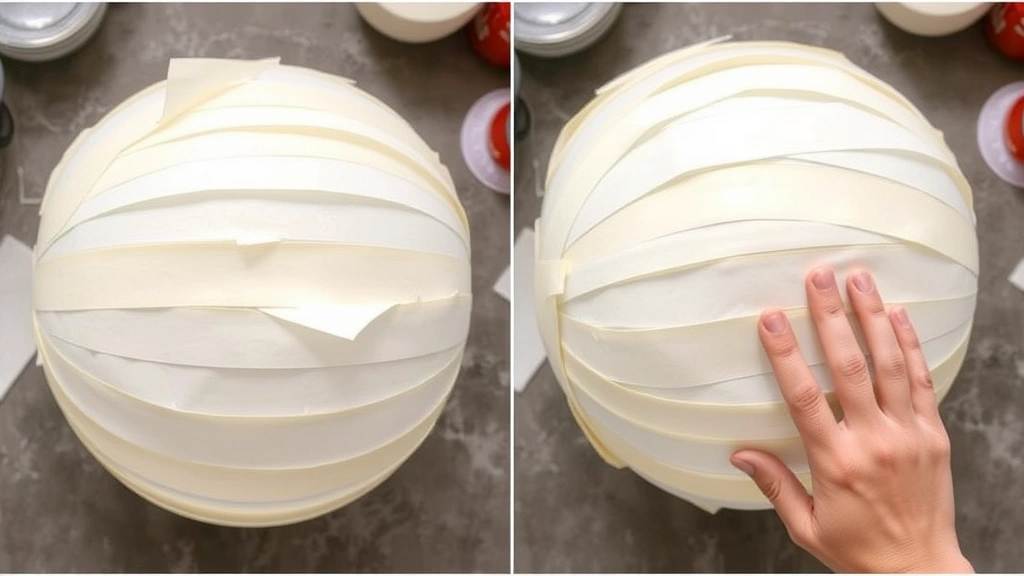
This is critical. Your first layer sets the tone for the entire project. Take a paper strip, dip it into your paste, and run it between your fingers to remove excess paste. You want it saturated but not dripping. If it’s dripping, you’ve got too much paste on it.
Smooth the strip onto your base form, overlapping slightly with the next strip. Use your fingers or a brush to smooth out air bubbles and wrinkles. Think of it like applying wallpaper—you want good contact with the base and no gaps.
Step 3: Build Your Layers
Once you’ve covered your base with one layer, do it again. And again. Most projects need 4-8 layers to be structurally sound. Here’s the thing: more layers = stronger final product, but also longer drying time.
A useful technique: alternate the direction of your strips with each layer. One layer goes horizontally, the next vertically, the next diagonally. This creates a cross-grain effect that strengthens the final product—same principle as plywood.
Step 4: Check Your Progress
Every couple of layers, step back and look at your work. Are there thin spots? Gaps? Wrinkles that need smoothing? Now’s the time to fix them. Once everything dries, it’s harder to add patches.
Safety Note: If you’re using flour paste, wash your hands regularly. While flour paste is non-toxic, it can get messy and attract pests if left sitting around. Keep your workspace clean.
The whole process is meditative. There’s no rush. You can do a few layers, take a break, come back later. The paste will stay usable for hours.
Drying and Curing Your Project
This is where patience becomes your best friend. Paper mache doesn’t dry fast, and that’s actually okay—slower drying means stronger bonding.
Drying Time: A thin project (like a mask) might dry in 24-48 hours. A thick project (like a large piñata) can take a week or more. The thicker your layers, the longer it takes. This isn’t something you can speed up with an oven or heat gun without risking warping or cracking.
Where to Dry: Find a warm, dry place with decent air circulation. A shelf in a garage, a corner of a room, or even outside on a dry day works. Avoid damp basements or humid bathrooms. If you’re in a humid climate, consider running a fan nearby to help with air circulation.
How to Tell It’s Dry: The entire project should feel light and solid. Tap it with your knuckles—it should sound hollow and firm, not soft or spongy. If any part feels damp to the touch, it needs more time.
The Hardening Phase: Even after your project feels dry, it’s still curing. The paste inside is continuing to set. Wait at least 24 hours after it feels completely dry before painting or handling it roughly. This ensures maximum strength.
If you built on a balloon base and want to remove the balloon, you can do this once the paper mache is completely dry. Carefully deflate it with a needle and pull it out. Your paper mache shell will hold its shape.
Finishing Touches and Paint
Once your project is fully dry, it’s time to make it look intentional.
Sanding: If you want a smooth finish, lightly sand the surface with fine-grit sandpaper (150-220 grit). This removes rough spots and loose bits of paper. Don’t sand too aggressively—you’ll just damage the surface. A light touch is all you need.
Priming (Optional): If you’re painting with bright colors or want a uniform base, consider a primer. Think of it like the primer you’d use on drywall—it gives paint something to grip and hides the newspaper underneath. You can use spray primer, brush-on primer, or even white acrylic paint thinned with water. According to Family Handyman, a good primer ensures better paint adhesion on porous surfaces.
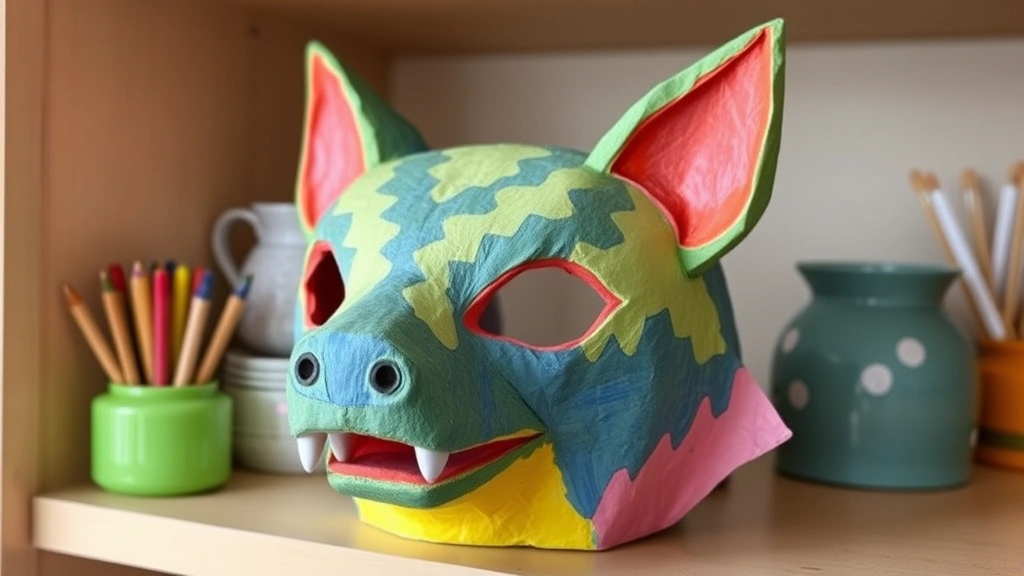
Painting: Use acrylic paint—it’s water-based, dries fast, and works beautifully on paper mache. You can use a brush, sponge, or spray paint depending on the effect you want. Two coats usually gives good coverage. Let each coat dry before applying the next.
Sealing: If you want your project to last longer and resist moisture, apply a clear sealant like polyurethane or acrylic sealer. This is especially important for projects that might be handled frequently or exposed to humidity. A couple of coats will do it.
Details and Decoration: Now’s when you can add googly eyes, glitter, markers, or whatever else fits your vision. Let your creativity run here—there’s no wrong answer.
Common Mistakes and How to Avoid Them
Mistake 1: Too Much Paste
This is the number-one issue. Soggy paper mache takes forever to dry and can get moldy. Your strips should be wet but not dripping. If you’re wringing them out and water is coming out, you’ve got too much paste. A quick squeeze between your fingers should fix it.
Mistake 2: Not Enough Layers
If your project feels fragile after drying, you didn’t use enough layers. It’s not a disaster—just add more. Apply a new layer of paste and strips over the dry surface. It’ll bond just fine.
Mistake 3: Uneven Drying
Thick spots dry slower than thin spots. If you’ve got a really thick area, consider rotating your project or adjusting its position so air can get to all sides. This prevents soft spots.
Mistake 4: Ignoring the Base**
A wobbly or unstable base makes everything harder. If your balloon pops too early or your cardboard box collapses, you’re fighting an uphill battle. Choose a solid base and reinforce it if needed.
Mistake 5: Rushing the Drying Process
I get it—you want to see the finished product. But forcing it with heat or not waiting long enough means cracks, weak spots, and disappointment. Patience pays off here.
Mistake 6: Using Newspaper with Heavy Ink**
Some newspaper inks can bleed through paint, especially lighter colors. If you’re worried about this, use the comics section or switch to paper towels for the final layer.
For more detailed finishing guidance on similar projects, This Old House has excellent resources on surface preparation and painting techniques.
Frequently Asked Questions
Can I use wallpaper paste instead of flour paste?
– Yes, absolutely. Wallpaper paste is designed to stick paper to walls, so it works great for paper mache. It actually dries faster than flour paste. Follow the mixing instructions on the package. The downside is cost—it’s more expensive than flour or glue.
What if my paper mache project cracks while drying?
– Small cracks are normal and usually cosmetic. You can fill them with spackling compound, sanded smooth, and painted over. If you’ve got large cracks, it usually means the base shifted or you used too much paste in one area. For future projects, ensure your base is stable and paste application is even.
How long does a paper mache project last?
– It depends on conditions and use. A sealed, painted project kept indoors can last years. Exposed to moisture or handled roughly, it’ll deteriorate faster. Paper mache isn’t meant to be permanent like wood or plastic, but it’s durable enough for most decorative purposes.
Can I make paper mache with recycled paper instead of newspaper?
– Absolutely. Shredded paper, brown packing paper, paper bags—all of it works. Avoid glossy or heavily printed paper for base layers. Recycled paper is actually a great way to use up stuff you’d otherwise throw away. According to Bob Vila, repurposing materials is a smart approach to budget-friendly crafting.
Is paper mache safe for kids?
– Flour paste is completely non-toxic and safe for kids. White glue is also non-toxic. The main things to watch: kids might eat the paste (it tastes bad but won’t hurt them), and they might get it in their eyes (rinse with water if that happens). Supervise young children, and you’re fine. It’s actually a great craft for teaching kids about layering and patience.
Can I paint paper mache while it’s still damp?
– No. Wait until it’s completely dry. Painting damp paper mache will trap moisture inside, leading to mold and weak spots. Patience here is non-negotiable.
What’s the best paper mache recipe for outdoor projects?
– For outdoor work, use a paste made with white glue or wallpaper paste rather than flour. Flour can attract pests and mold in outdoor conditions. Apply a waterproof sealant like polyurethane or exterior acrylic sealer after painting. Even then, paper mache isn’t ideal for long-term outdoor exposure. It’s better suited to covered areas or temporary installations.
Can I remove the balloon from inside my paper mache project before it’s fully dry?
– You can, but it’s risky. If the paper mache isn’t strong enough yet, the structure might collapse. Wait until it’s completely dry and feels solid. Then deflate the balloon carefully with a needle and remove it. The paper shell will hold its shape.
Why does my paper mache smell bad?
– Flour paste can develop an unpleasant smell if it sits around, especially in warm conditions. This is just fermentation—it’s not dangerous but unpleasant. Prevent it by making fresh paste each day or adding salt to the mix. White glue paste doesn’t have this issue.


