

Learning how to cook beef chuck roast is one of those kitchen skills that transforms a tough, affordable cut into fall-apart-tender, deeply flavorful meat that’ll make your whole house smell amazing. Chuck roast isn’t fancy—it’s honest, working-class beef that rewards patience and proper technique. Whether you’re braising it low and slow, throwing it in a slow cooker, or roasting it in the oven, I’m going to walk you through everything you need to know to nail it every single time.
Table of Contents
Choose the Right Cut
Not all chuck roasts are created equal. When you’re standing at the butcher counter, you want a piece that’s roughly 3 to 5 pounds—big enough to feed a crowd but small enough to cook evenly. Look for marbling throughout the meat; those white lines of fat are your best friend. They’ll render during cooking and keep everything juicy. The meat should be a deep red color, not brown or gray. Ask your butcher to cut you a piece from the chuck shoulder or chuck eye—these are the prime real estate of the chuck roast world.
Chuck roast works because it’s loaded with collagen, a protein that breaks down into gelatin during long, slow cooking. This is why tough cuts become tender—it’s pure chemistry. Don’t waste money on premium cuts like ribeye or strip steak for this cooking method. Chuck is designed for braising, and that’s where it shines.
Prep Work Matters More
Pat your roast completely dry with paper towels. Moisture is the enemy of browning, and browning is where flavor lives. If your meat is wet, it’ll steam instead of sear, and you’ll miss out on that rich, caramelized crust. Take your time here—really get it dry.
Season aggressively with kosher salt and freshly ground black pepper at least 30 minutes before cooking, or even the night before. This isn’t just surface seasoning; salt penetrates the meat and helps it retain moisture. Don’t be shy. You can always taste and adjust later, but you can’t unsalt meat.
Cut your vegetables into large chunks—carrots, celery, onions, garlic. These aren’t going to stay pretty, so don’t waste time with precision cuts. They’re flavor builders and will break down during cooking anyway. Having everything prepped before you start cooking makes the actual process smooth and stress-free.
Sear for Deep Flavor
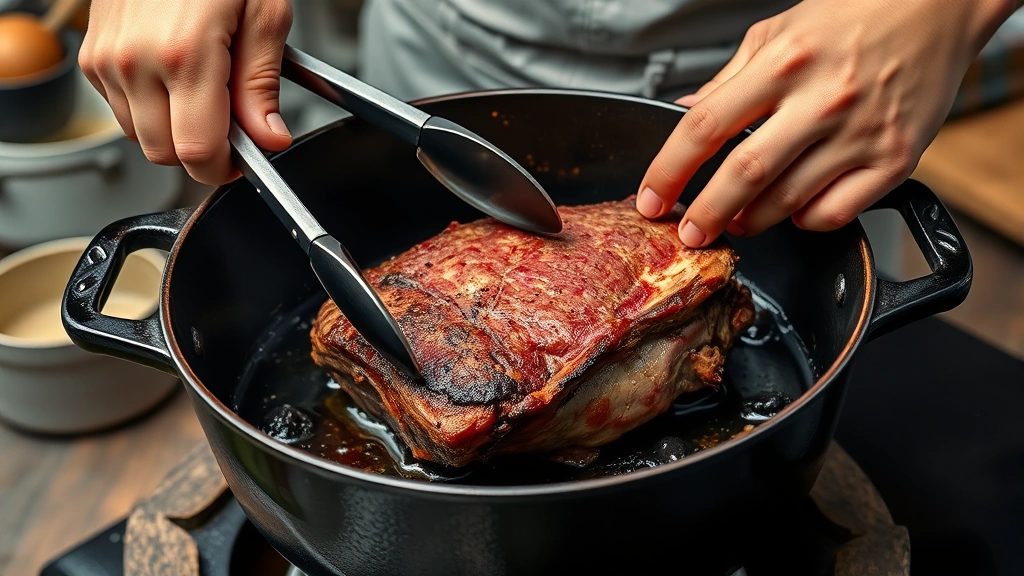
Heat a heavy-bottomed Dutch oven or large pot over medium-high heat. Add a splash of neutral oil—vegetable or canola works great. You want it hot enough that it shimmers and moves easily across the pan. This is non-negotiable if you want real flavor.
Place your roast in the pan and don’t touch it. Seriously, walk away. Let it sit for 3 to 4 minutes until it develops a dark brown crust. Flip it and repeat on the other side. Work on all sides until you’ve got a nice caramelized exterior. This takes about 10 to 12 minutes total, but it’s the foundation of everything that follows.
The Maillard reaction—that browning process—creates hundreds of flavor compounds that make beef taste like beef. You can’t skip this step if you want depth and richness. Remove the roast to a plate and set it aside.
The Braising Method
In the same pot with the browned bits stuck to the bottom (that’s liquid gold), add your chopped vegetables. Stir them around for 2 to 3 minutes until they start to soften and release their aromas. Add tomato paste if you want extra depth, and cook it for another minute.
Pour in your liquid—beef broth, red wine, or a combination. You want enough to come about halfway up the roast, not covering it completely. Add herbs like thyme, bay leaves, and rosemary. Bring everything to a simmer.
Return the roast to the pot, cover it with a lid, and transfer it to a 325°F oven. This is where patience becomes your secret weapon. Let it cook for 3 to 4 hours, turning it halfway through. The meat is done when a fork slides through it like butter with zero resistance.
Similar to how you’d approach baking pork chops in the oven, low and slow is the name of the game with beef chuck roast. The lower temperature ensures even cooking without drying out the exterior while the interior cooks.
Slow Cooker Approach
If you prefer hands-off cooking, a slow cooker is your friend. Sear your roast using the method above, then place it in the slow cooker with your vegetables and liquid. Set it to low and walk away for 8 to 10 hours. Set it to high and you’re looking at 4 to 6 hours.
The advantage here is convenience—you can prep everything in the morning and come home to dinner ready to go. The disadvantage is less control over the cooking process and a slightly less developed crust on the meat. But honestly? It still tastes fantastic.
Make sure your slow cooker is at least three-quarters full. Too much liquid and your sauce will be thin and watery. Too little and things might dry out. Aim for liquid that comes about halfway up the meat.
Oven Roasting Technique
For a slightly different approach, try dry-roasting. After searing, place your roast in a roasting pan with vegetables scattered around it. Cover tightly with foil and roast at 300°F for about 4 hours. You’re not braising here—there’s minimal liquid, so the meat cooks in its own steam and rendered fat.
This method gives you a drier exterior and more concentrated beef flavor, though you won’t have a sauce at the end. It’s perfect if you want to serve the roast sliced with gravy on the side, similar to how you might prepare breaded chicken with pan sauce.
Check doneness with a meat thermometer—you’re aiming for 190 to 210°F in the thickest part. At this temperature, the collagen has fully converted to gelatin, and the meat will shred easily.
Testing for Doneness
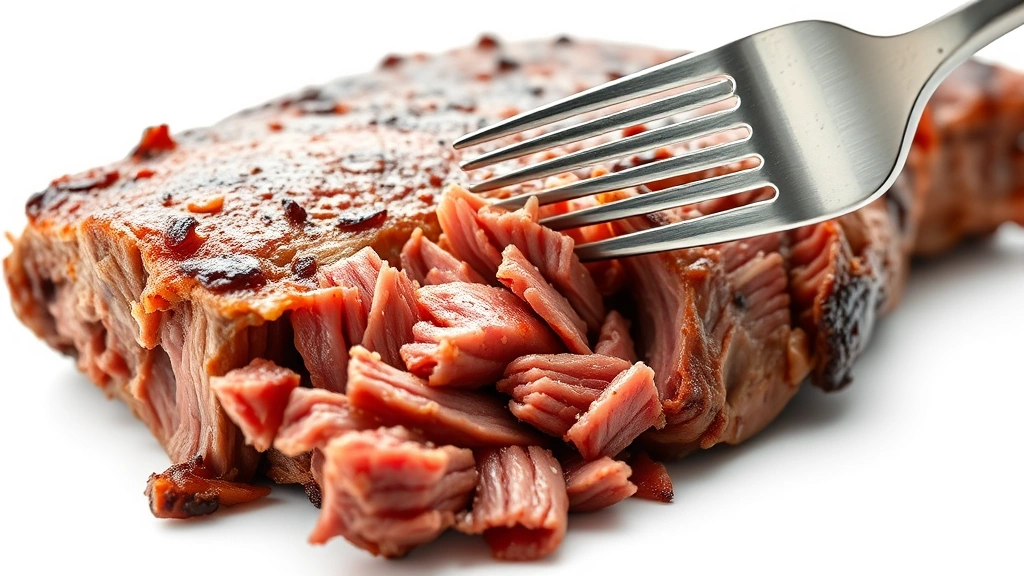
Forget about cooking time charts. Every roast is different, and every oven runs differently. Instead, use the fork test: insert a fork into the thickest part of the meat and twist gently. If it shreds and falls apart, you’re done. If it resists, give it more time.
A meat thermometer is your backup. You’re looking for 190°F minimum, but 205°F is even better. At this temperature, the connective tissue has completely broken down, and you’ll get that melt-in-your-mouth texture.
Don’t rush this. Undercooked chuck roast will be tough and chewy. It needs time for the collagen to convert to gelatin. This isn’t like steak where medium-rare is the goal. Chuck roast wants to be well-done, and that’s when it’s at its best.
Resting and Serving
Once your roast is tender, remove it from the pot and let it rest for 10 to 15 minutes. This allows the muscle fibers to relax and reabsorb some of the juices. If you cut into it immediately, all those juices run out onto the plate instead of staying in the meat.
While the roast rests, strain your cooking liquid into a saucepan. Skim off excess fat if you want a lighter sauce, or leave it for more flavor. Bring it to a simmer and let it reduce by about a quarter. This concentrates the flavors and thickens the sauce slightly. Taste it and adjust seasoning with salt and pepper.
Slice or shred your roast depending on what you’re making. For a traditional pot roast, slice it against the grain into quarter-inch pieces. For tacos or sandwiches, shred it with two forks. Serve it with that beautiful sauce spooned over top, alongside vegetables like grilled asparagus or roasted root vegetables.
Common Mistakes to Avoid
The biggest mistake people make is skipping the searing step. Yes, it takes extra time and dirties another pan, but it’s absolutely worth it. That crust is flavor. Don’t skip it.
The second mistake is cooking at too high a temperature. High heat will toughen the exterior before the interior becomes tender. Low and slow is the mantra. 325°F in the oven, or low on the slow cooker. Period.
Third mistake: not seasoning enough. Chuck roast is a blank canvas. It needs salt, pepper, and aromatics to shine. Be generous with your seasoning, and don’t be afraid to taste and adjust as you go.
Fourth: cutting into it too early. I know you’re excited, but let it rest. Those 10 to 15 minutes make a huge difference in juiciness and texture.
Flavor Variations Worth Trying
Once you’ve mastered the basic technique, experiment. Add red wine for a French-style braise. Try hoisin sauce and ginger for an Asian-inspired version. Make it spicy with chipotle peppers and cumin. The beauty of chuck roast is that it’s incredibly versatile.
Try General Gau’s sauce for a takeout-style variation that’ll blow your mind. Or keep it simple with just beef broth, carrots, celery, and onions—sometimes simple is best.
For something different, try boiling techniques adapted for beef—though you’ll want to modify the approach since chuck roast benefits from browning first. The principle of gentle, moist heat still applies.
Don’t be afraid to make it your own. Chuck roast is forgiving and wants to taste good. Trust your instincts, taste as you go, and adjust seasoning and flavors to match what you love.
Frequently Asked Questions
How long does chuck roast take to cook?
In the oven at 325°F, expect 3 to 4 hours. In a slow cooker on low, 8 to 10 hours. On high, 4 to 6 hours. Time varies based on size and your specific equipment, so use tenderness as your guide rather than the clock.
Can I cook chuck roast at a higher temperature to save time?
Technically yes, but you’ll sacrifice quality. Higher heat will toughen the exterior before the interior becomes tender. The low-and-slow method isn’t just tradition—it’s science. Stick with 325°F or lower for best results.
What’s the difference between chuck roast and pot roast?
Chuck roast comes from the shoulder of the cow, while pot roast is a cooking method that can use various cuts. Chuck roast is ideal for pot roast because of its marbling and connective tissue content, but you can make pot roast with other cuts too.
Can I freeze leftover chuck roast?
Absolutely. Store it in an airtight container with the cooking liquid for up to three months. The liquid protects the meat from freezer burn. Thaw it in the refrigerator overnight and reheat gently on the stovetop or in the oven.
What should I serve with chuck roast?
Mashed potatoes, egg noodles, or crusty bread are classics. Roasted vegetables, steamed green beans, or a simple salad work great too. The cooking liquid makes an excellent sauce, so don’t waste it.
Why is my chuck roast tough?
Either it didn’t cook long enough, or it cooked too fast at too high a temperature. Chuck roast needs time for collagen to break down into gelatin. If it’s tough, it needs more cooking time. Use the fork test to check for true tenderness.
The Bottom Line
Cooking a perfect beef chuck roast comes down to three things: proper searing for flavor, low-and-slow cooking for tenderness, and patience. There’s no magic trick, no secret ingredient. Just good technique and time. Start with a quality roast, season it well, sear it hard, and let the oven do the work. In a few hours, you’ll have meat so tender and flavorful that people will think you spent all day in the kitchen. And honestly? You’ll know better, but let them think it anyway.


