
Learning how to cook beef brisket in oven is one of those skills that separates weekend warriors from genuine kitchen masters. This isn’t fancy restaurant territory—it’s honest, straightforward cooking that transforms a tough cut of meat into something so tender it falls apart at the touch of a fork. If you’ve been intimidated by brisket, thinking it requires a smoker or special equipment, I’ve got great news: your regular kitchen oven is all you need.
Table of Contents
Choosing the Right Brisket
The foundation of great oven-cooked brisket starts at the butcher counter. You’re looking for a whole packer brisket—that’s the entire cut with both the flat and point muscles intact. This typically weighs 12-16 pounds and gives you the best texture and flavor development during cooking.
Don’t settle for the lean flat alone. Yes, it’s easier to slice, but the point muscle contains more marbling and fat, which is your secret weapon for tenderness. That intramuscular fat renders during the long, slow cooking process and keeps everything moist. Look for meat with a deep red color and white (not yellow) fat. Yellow fat indicates older meat that’s been sitting around too long.
Marbling—those white streaks running through the meat—is your friend here. It’s what keeps the brisket from drying out during the 4-6 hour cooking marathon. Prime grade brisket is ideal, but a good quality choice grade works fine too if Prime isn’t available or breaks the budget.
Prep and Seasoning Secrets
Here’s where most home cooks go wrong: they overthink the seasoning. You don’t need some complicated dry rub with seventeen ingredients. Keep it simple with salt, pepper, and maybe some garlic powder and paprika. The meat itself is the star—don’t bury it.
Pat your brisket completely dry with paper towels about 30 minutes before cooking. Moisture on the surface prevents browning, and browning is non-negotiable. It creates a flavorful crust through the Maillard reaction—that’s the chemical process that makes seared meat taste incredible.
Season generously on all sides, getting into the fat cap. Don’t be shy with the salt; it helps the meat retain moisture. Let the seasoned brisket sit at room temperature for 30-45 minutes before it hits the oven. Cold meat cooks unevenly, and you want consistent tenderness throughout.
Temperature and Timing Guide
Set your oven to 300°F. This low temperature is absolutely critical. Higher heat will cause the outer layers to dry out before the interior becomes tender. You’re aiming for gentle, even cooking that breaks down the tough collagen into gelatin without squeezing out moisture.
General rule: plan for about 1 hour of cooking time per pound of meat. A 12-pound brisket typically needs 12-14 hours total. Yes, that’s a long time, but most of it is unattended. You’ll sear it first (about 20 minutes), then braise it low and slow (the remaining time).
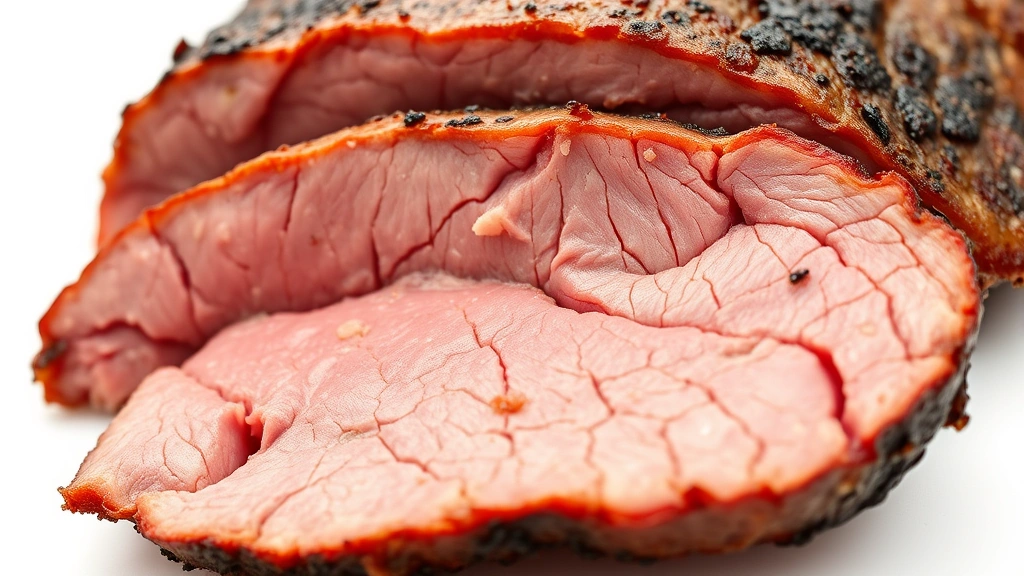
The exact time depends on several factors: your oven’s actual temperature (many run hot or cold), the brisket’s thickness, and how tender you want it. The meat’s done when a fork pierces it easily and it jiggles slightly when you shake the pan. That jiggle indicates properly rendered fat and broken-down connective tissue.
Why Braising Liquid Matters
You’ll be cooking this brisket in liquid—that’s braising, and it’s the secret to restaurant-quality results. The liquid keeps the surface from drying out and creates steam that helps break down tough fibers. It also becomes an incredible sauce or gravy base.
A simple braising liquid works best: beef broth, onions, garlic, bay leaves, and maybe some tomato paste. Some folks add Worcestershire sauce or apple cider vinegar for depth. The acidic component helps tenderize the meat while adding complexity to the final sauce.
Don’t use water alone—it’s flavorless and misses the opportunity to build taste. A 50/50 mix of beef broth and beef stock works beautifully. You’ll need enough liquid to come about halfway up the sides of the brisket. Too much and you’re basically boiling it (bad); too little and you risk drying out the top (also bad).
The Low and Slow Cooking Process
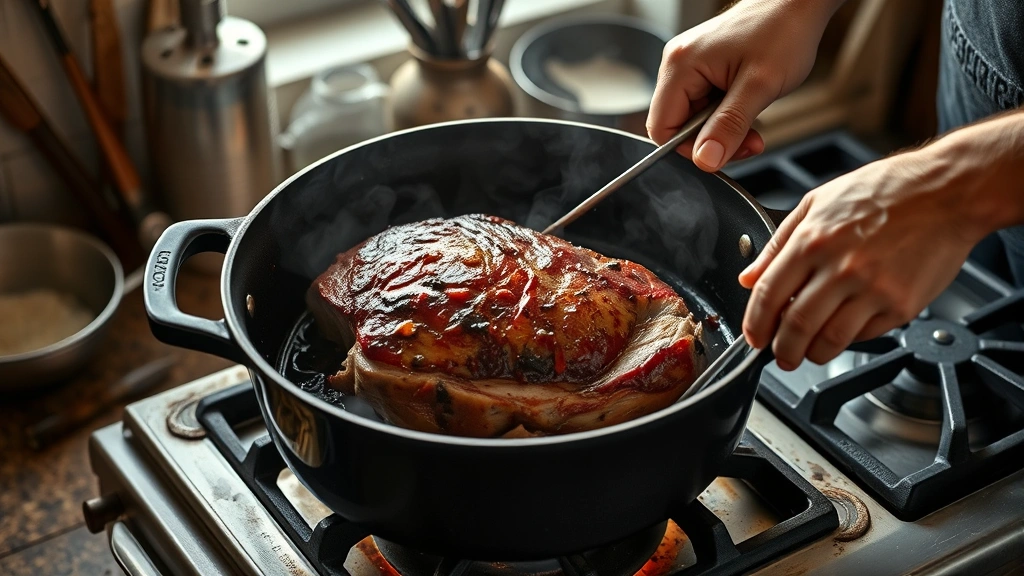
Start by searing your seasoned brisket in a heavy Dutch oven on the stovetop over medium-high heat. Fat-side down first, about 5 minutes per side until you get a dark brown crust all over. This step isn’t optional—it builds flavor through browning and helps render some of that fat cap.
Once seared, remove the brisket and set it aside. Sauté your onions and garlic in the same pot to deglaze it and build more flavor. Pour in your braising liquid, scraping up all those browned bits stuck to the bottom. Those flavorful bits are liquid gold.
Return the brisket to the pot, fat-side up this time. Cover with foil first, then place the lid on top. The foil prevents the lid from getting stuck by steam condensation—a pro tip that saves frustration later. Slide the whole pot into your preheated 300°F oven.
Check it every couple hours. You’re not stirring or flipping; you’re just monitoring that the liquid stays at a gentle simmer. If it’s boiling vigorously, lower the oven temperature by 25 degrees. If it’s barely simmering, raise it slightly. You want small, lazy bubbles breaking the surface.
Resting and Slicing Technique
When the brisket is fork-tender, pull it from the oven and let it rest in its braising liquid for at least 15 minutes. This resting period is crucial—it allows the meat fibers to relax and reabsorb some of the juices they’ve released during cooking. Skip this and you’ll have dry, stringy results.
Transfer the brisket to a cutting board and tent it loosely with foil. Let it rest for another 10 minutes while you strain the braising liquid and skim the fat from the top (or refrigerate overnight and lift the solidified fat off the next day).
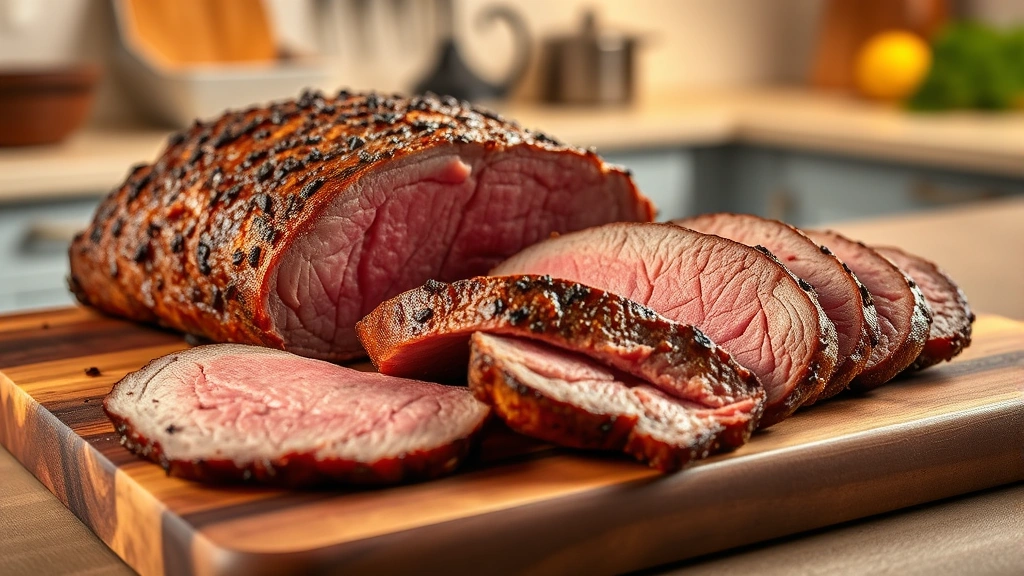
Here’s the technique that separates pros from amateurs: slice against the grain. The flat and point have different grain directions, so pay attention. Use a sharp knife and make thin, even slices—about 1/4 inch thick. The brisket should practically fall apart under the knife if it’s cooked properly. If you’re having to saw through it, something went wrong (usually insufficient cooking time or temperature too high).
Troubleshooting Common Mistakes
Tough, chewy brisket usually means insufficient cooking time or temperature too high. Brisket needs time for collagen to break down into gelatin. You can’t rush this process. If yours came out tough, you didn’t cook it long enough. Next time, aim for a full fork-tender test before pulling it out.
Dry brisket indicates either too much heat (which causes rapid moisture loss) or cooking uncovered (allowing steam to escape). Always braise covered, and always keep that liquid at a gentle simmer, not a rolling boil. The braising liquid is your insurance policy against dryness.
Fat not rendering properly? Make sure you’re cooking low enough and long enough. The fat cap needs time to break down and distribute through the meat. If you see a thick, rubbery fat layer after cooking, you didn’t go long enough. Aim for that fat cap to be soft and pliable, almost melting.
If your brisket is falling apart too much when slicing, you actually cooked it perfectly—that’s what you want. If you can’t slice it cleanly because it’s disintegrating, it’s overdone, but honestly, that’s still delicious. Chop it up and use it for sandwiches or tacos.
Serving and Pairing Ideas
Oven-cooked brisket is incredibly versatile. Serve it sliced with mashed potatoes and the reduced braising liquid as gravy. The tender meat and rich sauce are pure comfort food. For something lighter, pair it with a fresh green salad and crusty bread to soak up the juices.
Brisket sandwiches are legendary for a reason. Pile sliced brisket on a toasted roll, top with coleslaw, and drizzle with the pan sauce. If you want to get fancy, try an au poivre sauce recipe for a sophisticated twist on classic brisket.
Leftovers are your friend. Shred the remaining brisket and use it for tacos, nachos, or grain bowls. The meat reheats beautifully in the braising liquid, staying moist and flavorful for days. You can also freeze it for up to three months.
Temperature pairing: this is hearty, rich food that pairs well with full-bodied red wines like Cabernet Sauvignon or Malbec. If you prefer beer, go for something with good body—a brown ale or porter complements the deep, savory flavors beautifully. For non-alcoholic options, a good quality beef broth or rich tomato juice works in a pinch.
Frequently Asked Questions
How long does beef brisket take to cook in the oven?
Plan for approximately 1 hour per pound at 300°F. A 12-14 pound brisket typically takes 12-14 hours total, including searing time. The exact duration depends on your specific oven, the brisket’s thickness, and your desired tenderness level. Always test for doneness with a fork rather than relying solely on time.
Can you cook brisket at a higher temperature to save time?
Technically yes, but you’ll sacrifice quality. Cooking at 325°F might shave an hour or two off the process, but the meat won’t be as tender and the braising liquid won’t develop the same depth of flavor. Brisket requires low heat to properly break down collagen into gelatin. Higher temperatures dry out the exterior before the interior becomes tender.
What’s the difference between oven brisket and smoked brisket?
The cooking method and flavor profile differ significantly. Smoked brisket develops a smoke ring and distinct smoky flavor from wood smoke. Oven brisket relies on braising liquid and browning for flavor development. Both can be delicious—oven brisket is more accessible for home cooks without special equipment. If you’re interested in other oven cooking techniques, check out our guide on how long to cook ribs in oven for similar low-and-slow methods.
Should brisket be cooked fat-side up or down?
Sear it fat-side down first to render some fat and create a crust. For the braising portion, position it fat-side up so the melting fat bastes the meat as it cooks. This is the optimal approach for maximum tenderness and flavor distribution throughout the meat.
Can you cook brisket without braising liquid?
Not recommended. The braising liquid serves multiple purposes: it prevents the meat from drying out, creates steam that helps tenderize tough fibers, and provides the base for a delicious sauce. Dry-roasting brisket in the oven typically results in a tough, dried-out exterior before the interior becomes tender. The liquid is essential to the process.
How do you know when brisket is done cooking?
The fork-tender test is your best indicator. Pierce the thickest part of the flat with a fork—it should slide through with minimal resistance. The meat should jiggle slightly when you shake the pan, indicating properly rendered fat and broken-down connective tissue. A meat thermometer should read around 190-203°F in the thickest part, but the fork test is more reliable.
Can you cook brisket overnight in the oven?
Yes, many home cooks use this approach. Set your oven to 250°F and plan for longer cooking time—potentially 14-16 hours for a large brisket. Start in the evening, and you’ll have finished brisket by morning. Just ensure your oven has reliable temperature control and check it periodically to ensure the braising liquid maintains a gentle simmer.
What should the internal temperature of brisket be?
Aim for 190-203°F in the thickest part of the flat. However, tenderness matters more than hitting a specific temperature. A brisket at 185°F that’s fork-tender is better than one at 205°F that’s still tough. Use the meat thermometer as a guide, but rely on the fork test for final doneness determination.


