
Learning how to contour your face is one of the best-kept secrets for transforming your appearance without surgery or filters. Whether you’re heading to a special event or just want to enhance your natural features, face contouring uses simple makeup techniques to add dimension, definition, and balance to your face shape. Think of it like using light and shadow to sculpt—and the best part? You can learn it in an afternoon.
Table of Contents
- Understanding Face Contouring Basics
- Identify Your Face Shape First
- Gather Your Contouring Tools
- Prep Your Skin Properly
- Apply Your Base Foundation
- The 5-Step Contouring Process
- Blending: The Secret Weapon
- Highlight for Maximum Impact
- Avoid These Common Mistakes
- Practice Tips for Beginners
- Frequently Asked Questions
Understanding Face Contouring Basics
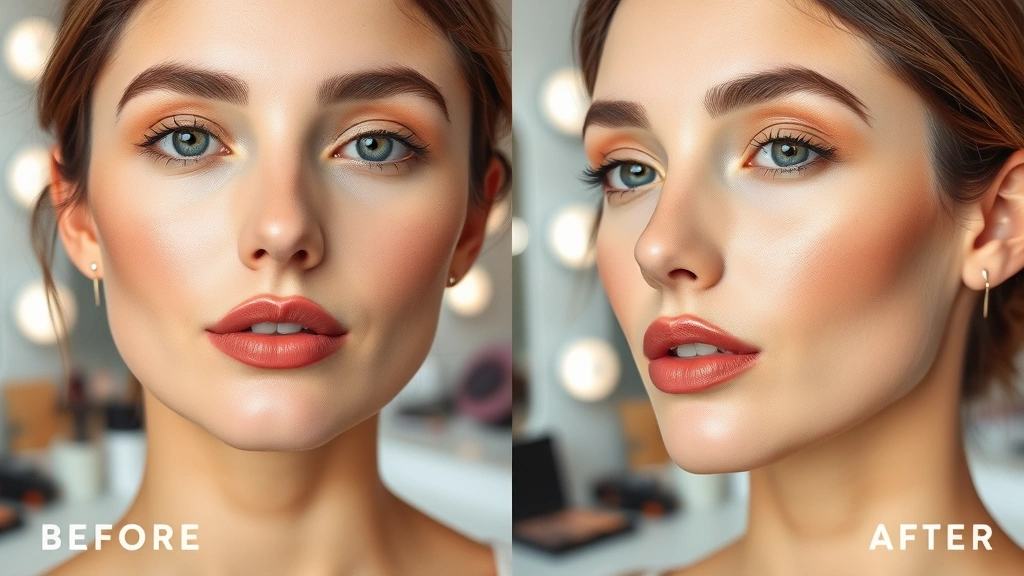
Face contouring is fundamentally about creating the illusion of shadows and highlights using makeup. Darker shades (contour) recede and make areas appear smaller or less prominent, while lighter shades (highlights) bring features forward and make them pop. It’s the same principle makeup artists have used for decades on film sets and runways. The beauty of contouring is that it’s completely customizable to your unique face—there’s no one-size-fits-all approach. You’re essentially using makeup as a sculpting tool to enhance what you already have.
Identify Your Face Shape First
Before you start applying anything, you need to know your face shape. Are you working with a round face, square jaw, oval features, or a heart-shaped face? Your face shape determines where you’ll apply contour and highlight. For example, if you have a round face, you’ll want to contour along the sides of your cheeks to create more definition. With a square face, softening the jawline and temples becomes priority. Take a selfie straight-on, look in the mirror, and trace your face outline with your finger. This simple step makes everything else fall into place. Understanding your unique geometry is the foundation of successful contouring.
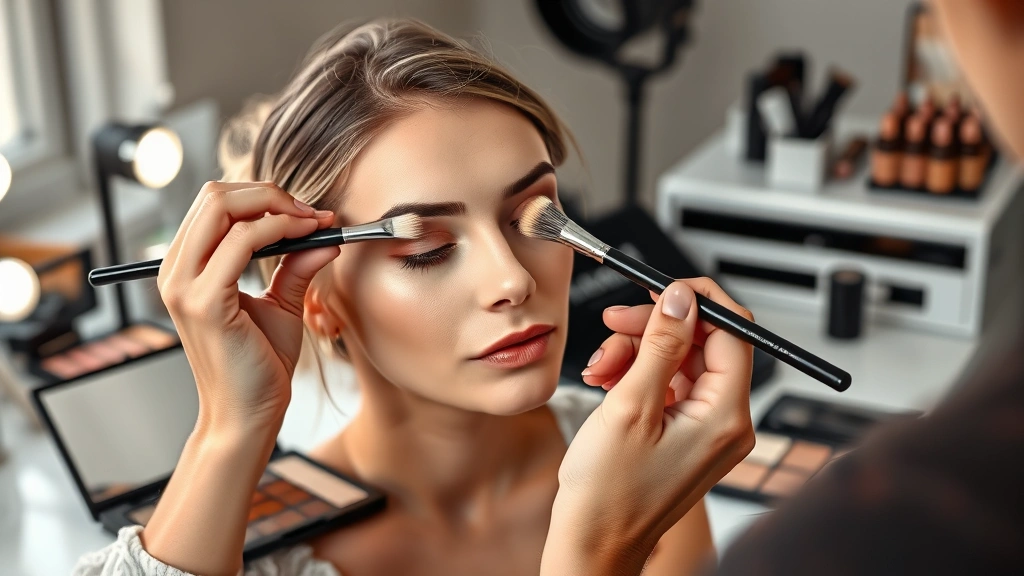
Gather Your Contouring Tools
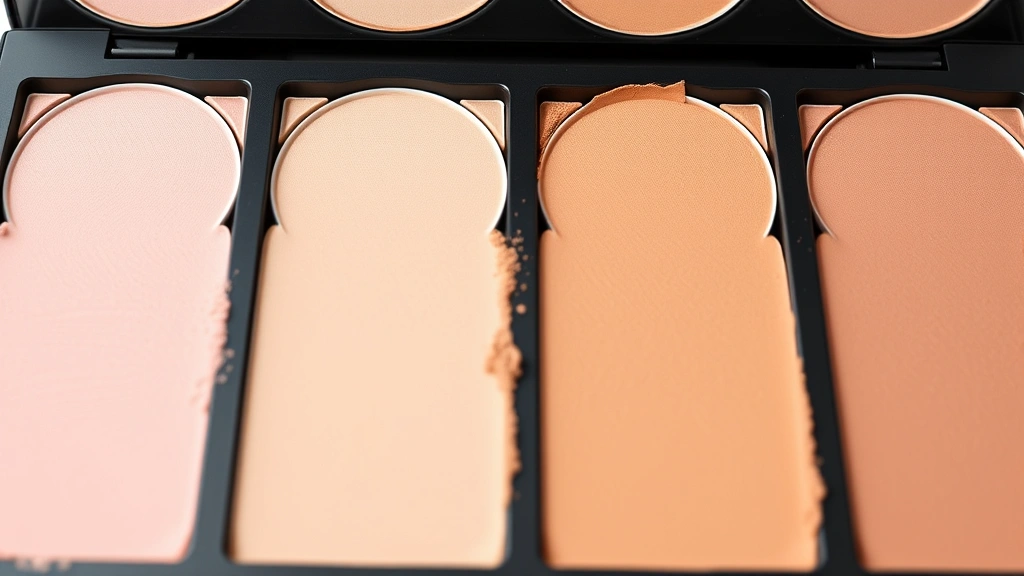
You don’t need a massive makeup collection to start contouring. Here’s what actually matters: a contour shade (usually 2-3 shades darker than your skin tone), a highlight shade (1-2 shades lighter), brushes or beauty sponges for application, and a good blending tool. Cream contour works beautifully for beginners because it’s more forgiving and blends easier than powder. You’ll want a fluffy blending brush, a smaller angled brush for precise application, and maybe a damp beauty sponge for seamless blending. Pro tip: quality brushes make a massive difference in your results. You can find beginner-friendly kits at any drugstore, and they work just fine while you’re learning.
Prep Your Skin Properly
Contouring works best on a clean, moisturized canvas. Start with a gentle cleanser, pat your skin dry, and apply your regular moisturizer. If you have oily skin, use a lightweight, oil-free moisturizer. Wait about a minute for it to sink in, then apply a primer. A good primer creates a smooth surface for makeup application and helps everything last longer throughout the day. Think of primer as the base coat before painting a wall—it makes everything look better and last longer. This step might seem extra, but it’s genuinely the difference between contouring that looks blended and professional versus patchy and obvious.
Apply Your Base Foundation
Your foundation is your blank canvas. Choose a shade that matches your skin tone perfectly—not too light, not too dark. Apply it all over your face using a damp beauty sponge or brush, blending outward from the center. Make sure you get your jawline and temples evenly covered. A full-coverage foundation works best for contouring because it gives you a uniform base to work from. Don’t skip this step thinking you can contour without it. The foundation creates the neutral starting point you need. Blend thoroughly until there are no visible edges. This is also a good time to set your under-eye area with a light powder if you tend to get creasy.
The 5-Step Contouring Process
Step 1: Contour Your Cheekbones
This is the most noticeable area to contour. Suck in your cheeks to find your cheekbone, then apply contour in the hollow underneath using an angled brush. Apply in upward strokes toward your temples. This creates definition and makes cheekbones appear more prominent. Blend well so there are no harsh lines.
Step 2: Define Your Jawline
Apply contour along your jawline, starting from under your chin and working backward toward your ears. This creates a sharper, more defined jaw. Use light pressure and blend upward into your cheeks. The goal is subtle definition, not a dark stripe.
Step 3: Narrow Your Nose (Optional)
If you want to make your nose appear slimmer, apply thin lines of contour down both sides of your nose. Keep it light and blend immediately. Skip this step if you’re happy with your nose—not every feature needs contouring.
Step 4: Contour Your Temples
Apply contour to your temples in circular motions to add dimension to the sides of your face. This helps frame your face and can make it appear less round. Blend thoroughly into your cheeks and hairline.
Step 5: Define Your Forehead
Apply contour along your hairline, especially at the temples and sides of your forehead. This creates the illusion of a smaller forehead and adds overall dimension. Blend upward into your hairline so it doesn’t look like a dark line.
Blending: The Secret Weapon
Blending is honestly where the magic happens. A perfectly applied contour that isn’t blended looks like you drew on your face with a marker. A slightly imperfect contour that’s blended beautifully looks professional. Use a clean, fluffy brush or damp beauty sponge to blend out your contour lines. Work in circular motions, feathering the edges outward. The goal is for your contour to look like a natural shadow, not a stripe. Spend more time blending than you think you need to. This is the difference between amateur and polished results. If you mess up during blending, just keep going—most mistakes disappear with proper blending.
Highlight for Maximum Impact
Now for the fun part—highlighting brings your best features forward. Apply highlighter to the high points of your face: tops of cheekbones, bridge of nose, cupid’s bow, and inner corners of eyes. Use a light hand and build gradually. You want to look dewy and dimensional, not like a disco ball. Cream highlighter blends seamlessly, while powder highlighter gives more intensity. For beginners, cream is more forgiving. Apply with your fingertip or a small brush, pressing gently onto the skin. The light reflection should catch these areas naturally, just like real light would hit your face.
Avoid These Common Mistakes
The biggest beginner mistake is applying contour too dark or too heavy. Start light—you can always add more. Another common error is not blending enough, which makes contouring obvious and unflattering. Some people also contour areas they shouldn’t based on their face shape, which can actually make features look worse. Don’t contour your entire cheek; focus on the hollows underneath. And please, don’t skip the primer and foundation—they’re not optional steps. Finally, avoid using warm-toned contour if you have cool undertones, or vice versa. The undertone of your contour should match your skin’s undertone for the most natural look. Learning from these mistakes now saves you from frustration later.
Practice Tips for Beginners
Start by practicing on days when you’re staying home. This takes the pressure off and lets you experiment without worrying about going out. Use natural lighting or a ring light to see your work clearly—bathroom lighting lies. Practice one area at a time rather than doing your whole face. Master cheekbone contouring before moving to jawline work. Take progress photos from the same angle to track improvement. Watch your face from different angles in the mirror—contouring should look good from the front and sides. Don’t compare your results to heavily filtered Instagram photos; real contouring is subtle. Give yourself grace; this skill takes practice. Most people need 5-10 attempts before it starts looking natural.
Frequently Asked Questions
Can I contour if I have sensitive skin?
Absolutely. Choose hypoallergenic, fragrance-free contour products and test them on a small area first. Cream contours are often gentler than powders. If you’re concerned, consult your dermatologist before starting.
How long does contouring take once you get good?
Once you’re practiced, contouring takes 5-10 minutes. As a beginner, expect 15-20 minutes. Speed comes with repetition and muscle memory.
Do I need expensive products to contour?
Not at all. Drugstore brands work just fine. Product quality matters less than technique and blending. Invest in good brushes before expensive makeup.
Can men contour their faces?
Contouring is for anyone who wants to enhance their features. Gender doesn’t matter. The techniques are identical regardless of who’s applying them.
What’s the difference between contouring and bronzing?
Bronzer is typically applied all over for warmth and a sun-kissed look, while contour is applied strategically to create shadows and definition. They serve different purposes.
Should I contour every day?
You don’t have to. Many people save contouring for special occasions or when they want extra definition. Daily is fine too if you enjoy it and have the time.
How do I remove contour at the end of the day?
Use your regular makeup remover or cleansing oil. Gently massage it into your face, then rinse with lukewarm water. Follow with your normal skincare routine. Don’t scrub harshly.
Final Thoughts
Learning how to contour your face is genuinely easier than it seems once you break it down into steps. You’re not doing anything complicated—just applying darker and lighter makeup strategically. The real skill is blending and understanding your unique face shape. Start simple, practice regularly, and be patient with yourself. Within a few weeks, you’ll notice significant improvement. Remember that contouring should enhance your natural features, not mask them. The goal is to look like a better version of yourself, not like someone else entirely. Once you nail the basics, you can experiment with different techniques and products. This is a skill that builds confidence because you’re literally taking control of how you present yourself to the world. Have fun with it, and don’t take it too seriously—makeup should be enjoyable, not stressful.


