
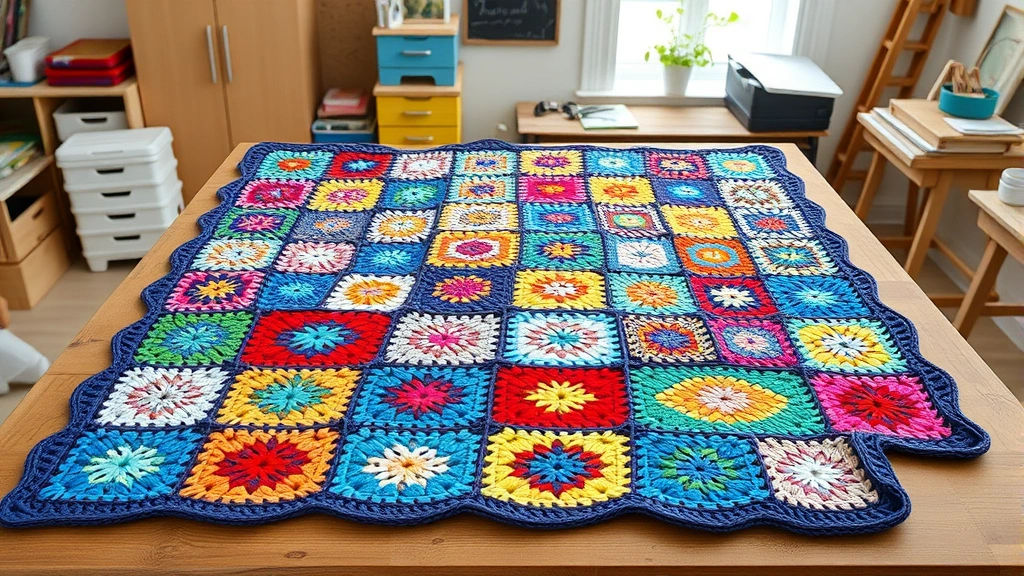
Learning how to connect granny squares is one of the most rewarding skills any crocheter can master—it transforms individual motifs into stunning blankets, afghans, and garments that look professionally finished. Whether you’re a seasoned hook-wielder or picking up your first project, there are several proven techniques that make joining squares smooth, secure, and beautiful.
Table of Contents
Five Methods Overview
Before diving into specifics, let’s talk about why connecting granny squares matters. A poor join creates visible gaps, uneven tension, and projects that don’t hold together properly. The good news? Each of these five methods has been battle-tested by thousands of crafters. Some prioritize invisibility, others prioritize speed, and a few do both. Your choice depends on your project type, yarn weight, and personal preference.
The five core methods are whip stitching, slip stitch joining, single crochet seaming, mattress stitch technique, and join-as-you-go assembly. Each produces slightly different results and requires different skill levels. Some methods create decorative seams that become design features, while others disappear almost entirely into your finished piece.
Whip Stitch Method
The whip stitch is the gold standard for invisible seams and remains the most popular choice among experienced crafters. This hand-sewing technique creates a nearly invisible join that lies completely flat against your squares.
Start by threading a yarn needle with a length of yarn matching your squares (about an arm’s length). Position two squares with their right sides facing you and edges aligned perfectly. Insert your needle through the first loop of the edge stitch on one square, then directly across into the corresponding loop on the adjacent square. The key is working through the outermost loops only—this creates that magical invisible seam.
Continue this back-and-forth motion, keeping your tension consistent but not tight. If you pull too hard, your seam will pucker and distort the squares. Think of it as gentle persuasion rather than force. Every 3-4 stitches, gently pull your yarn to close the gap, but stop before creating visible dimples.
Pro tip: Weave in your yarn ends as you go by running them through several stitches before trimming. This prevents unraveling and keeps your project tidy from the inside out.
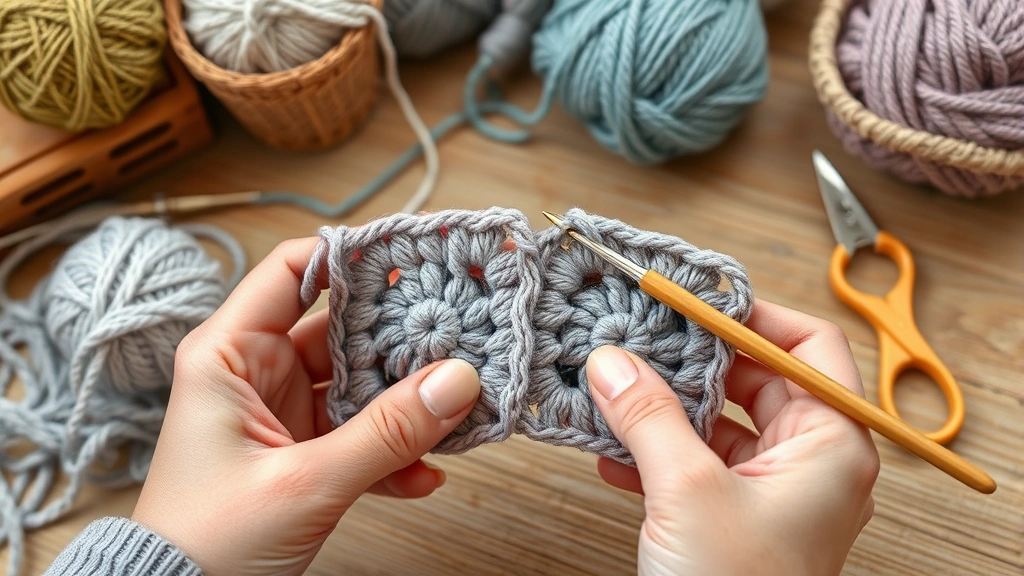
Slip Stitch Joining
Slip stitch joining is faster than whip stitching and works beautifully when you want a decorative seam that becomes part of your design. This crochet-based method keeps everything in your hands and never requires switching to a needle.
Hold two squares together with wrong sides facing (so the right sides are on the outside). Insert your crochet hook through both squares simultaneously, yarn over, and pull through both layers. Then yarn over again and pull through both loops on your hook—that’s your slip stitch. Repeat along the entire edge, working into each corresponding stitch on both squares.
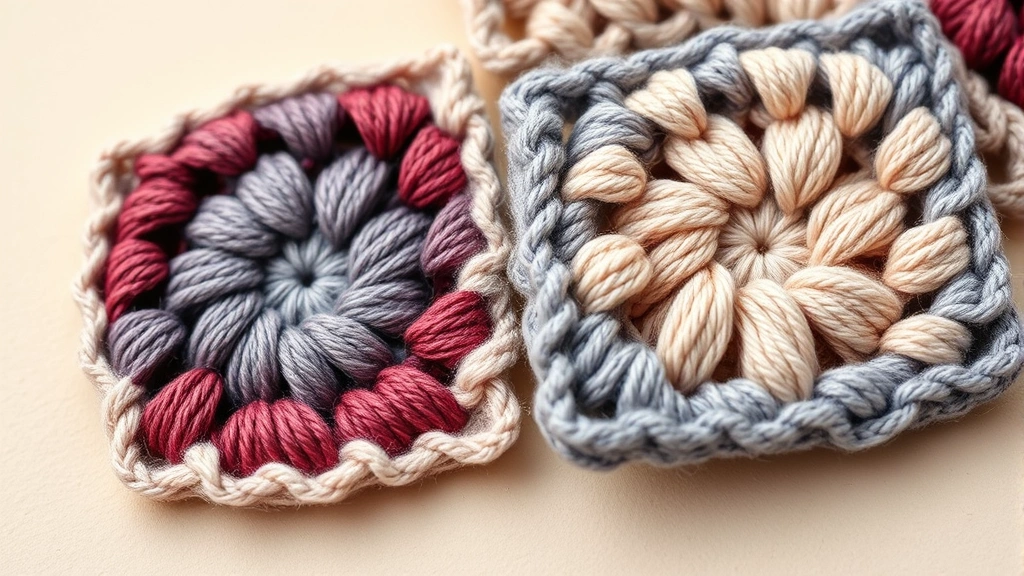
The slip stitch creates a visible ridge that can actually enhance your project’s aesthetic, especially with contrasting yarn colors. Many modern granny square blankets deliberately showcase these seams as design elements. If you want seams to disappear, use matching yarn; if you want them to pop, try a coordinating color.
One advantage of slip stitch joining is that it’s incredibly sturdy—the seam won’t separate even under stress, making it perfect for items that get heavy use like baby blankets or pet beds.
Single Crochet Seam
Single crochet seaming offers a middle ground between slip stitch and whip stitch—it’s faster than whip stitch but creates a slightly less visible seam than slip stitch. This method works beautifully for connecting granny squares when you want durability without prominent seaming.
Again, hold squares together with wrong sides facing. Insert your hook through both layers, yarn over, and pull through both. This time, yarn over and pull through just the first loop on your hook, then yarn over and pull through both remaining loops. That’s your single crochet stitch, and you repeat it all along the edge.
Single crochet seams are thicker and more textured than slip stitch seams, which means they’re slightly more visible but also more durable. They work particularly well with chunky yarns where the seam becomes a design feature rather than something you’re trying to hide.
Mattress Stitch Technique
The mattress stitch is a secret weapon for creating completely invisible seams that rival whip stitching in terms of invisibility. This technique is borrowed from knitting but translates beautifully to crochet squares.
With the mattress stitch, you work through the bars between stitches rather than through the stitch loops themselves. Position your squares side by side with right sides facing you. Using a yarn needle, insert your needle under the horizontal bar between the first and second stitch on the edge of one square. Move directly across and insert under the corresponding bar on the adjacent square. Alternate sides as you work upward.
The magic happens when you pull gently—the seam essentially zips itself closed from the inside, creating a join so invisible that people won’t believe you didn’t knit the whole thing as one piece. This method requires a bit more patience and precision than others, but the results are absolutely worth it for showcase projects.
Join As You Go
Join-as-you-go (JAYG) is the speed demon of connecting methods. Instead of completing all your squares first and then joining them, you connect each new square to the previous ones as you crochet the final round.
When you reach the final round of a new square, you don’t complete it independently. Instead, you slip stitch into corresponding stitches of adjacent completed squares while simultaneously completing your final round. This eliminates an entire step and creates a cohesive fabric from the start.
The tradeoff? JAYG requires more concentration because you’re juggling multiple squares and keeping track of which corners and edges connect to which neighbors. It’s not recommended for beginners or when you’re working with complicated color changes. But for straightforward projects with consistent squares, JAYG can cut your assembly time in half.
Choosing Your Method
So which method should you actually use? Consider these factors: yarn weight (thicker yarns look better with visible seams), project type (baby blankets need durability; decorative throws can prioritize aesthetics), your skill level, and time constraints.
For beginners, start with slip stitch or single crochet joining because they’re forgiving and you stay in crochet mode. For invisible seams on special projects, invest the time in whip stitch or mattress stitch. For speed and when you’re confident in your technique, try join-as-you-go.
Many experienced crafters use different methods for different projects. You might whip stitch a delicate lace blanket but slip stitch a chunky wool throw. There’s no one “right” answer—only the right method for your specific project.
Finishing Touches
Regardless of which method you choose, finishing your seams properly makes the difference between amateur and professional-looking results. After joining all your squares, take time to weave in every single yarn end securely. Don’t just trim them flush—weave them through at least 4-5 stitches in both directions to prevent unraveling.
Consider adding a border after connecting your squares. A simple single crochet border or shell stitch border frames your work beautifully and hides any minor seaming imperfections. This also provides an opportunity to add a pop of color or create a finished edge that looks intentional rather than accidental.
Blocking your finished piece after joining is optional but highly recommended. Wet blocking (or steam blocking for acrylic) evens out tension, smooths seams, and gives your project a polished, professional appearance. Lay your piece flat on a blocking board, pin it to shape, mist with water, and let it dry completely.
Troubleshooting Common Issues
Puckered seams? You’re pulling too tightly. Loosen your tension and let the yarn flow more naturally through your stitches. Visible gaps between squares? Make sure you’re working into every single stitch—don’t skip any, even at corners.
Uneven tension making seams look wonky? Practice on scrap squares first. Consistency comes with repetition, so don’t get discouraged if your first few seams look imperfect. Your hands will find their rhythm.
Seams coming apart? You might be using yarn that’s too thin or slippery for your yarn weight. Switch to a slightly heavier yarn for joining, or use a yarn needle with a smaller eye that grips yarn more securely.
For more detailed guidance on specific techniques, check out resources from Family Handyman’s craft section, which covers various fiber arts projects. Additionally, This Old House occasionally features DIY textile projects, and Bob Vila’s website has helpful guides for various crafting techniques.
Frequently Asked Questions
What’s the easiest method for beginners?
Slip stitch joining is the easiest because you stay in crochet mode and don’t need to switch to a needle. The learning curve is minimal, and mistakes are forgiving.
Which method creates the most invisible seams?
Whip stitch and mattress stitch create the most invisible seams. Whip stitch is slightly easier to learn, while mattress stitch produces seams that are nearly impossible to detect once complete.
Can I use different joining methods in the same project?
Absolutely. Many crafters mix methods—perhaps using slip stitch for speed on internal joins and whip stitch for the visible edges. Just maintain consistency in tension and stitch placement.
Do I need special yarn for joining?
Not necessarily, but using the same yarn as your squares ensures color matching. For joining, you can use slightly thinner yarn if you’re worried about bulk, but never go too thin or your seams will be weak.
How do I join squares with different colored yarns?
Use yarn that matches one of the squares, or choose a neutral color that complements both. If you want the seams to be a design feature, pick a contrasting color and let them show proudly.
What’s the strongest joining method?
Slip stitch and single crochet seams are the strongest because they create thick, durable joins. These are perfect for items that will get heavy use or frequent washing.
Can I machine wash projects with hand-joined seams?
Yes, but use gentle cycles with cold water. Hand-joined seams are secure when done properly, but aggressive washing can stress them. Use a mesh bag for extra protection.
Conclusion
Mastering how to connect granny squares opens up endless creative possibilities. Whether you choose whip stitch for invisibility, slip stitch for durability, or any of the other methods, the key is practicing until the technique becomes second nature. Start with one method, master it, then experiment with others to find your personal preference.
Remember that perfect seams come from consistent tension, attention to detail, and practice. Your first project might have slightly uneven joins, but by your third or fourth, you’ll be producing work that looks professionally finished. The satisfaction of holding a completed blanket or garment made entirely of connected squares is absolutely worth the effort invested in learning these techniques.


