
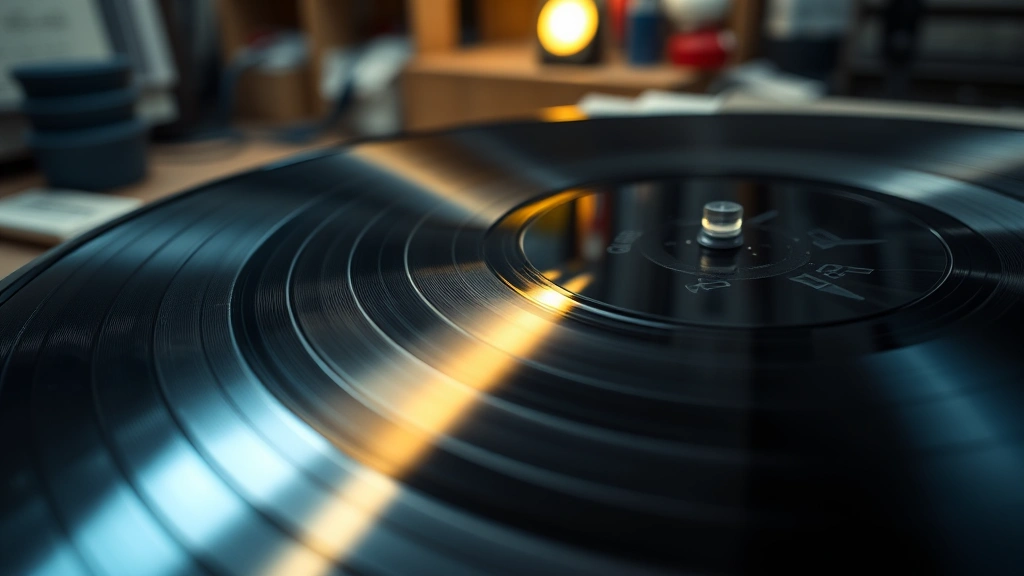
Learning how to clean vinyl records is one of those skills that separates casual listeners from true audiophiles. Your vinyl collection deserves better than dust, fingerprints, and static buildup—these enemies of sound quality can degrade your favorite albums faster than you’d think. The good news? With the right approach and a few basic tools, you can restore your records to near-mint condition and keep them sounding pristine for decades.
Table of Contents
Why Clean Your Records
Before diving into the methods, let’s talk about why this matters. Vinyl records work through tiny grooves that your stylus reads—dust and debris in those grooves create pops, clicks, and surface noise that ruins the listening experience. Over time, accumulated grime can actually damage the grooves themselves, making the damage permanent. Regular cleaning isn’t just about sound quality; it’s about preservation. A well-maintained vinyl collection can sound as good in 30 years as it does today.
Static electricity is another culprit. It attracts dust particles like a magnet, which then settle into the grooves. This is why anti-static brushes and proper handling are crucial components of any cleaning routine.
Gather Your Supplies
You don’t need expensive equipment to get started with cleaning vinyl records properly. Here’s what you’ll need for basic maintenance:
- Microfiber cleaning brush – The gold standard for dry cleaning. Soft bristles won’t scratch the surface.
- Anti-static record brush – These have conductive fibers that neutralize static as you clean.
- Distilled water – Never use tap water; minerals will leave residue.
- Isopropyl alcohol – 90% concentration or higher for wet cleaning methods.
- Lint-free cloths – Microfiber works best; cotton leaves fibers behind.
- Spray bottle – For applying cleaning solutions evenly.
- Soft-bristled brush – A dedicated vinyl record brush, not a toothbrush.
- Drying rack or towel – For air-drying without water spots.
Optional but worthwhile additions include a record cleaning machine (like a Spin-Clean or similar device) and specialized vinyl cleaning solutions designed specifically for records.
The Dry Cleaning Method
This is your first line of defense and should happen regularly, even between deeper cleanings. Dry cleaning removes surface dust without introducing moisture, making it perfect for records you play frequently.
The Process: Start with an anti-static brush. Hold the record firmly by its edges and gently brush from the center outward in a circular motion, following the grooves. Never brush radially (from center to edge)—this pushes debris into the grooves instead of removing it. Use light pressure; you’re not scrubbing, just guiding dust away.
After brushing, use a microfiber cloth to wipe the surface gently. Again, circular motions following the groove direction work best. For stubborn dust particles, a dedicated record cleaning brush with conductive fibers will neutralize static and pull debris away more effectively than regular brushes.
Pro tip: Do this in a dust-free environment. Cleaning records near an open window or fan just invites new dust to settle on them immediately after you finish.
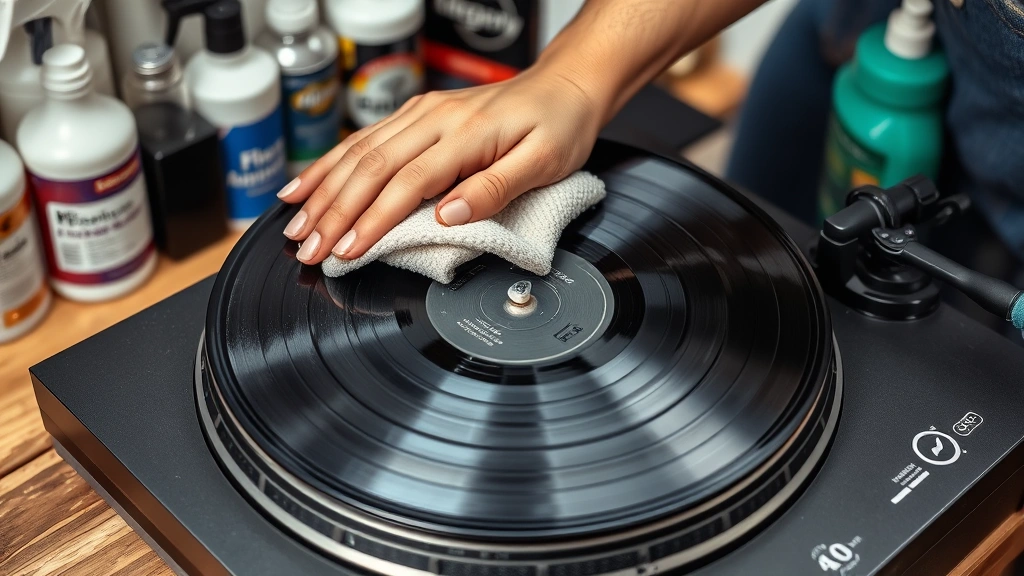
Wet Cleaning Basics
Wet cleaning tackles deeper grime, fingerprints, and oxidation that dry methods can’t handle. The key is using the right liquid and proper technique to avoid water spots and damage.
Critical Rules for Wet Cleaning: Never submerge vinyl records completely—water can seep into the center label area and cause warping or delamination. Always use distilled water; tap water contains minerals that leave visible residue. Work in a clean environment where you can control dust during the drying process. Have lint-free cloths ready before you start, and never let records air-dry completely unattended.
The general approach involves applying a cleaning solution to a cloth, gently working it across the record surface in circular motions, then immediately drying with a separate lint-free cloth. Speed matters here—you want to minimize the time moisture sits on the vinyl.
Distilled Water Method
This is the gentlest wet cleaning approach and works surprisingly well for records that aren’t heavily soiled. It’s also the most affordable option if you’re just getting started.
Step-by-Step: Fill a spray bottle with distilled water. Lightly mist one side of the record—you want it damp, not wet. Using a soft microfiber cloth, gently wipe in circular motions following the groove direction. Don’t apply pressure; let the cloth do the work. Once you’ve covered the entire surface, immediately dry it with a clean, dry microfiber cloth using the same circular motion.
Flip the record and repeat on the side B. The entire process should take less than five minutes per record to minimize moisture exposure. This method works best for regular maintenance rather than heavily soiled records.
Isopropyl Alcohol Method
For records with stubborn grime, fingerprints, or visible oxidation, isopropyl alcohol cuts through buildup better than water alone. The alcohol also evaporates faster, reducing drying time and water spot risk.
The Technique: Mix a solution of 90% isopropyl alcohol and 10% distilled water in a spray bottle. Some collectors prefer straight 90% alcohol, but the small amount of water helps it spread evenly. Spray lightly onto a microfiber cloth—never spray directly onto the record, as excess liquid can seep into the center label.
Work one side at a time, using gentle circular motions. The alcohol will start breaking down grime immediately. After covering the surface, dry thoroughly with a clean microfiber cloth. The alcohol evaporates quickly, which is actually beneficial—it helps prevent water spots. Just make sure you dry completely; any remaining alcohol residue can attract dust.
This method is excellent for records you’ve picked up at estate sales or thrift stores that might have accumulated years of dust and handling.
Specialized Cleaning Solutions
If you’re serious about your vinyl collection, specialized record cleaning solutions offer advantages over DIY mixtures. Products like Spin-Clean record washer fluid, Groove Glide, and similar solutions are formulated specifically for vinyl and include surfactants that break down grime without leaving residue.
How They Work: These solutions contain ingredients that lift dirt and oils from the grooves while including anti-static agents that prevent dust attraction during and after cleaning. They’re typically more expensive than distilled water or isopropyl alcohol, but for valuable or heavily played records, the investment pays off in superior cleaning and protection.
Follow the manufacturer’s instructions carefully—some solutions require specific dilution ratios or application methods. Many are designed to work with record cleaning machines, though you can apply them by hand with proper technique. The key advantage is that they’re pH-balanced and won’t damage the vinyl or degrade the grooves over time like harsh chemicals might.
Drying and Storage Tips
How you dry and store records after cleaning is just as important as the cleaning process itself. Improper drying can undo all your hard work and introduce new problems.
Drying Best Practices: Always air-dry records vertically, never laying flat. Gravity helps water run off rather than pooling in the grooves. Use a dedicated record drying rack, or lean records against a clean towel at a slight angle. In humid environments, a hair dryer on the cool setting can help—hold it about 12 inches away and use gentle, sweeping motions. Never use hot air; heat can warp vinyl.
Wait until records are completely dry before returning them to their sleeves. Any residual moisture can promote mold growth and create a musty smell. In high-humidity climates, this might take several hours. Once dry, store records vertically in acid-free sleeves inside their original jackets, away from direct sunlight and heat sources.
Storage conditions matter tremendously. Vinyl is sensitive to temperature fluctuations and humidity extremes. Keep your collection in a cool, dry place between 60-70°F with humidity around 40-50%. Basements and attics are terrible storage locations—temperature swings and moisture exposure will degrade your records regardless of how well you cleaned them.
Maintenance Routine
Establishing a regular cleaning schedule keeps your records in top condition and prevents the need for aggressive cleaning methods down the road.
Weekly/Monthly: Use an anti-static brush on records you play frequently. This takes 30 seconds per record and removes dust before it settles deep into the grooves.
Quarterly: Do a more thorough dry cleaning with a microfiber cloth on your entire collection. This prevents dust accumulation and keeps everything sounding fresh.
Annually: Perform a wet cleaning on your most-played records using the distilled water or isopropyl alcohol method. This removes fingerprints and light grime before they become stubborn.
As Needed: Use specialized cleaning solutions or more aggressive methods on records that show visible dirt, oxidation, or sound quality degradation.
This approach means you’re never dealing with heavily soiled records, and your collection stays in excellent condition without excessive maintenance effort.
Common Mistakes to Avoid
Even with good intentions, people often make cleaning mistakes that damage vinyl. Here’s what to avoid:
Using Tap Water: Those minerals leave visible residue and can cause permanent damage. Always use distilled water, period.
Radial Brushing: Brushing from center to edge pushes debris into grooves instead of removing it. Always use circular motions following the groove direction.

Excessive Pressure: You’re not scrubbing a dirty pot. Light, gentle pressure is all you need. Pushing hard can damage the delicate groove walls.
Letting Records Air-Dry: Unattended air-drying invites dust to settle on wet vinyl. Always dry actively with lint-free cloths.
Using Household Cleaners: Windex, furniture polish, and similar products will damage vinyl. Stick to distilled water, isopropyl alcohol, or specialized vinyl solutions.
Storing Damp Records: This promotes mold and mildew. Ensure records are completely dry before returning them to sleeves.
Ignoring the Center Label: Water seeping into the label area causes warping and delamination. Keep moisture away from the center hole and label.
Frequently Asked Questions
Can I use a regular brush to clean vinyl records?
Regular brushes often leave fibers behind and can create static. Invest in a proper anti-static record brush or microfiber cloth designed for vinyl. The small cost difference is worth the protection of your collection.
How often should I clean my vinyl records?
Use an anti-static brush weekly on records you play regularly. Do a deeper wet cleaning quarterly or when you notice sound quality degradation. Well-maintained records rarely need aggressive cleaning.
Is it safe to use vinegar or baking soda on vinyl?
No. Vinegar is acidic and can damage vinyl, while baking soda is abrasive and leaves residue. Stick to distilled water, isopropyl alcohol, or specialized vinyl solutions.
What’s the best record cleaning machine?
Spin-Clean and similar machines are excellent investments for large collections. They automate the wet cleaning process and typically cost $30-50. For smaller collections, hand cleaning with proper technique works just fine.
Can I clean records that are visibly moldy?
Visible mold indicates serious problems beyond cleaning. Moldy records should be isolated from your collection to prevent spread. Consult specialist restoration services for valuable albums, or consider them a loss for standard records.
Will cleaning records remove scratches?
No cleaning method removes existing scratches. Cleaning removes dust and grime that create sound distortion, but physical damage to the groove walls is permanent. Prevention through proper handling is your best defense.
Should I clean new records?
Yes. Even new records benefit from a light dry cleaning before first play to remove manufacturing dust. Some collectors do a gentle wet cleaning on new purchases to ensure optimal sound from day one.
Final Thoughts
Learning how to clean vinyl records properly transforms your listening experience and protects your investment. Whether you’re maintaining a casual collection or curating hundreds of albums, the methods covered here—from simple dry brushing to specialized wet cleaning—give you the tools to keep your records sounding their best.
Start with dry cleaning and anti-static brushes for regular maintenance. Graduate to wet cleaning with distilled water or isopropyl alcohol when you notice sound quality issues. For serious collectors, specialized solutions and cleaning machines offer convenience and superior results.
The key is consistency. Regular, gentle maintenance prevents the need for aggressive cleaning and keeps your records in excellent condition for decades. Your ears—and your vinyl collection—will thank you for taking the time to do it right. For additional cleaning guidance on other items, check out how to clean a mousepad for similar gentle techniques, or learn about how to clean battery corrosion for more detailed cleaning methods. You might also find our guide on how to clear Instagram cache helpful for maintaining your digital devices alongside your physical collection.


