
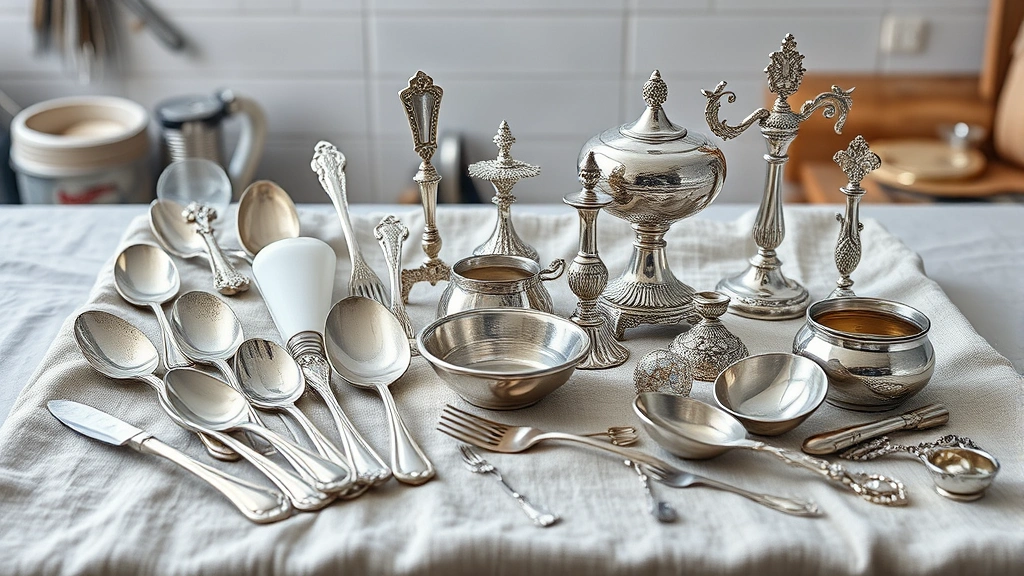
Learning how to clean silver at home doesn’t require fancy chemicals or professional jewelers—just a few household items and about 15 minutes of your time. Whether you’re dealing with tarnished silverware, heirloom jewelry, or decorative pieces, I’ve got you covered with methods that actually work without damaging your precious metals.
Table of Contents
Why Silver Tarnishes
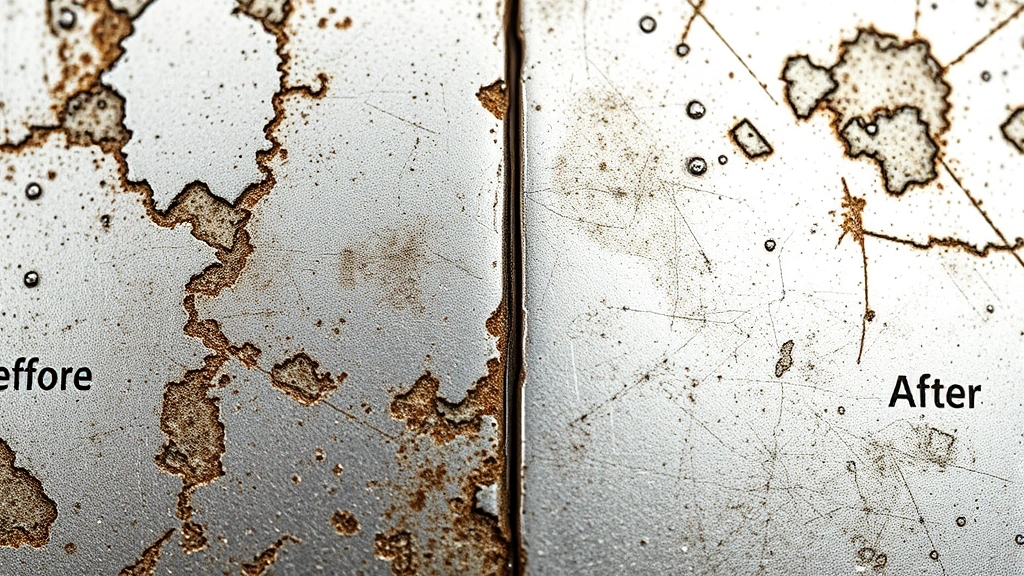
Before diving into solutions, let’s talk about what causes the problem. Silver tarnishes when it reacts with sulfur compounds in the air—it’s a natural chemical process, not a sign of poor quality. The dark layer that builds up is silver sulfide, and it’s actually protective in some ways, but yeah, it doesn’t look great on your grandmother’s candlesticks.
The speed of tarnishing depends on humidity, air quality, and how often you use the pieces. Items stored in damp basements tarnish faster than those kept in dry cabinets. Understanding this helps you pick the best cleaning method for your situation.
Baking Soda Method
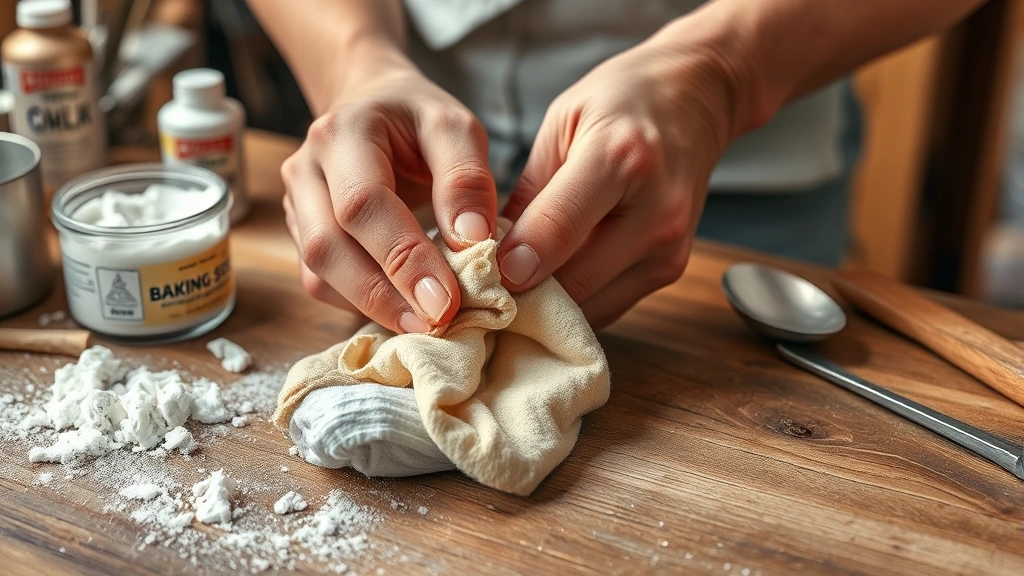
This is my go-to method for everyday silver cleaning, and it’s gentler than you’d expect. Grab some baking soda from your kitchen—that’s really all you need to start.
Mix three parts baking soda with one part water to create a paste. Apply it directly to tarnished areas using a soft cloth, rubbing gently in circular motions. For intricate pieces like forks or ornate jewelry, use an old toothbrush to work the paste into crevices. Rinse thoroughly under lukewarm water and dry immediately with a soft cloth to prevent water spots.
This method works best for light to moderate tarnish. Heavy buildup might need a second application, but patience beats aggressive scrubbing every time. The beauty of baking soda is that it’s non-toxic and won’t scratch most silver finishes when used properly.
Aluminum Foil Trick
Here’s a technique that feels like magic the first time you try it. Line a bowl with aluminum foil (shiny side up), fill it with hot water, add a tablespoon of baking soda, and drop your silver pieces in. The tarnish transfers to the foil through a chemical reaction—no scrubbing required.
Let pieces soak for 5-15 minutes depending on tarnish severity. You’ll literally watch the silver brighten as you look at it. Remove items carefully, rinse with cool water, and dry immediately. This method is fantastic for delicate jewelry and pieces with gemstones since there’s zero friction involved.
Fair warning: the water gets dark and smells a bit funky—that’s the tarnish leaving your silver and bonding with the aluminum. It’s harmless but definitely weird the first time you see it. This is similar to how you’d approach how to clean battery corrosion, where chemical reactions do the heavy lifting instead of elbow grease.
Vinegar Solution
White vinegar is a powerhouse cleaner that most people already have sitting in their kitchen cabinet. Pour about half a cup into a bowl and submerge your silver pieces for 10-15 minutes. The acidity cuts through tarnish effectively without being overly harsh.
After soaking, use a soft cloth or soft-bristled brush to gently wipe away loosened tarnish. Rinse thoroughly with clean water—this step matters because vinegar smell lingers otherwise. Dry everything completely before storing.
For stubborn tarnish, you can create a vinegar and baking soda combo. The fizzing action helps lift buildup from textured surfaces. Just remember that vinegar can dull certain finishes if you soak too long, so stick to the 15-minute window.
Toothpaste Technique
Use only non-gel, non-whitening toothpaste for this method—the abrasive particles do the cleaning work. Apply a small amount directly to your silver piece and rub gently with a soft cloth using circular motions. This works particularly well on flat surfaces like spoons, plates, and bangles.
Avoid toothpaste on delicate jewelry with gemstones or intricate engravings. The mild abrasive can scratch softer stones and work into tiny crevices where it’s hard to rinse out completely. For those pieces, stick with the baking soda or aluminum foil methods instead.
Rinse thoroughly under running water and dry immediately. Toothpaste residue left on silver can actually cause new tarnishing, so don’t skip this step. The whole process takes about five minutes and requires zero special supplies.
Lemon Salt Paste
Combine lemon juice with salt to create an aggressive tarnish fighter for heavily tarnished pieces. Mix equal parts lemon juice and salt into a paste, apply it to your silver, and let it sit for 5-10 minutes. The citric acid and salt work together to break down stubborn tarnish quickly.
Use a soft cloth to gently rub the paste onto affected areas. This method is more abrasive than others, so reserve it for sturdy pieces like silverware or decorative items without delicate finishes. Rinse extremely well under cool running water and dry immediately.
The lemon-salt combo can be harsh on certain finishes, so test it on an inconspicuous area first if you’re working with valuable pieces. It’s similar to how you’d tackle tough cleaning jobs elsewhere in your home—sometimes you need the heavy artillery.
Prevention Tips
Cleaning is easier when you prevent tarnish in the first place. Store silver in airtight containers or anti-tarnish bags that you can find at any hardware store. These bags contain materials that neutralize sulfur compounds before they can damage your silver.
Keep silver in dry environments—humidity is tarnish’s best friend. If you store pieces in a basement or attic, use silica gel packets to control moisture. Use your silver regularly too; handling and polishing pieces naturally slows tarnish buildup.
Avoid storing silver in direct sunlight or near sources of heat. Keep rubber bands, newspaper, and plastic wrap away from silver items since certain materials accelerate tarnishing. This preventative approach means you’ll spend less time cleaning and more time enjoying your pieces.
Frequently Asked Questions
Can I use commercial silver polish instead of these methods?
Absolutely. Commercial polishes work well and save time, but they’re more expensive and contain chemicals that some people prefer to avoid. The methods here use household items and are equally effective for most situations.
Will these methods damage valuable silver items?
These gentle methods are safe for most silver pieces when done carefully. However, if you have antique or extremely valuable items, consider consulting a professional conservator. Valuable pieces with special finishes or gemstones deserve expert care.
How often should I clean my silver?
That depends on usage and storage. Regularly used pieces might need cleaning monthly, while stored items could go 6-12 months between cleanings. Clean only when you notice visible tarnish—over-cleaning can wear down the silver over time.
Is the aluminum foil method safe for all silver?
It’s safe for solid silver and most plated pieces, but avoid it for items with gemstones or special finishes. The soaking process is gentler than scrubbing, making it ideal for delicate jewelry. When in doubt, test on a small area first.
Why shouldn’t I use steel wool on silver?
Steel wool is far too abrasive and will scratch silver permanently. Even fine steel wool removes the finish and creates micro-scratches that catch light poorly. Stick with soft cloths and soft-bristled brushes exclusively.
Can I clean silver-plated items the same way?
Yes, but be gentler. Silver plating is thinner than solid silver, so avoid aggressive scrubbing. The aluminum foil method and baking soda paste work beautifully on plated pieces without risk of wearing through the plating.
Final Thoughts
You don’t need expensive products or professional services to keep your silver looking brilliant. Whether you choose the quick baking soda method, the hands-off aluminum foil trick, or the heavy-duty lemon-salt paste, you’ve got proven solutions right in your home. Pick the method that matches your tarnish level and your piece’s delicacy, and you’ll get results every time.
The key is gentle handling, thorough rinsing, and immediate drying. These three principles apply across every method and guarantee you won’t accidentally damage your silver while cleaning it. Start with the gentlest approach and work up to stronger methods only if needed.
Keep your silver stored properly between cleanings, and you’ll find yourself reaching for the polish cloth less often. Your heirloom pieces, everyday flatware, and favorite jewelry will stay beautiful for generations with this straightforward care routine. Much like learning to how to patch a hole in drywall, silver cleaning becomes second nature once you understand the basics.
For more detailed information on metal care and preservation, check out resources from Family Handyman, which covers extensive home maintenance topics. You can also explore This Old House for heritage item care advice, or visit Bob Vila for comprehensive cleaning guides. These resources complement the hands-on methods I’ve shared here.


