

Your mouse pad is probably one of the grimiest things on your desk—and you barely notice it. Dust, dead skin cells, coffee spills, and whatever else your hands have touched accumulate on that fabric or rubber surface every single day. Over time, a dirty mouse pad doesn’t just look gross; it actually affects how your mouse glides and can even slow down your cursor responsiveness. The good news? Learning how to clean mouse pad properly takes about 15 minutes and requires nothing fancy. This guide walks you through every method, from quick spot-cleaning to deep washing, so your mouse pad performs like new again.
Why Your Mouse Pad Gets Dirty (And Why It Matters)
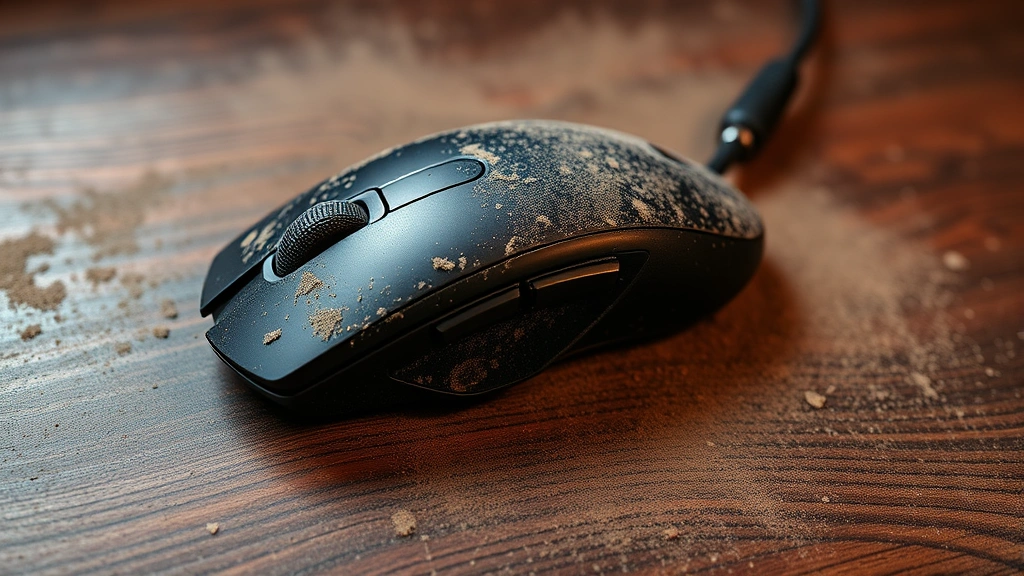
Think of your mouse pad like a sponge—it absorbs everything. Your hands rest on it for hours. Dust settles into the fabric weave. Food crumbs land on it. Sweat and skin oils create a film that attracts more dirt. Unlike your keyboard or monitor, the mouse pad doesn’t get the attention it deserves.
Here’s the real problem: a grimy mouse pad slows down your mouse’s optical or laser sensor. The dust and oils coat the surface, making the sensor work harder to track movement. Your cursor becomes sluggish or jittery. If you’ve ever wondered why your mouse suddenly feels “off,” the mouse pad is often the culprit. Plus, a filthy mouse pad just feels unpleasant under your hand, and it’s a bacteria magnet.
Regular cleaning—even just once a month—keeps your mouse responsive and your workspace feeling fresh. And honestly, it takes less time than you think.
Quick Daily Cleaning Method
If you want to maintain your mouse pad between deep cleans, this is your go-to move. It takes 2 minutes.
- Grab a microfiber cloth or soft brush. A dry microfiber cloth (the kind you’d use for glasses) works best. If you don’t have one, a soft-bristled brush like an old toothbrush is fine.
- Wipe in one direction. Start from one corner and wipe toward the opposite corner. Don’t scrub in circles—that pushes dirt deeper into the fabric. Go with the grain of the pad.
- Flip and repeat. Flip the mouse pad over and do the same thing. Dust accumulates on the underside too, and it can affect the pad’s grip on your desk.
- Check the edges. Use your cloth to get into the seams and edges where dust loves to hide.
That’s it. This quick method removes surface dust and keeps your pad from getting too nasty. Do this once or twice a week, and you’ll never need emergency deep cleaning.
Pro Tip: Keep a microfiber cloth in your desk drawer specifically for this. It becomes a habit after a week or two, like wiping your monitor.
Spot-Cleaning Stubborn Stains
Coffee spilled on your pad? Mysterious sticky spot that won’t budge? Spot cleaning is faster than full washing and works great for isolated problems.
- Identify the stain. Is it wet or dry? Fresh or old? This matters because old stains need more aggressive treatment.
- Blot, don’t rub. If it’s wet, use a clean cloth to blot up as much as possible. Rubbing spreads the stain deeper into the fibers.
- Mix a cleaning solution. Combine warm water with a tiny drop of dish soap. You want barely-soapy water, not a bubble bath. According to Family Handyman’s cleaning guides, this ratio works for most fabric stains.
- Apply with a damp cloth. Dip a clean cloth into your solution (wring it out so it’s not dripping), and dab the stain. Let it sit for 30 seconds.
- Blot again with a dry cloth. Repeat the dab-and-blot process 2-3 times until the stain lifts.
- Rinse with plain water. Use a cloth barely dampened with plain water to remove any soap residue. Soap left behind makes the pad feel sticky.
- Dry immediately. Use a dry cloth to absorb moisture. You don’t want your pad sitting wet.
For stubborn stains (like ink or marker), you might need a slightly stronger solution. Mix equal parts white vinegar and water. Vinegar is acidic enough to break down tough marks without damaging most mouse pad materials. Test it on a corner first if you’re nervous.
Deep Washing Your Mouse Pad
Every 2-3 months, your mouse pad deserves a real wash. This removes embedded dirt and restores the original texture. The process depends on whether your pad is fabric or rubber, but the basic approach is similar.
Fabric Mouse Pads
- Check the label. Some premium pads have care instructions. Follow them if they exist.
- Fill a sink or basin with warm water. Not hot—warm. Hot water can damage adhesives or fade colors on some pads.
- Add a small amount of gentle detergent. A few drops of dish soap or a tiny squirt of laundry detergent works. You’re not doing a load of laundry; you need gentle cleaning.
- Submerge the pad. Let it soak for 5-10 minutes. This loosens trapped dirt without aggressive scrubbing.
- Gently scrub with a soft brush. Use an old toothbrush or soft-bristled brush. Work in one direction, focusing on any visible stains or grimy areas. Don’t go crazy—gentle pressure is enough.
- Rinse thoroughly. Drain the soapy water and rinse under clean running water until the water runs clear. Soap residue will make your pad feel weird and attract more dirt faster.
- Squeeze out excess water. Don’t wring it like a towel. Gently press the pad against the sink to remove water without damaging the fibers or the base.
- Air dry completely. Lay it flat on a clean towel or hang it up. This takes 4-12 hours depending on humidity. Don’t use a dryer or heat gun—that can melt the pad or warp the rubber base.
Rubber or Hard Mouse Pads
If you have a solid rubber or hard plastic pad, the process is even easier.
- Mix warm soapy water. Same as fabric—just a few drops of dish soap in warm water.
- Wipe down with a cloth. Dip a cloth in the solution and wipe the entire surface, top and bottom. For hard pads, you can scrub a bit harder than with fabric.
- For stubborn grime, use a soft sponge. The non-abrasive side of a kitchen sponge works great for rubber pads. Avoid the rough side unless you want to scratch the surface.
- Rinse with a damp cloth and plain water. Wipe away all soap residue.
- Dry immediately with a towel. Hard pads dry fast, but don’t leave them wet. Water can seep into seams and damage the internal structure if the pad has any electronics (like RGB lighting).
Safety Warning: If your mouse pad has built-in USB ports, RGB lighting, or any electronics, avoid soaking it. Stick to damp-cloth cleaning only. Water and electronics don’t mix.
Material-Specific Cleaning Tips
Mouse pads come in different materials, and each has quirks. Here’s how to handle the most common types.
Cloth/Fabric Pads (Most Common)
These are the standard fabric pads you see everywhere. They’re absorbent, which means they trap dirt easily but also respond well to gentle washing. The method described above works perfectly. The only extra caution: don’t use bleach, even diluted. It can weaken the fibers and cause the pad to fall apart. If you’re dealing with mold or mildew (gross, but it happens in humid climates), mix equal parts white vinegar and water instead of using bleach.
Hard/Rigid Pads
These plastic or resin pads are durable and easy to clean. They don’t absorb water, so mold isn’t a concern. The downside? They can scratch easily. Avoid abrasive scrubbers or scouring pads. A soft sponge or cloth is your friend. If the surface gets scratched, it’s purely cosmetic—the pad still works fine.
Gel Pads
Some pads have a gel layer for wrist support. These are sensitive. Never soak them or use harsh chemicals. Stick to gentle wiping with a barely damp cloth. The gel can degrade if exposed to prolonged moisture or harsh solvents. If your gel pad starts feeling sticky or separating, it’s probably time to replace it.
Gaming Pads (Speed or Control)
High-end gaming pads are made from specialized materials designed for specific mouse movements. Check the manufacturer’s website for care instructions—they usually have specific recommendations. In general, treat them like fabric pads but be extra gentle. These pads are expensive, and improper cleaning can ruin them.
Wireless Charging Pads
If your pad has built-in wireless charging, never submerge it. Damp-cloth cleaning only. Water can damage the charging coils hidden inside. This also applies to any pad with RGB lighting or USB connectivity.
Drying and Storage Best Practices
How you dry and store your mouse pad matters more than people realize. Improper drying can lead to mold, mildew, or a permanently funky smell.
The Right Way to Dry
- Air dry flat or hanging. Lay the pad flat on a clean towel or hang it from a clothesline. Both methods work. Flat drying is easier; hanging drying is faster.
- Ensure good air circulation. Don’t dry it in a closed closet or damp basement. A well-ventilated room or near an open window is ideal. If you’re in a humid climate, a fan pointed at the pad speeds things up.
- Flip it halfway through. If drying flat, flip the pad after a few hours so both sides dry evenly.
- Don’t use heat. No hair dryers, no ovens, no direct sunlight for hours. Heat can warp rubber bases, melt glue, or fade colors. The sun is fine for 30 minutes, but not all day.
- Check for dampness before using. It should feel completely dry to the touch. If there’s any moisture, wait longer. Using a damp pad can cause mold to grow inside the fibers.
Storage Tips
If you’re not using your mouse pad (like if you’re replacing it or traveling), store it properly to keep it fresh.
- Store in a cool, dry place. Not under the bed where dust and moisture accumulate. A desk drawer or cabinet works.
- Keep it flat or loosely rolled. Don’t fold it tightly—creases can become permanent, and tight folding traps moisture.
- Avoid plastic bags. Plastic traps moisture and can cause mold. If you need to cover it, use a breathable cloth bag.
- Keep it away from heat sources. Radiators, heaters, and direct sunlight can degrade the materials over time.
Prevention: Keep It Cleaner Longer
The best cleaning is the one you never need to do. Smart habits keep your mouse pad fresh between washes.
Daily Habits
- Wash your hands before using your computer. This is the single biggest factor. Grimy hands = grimy mouse pad. It’s that simple.
- No eating or drinking at your desk. Or at least, keep food and drinks away from your mouse pad. Spills are the most common cause of stains.
- Quick wipe once a week. Spend 2 minutes with a dry cloth. This prevents dust from building up.
Environmental Factors
- Keep your desk tidy. Clutter means more dust floating around and settling on your pad.
- Use a desk fan if you’re in a dusty environment. Counterintuitive, but a fan moves air and prevents dust from settling. Position it to blow dust away from your workspace.
- Control humidity. In humid climates, mold and mildew are real risks. A dehumidifier in your office helps. So does keeping windows open for air circulation.
Mouse Pad Placement
- Elevate it slightly if possible. A pad that sits directly on a dusty desk collects more grime. A small desk organizer or even a piece of foam underneath creates air space.
- Position it away from vents. Air vents blow dust and debris. Keep your pad a few inches away if you can.
Frequently Asked Questions
Can I put my mouse pad in the washing machine?
– Not recommended. Washing machines are too aggressive and can damage the rubber base, adhesives, or internal structure if your pad has electronics. Hand washing with a cloth or soft brush is safer and just as effective. However, if your pad is extremely durable (like a basic cloth pad with no special features), a gentle cold water cycle on delicate might work—but hand washing is still the safer bet.
How often should I clean my mouse pad?
– Quick wipes (dry cloth) once a week, and a deeper wash every 2-3 months. If you eat at your desk or have a pet, bump that up to monthly deep cleaning. If your pad is used in a clean, controlled environment, quarterly cleaning is fine. Listen to your mouse pad—if it feels grimy or your cursor is sluggish, it’s time to clean.
What if my mouse pad smells bad?
– Bad smells usually mean mold or mildew, especially in humid climates. Wash it thoroughly with warm soapy water, then dry it completely in a well-ventilated area. If the smell persists after washing and drying, the mold has probably colonized deep in the fibers and the pad might be beyond saving. Replace it. Mold is a health hazard, and no amount of cleaning will fix a severely compromised pad. For prevention, store your pad in a dry place and ensure it dries completely after cleaning.
Can I use bleach on my mouse pad?
– No. Bleach is too harsh and will damage the fibers, weaken the pad, and potentially cause discoloration. For stubborn stains or mold, use white vinegar and water instead. Vinegar is a natural disinfectant and won’t harm the material. Mix equal parts vinegar and water, apply with a cloth, let it sit for a few minutes, then rinse thoroughly.
My mouse pad has RGB lighting. Can I still wash it?
– Yes, but carefully. Never soak it or submerge it. Use a damp cloth only—barely damp, not dripping. Wipe the surface gently, then dry immediately with a dry cloth. Water can seep into the electronics and damage the circuitry. If you spill something on it, act fast: blot it up immediately and let it air dry for several hours before using it again. If water gets inside and the lights stop working, the damage is likely permanent.
Is it better to clean or replace my mouse pad?
– Clean it first. A proper wash usually restores a pad to 90% of its original feel and performance. Only replace it if cleaning doesn’t help, the pad has visible damage (tears, peeling base), or it’s old and worn out. Replacement pads are cheap (usually $10-30), but cleaning extends the life of a good pad for years. If you have a premium gaming pad, cleaning is definitely worth it.
What’s the best cloth to use for cleaning?
– Microfiber cloths are ideal—they grab dust without scratching. Soft cotton cloths work too. Avoid paper towels (they leave fibers behind) and rough fabrics (they can scratch). If you don’t have a microfiber cloth, an old soft t-shirt works in a pinch. According to This Old House’s cleaning advice, microfiber is the gold standard for delicate surfaces.

Can I dry my mouse pad in the sun?
– Yes, but limit it to 30-60 minutes. Extended sun exposure can fade colors and degrade some materials, especially rubber. The sun is great for killing bacteria and mold naturally, but don’t leave your pad baking in direct sunlight all day. A few hours of indirect sunlight is fine. If you’re in a humid climate, 30 minutes of morning sun followed by air drying in a shaded, well-ventilated area is perfect.
Why does my mouse cursor skip after cleaning?
– Likely causes: (1) Your pad is still damp. Make sure it’s completely dry before using. (2) You used too much soap and residue is left behind. Rinse thoroughly with plain water. (3) The mouse sensor is dirty, not the pad. Clean your mouse with a dry cloth too. If the problem persists, check that your mouse batteries aren’t dying or that the USB connection is secure.


