
Learning how to clean mold in shower spaces is one of those skills that separates folks who live in gross bathrooms from those who actually maintain them. Mold thrives in damp, warm environments—and your shower is basically a five-star resort for fungal growth. The good news? You don’t need toxic chemicals or expensive professionals. I’ve tested five solid methods that actually work, and I’m breaking down each one so you can pick what fits your situation best.
Table of Contents
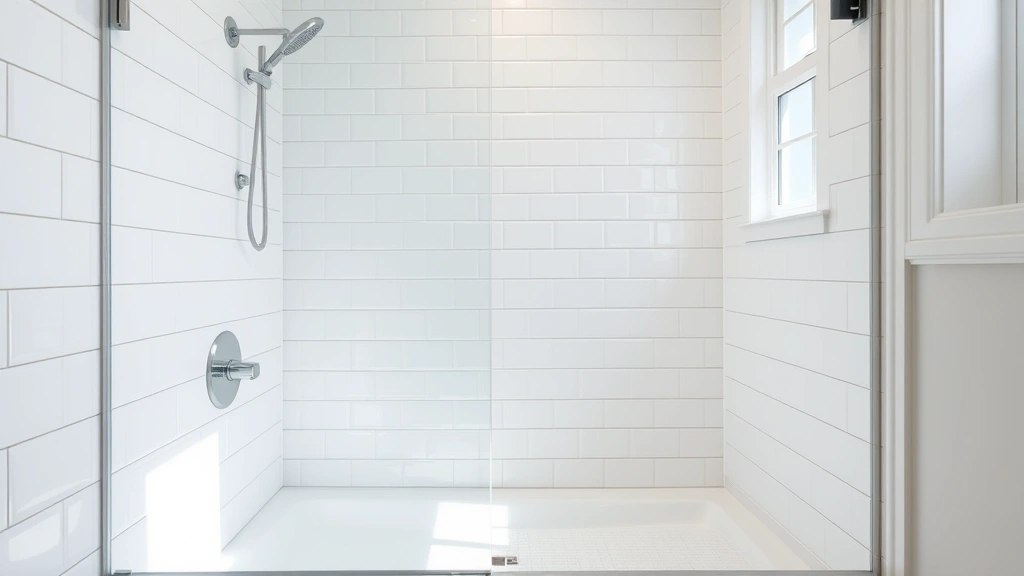
Why Mold Grows in Showers
Before you start cleaning, understand the enemy. Mold spores are everywhere—literally floating around your house right now. They only activate when they land on a damp surface with poor air circulation. Your shower creates the perfect storm: moisture from hot water, minimal airflow, organic matter (soap scum, dead skin cells), and darkness in corners. Bathrooms typically stay between 50-100% humidity, which is mold’s happy place.
The black or green stuff you see isn’t always toxic mold, but it’s definitely gross and can trigger allergies. The white or pink slimy buildup? That’s usually bacteria, not mold, but it’s just as unwelcome. Either way, you need a strategy to eliminate it and keep it gone.
White Vinegar Solution
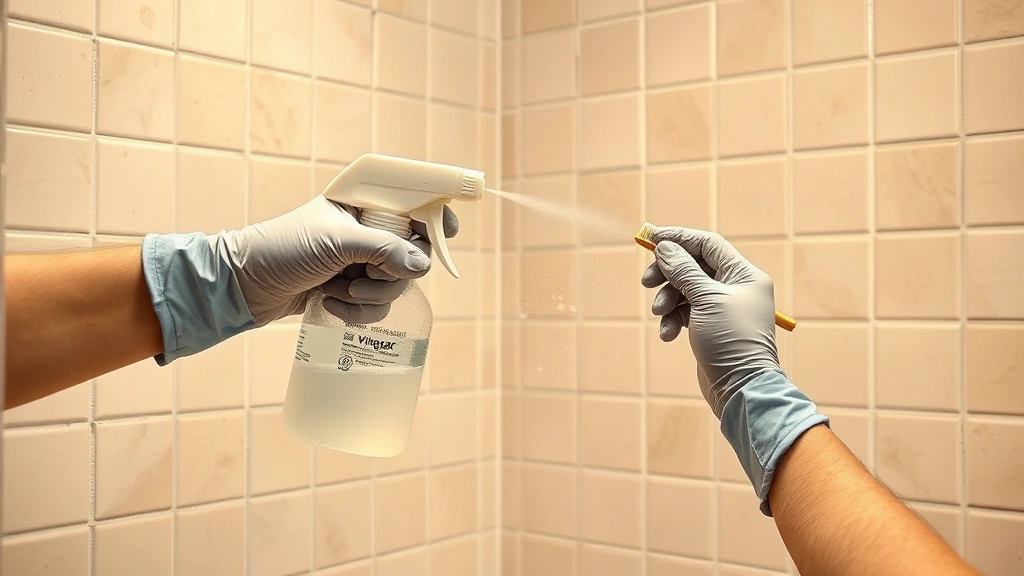
This is my go-to first method because it’s safe, cheap, and surprisingly effective for light to moderate mold. White vinegar contains acetic acid, which kills mold spores on contact. Here’s the process:
What you need: White vinegar (5% acidity), spray bottle, old toothbrush or soft scrub brush, cloth or sponge.
Steps: Fill your spray bottle with undiluted white vinegar. Spray affected areas generously—tiles, grout, caulk, even shower curtains. Let it sit for 1-2 hours. The smell is strong, so crack a window. After sitting time, scrub with your brush using circular motions. For stubborn spots, spray again and wait another hour. Rinse thoroughly with clean water. The vinegar smell dissipates as it dries.
This method works best on tile and smooth surfaces. It’s less effective on porous grout because mold roots deeper there. One bonus: vinegar also cuts soap scum, so your shower gets a double cleaning. Just don’t mix vinegar with bleach—that creates toxic chlorine gas.
Baking Soda Paste Technique
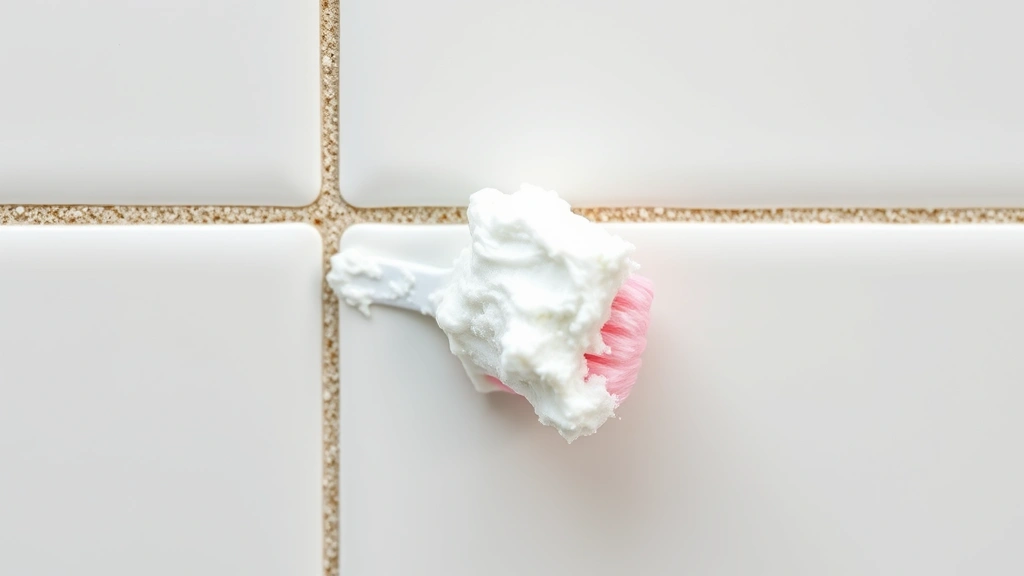
Baking soda is gentler than vinegar but still gets the job done, especially for grout lines where mold loves to hide. It’s also non-toxic and won’t damage your shower’s finish.
What you need: Baking soda, water, small bowl, old toothbrush, damp cloth.
Steps: Mix baking soda with water until you get a thick paste—about 3 parts baking soda to 1 part water. Apply directly to moldy areas, working it into grout lines with your brush. Let sit for 10-15 minutes. Scrub hard in circular motions, really working the paste into the affected spots. Rinse completely with clean water and dry with a cloth.
Baking soda shines on grout because it penetrates the porous surface without harsh chemicals. You can also sprinkle dry baking soda on damp shower floors to absorb moisture and prevent mold growth between cleanings. This method requires more elbow grease than vinegar, but the results are worth it.
Hydrogen Peroxide Approach
Hydrogen peroxide sits between vinegar and bleach in terms of strength. It’s a natural antimicrobial that breaks down into water and oxygen, leaving no toxic residue. Most household versions are 3% concentration, which works fine for mold.
What you need: 3% hydrogen peroxide, spray bottle, brush, cloth.
Steps: Pour hydrogen peroxide into your spray bottle and apply to moldy surfaces. Let it sit for 10 minutes—you’ll see it foam slightly as it works. Scrub with your brush and rinse well. For tougher mold, spray, wait 10 minutes, scrub, spray again, and let sit another 10 minutes before final rinsing.
This method is particularly good for shower walls and fixtures because it won’t damage metal or discolor most materials. It’s also safe to use around kids and pets once rinsed. The downside? It can take multiple applications for stubborn mold. If you’re cleaning mold in shower areas with significant growth, pair this with the baking soda paste for better penetration.
Bleach Solution (Heavy Duty)
When mold is thick, black, and covering large areas, bleach is your heavy artillery. It kills mold fast and prevents regrowth better than other methods. Use this as a last resort because bleach is harsh on materials and your lungs.
What you need: Bleach, water, spray bottle, brush, gloves, ventilation (open window, exhaust fan running).
Steps: Mix one part bleach to ten parts water in your spray bottle. Wear gloves—bleach damages skin and clothes. Spray the affected areas and let sit for 5-10 minutes. Scrub thoroughly with your brush. Rinse multiple times with clean water until the bleach smell is gone. Don’t skimp on ventilation; bleach fumes are serious.
Critical warning: Never mix bleach with vinegar, ammonia, or any other cleaning products. The chemical reactions create toxic gases that can hospitalize you. Bleach should be your last option after trying gentler methods. It’s also hard on grout and caulk over time, potentially weakening these seals.
Tea Tree Oil Natural Method
If you prefer natural solutions and have time to wait, tea tree oil is a legitimate mold killer. It’s antimicrobial and antifungal, though slower-acting than chemical options.
What you need: Tea tree oil (100% pure), water, spray bottle, brush.
Steps: Mix 1 teaspoon of tea tree oil with 1 cup of water in your spray bottle. Shake well before each use because oil and water don’t naturally mix. Spray affected areas and let sit for 30 minutes to an hour. Scrub with your brush and rinse thoroughly. Repeat daily for 3-5 days for best results.
Tea tree oil is safe around kids and pets, and it smells better than vinegar or bleach. The trade-off is patience—it takes longer to work. This method is excellent for prevention; spray your shower weekly to keep mold from returning. You can also use it on shower curtains and bath mats.
Prevention Strategies That Stick
Cleaning is only half the battle. Preventing mold from coming back is where you win the war.
Ventilation is king: Run your exhaust fan during and for 20-30 minutes after every shower. If you don’t have a fan, open windows wide. Moving air dries moisture fast and starves mold of its breeding ground.
Squeegee daily: Wipe down walls and glass doors after each shower. This removes standing water where mold spores settle. Takes 30 seconds and makes a huge difference.
Keep surfaces dry: Dry your shower floor and walls with a cloth if water pools. Store bottles and products off the floor so air can circulate underneath.
Reduce soap scum: Soap scum feeds mold growth. Use less product or switch to bar soap. Clean soap residue weekly with vinegar.
Caulk and grout maintenance: Damaged caulk and grout are mold highways. If caulk is cracked or missing, recaulk immediately. Grout should be sealed annually in high-moisture bathrooms. When you remove corrosion from bathroom fixtures, you’re also preventing mold from hiding in corroded areas.
Humidity control: Keep bathroom humidity below 50% if possible. A small dehumidifier in the bathroom helps, especially in naturally damp climates. Some folks also use diffusers with essential oils to improve air quality while addressing moisture.
Tools and Supplies Checklist
Here’s what you need to keep on hand for regular shower maintenance:
- White vinegar (gallon jug, cheap and multipurpose)
- Baking soda (box or bulk)
- Hydrogen peroxide (3% from drugstore)
- Spray bottles (at least 2)
- Soft-bristled brush (old toothbrush works, or buy a small grout brush)
- Microfiber cloths (dry and damp)
- Rubber gloves (protect your hands)
- Squeegee (prevents mold from starting)
- Exhaust fan or open windows (free but essential)
You don’t need expensive commercial mold cleaners. The items above cost under $20 total and last months. For regular maintenance between deep cleans, just vinegar and a brush handle 80% of shower mold issues.
When to Call a Professional
Most shower mold is cosmetic and manageable with DIY methods. However, call a professional if:
- Mold covers more than 10 square feet
- Mold appears inside walls (black spots around tile edges)
- You have health issues (respiratory problems, compromised immunity)
- Mold returns within days of cleaning (indicates ventilation or structural moisture problems)
- You smell musty odors that cleaning doesn’t fix (possible hidden mold)
A mold specialist can identify if you have toxic black mold (rare in showers but possible) and address underlying moisture issues. This is worth the cost if DIY methods fail repeatedly.
Frequently Asked Questions
Is black mold in shower dangerous?
Most black mold in showers is cosmetic and not the toxic variety (Stachybotrys). However, any mold can trigger allergies and respiratory issues in sensitive people. Clean it off regularly and improve ventilation. If you have health concerns, get it tested by a professional.
Can I use bleach on tile and grout?
Yes, diluted bleach is safe on ceramic tile and glazed surfaces. However, repeated bleach use weakens grout over time and can damage natural stone tile. For grout, use baking soda paste or vinegar first; reserve bleach for stubborn cases.
Why does mold come back so fast?
Mold returns quickly if you don’t address moisture. Cleaning removes visible mold, but spores remain dormant on surfaces. If humidity stays high and ventilation is poor, spores reactivate within days. Fix your ventilation and squeegee after showers—that’s the real solution.
Is tea tree oil safe for all shower surfaces?
Tea tree oil is safe on most surfaces but can stain some materials if left undiluted. Always dilute it with water (1:10 ratio). Test on a hidden spot first if you have natural stone or vintage fixtures.
How often should I clean my shower for mold prevention?
Weekly vinegar or tea tree oil spray keeps mold from establishing. Deep cleaning with baking soda paste every 2-4 weeks addresses grout lines. If your bathroom is naturally damp, increase frequency to weekly deep cleans.
Can I prevent mold without an exhaust fan?
An exhaust fan is ideal, but you can manage without one. Open windows during and after showers, keep the bathroom door open for airflow, and squeegee surfaces dry. It’s harder work, but possible. Consider installing a fan if mold keeps returning—it’s a worthwhile upgrade.
What’s the best method for shower curtains and liners?
Spray with white vinegar or tea tree oil solution and let sit 30 minutes before rinsing. For heavy mold, soak in a bathtub with vinegar and water (1:1 ratio) for an hour, scrub gently, and rinse. Replace plastic liners every 6-12 months since they deteriorate. When you clean items in the washing machine, shower curtains can go in on gentle cycle with vinegar instead of detergent.
Final Thoughts
Knowing how to clean mold in shower spaces is straightforward once you pick your method and commit to prevention. Start with white vinegar or baking soda paste for light mold. Graduate to hydrogen peroxide or bleach only if you need heavy-duty firepower. The real win comes from running your exhaust fan, squeegeeing after showers, and keeping humidity down. That’s what stops mold from coming back.
Most shower mold is preventable with basic habits and cheap supplies you probably already have. Don’t overthink it—grab a spray bottle, some vinegar, and a brush. You’ve got this. For broader cleaning knowledge, check out Family Handyman’s comprehensive mold cleaning guide and This Old House’s bathroom mold prevention tips. The EPA also provides official guidance on mold cleanup if you’re dealing with extensive growth.


