
Cleaning the inside of your windshield is one of those annoying car maintenance tasks that most folks put off way too long. You’re driving down the road, sunlight hits at just the wrong angle, and suddenly you can barely see through all that grime, dust, and haze. The good news? How to clean inside of windshield is actually straightforward once you know the right technique and grab the proper supplies. In this guide, I’ll walk you through everything you need to get that glass crystal clear—no streaks, no residue, just visibility.
Table of Contents
Why Your Inside Glass Gets Dirty
Before we dive into the cleaning process, let’s understand what you’re actually dealing with. The inside of your windshield collects a unique cocktail of contaminants that the outside never sees. You’ve got off-gassing from your dashboard—that’s the plastic breaking down in the heat and sun, leaving a thin oily film. Then there’s dust from your cabin air filter, moisture from humidity, and residue from your windshield wipers transferring dirt back onto the glass.
Your breath and body moisture contribute too, especially during winter months when you’re fogging up the windows. Over time, this buildup creates that hazy, streaky appearance that makes driving uncomfortable and potentially unsafe. That’s why regular cleaning isn’t just about looks—it’s about maintaining safe visibility on the road.
Gather Your Cleaning Supplies
You don’t need fancy equipment to get professional results. Here’s what actually works:
- Glass cleaner: Use a quality automotive glass cleaner like Stoner Invisible Glass or Sprayway. These are formulated specifically for car windows and won’t leave residue like household cleaners do.
- Microfiber cloths: This is non-negotiable. Regular paper towels and cotton rags will streak like crazy. Grab at least two microfiber cloths—one for initial cleaning, one for final buffing.
- Newspaper or coffee filters: If you don’t have extra microfiber cloths, newspaper actually works better than paper towels for the final buff.
- Rubbing alcohol: For stubborn residue and that final streak-free shine.
- Soft-bristle brush: A soft detailing brush helps loosen dried-on grime without scratching.
- Knowing how to disconnect your car battery can be useful if you need to access the windshield from the engine bay for thorough cleaning.
Prep Your Car for Cleaning
Park your car in a shaded area—direct sunlight will dry your cleaner too fast and create streaks. Open all the doors and windows to ensure good ventilation. You’ll be working with fumes, so fresh air matters.
Recline your front seats all the way back or remove them if you’re going deep clean. This gives you proper access to the entire windshield surface without contorting yourself. Lay down some newspaper or old towels on your dashboard to catch drips and protect your interior.
Wipe away loose dust from the glass with a dry microfiber cloth first. This removes the bulk of surface debris and prevents you from grinding grit into the glass when you start wet cleaning.
Step-by-Step Cleaning Process
Now for the actual work. Here’s the method that delivers streak-free results every single time:
Step 1: Apply glass cleaner generously. Spray your automotive glass cleaner directly onto the windshield, covering the entire interior surface. Don’t be stingy—the cleaner needs to dissolve all that built-up film and grime. Let it sit for 30 seconds to a minute so the chemicals can break down the residue.
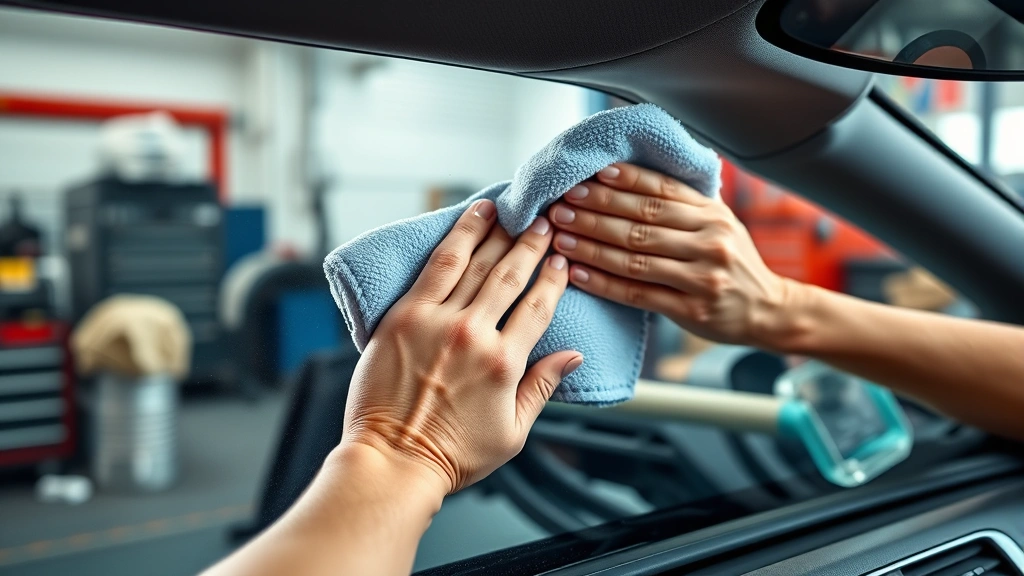
Step 2: Wipe with your first microfiber cloth. Using firm, circular motions, wipe the glass with your first microfiber cloth. Work from top to bottom, overlapping your strokes. You’ll notice the cloth picking up a surprising amount of brown, gray, or yellowish grime. This is normal and shows you’re actually removing the buildup.
Step 3: Repeat application if needed. For really grimy windshields, spray again and let it sit. Sometimes one pass isn’t enough to remove months or years of accumulated film. Don’t get frustrated—just keep going until the glass feels smooth when you run your finger across it.
Step 4: Buff with your second cloth. This is where the magic happens. Take your clean, dry microfiber cloth and buff the entire windshield with long, straight strokes from top to bottom. This removes any remaining cleaner residue and gives you that crystal-clear finish. The key is using a completely dry cloth—any moisture left will create new streaks.
Step 5: Final alcohol wipe (optional but recommended). For the ultimate streak-free shine, dampen a corner of your cloth with rubbing alcohol and do one final pass. The alcohol evaporates quickly and leaves zero residue. This is the pro move that takes your results from good to showroom quality.
Avoid Common Mistakes
Most people make the same errors over and over. Don’t be that person. First mistake: using household glass cleaners like Windex. These are designed for windows in your house, not car glass, and they’ll leave a hazy film that’s worse than what you started with.
Second mistake: using paper towels or cotton rags. They shed fibers and create streaks. Spend five bucks on quality microfiber cloths and save yourself the frustration. Third mistake: cleaning in direct sunlight. The cleaner dries too fast, trapping residue on the glass. Always work in shade or at least on a cloudy day.
Fourth mistake: not letting the cleaner sit long enough. Those chemicals need time to break down the film. Rushing the process means you’ll just spread the grime around instead of removing it. Fifth mistake: using too much pressure. You’re not trying to sand the glass—gentle, firm strokes work better than aggressive scrubbing.
Dealing with Stubborn Grime
Sometimes you run into windshields that look like they haven’t been cleaned in years. The dashboard off-gassing creates a nearly permanent film that regular cleaners struggle with. Here’s how to handle it:
Use a soft-bristle detailing brush with your glass cleaner to gently scrub the stubborn areas. The bristles help loosen the film without scratching the glass. Work in small sections and be patient. For extreme cases, let the cleaner soak for several minutes before scrubbing.
Another option is using a clay bar—the same product used for automotive paint. Dampen it slightly, use very light pressure, and gently glide it across the stubborn spots. This physically removes contaminants without chemicals. It sounds aggressive but it’s actually quite safe when done correctly. Family Handyman offers additional tips on automotive window cleaning that can help with particularly challenging situations.
Final Polish and Protection
Once your windshield is clean, you can take it one step further with protection. Some automotive glass cleaners include protective coatings that help repel water and reduce future buildup. These products make your next cleaning session easier.
If you want maximum protection, consider a glass sealant product. These create a hydrophobic barrier that repels water, dust, and contaminants. Apply according to the product instructions—usually it’s a one-time application that lasts several months. This Old House’s automotive section has detailed guidance on protective treatments for vehicle glass.
Keep your windshield wipers in good condition too. Worn wiper blades drag dirt and grime across your glass, creating new streaks and buildup. Replace them annually or whenever they start chattering or leaving streaks.
Maintain Your Windshield Clarity
The best part about cleaning your windshield properly? Maintenance is easy. Once it’s clean, do a quick wipe-down every month with a microfiber cloth and glass cleaner. These quick touch-ups prevent heavy buildup from forming again.

During winter, be more aggressive with interior cleaning. The combination of cold temperatures, heating systems, and moisture creates perfect conditions for that hazy film to return quickly. A quick monthly clean keeps visibility excellent year-round.
Keep your cabin air filter clean too. A clogged filter forces more dust into your cabin, which ends up on your windshield. Check it according to your vehicle’s maintenance schedule and replace it when it looks dirty. This simple step reduces windshield buildup significantly.
Frequently Asked Questions
Can I use vinegar and water to clean my windshield?
You can, but automotive glass cleaners work better. Vinegar leaves its own residue and doesn’t break down dashboard off-gassing as effectively. If you’re in a pinch, a 50/50 vinegar and water mix will work, but stick with proper glass cleaner for best results.
Why does my windshield streak no matter what I do?
You’re likely using the wrong cloth material or not using enough pressure. Microfiber cloths are essential—anything else will streak. Also make sure your cloth is completely dry for the final buff. If you’re still getting streaks, try the rubbing alcohol final pass.
How often should I clean my windshield interior?
A deep clean every 2-3 months keeps buildup manageable. Quick monthly touch-ups between deep cleans prevent that hazy film from returning. In winter or if you have a long commute, you might want to clean more frequently.
Is it safe to use a razor blade on windshield glass?
Only if absolutely necessary and only on the glass itself, never on the trim. Hold the blade at a very shallow angle (nearly flat) and use gentle pressure. Most of the time, proper cleaning methods eliminate the need for this. Bob Vila provides professional guidance on when and how to use scraping tools safely.
What’s the best glass cleaner for automotive use?
Stoner Invisible Glass, Sprayway, and Griot’s Garage are all excellent choices. They’re specifically formulated for automotive glass and won’t leave residue. Pick one and stick with it—consistency matters more than the specific brand.
Can I clean the windshield while the car is running?
Avoid it. You want to be able to turn the wipers off immediately if you accidentally activate them while cleaning. Plus, you need the car parked safely to work effectively without distractions.
Conclusion: Cleaning the inside of your windshield isn’t complicated—it just requires the right supplies and technique. Use automotive glass cleaner, quality microfiber cloths, and work in the shade with patience. Follow these steps and you’ll have crystal-clear visibility that makes driving safer and more enjoyable. The whole process takes maybe 20 minutes, and the results last for months with just quick monthly touch-ups. Your eyes will thank you every time you get behind the wheel.


