

Learning how to clean earrings is one of those simple skills that makes a massive difference in keeping your jewelry looking brand new. Whether you’ve got delicate gold studs, silver hoops, or gemstone pieces collecting dust in your jewelry box, a proper cleaning routine brings back that sparkle without damaging your favorite accessories. Most people don’t realize that earrings accumulate dead skin cells, soap residue, sweat, and bacteria—especially the backs of studs that sit against your skin all day. The good news? You don’t need fancy jewelers’ equipment or expensive cleaners. With everyday household items and about 15 minutes, you can restore your earrings to their former glory.
Table of Contents
Gather Your Supplies
Before you start, assemble everything you’ll need. The beauty of cleaning earrings at home is that you probably already own most of these items. Grab a small bowl (ceramic or glass works best—avoid metal), warm water, mild dish soap, soft toothbrushes or denture brushes, clean microfiber cloths, and optionally some white vinegar or rubbing alcohol for tougher jobs. If you’re dealing with gemstone earrings, you might want to check whether your stones are sensitive to certain solutions—we’ll cover that in detail later. Think of this setup like prepping your workshop before a project; having everything within arm’s reach makes the job flow smoothly without interruptions.
The Gentle Soak Method
The soak method is your go-to technique for most earrings and works particularly well for removing everyday grime. Fill your bowl with lukewarm water—not hot, since extreme temperatures can damage some materials—and add two to three drops of mild dish soap. Drop your earrings in and let them sit for 15 to 20 minutes. This soaking time allows the soapy water to penetrate and loosen debris around the posts, backs, and settings. For earrings with intricate designs or lots of crevices, longer soaking times work better. You can even leave them overnight in a gentle solution if they’re particularly grimy. The warmth of the water helps dissolve oils and buildup naturally, making the next steps easier.
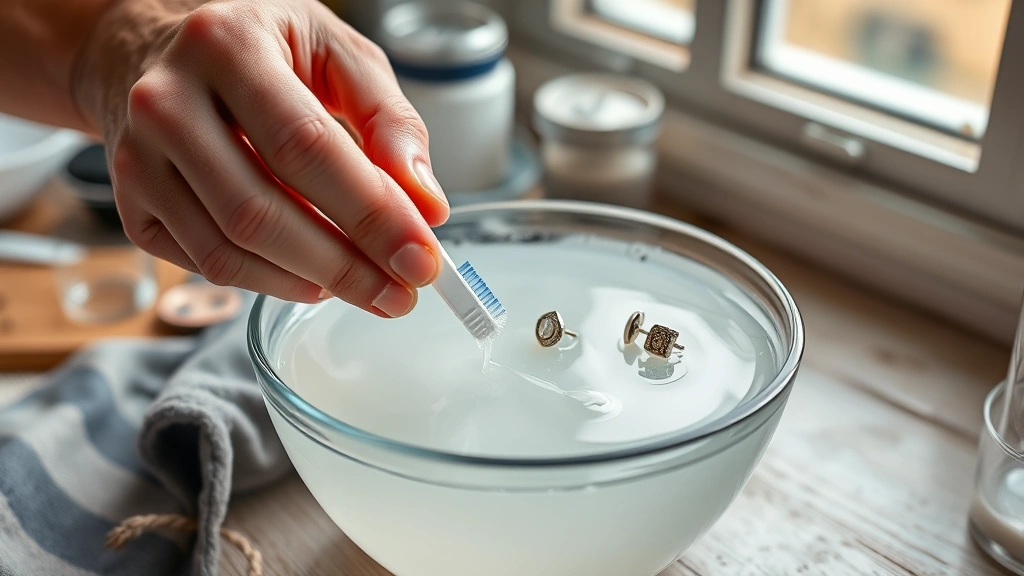
Scrubbing Without Scratching
After soaking, use a soft toothbrush or denture brush to gently scrub your earrings. This is where patience matters—aggressive scrubbing can scratch precious metals and damage delicate settings. Work the brush around the post, back, and setting, paying special attention to areas where debris likes to hide. For stud earrings, the back is often the grimiest spot since it sits against your skin. Use light circular motions rather than hard back-and-forth strokes. If you’re working with gemstones, use even lighter pressure and avoid brushing directly on the stones unless they’re extremely durable (like diamonds or sapphires). Think of it like washing a delicate car—you want thorough cleaning without causing damage.
Tackling Stubborn Buildup
Sometimes regular soap and water aren’t enough, especially for earrings that haven’t been cleaned in a while. For stubborn buildup, create a stronger solution using equal parts white vinegar and warm water, or use rubbing alcohol diluted with water. Soak your earrings for 10 to 15 minutes in this solution, then gently scrub with your soft brush. Vinegar is particularly effective for removing mineral deposits and tarnish from silver jewelry. Rubbing alcohol works great for cutting through stubborn oils and bacteria. Always test your cleaning solution on a small, inconspicuous area first if you’re unsure how your earrings will react. Never use harsh chemicals like bleach or acetone, which can permanently damage metals and gemstones. If buildup is really severe, you might consider professional cleaning, especially for valuable pieces.
Rinsing and Drying Right
Thorough rinsing is crucial to remove all soap residue and cleaning solution. Hold each earring under running lukewarm water, gently rubbing with your fingers to wash away any remaining cleaner. Make sure water gets into all the crevices and around the post. Pat dry immediately with a clean, lint-free microfiber cloth—this prevents water spots and mineral deposits from forming as the water evaporates. Don’t let earrings air dry sitting on paper towels or regular cloth, as lint particles will stick to them and you’ll end up back where you started. If your earrings have small gemstones that are loosely set, be extra gentle during rinsing to avoid putting pressure on the setting.
Polish for Maximum Shine
For that final professional-level sparkle, use a jewelry polishing cloth or create a simple polish using baking soda and water to form a paste. Apply the paste with a soft cloth in gentle circular motions, then wipe clean with a damp cloth and dry thoroughly. For silver earrings specifically, specialized silver polishing cloths work wonders and take just seconds to restore brilliance. Gold earrings benefit from a similar approach—light polishing brings back luster without stripping the finish. This polishing step is optional but makes a noticeable difference, especially if you’re preparing earrings for an important event. Store your polishing cloth in a sealed bag so it stays fresh between uses.
Cleaning Different Materials
Different materials require slightly different approaches. Sterling silver responds beautifully to vinegar solutions and polishing cloths but can develop tarnish if stored improperly—we’ll address that next. Gold earrings are more durable and handle most gentle cleaning methods well; avoid harsh chemicals that can strip plating from gold-plated pieces. Platinum is extremely durable and can handle more vigorous cleaning. Gemstones like diamonds, sapphires, and rubies tolerate soap and water beautifully, but softer stones like opals, pearls, and emeralds need gentler treatment—avoid soaking them and use only soft cloths. Costume jewelry with plated finishes requires the lightest touch to avoid wearing through the plating. If you’re uncertain about your earrings’ composition, check any documentation that came with them or consult a jeweler. This is similar to how cleaning battery terminals requires knowing what you’re working with before you start.
Storage and Maintenance Tips
Proper storage prevents the need for frequent deep cleaning. Keep earrings in a cool, dry place away from direct sunlight, humidity, and heat. Jewelry boxes with individual compartments are ideal because they prevent pieces from rubbing against each other. For silver earrings, store them with anti-tarnish strips or in sealed plastic bags to minimize oxidation. Avoid storing earrings in bathrooms where humidity is high—moisture is the enemy of shiny jewelry. Clean your earrings every two to three weeks if you wear them daily, and after each use if you’ve been sweating or in water. Quick maintenance cleaning prevents heavy buildup from forming. Think of it like regular maintenance on a project—small efforts regularly beat one massive cleanup later. Just as making perfume last longer involves proper storage techniques, jewelry longevity depends on smart storage habits.
Frequently Asked Questions
Can I clean pearl earrings with soap and water?
Pearl earrings require special care since pearls are delicate organic gemstones. Use only lukewarm water with a tiny drop of mild soap, and wipe gently with a soft cloth immediately—never soak pearls. Avoid vinegar and alcohol solutions entirely, as they can damage the pearl’s surface. If your pearl earrings have metal components, you can clean those separately with standard methods.
How often should I clean my earrings?
If you wear earrings daily, a quick rinse and wipe-down weekly keeps them fresh. A deeper cleaning every two to three weeks prevents significant buildup. Earrings you wear occasionally can go longer between cleanings, but always clean them before putting them in after storage to remove dust and debris.
Is it safe to use an ultrasonic cleaner on earrings?
Ultrasonic cleaners work well for many jewelry pieces, but they’re not ideal for delicate gemstones like pearls, opals, or emeralds, which can crack or damage in the vibrations. They’re excellent for sturdy pieces like diamond studs or solid gold hoops. If you invest in an ultrasonic cleaner, follow the manufacturer’s guidelines for your specific jewelry types.
Why do earring backs get so dirty?
Earring backs sit directly against your skin all day, collecting dead skin cells, sweat, oils, and bacteria. This warm, moist environment is perfect for buildup. Regular cleaning and occasionally switching which ear you wear studs in can help reduce this accumulation. Always clean the backs thoroughly during your cleaning routine.

Can I use toothpaste to clean earrings?
While toothpaste can work, it’s not ideal because many formulas contain abrasive particles that can scratch soft metals and gemstones. Stick with the gentler methods outlined above. If you must use toothpaste, choose a non-abrasive formula and use it sparingly with very light pressure.
What should I do if my earrings are tarnished?
Tarnish, especially on silver, responds well to vinegar soaks and polishing cloths. For heavy tarnish, soak in equal parts white vinegar and water for 15 minutes, scrub gently, rinse thoroughly, and dry completely. Follow up with a silver polishing cloth for best results. Prevent future tarnish by storing earrings in sealed bags with anti-tarnish strips.
Is rubbing alcohol safe for all earrings?
Rubbing alcohol is safe for most metal earrings and durable gemstones, but avoid it on delicate stones, pearls, and opals. For costume jewelry with glued-on gemstones, alcohol can dissolve the adhesive. Always dilute rubbing alcohol with equal parts water rather than using it full strength, and test on an inconspicuous area first.
How do I clean earrings with intricate designs?
Intricate designs trap more debris, so longer soaking times help. Use a soft brush with fine bristles to access crevices, and consider using a toothpick wrapped in soft cloth for very tight spots. Take your time and work methodically around each detail. If designs are extremely delicate or valuable, professional cleaning might be the safest option.


