
Learning how to clean dog ears is one of the most important grooming skills you can master as a pet owner, and honestly, it’s way easier than most people think. Your pup’s ears are like little floppy treasure chests that collect dirt, wax, and moisture faster than you’d believe, especially if they love swimming or have those adorable droopy ears. Regular ear cleaning prevents infections, keeps your dog comfortable, and saves you a fortune in vet bills down the road. Let me walk you through this like we’re hanging out in the workshop together—no fancy jargon, just straightforward steps that actually work.
Table of Contents
Why Dog Ear Cleaning Matters
Your dog’s ears are breeding grounds for bacteria and yeast if you don’t stay on top of maintenance. Think of it like gutters on your house—if you don’t clean them regularly, you’re asking for problems. Dogs with floppy ears, like Cocker Spaniels and Basset Hounds, are especially prone to ear infections because moisture gets trapped inside. Water from baths or swimming creates the perfect humid environment for nasty stuff to grow. Even dogs with upright ears can develop issues if they spend time outdoors or have allergies. Regular cleaning keeps the ear canal dry and healthy, reduces odor, and catches early signs of infection before they become serious.
Gather Your Supplies First
Before you start how to clean dog ears, get everything ready—just like prepping your workspace before a project. You’ll need a veterinarian-approved ear cleaning solution (ask your vet for a recommendation), cotton balls or gauze pads (never use Q-tips deep in the ear canal), and a towel. Some people use a small flashlight to see better, which is smart. Have treats on hand to reward your pup for cooperation. The cleaning solution is crucial—don’t just use water or vinegar without professional guidance, as the wrong pH can cause irritation. Your vet can recommend solutions specifically formulated for dogs, which typically contain gentle acids and antifungal or antibacterial agents. If your dog has sensitive ears or a history of infections, get a prescription solution from your veterinarian.
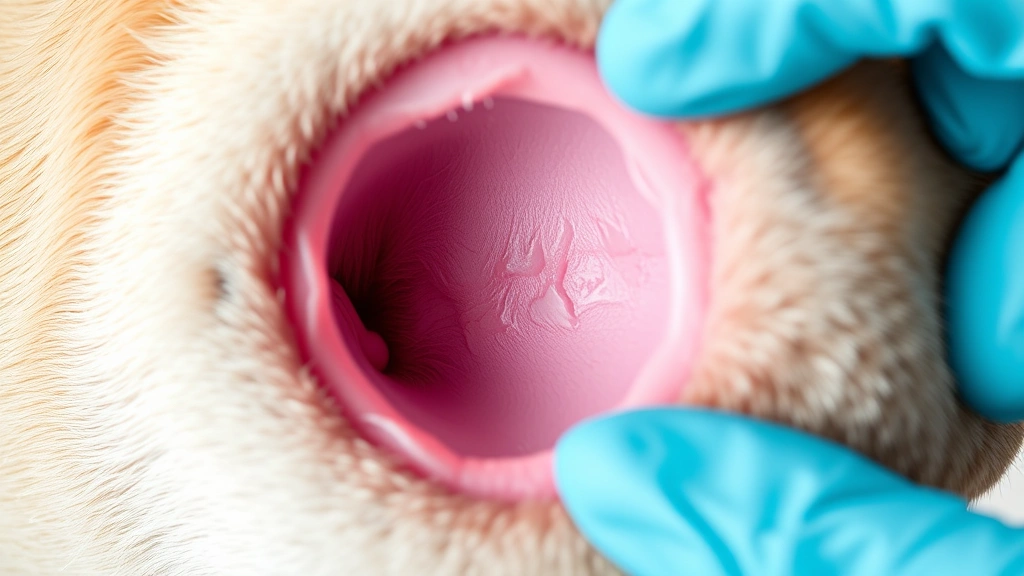
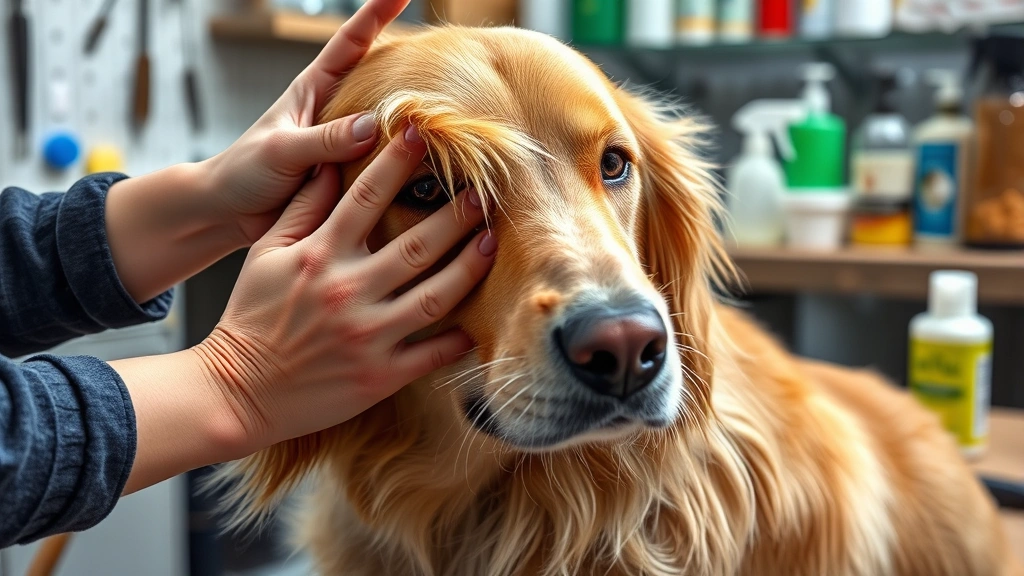
Inspect Before You Start
Take a good look at your dog’s ears before cleaning. Healthy ears should be pink inside, relatively clean, and smell neutral. If you notice redness, swelling, excessive wax buildup, discharge, or a strong odor, that’s a sign to visit your vet before attempting cleaning. You might be dealing with an active infection that needs professional treatment. This inspection step is like checking your roof before deciding whether to clean the gutters—sometimes you need professional help first. Gently fold back the ear flap and look into the canal. If your dog pulls away, seems painful, or the ear looks severely inflamed, hold off on cleaning and schedule a vet appointment immediately.
Apply Cleaning Solution Generously
This is where the real work begins. Fill the ear canal with the cleaning solution—and I mean actually fill it. Squeeze the bottle so the solution goes deep into the canal until you see it pooling at the opening. Your dog will probably shake their head, and that’s exactly what you want to happen. The solution needs to get down there to break up wax and debris. Don’t be timid with the amount; you can’t hurt anything by using enough solution. This step is similar to how you’d saturate a stain before scrubbing it out of fabric. The solution does the heavy lifting here, so let it work. Some vets recommend warming the solution slightly to room temperature before application, which makes it more comfortable for your pup.
The Massage Technique Works Magic
After applying the solution, gently massage the base of the ear—that soft area just below where the ear flap connects to the head. Massage in circular motions for about 20-30 seconds. You’ll hear a squelching sound as the solution works through the ear canal and breaks up the buildup. This is the secret sauce of how to clean dog ears effectively. The massage helps the solution penetrate deep and dislodges debris that’s stuck to the canal walls. Your dog might actually enjoy this part if you’re gentle. Keep massaging until you feel the ear canal relax under your fingers. This technique is similar to working a degreaser into engine parts—you’re letting the chemical do the work while you help it along with physical action.
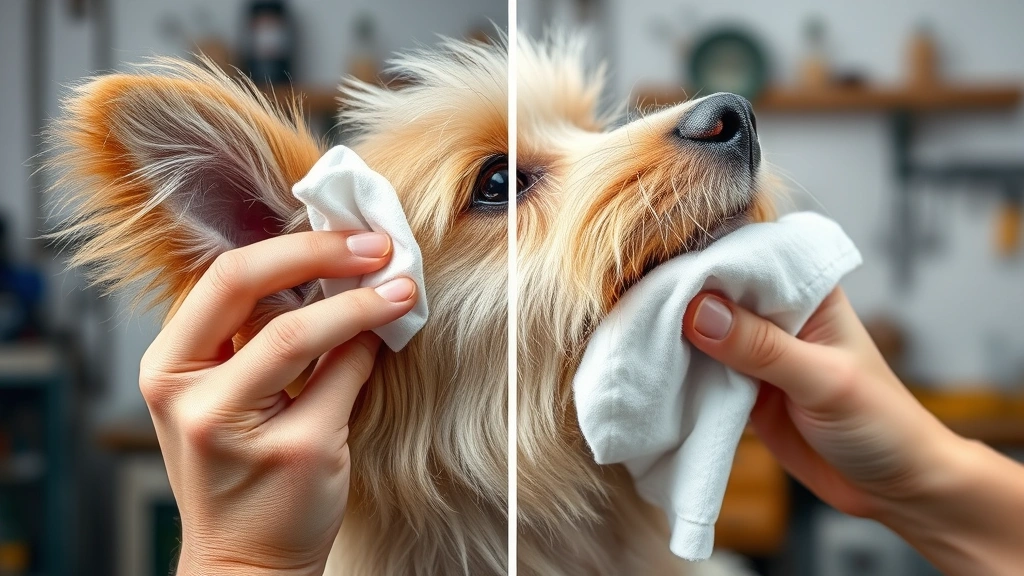
Wipe Away the Debris
Now comes the satisfying part—watching all that gunk come out. Let your dog shake their head naturally first (maybe do this outside or over a towel), then use cotton balls or gauze to gently wipe out the ear canal. Go as deep as you can comfortably reach, but never force anything. If your dog resists, back off and try again gently. You’ll be amazed at how much debris comes out—it’s like cleaning a really dirty surface and watching it transform. Keep wiping until the cotton comes out mostly clean. You might need several cotton balls. Don’t worry about getting it perfectly clean on the first try; sometimes you need multiple passes. If excessive discharge or pus comes out, that’s another sign to see your vet, as it indicates infection beyond what home cleaning can address.
Dry Thoroughly When Done
This step is critical and often overlooked. After wiping, use a dry cotton ball or gauze to absorb any remaining moisture in the ear canal. Moisture left behind creates the perfect environment for infections to develop, undoing all your good work. Gently insert the dry cotton into the canal and let it absorb the liquid. You can repeat this with fresh cotton until the ear feels dry. Some people use a soft cloth or even a hair dryer on the lowest setting held at a safe distance, but cotton works fine for most situations. Think of this like the final step when sealing a surface—you need to remove moisture before it causes problems. Your dog’s ear should feel dry to the touch inside when you’re finished.
Cleaning Frequency Depends on Your Dog
How often you need to clean your dog’s ears depends on breed, ear type, and individual factors. Dogs with floppy ears need cleaning every 1-2 weeks, while dogs with upright ears might only need monthly cleaning. Dogs that swim regularly or have allergies need more frequent cleaning. Ask your veterinarian for a personalized schedule based on your specific dog. Some dogs never have ear issues and need minimal cleaning, while others are prone to problems and benefit from weekly maintenance. Keep a simple calendar and mark when you clean—this helps you spot patterns and notice if problems are developing. If your dog starts scratching their ears more frequently or you notice odor developing faster, increase cleaning frequency or see your vet about underlying allergies or infections.
Warning Signs You Need Professional Help
Stop cleaning at home and call your vet immediately if you notice excessive scratching, head shaking, redness, swelling, discharge (especially pus or blood), foul odor, or if your dog pulls away in pain. These are signs of infection or other ear problems that require professional diagnosis and treatment. Don’t try to power through and clean anyway—you might make things worse. Your vet has specialized equipment to look deep into the ear canal and can prescribe appropriate medication if needed. Ear infections can become serious quickly, especially if they reach the middle or inner ear. Think of it like recognizing when a home repair is beyond DIY—sometimes you need the professional. Regular preventative cleaning reduces the likelihood of these problems, but when they do occur, professional help is essential.
Frequently Asked Questions
Can I use vinegar to clean my dog’s ears?
Vinegar can be used in very diluted solutions (one part vinegar to one part water) as a preventative rinse, but it’s not ideal for deep cleaning. The acidity can irritate already-sensitive ears. Always check with your vet before using vinegar, and never use it if your dog has an active infection or ear damage. Your vet’s recommended solution is always the safer choice.
What if my dog won’t sit still during cleaning?
Start with short sessions and reward heavily with treats. Some people find it easier to clean one ear at a time. You can also try cleaning when your dog is tired or relaxed. If your dog is extremely resistant or anxious, ask your vet about the best approach—sometimes they recommend mild sedation for dogs with severe anxiety about ear cleaning.
How do I know if the cleaning solution is expired?
Check the bottle for an expiration date and follow it. Expired solutions lose effectiveness and can potentially harbor bacteria. Store solutions in a cool, dark place, and discard opened bottles after 6-12 months depending on the product. When in doubt, ask your vet for a fresh bottle.
Is it normal for ears to smell after cleaning?
A mild, neutral smell is normal. If ears smell bad after cleaning or develop odor quickly afterward, that suggests an underlying infection or yeast problem that needs veterinary attention. Healthy ears shouldn’t have a strong odor.
Can I clean my dog’s ears too often?
Over-cleaning can irritate the ear canal and disrupt healthy bacteria. Stick to your vet’s recommended schedule. More frequent cleaning is only necessary if your dog has specific conditions like allergies or frequent ear infections.
What’s the difference between ear mites and regular ear wax?
Ear mites cause a dark, crumbly discharge that looks like coffee grounds, along with intense itching. Regular ear wax is yellowish or brown and doesn’t cause excessive scratching. If you suspect mites, see your vet immediately—they require specific treatment beyond regular cleaning.
Learning how to clean dog ears is a straightforward skill that pays dividends in your dog’s health and comfort. Start with the basics, follow your vet’s guidance, and pay attention to your dog’s individual needs. Most dogs tolerate ear cleaning well once they get used to it, and many actually seem to enjoy the massage part. The key is being gentle, thorough, and consistent. By staying on top of ear maintenance, you’ll catch problems early, keep your pup comfortable, and develop a stronger bond through regular grooming care. Your dog will thank you with head bumps and tail wags.
For more information on pet care and maintenance, check out resources like the American Veterinary Medical Association and American Kennel Club. If you’re interested in other cleaning projects around your home, we have guides on how to clean iPhone speaker and maintaining various household systems. For those tackling home repairs, you might also find our article on how to patch a hole in drywall useful, and if you’re working on outdoor maintenance like how to install gutters, those same attention-to-detail skills apply to pet care as well.


