

Learning how to clean cricut mat is essential if you want to keep your cutting machine performing at peak efficiency. A sticky mat that’s clogged with dust, lint, and adhesive buildup will ruin your cuts, waste your materials, and frustrate you faster than a dull blade. The good news? Cleaning your Cricut mat is straightforward, doesn’t require fancy tools, and can extend the life of your mat by months or even years.
Table of Contents
Why Mat Cleanliness Matters
Your Cricut mat is basically a sticky work surface designed to hold your vinyl, cardstock, leather, and other materials steady while the blade cuts. Over time, dust, lint, paper scraps, and dried adhesive accumulate on the surface. This buildup reduces the mat’s grip, which means your material shifts during cutting. Misaligned cuts lead to wasted supplies and failed projects.
Think of it like this: a clean mat is a happy mat. When you keep it maintained, you’ll notice better cut quality, fewer material slips, and projects that actually look professional. Plus, a well-maintained mat lasts longer, saving you money in the long run. Most people can get 6-12 months out of a single mat with proper cleaning, versus maybe 2-3 months if they neglect it.
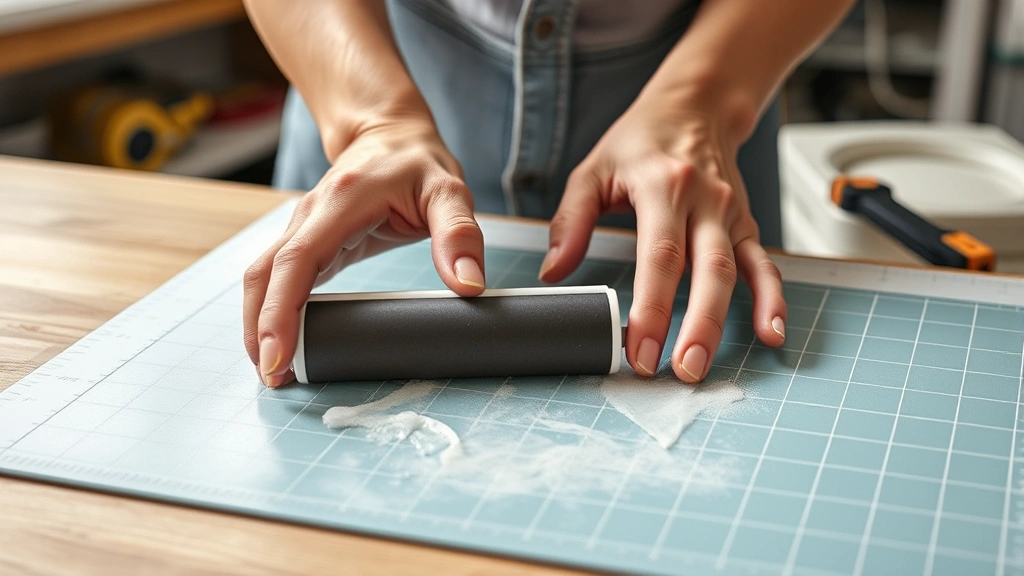
Method 1: Tape Roller Technique
This is the quickest and most popular method for light cleaning. Grab a standard painter’s tape roller or a lint roller and roll it gently across the entire surface of your mat. The adhesive side of the tape picks up dust, lint, and loose particles without damaging the mat’s sticky coating.
Start at one corner and work in overlapping rows toward the opposite corner, just like you’re painting a wall. Use light to medium pressure—you’re not trying to scrub, just lift debris. One or two passes usually does the trick for daily maintenance. This method works especially well if you’re cutting paper or cardstock regularly, as these materials shed fibers that accumulate quickly.
The tape roller method takes about 2-3 minutes and requires almost zero setup. Keep a roller dedicated to your Cricut mat so you’re not using the same one on your walls or other projects.
Method 2: Lint Roller Magic
A standard household lint roller is your secret weapon for removing stubborn lint and fibers. This method is especially effective after cutting fabric or felt, which shed more than other materials. Roll the lint roller across your mat surface with medium pressure, using the same overlapping pattern as the tape method.
The advantage of a lint roller is that it covers more surface area per roll and the sticky sheets are designed specifically for picking up fibers. You might need 2-3 sheets per cleaning session, depending on how much debris has accumulated. Lint rollers cost about a dollar, so this is an incredibly budget-friendly approach.
This method works great for weekly maintenance. Combine it with the tape roller technique for a one-two punch that keeps your mat in excellent shape. If you notice the lint roller isn’t picking up as much, it’s time to move to a deeper cleaning method.
Method 3: Scrape and Wipe
When light rolling isn’t cutting it, bring out the scraper. Use a plastic scraper, old credit card, or plastic squeegee to gently scrape away dried adhesive, caked-on debris, and stubborn buildup. Work at a low angle to avoid gouging the mat’s surface. This method removes more aggressive gunk than rolling alone.
After scraping, wipe the mat with a slightly damp microfiber cloth or soft cotton cloth. Use gentle circular motions and don’t oversaturate the cloth—you want it damp, not dripping wet. The moisture helps lift remaining particles without damaging the adhesive layer underneath.
This approach takes about 5-10 minutes and is perfect for monthly deep cleaning. Never use metal scrapers or abrasive materials, as these will damage the mat permanently. Stick with plastic tools and soft fabrics. Follow up with the tape or lint roller method after scraping to catch any loosened debris.
Method 4: Gentle Water Wash
For seriously grimy mats, a gentle water wash can work wonders. Fill a shallow basin or your kitchen sink with lukewarm water and a tiny drop of mild dish soap. Submerge your mat and let it soak for 5-10 minutes to loosen stubborn buildup.
Use a soft sponge or cloth to gently wipe the surface, working in circular motions. Pay special attention to areas where you frequently cut. Rinse thoroughly under lukewarm running water until all soap residue is gone. Soap left on the mat will reduce stickiness, so this step is critical.
Pat the mat dry with a clean towel and stand it upright to air dry completely before using it again. This usually takes 30-60 minutes depending on humidity. Never use hot water, as extreme temperature changes can warp the mat. This method is best used once every 2-3 months or when your mat needs serious rehabilitation.
Method 5: Restoring Stickiness
Sometimes your mat is clean but just isn’t sticky anymore. This happens naturally over time as the adhesive layer wears out. Before you toss it, try restoring stickiness with a light spray of temporary spray adhesive. Products like 3M Super 77 or similar repositionable spray adhesive can breathe new life into a tired mat.
Work in a well-ventilated area and follow the product instructions carefully. Spray in light, even coats across the entire surface. Let it dry for the recommended time before using your mat again. This method extends mat life by several months and costs just a few dollars.
Alternatively, some crafters swear by lightly misting the mat with water and letting it dry to reactivate the adhesive. This works temporarily but isn’t as effective as spray adhesive. Test it on a corner first if you’re skeptical. Keep in mind that spray adhesive is a temporary fix—eventually, all mats reach end of life and need replacement.
Maintenance Tips Between Cleans
Prevention is easier than cure. Develop these habits to keep your mat cleaner longer. Always remove cut materials immediately after your project finishes. Leaving scraps sitting on the mat causes them to stick permanently and creates buildup. Store your mat flat in a cool, dry place away from direct sunlight, which can degrade the adhesive.
Use a protective cover or storage sleeve to keep dust off your mat when it’s not in use. Many Cricut mats come with protective covers, or you can buy them separately. Keep your cutting area clean and organized—this reduces the amount of lint and debris that ends up on your mat in the first place.
Rotate between two mats if you cut frequently. This gives each mat recovery time and extends overall lifespan. Most serious crafters keep 2-3 mats in rotation, using one while others dry or recover. This approach also means you always have a clean mat ready to go.
When to Replace Your Mat
Even with excellent care, Cricut mats eventually wear out. Signs that replacement time has arrived include: the mat no longer grips materials even after cleaning and stickiness restoration, visible gouges or damage to the surface, or materials consistently slipping during cuts regardless of your technique.
Most standard Cricut mats cost $15-25 and last 6-12 months with regular use and proper maintenance. Premium mats cost more but may last slightly longer. When you notice your cuts becoming consistently poor quality, invest in a fresh mat. The cost is minimal compared to the wasted materials from failed projects.
Keep track of when you purchased your mat so you know when it’s approaching typical end-of-life. Set a calendar reminder every 6 months to assess your mat’s condition. This proactive approach prevents frustration and ensures your Cricut always performs at its best.
Frequently Asked Questions
Can I use rubbing alcohol to clean my Cricut mat?
Avoid rubbing alcohol, as it can damage the adhesive layer and reduce stickiness. Stick with water, mild soap, or dedicated mat cleaning products designed for Cricut equipment. If you must use alcohol, test it on a small corner first.
How often should I clean my mat?
Light cleaning with a tape or lint roller should happen weekly if you cut frequently, or after every 3-4 projects. Deeper cleaning with scraping and water washing is needed monthly or as needed. Listen to what your mat tells you—if materials start slipping, it’s time to clean.
Is it safe to wash my mat in the dishwasher?
Never put your Cricut mat in the dishwasher. The heat, harsh detergents, and water pressure will destroy the adhesive layer permanently. Hand washing with lukewarm water and mild soap is the only safe wet cleaning method.
What’s the best way to store a clean mat?
Store your mat flat or rolled loosely (adhesive side in) in a cool, dry place away from sunlight. Use a protective cover or storage sleeve to keep dust off. Never fold your mat, as this can create permanent creases.
Can I use baby wipes on my mat?
Baby wipes are generally safe for light cleaning but aren’t ideal. They leave residue that can reduce stickiness. If you use them, follow up with a dry cloth to remove excess moisture and residue.
Why does my mat lose stickiness so quickly?
Overuse, exposure to lint and dust, and not removing materials promptly all accelerate stickiness loss. Regular cleaning extends mat life significantly. If your mat loses stickiness very quickly despite proper care, you may have a defective mat and should contact Cricut support.
Final Thoughts
Knowing how to clean cricut mat properly is one of the best investments you can make in your crafting hobby. A clean, well-maintained mat performs better, lasts longer, and helps you create projects you’re proud of. Start with the simple tape roller method for weekly maintenance, graduate to deeper cleaning when needed, and don’t hesitate to restore stickiness or replace your mat when the time comes.
Your Cricut mat is a workhorse that deserves respect and care. Spend a few minutes each week keeping it clean, and it will reward you with consistent, professional-quality cuts every single time. Happy crafting!


