
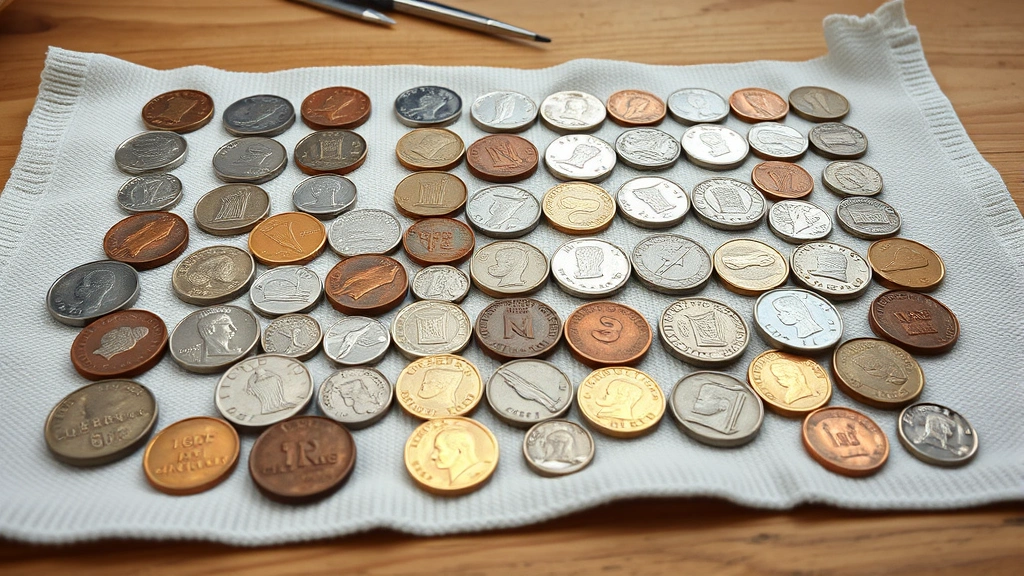
Learning how to clean coins is one of those skills that sounds fancier than it actually is—but man, does it make a difference when you nail it. Whether you’ve inherited grandma’s coin collection, found some tarnished treasures at a flea market, or just want to restore those old pennies gathering dust in a jar, I’ve got you covered with methods that actually work without destroying your coins’ value or finish.
Table of Contents
Gentle Soap and Water Method
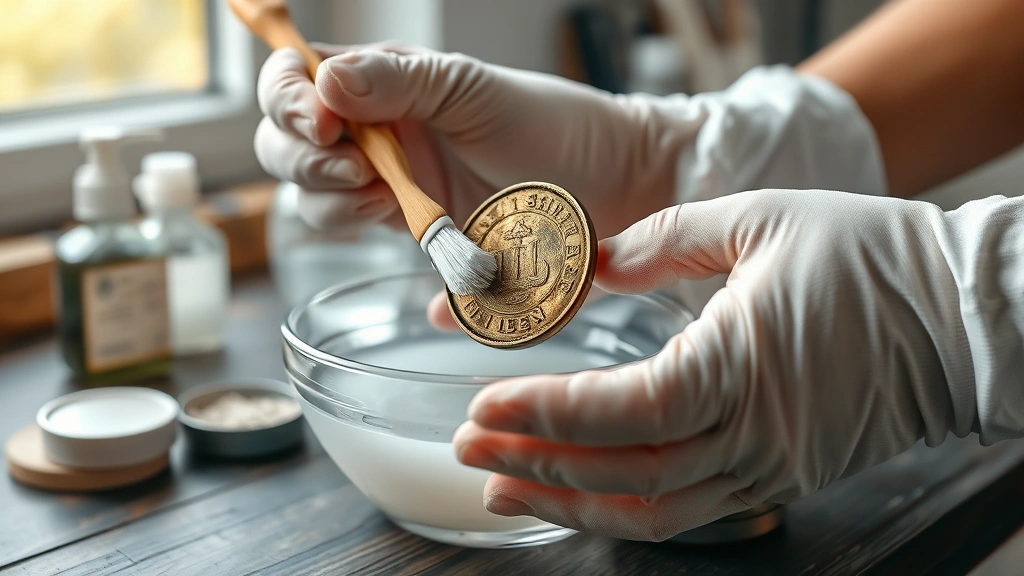
This is your starting point, your gateway drug to coin cleaning. It’s the safest method and honestly, it’s where 80% of people should stop. Fill a small bowl with warm (not hot) water and add a few drops of mild dish soap—the kind you’d use on fine china, not the heavy-duty stuff. Drop your coins in and let them soak for 15-20 minutes. The warm water helps loosen surface dirt and oxidation without being aggressive.
After soaking, use a soft-bristled toothbrush—and I mean soft, like the kind dentists recommend—to gently brush each coin under running water. Work in circular motions, focusing on the grooves and recesses where gunk loves to hide. Rinse thoroughly with distilled water (tap water leaves mineral deposits) and pat dry immediately with a lint-free cloth. This method works beautifully on modern coins and lightly tarnished vintage pieces.
Vinegar and Salt Soak
When soap and water aren’t cutting it, vinegar steps up to the plate. The acidity in vinegar is a natural tarnish fighter, and when you combine it with salt, you’ve got a gentle but effective cleaning agent. Mix equal parts white vinegar and salt in a small container—about a quarter cup of each works well for a handful of coins.
Drop your coins into this mixture and let them soak for 5-10 minutes. You’ll actually see the tarnish starting to lift. Use that soft toothbrush again to work away stubborn spots, then rinse with distilled water. The beauty of this method is that it’s stronger than soap and water but still respectful to the coin’s surface. I’ve used this on coins with moderate tarnish and gotten genuinely impressive results. Just like when you’re learning how to clean a washing machine, patience and the right solution matter more than elbow grease.
Baking Soda Paste Technique
Baking soda is the Swiss Army knife of household cleaning, and it works wonders on coins. Make a paste by mixing baking soda with a tiny bit of water—you want it thick enough to stay on the coin but thin enough to spread. The consistency should be like toothpaste, not concrete.
Apply this paste directly to your coins and use a soft cloth or soft-bristled brush to gently work it in circular motions. For coins with heavier tarnish, you can let the paste sit for a few minutes before brushing. The mild abrasive nature of baking soda removes oxidation without scratching the underlying metal. Rinse thoroughly with distilled water and dry immediately. This method is particularly effective on copper and silver coins that have turned dark or greenish.
Lemon Juice for Stubborn Tarnish
When you’ve got serious tarnish that’s been building up for decades, lemon juice brings the acid power. The citric acid in fresh lemon juice (bottled works too, but fresh is better) cuts through oxidation like nothing else. Squeeze some lemon juice into a small bowl and drop your coins in for a 5-15 minute soak, depending on how bad the tarnish is.
Check progress every few minutes—you don’t want to leave coins in lemon juice too long as the acid can eventually affect the metal itself. Once the tarnish starts lifting, remove the coins, rinse with distilled water, and gently brush with your soft toothbrush if needed. This method is particularly good for old silver coins and copper pieces that have turned almost black. The results can be dramatic, but remember: restraint is your friend here.
Electrolysis for Deep Cleaning
Now we’re getting into the advanced moves. Electrolysis sounds intimidating, but it’s actually a safe, chemical-free way to remove heavy tarnish and corrosion. You’ll need a 9-volt battery, two wires, a piece of aluminum foil, and a glass of water with a tablespoon of baking soda dissolved in it.
Connect one wire to the positive terminal and one to the negative terminal of the battery. Crumple the aluminum foil into a ball and attach the positive wire to it. Attach the negative wire to your coin (or create a small loop to hold it). Place the aluminum foil in your baking soda solution and submerge your coin so it’s close to—but not touching—the foil. Leave it for 5-30 minutes depending on tarnish severity. You’ll see bubbles forming, which means it’s working. This method is fantastic for heavily corroded coins without being harsh on the metal itself.
What NOT to Do
Listen, there are some coin-cleaning sins that’ll haunt you. Never—and I mean never—use commercial metal polishes like Brasso or Tarnex on collectible coins. These are abrasive and can permanently damage a coin’s surface and drastically reduce its value. Avoid steel wool, scouring pads, or any kind of rough cloth. Don’t use hot water or let coins air dry—always use distilled water and pat dry immediately with a soft cloth.
Don’t soak coins for hours on end, and don’t mix cleaning methods in one session. Stick with one method, evaluate the results, and if needed, try a different approach next time. Think of it like how to caulk a shower—rushing the process or using the wrong technique creates problems that are hard to fix. Also, never clean rare or valuable coins yourself; take them to a professional numismatist.
Proper Drying and Storage
How you dry and store your coins after cleaning is just as important as the cleaning itself. Always use a lint-free cloth—microfiber works great—and dry each coin individually. Don’t let them air dry, as this can cause water spots and new oxidation. Once dry, store them in acid-free holders or capsules, never in plastic bags or PVC holders that’ll cause green corrosion.
Keep cleaned coins in a cool, dry place away from humidity. If you live somewhere humid, consider a small dehumidifier or storing coins in airtight containers with silica gel packets. Fingerprints are the enemy of clean coins, so handle them by the edges only, and consider wearing cotton gloves if you’re handling valuable pieces. Proper storage prevents you from having to clean them again anytime soon.
Tips for Valuable Coins
If you’ve got coins that might be worth actual money, proceed with caution. Rare coins often have more value in their original patina than if you clean them to a mirror shine. The numismatic community generally prefers coins in their natural state, and aggressive cleaning can tank the value faster than you’d think.
For potentially valuable coins, do your research first. Check recent sales of similar coins online to see if they’re cleaned or original. When in doubt, take your coins to a professional grading service like PCGS or NGC. They’ll evaluate the coin and clean it professionally if cleaning is warranted. It’s like the difference between doing a DIY repair and calling a specialist—sometimes the investment pays off. Just as you’d research before tackling a complex project like how to change guitar strings, do your homework on coin value before cleaning.
Frequently Asked Questions
Can I use toothpaste to clean coins?
Not recommended. Most toothpastes are too abrasive and contain additives that can damage coins. Stick with the methods outlined above—they’re specifically designed to be gentle on metal surfaces.
How often should I clean my coins?
Ideally, you shouldn’t need to clean coins frequently if you’re storing them properly. Once cleaned and stored correctly in acid-free holders, they should stay clean for years. Only clean when visible dirt or tarnish appears.
Is it safe to clean old coins from the 1800s?
Proceed carefully with antique coins. Start with the gentlest method (soap and water), and if that doesn’t work, try vinegar and salt. Avoid aggressive methods on coins older than 100 years unless you’ve had them professionally appraised first.
What’s the best method for coins I just found?
Start with the soap and water method. If that doesn’t remove the dirt, move to vinegar and salt. Only escalate to stronger methods if necessary. Most found coins just need gentle cleaning to reveal their true appearance.
Can I clean coins with a wire brush?
Absolutely not. Wire brushes, even soft ones, are too abrasive for coins. Stick with soft-bristled toothbrushes or soft cloths. The goal is to remove tarnish and dirt, not to scratch the metal.
Should I clean coins before selling them?
Not necessarily. Many collectors prefer original patina, and cleaning can actually reduce value. If you’re selling common modern coins, light cleaning is fine. For older or rare coins, leave them as-is and let the buyer decide, or have them professionally graded first.
The Bottom Line on Coin Cleaning
Learning how to clean coins doesn’t require fancy equipment or harsh chemicals. Start gentle, work your way up if needed, and always prioritize the coin’s long-term appearance over immediate sparkle. The soap and water method handles most situations beautifully, and for tougher jobs, vinegar and salt or baking soda paste will get you 90% of the way there.
Remember that the goal isn’t to make coins look brand new—it’s to reveal their true appearance by removing dirt and surface oxidation. Take your time, use soft tools, and dry everything immediately with distilled water and lint-free cloths. Whether you’re restoring a family heirloom or cleaning up some pocket change, these methods work reliably without damaging your coins. Your future self—and your coin collection—will thank you for treating them right. For more detailed guidance on restoration techniques, check out resources from Family Handyman, and for collectible coin care, the U.S. Mint offers excellent information on preservation standards.


