

Learning how to clean cloth car seats doesn’t require fancy equipment or expensive professionals—just some elbow grease, the right supplies, and a methodical approach. Your car’s interior takes a beating: spilled coffee, dusty commutes, pet paw prints, and everyday grime all settle into those fabric fibers. The good news? You can restore them to showroom condition right in your driveway.
Table of Contents
Vacuum First, Always
Before you spray anything on those cloth car seats, grab a quality vacuum. This is non-negotiable. Loose dirt, crumbs, and dust particles need to go first—they’ll turn into mud if you wet them without removing them. Use the upholstery attachment and really work the crevices where the seat cushion meets the backrest. Pay special attention to the seams and piping where debris loves to hide.
Spend at least 5-10 minutes per seat section. Work the vacuum in multiple directions to lift the nap of the fabric. If you have a handheld vacuum, even better—you can get into tight spots more easily. This step alone removes roughly 80% of the grime without any chemicals.
Spot Test Your Solution
Never—and I mean never—apply your cleaning solution directly to the entire seat without testing it first. Find an inconspicuous area, like under the seat or on the back cushion, and apply a small amount of your chosen cleaner. Wait 5 minutes and blot with a white cloth. Look for any discoloration or fabric damage. This prevents you from accidentally bleaching or staining your seats worse than they already are.
Common cloth car seat cleaners include:
- Commercial upholstery cleaners (Folex, Resolve, Spot Shot)
- DIY solution: 1 part white vinegar, 1 part water, 1 drop dish soap
- Baking soda paste for dry spot cleaning
- Enzyme-based pet stain removers for organic messes
The DIY vinegar solution works surprisingly well for general grime and costs pennies. For tougher stains, commercial products designed for automotive upholstery give better results.
Tackle Stubborn Stains
Different stains need different tactics. Treat stains before doing the whole-seat deep clean. For grease or oil marks, sprinkle baking soda directly on the spot and let it sit for 15 minutes—it absorbs the oils naturally. Then vacuum it up. For protein-based stains (blood, food, pet accidents), use an enzyme cleaner that breaks down the organic material at a molecular level.
For chocolate, gum, or sticky residue, let it dry completely first. Dried gunk is easier to lift than wet. You can even freeze it with ice to make it more brittle, then gently scrape with a plastic scraper. Once the bulk is gone, treat any remaining stain with your chosen solution.
Wine, juice, and coffee stains respond well to the blot-and-lift method: apply your cleaning solution, let it sit for 2-3 minutes (don’t oversaturate), then blot repeatedly with clean white cloths. Each blot should lift a little more color. Resist the urge to rub—rubbing spreads the stain deeper into the fibers.
Deep Clean the Fabric
Now that spots are handled and the seat is vacuumed, it’s time for the full deep clean. Spray your chosen cleaner lightly across the seat surface—you want damp, not soaked. A spray bottle gives you better control than pouring. Let the solution sit for 3-5 minutes so it can break down embedded dirt and body oils.
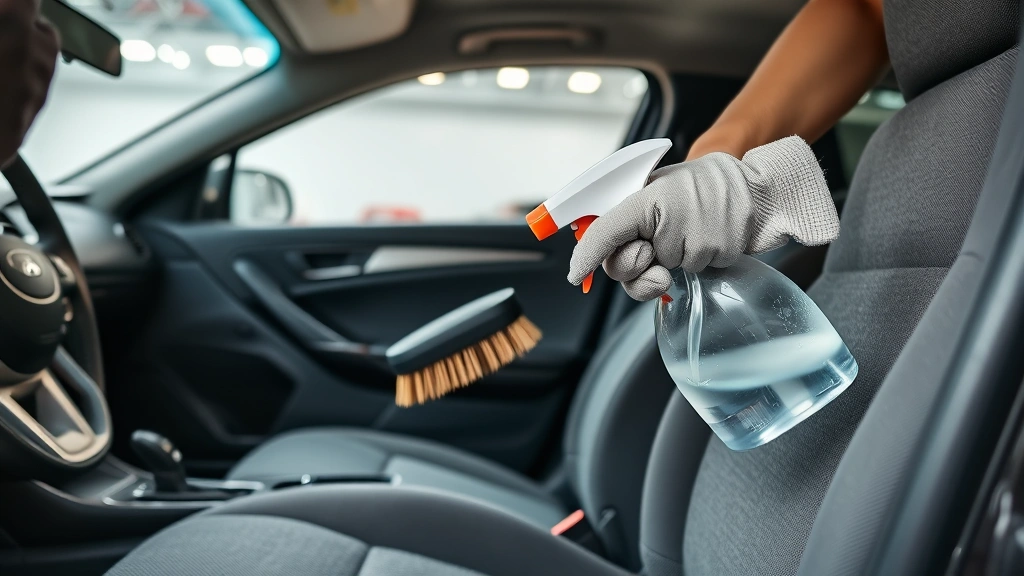
Grab a soft-bristled upholstery brush or an old toothbrush and work the cleaner into the fabric with gentle circular motions. Don’t scrub aggressively; you’re coaxing the dirt out, not attacking the fabric. Work in small sections. The friction combined with the chemical action of the cleaner does the heavy lifting.
After brushing, use clean white cloths to blot away the dirty solution. You’ll be amazed how much grime comes out. Keep blotting with fresh cloth sections until the water you’re extracting runs clear. This might take 8-10 passes per section. Patience here makes the difference between mediocre and excellent results.
Dry Properly to Prevent Mildew
Moisture is the enemy of clean upholstery. Damp seats attract mildew, which smells terrible and damages the fabric. Open all your car doors and windows wide. If you have access to a wet/dry shop vacuum, use it to extract remaining moisture from the seats. Run it over each cleaned section several times.
On a sunny day, park your car in direct sunlight with windows down. UV rays naturally kill bacteria and help evaporate moisture. If it’s overcast or cold, crack the windows and leave the interior vents on recirculate mode while parked in a garage. Never close the car up while the seats are still damp.
For faster drying, you can use a hair dryer on cool or low heat setting, keeping it 12 inches away from the fabric and moving constantly. High heat can damage some synthetic fabrics. The goal is to have your seats completely dry within 4-6 hours. Check the underside of cushions too—moisture can hide there.
Maintain Between Cleanings
You’ve done the hard work. Now keep those seats clean longer with simple habits. Use seat covers or throws if you have kids or pets. Vacuum weekly with the upholstery attachment, especially if anyone eats in the car. Address spills immediately—the longer they sit, the deeper they set.
Keep a small container of baking soda in your car. When a fresh spill happens, blot with a cloth first, then sprinkle baking soda and let it sit for 10 minutes before vacuuming. This prevents the stain from setting while you’re away from home supplies. For pet owners, knowing how to clean dog ears might seem unrelated, but the same gentle cleaning principles apply to pet-related messes on your upholstery.
Every 3-4 months, do a light refresh: vacuum thoroughly and spot-clean any new marks. This prevents buildup and keeps your seats looking fresh without needing a deep clean every time.
Common Mistakes to Avoid
Don’t oversaturate. Soaking your seats with cleaner doesn’t clean better—it just takes longer to dry and risks mildew. Use a light touch with your spray bottle. If you can wring out the cloth you’re blotting with, you’ve used too much solution.
Don’t use hot water on cloth seats. Hot water can set stains and damage some synthetic fibers. Stick with cool or lukewarm water. Don’t mix cleaning products—combining bleach with ammonia-based cleaners creates toxic fumes. Choose one product and stick with it.
Don’t forget the undersides and crevices. The seat bottom and the gap between cushions collect tremendous amounts of dirt. These areas need vacuuming and cleaning just as much as the visible surfaces. Don’t rush the drying process. Patience prevents mildew problems that are far worse than the original dirt.
Frequently Asked Questions
Can I use a steam cleaner on cloth car seats?
Yes, but carefully. Steam cleaners work well for deep cleaning, but they introduce a lot of moisture. Use a commercial upholstery steam cleaner with extraction capability—one that pulls moisture back out. Avoid cheap handheld steamers that just add water. Always follow up with thorough drying to prevent mildew.
What’s the best product for pet stains on car seats?
Enzyme-based cleaners designed for pet stains are your best bet. Brands like Nature’s Miracle or Rocco & Roxie break down uric acid and other organic compounds that regular cleaners miss. Apply, let sit for the recommended time, then extract thoroughly. The enzymes continue working even after initial application if the area stays slightly damp.
How often should I deep clean my car seats?
For regular use without kids or pets, every 6-12 months works fine. With kids or pets, every 2-3 months keeps them looking good. High-traffic commuters might benefit from quarterly deep cleans. Light vacuuming and spot-cleaning should happen weekly regardless.
Will vinegar damage my car seat fabric?
No, the diluted vinegar solution (1:1 with water) is gentle and safe for most cloth upholstery. The vinegar smell dissipates as it dries. If you’re concerned, test it on a hidden area first. For delicate fabrics, use less vinegar or skip it entirely and choose a commercial upholstery cleaner instead.
Can I use a carpet cleaner on my car seats?
Some carpet cleaners work on upholstery, but they’re often too harsh and designed for thicker carpet fibers. Car seat fabric is more delicate. Stick with products specifically labeled for upholstery or automotive use. When in doubt, use the gentler DIY solutions first before graduating to commercial products.
The Bottom Line
Cleaning cloth car seats is straightforward when you follow the right sequence: vacuum, spot-treat, deep clean, and dry thoroughly. You don’t need expensive equipment or professional services. A methodical approach and patience give you results that rival professional detailing at a fraction of the cost. Your car’s interior is one of the most-used surfaces in your life—keeping it clean isn’t just about appearance, it’s about maintaining a healthy, pleasant environment where you spend significant time. Start with these proven steps, and you’ll have fresh, clean seats that make every drive more enjoyable. For more cleaning wisdom around your home, check out our guide on how to clean baseboards using similar techniques.
The satisfaction of transforming dingy, stained seats into clean fabric is real. You’ll wonder why you didn’t tackle this sooner. And next time a spill happens, you’ll know exactly what to do.


