
Learning how to clean AC coils is one of the best investments you can make in your cooling system’s longevity and performance. Dirty coils force your air conditioner to work harder, waste energy, and can lead to costly repairs down the road. The good news? You don’t need a professional—just some basic tools, a little elbow grease, and this straightforward guide.
Table of Contents
Why Coil Cleaning Matters
Your AC system’s evaporator and condenser coils are like the lungs of your air conditioning unit. Over time, dust, pollen, pet hair, and moisture accumulate on these coils, creating a grimy layer that blocks heat transfer. This buildup doesn’t just reduce cooling efficiency—it can increase your energy bills by 15-30% according to the U.S. Department of Energy. When coils get too dirty, your system overheats and shuts down, potentially requiring expensive repairs. Regular cleaning keeps everything running smoothly and extends your unit’s lifespan by years.
Safety First: Power Down
Before you touch anything, kill the power. Locate your AC unit’s circuit breaker and flip it off completely. Don’t just turn off the thermostat—you need to cut electrical power entirely. Wait a few minutes for any residual charge to dissipate. This isn’t being overly cautious; it’s the difference between a safe afternoon and a trip to the emergency room. If you’re uncomfortable working with electrical systems, this is the moment to call a pro.
Gather Your Tools
You don’t need fancy equipment for this job. Here’s what to have on hand:
- Soft-bristled brush (old toothbrush works great)
- Vacuum with hose attachment
- Fin comb (optional but helpful)
- Coil cleaner spray (AC-specific, not general-purpose)
- Spray bottle with distilled water
- Towels or rags
- Safety glasses
- Gloves
- Drain pan (to catch runoff)
Don’t skip the AC-specific cleaner—regular household cleaners can damage coil fins and void warranties. Check that your chosen product is compatible with your system type.
Locate Your AC Coils
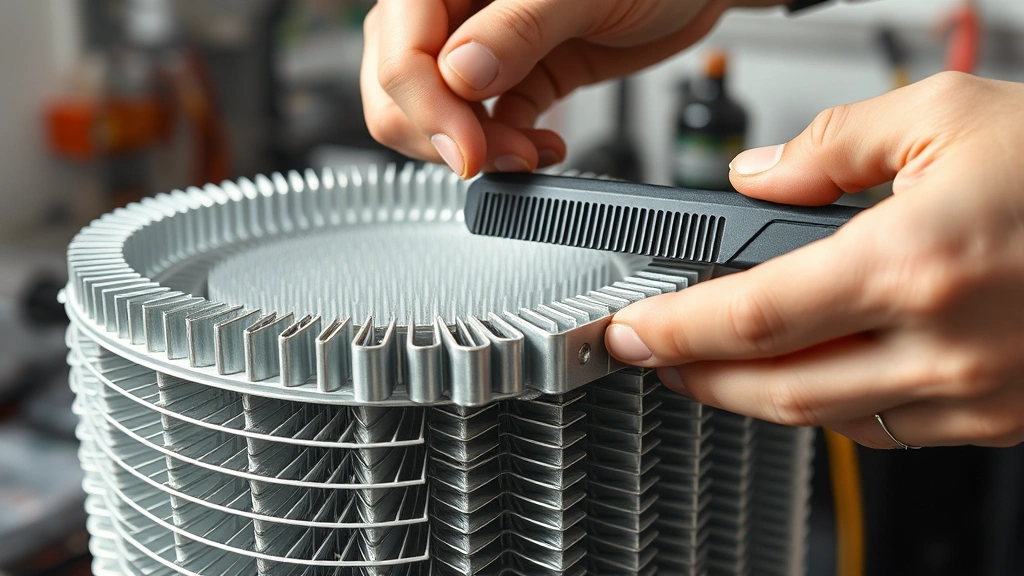
AC systems have two sets of coils: evaporator coils (inside your home, usually in the air handler) and condenser coils (outside in the unit). For a complete cleaning, you’ll want to tackle both, though the condenser coils are typically more accessible and dirtier. The condenser unit is that metal box outside your home. Pop the cover—usually held by a few bolts—and you’ll see the coils: aluminum fins arranged in rows. The evaporator coils are trickier to reach; they’re usually tucked inside the indoor unit near your furnace or air handler. You might need to remove a panel or access cover. Take photos before disassembling anything so you remember how it goes back together.
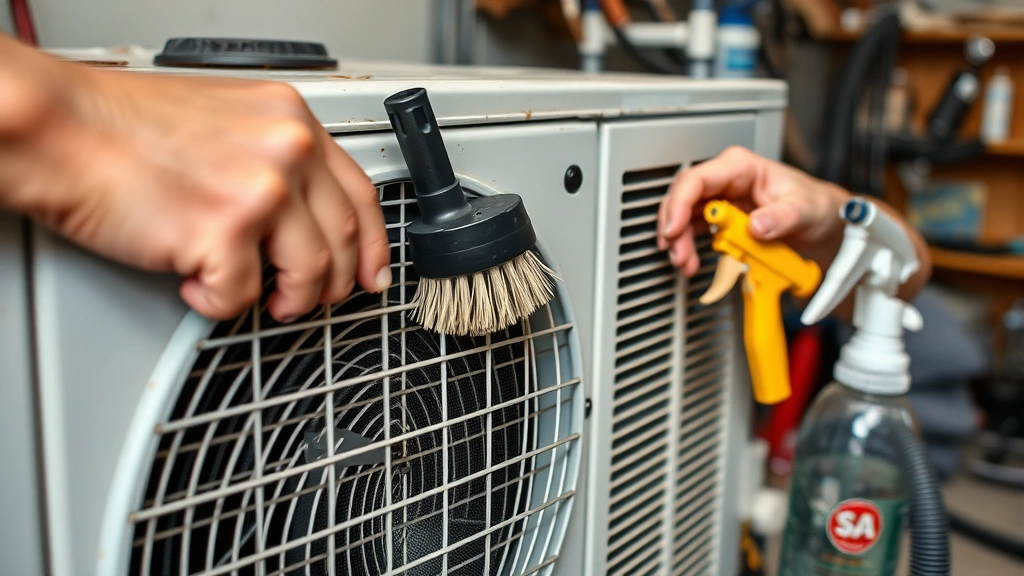
Vacuum Away Loose Debris
Start with your vacuum’s hose attachment and gently remove loose dust and debris from the coil fins. Work carefully—those aluminum fins are delicate and bend easily. Use light pressure and move the hose parallel to the fins rather than perpendicular to them. You’ll be surprised how much gunk comes off with just vacuuming. This step is crucial because it prevents you from pushing debris deeper into the coils when you apply the cleaner. If any fins are bent, use your fin comb to straighten them gently. A fin comb is a specialized tool with teeth spaced to match your coil’s fin spacing—they’re cheap and worth having.
Apply Coil Cleaner
Shake your AC coil cleaner well and spray it evenly across the coils, working from top to bottom. The cleaner will foam up as it breaks down the grime—that’s exactly what you want. Let it sit for 10-15 minutes (check your product’s instructions) while the chemical does the heavy lifting. Don’t let it dry completely. The foam will turn brown or gray as it lifts dirt and oils from the coils. If your coils are really grimy, you might need a second application. While waiting, don’t start another project—stay nearby so you can move to the next step on schedule.
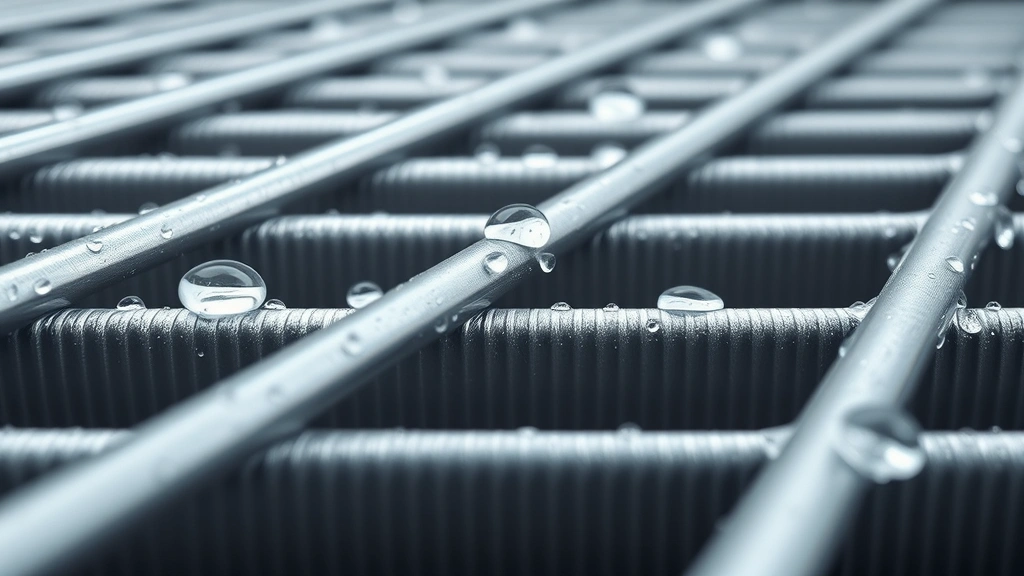
Rinse Thoroughly
After the cleaner has worked its magic, rinse everything away with distilled water. A spray bottle works fine for smaller areas, but for the condenser coils, you might want a garden hose on low pressure. Rinse from top to bottom, letting water flow downward and carrying away the loosened grime. Make sure you flush out all the cleaner residue—any leftover chemicals can corrode the aluminum fins. This step is where patience pays off. Take your time and ensure every trace of cleaner is gone. The water running off should be relatively clear by the end.
Reassemble and Test
Once everything is clean and dry, reassemble your unit carefully. Replace any panels, covers, or access doors you removed. Double-check that all bolts are tight and everything is seated properly. Now flip the circuit breaker back on and set your thermostat to cool. Listen for the unit to start smoothly and feel the air coming from your vents. It should be noticeably colder than before—you might feel the difference immediately. Let it run for 15-20 minutes and check that the temperature is dropping steadily. If something seems off, turn it back off and investigate before running it longer.
Maintenance Tips
Cleaning your coils isn’t a one-time event. Plan to clean your condenser coils annually, ideally before summer when your AC works hardest. If you have pets or live in a dusty area, consider cleaning twice yearly. Change your air filter every 1-3 months—a clean filter prevents dust from reaching your evaporator coils in the first place. Keep vegetation and debris away from your outdoor condenser unit; give it at least 2 feet of clearance on all sides. If you notice your AC isn’t cooling as well as it used to, or your energy bills are creeping up, coil cleaning should be your first troubleshooting step. Think of it like how to free up storage space—removing the buildup keeps everything running efficiently.
When to Call a Professional
Some situations call for expert help. If your evaporator coils are frozen solid, you have a refrigerant leak (indicated by ice buildup), or your unit isn’t cooling after cleaning, contact an HVAC technician. If you’re uncomfortable working with electrical systems or accessing your unit’s internals, that’s perfectly valid—professionals have the right insurance and expertise. According to Family Handyman, knowing your limits prevents costly mistakes. A service call costs $150-300, but a damaged coil replacement runs $1000+. Also, if your unit is still under warranty, some manufacturers require professional service to keep coverage valid.
Troubleshooting Common Issues
If your AC still isn’t cooling properly after cleaning, check these culprits: Is your air filter clogged? Replace it. Are your ductwork connections loose? Seal them with duct tape. Is your thermostat set correctly? Verify it’s in cooling mode and set below room temperature. Is your outdoor unit blocked? Clear vegetation and debris. According to This Old House, 80% of AC problems stem from simple maintenance oversights. If you’ve eliminated these basics and the problem persists, that’s when you call for professional diagnosis.
Frequently Asked Questions
How often should I clean my AC coils?
Clean your condenser coils at least once yearly, ideally before summer. If you have pets, live in a dusty climate, or notice reduced cooling, clean twice yearly. Evaporator coils benefit from annual inspection and cleaning if accessible.
Can I use a pressure washer on my condenser coils?
Avoid high-pressure washers—they can bend fins and damage the delicate coil structure. Stick with low-pressure water from a garden hose or spray bottle. If you must use a pressure washer, keep it on the lowest setting and maintain distance.
What’s the difference between evaporator and condenser coils?
Evaporator coils are inside your home and absorb heat from indoor air. Condenser coils are outside and release that heat to the outdoor air. Both get dirty and benefit from cleaning, but the condenser is more exposed to dust and debris.
Is AC coil cleaner toxic?
Most commercial AC coil cleaners are safe when used as directed, but they’re not meant for ingestion. Wear gloves, avoid breathing fumes directly, and ensure good ventilation. Keep cleaners away from children and pets. Check your product’s safety data sheet for specific precautions.
Will cleaning coils reduce my energy bill?
Yes, significantly. Clean coils improve efficiency by 15-30%, which translates directly to lower energy costs. The savings often pay for the cleaning supplies and effort within a few months, especially in hot climates where AC runs constantly.
Can I clean coils without turning off power?
Absolutely not. Always disconnect power at the circuit breaker before touching any part of your AC system. This is non-negotiable for safety. Bob Vila emphasizes that electrical hazards are serious and preventable with proper precautions.
Final Thoughts
Cleaning your AC coils is a straightforward maintenance task that pays huge dividends in comfort and savings. You don’t need special certifications or expensive tools—just care, attention to detail, and a methodical approach. By following these five proven steps, you’ll keep your system running at peak efficiency, extend its lifespan, and avoid emergency repair calls during summer heat waves. Start with your outdoor condenser coils since they’re more accessible, build confidence, then tackle the evaporator coils if you’re comfortable. Your future self will thank you when your AC is still running strong years from now, and your energy bills stay reasonable. Now get out there and give your cooling system the cleaning it deserves.


