

Learning how to clean a toaster is one of those kitchen skills that takes five minutes but can extend your appliance’s life by years. Most people ignore their toaster until it starts smoking or smelling like burnt rubber—don’t be that person. A clean toaster toasts more evenly, runs safer, and honestly just feels better to use.
Table of Contents
Why You Need to Clean Your Toaster
Here’s the thing about toasters: they’re basically little ovens that catch everything. Every time you toast bread, bagels, or anything else, crumbs fall through the slots and pile up in the bottom. Over time, this buildup becomes a fire hazard and affects how your toaster performs. The heating elements work harder, your toast comes out unevenly, and you might notice a burnt smell even when you’re not toasting anything.
Beyond safety, a clean toaster just works better. If you’ve ever made Dollywood Cinnamon Bread or fresh sourdough toast, you know that even browning matters. Crumb buildup creates hot spots that burn some spots while leaving others pale. Regular cleaning fixes this and keeps your morning routine running smoothly.
Gather Your Supplies First
You don’t need fancy cleaning products for this job. Grab:
- A dry, soft-bristled brush or old toothbrush
- A butter knife or wooden skewer (never metal)
- A small vacuum with a hose attachment, or a handheld duster
- A damp microfiber cloth
- Optional: white vinegar for stubborn residue
That’s genuinely all you need. Don’t use water inside the toaster or spray anything directly into the slots—electricity and moisture don’t mix. We’re going dry-clean for the interior and damp-clean for the outside only.
Unplug and Let It Cool
This is non-negotiable. Unplug your toaster from the wall outlet before touching anything inside. Then wait at least 10-15 minutes if you’ve been using it recently. The heating elements get genuinely hot and can cause burns or damage your tools.
While you’re waiting, this is a good time to prep your workspace. Put down some newspaper or paper towels to catch the crumbs you’re about to shake loose. Trust me, there will be more than you expect.
Empty the Crumb Tray Regularly
Most toasters have a removable crumb tray on the bottom or back. Locate yours and slide it out gently. You’ll probably be shocked at what’s in there—it’s like an archaeological dig through your breakfast history.
Empty the tray into your trash, then tap it against the side of the trash can a few times to shake out any stuck crumbs. If you’ve been toasting fresh corn bread or other crumbly items, there might be stubborn bits. Use your soft brush to loosen these before tapping again. Slide the tray back in until it clicks or sits flush.
Pro tip: do this monthly as part of regular maintenance, or weekly if you’re a heavy toaster user. It’s the easiest way to prevent major buildup.
Deep Clean the Interior
Now for the deep clean. With the toaster still unplugged and cool, hold it over your newspaper and gently tilt it side to side. Crumbs will fall out—more than you’d think. You’re basically shaking loose all the debris that’s settled on the heating elements.
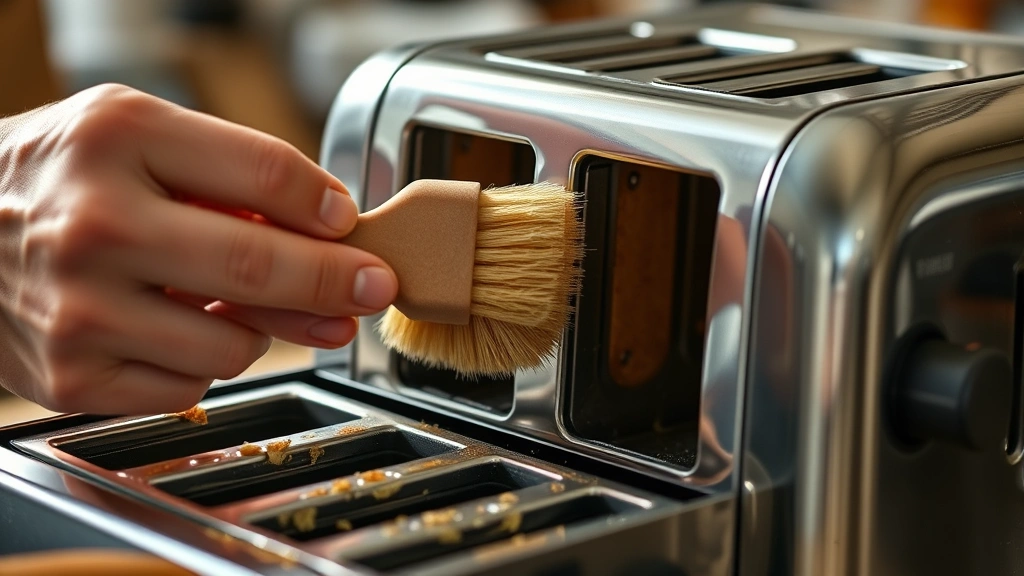
Next, take your soft-bristled brush and gently brush inside each slot. Go slowly and don’t force anything. You’re brushing crumbs loose, not scrubbing. If you have a handheld vacuum, use it on the lowest setting to carefully vacuum out the loosened crumbs. The hose attachment lets you reach into the slots without pushing anything around.
For stubborn crumbs stuck to the heating elements, use your butter knife or wooden skewer. Gently scrape along the wires—never poke directly at them. The goal is to dislodge crumbs without damaging the elements. If anything feels stuck or you’re nervous, stop and try the vacuum instead.
Clean the Exterior Surfaces
Once the interior is handled, wipe down the outside. Dampen your microfiber cloth with plain water (not dripping wet, just damp) and wipe the sides, top, and front. Pay attention to the control lever and any buttons—these collect dust and crumbs too.
If you notice stubborn stains or sticky spots, use a cloth dampened with equal parts white vinegar and water. Wipe gently, then follow up with a cloth dampened with plain water to remove any vinegar smell. Dry everything with a clean cloth.
Don’t forget the cord and plug. Wipe these down too, but never spray anything directly on the plug itself. Keep it dry and functional.
Prevent Buildup Between Cleanings
The secret to not hating toaster maintenance is staying on top of it. Empty that crumb tray monthly, or more often if you toast a lot. If you’re making sourdough discard recipes that involve toasted bread, you might want to do it bi-weekly.
Also, consider what you’re toasting. The crumblier the item, the more debris it creates. Bagels and thick-cut bread are better than delicate pastries or overly toasted bread that’s falling apart. If something is already breaking into pieces, it probably shouldn’t go in the toaster.
Keep your toaster in a clean spot away from high-traffic areas. The less dust settling on it, the less you have to clean.
Troubleshoot Common Problems
If your toaster still isn’t working right after cleaning, here’s what to check:
Uneven toasting: You might have missed some crumb buildup on one side. Repeat the interior cleaning, paying special attention to both slots equally.
Burnt smell: This usually means crumbs are still burning on the heating elements. Do a deeper clean and make sure you’re emptying the crumb tray more frequently.
Toast gets stuck: Don’t use a metal object to fish it out—you’ll damage the elements. Unplug the toaster, let it cool, and gently shake it to dislodge the toast. If it’s truly stuck, you might need to disassemble slightly, but most toasters have a release lever for this.

Lever doesn’t stay down: This usually isn’t a cleaning issue but a mechanical one. If cleaning doesn’t fix it, the toaster might be ready for retirement. Check Family Handyman’s appliance guides for replacement recommendations.
Frequently Asked Questions
How often should I clean my toaster?
Empty the crumb tray monthly at minimum, or every two weeks if you use it daily. Do a full deep clean every 3-6 months depending on usage. Heavy users might go quarterly.
Can I use water inside my toaster?
Absolutely not. Water and electricity are a dangerous combination. Only use dry brushes and vacuums for the interior. The exterior can handle a damp cloth, but never spray or pour anything inside.
What if my toaster has a lot of stuck-on residue?
If there’s sticky buildup (like from melted cheese or jam), let it dry completely first. Once dry, it becomes brittle and easier to brush away. Never try to clean sticky residue while it’s wet or warm—you’ll just spread it around.
Is it safe to take apart my toaster?
Most modern toasters aren’t designed for user disassembly. Stick with cleaning from the crumb tray and slot openings. If you need to go deeper, consult your manual or check This Old House’s appliance section for model-specific advice.
Why does my toaster smell like burning even after cleaning?
Sometimes the smell is just residual from old crumbs. Run it empty (unplugged) for a few minutes after cleaning to let any remaining dust burn off. If the smell persists or smells like melting plastic, stop using it immediately—it might be a safety issue.
Can I use vinegar inside the toaster?
No. Vinegar is liquid, and you don’t want any moisture inside. Save the vinegar for the exterior only. For interior stubborn spots, stick with dry brushing.
What’s the best way to prevent crumbs from getting everywhere?
Place your toaster on a crumb-catching mat or tray, or position it over a cutting board when you’re about to empty the crumb tray. This keeps your countertop clean and makes cleanup faster.
Final Thoughts
How to clean a toaster really comes down to this: unplug it, empty the tray, brush out the crumbs, and wipe the outside. It takes maybe 10 minutes total and makes a massive difference in how your toaster performs. You’ll get more even toasting, fewer burnt smells, and a safer appliance overall.
Make it a habit. Set a reminder on your phone for the first of every month to empty the crumb tray. Do a deep clean when you notice the toast isn’t coming out right. Your toaster will last longer, work better, and you’ll actually enjoy using it instead of dreading the burnt smell.
Whether you’re toasting bread for homemade breadlings or just getting your breakfast ready, a clean toaster is a happy toaster. And honestly, that’s one less thing to stress about in the kitchen.


