
Learning how to clean a Keurig is one of those maintenance tasks that’ll save you hundreds of dollars and keep your morning coffee tasting fresh instead of stale. Most people ignore their Keurig until it starts sputtering or the coffee tastes off, but regular cleaning prevents mineral buildup, extends the machine’s lifespan, and ensures every cup tastes like it should. I’m going to walk you through the exact process I use, broken down into five straightforward steps that take about 30 minutes total.
Table of Contents
Why Regular Cleaning Matters
Your Keurig is basically a mini water heater, and water—especially tap water—contains minerals like calcium and magnesium. Every single brew deposits these minerals inside the machine’s internal tubes and heating element. Over time, this mineral buildup (called scale) restricts water flow, makes the machine work harder, and changes how your coffee tastes. I’ve seen machines that barely dribble out coffee because of neglect, and honestly, it’s preventable with basic cleaning.
Think of descaling like changing your car’s oil. You wouldn’t skip that maintenance, right? Same principle here. A clean Keurig brews faster, uses less energy, and your coffee actually tastes good. Plus, you’re not drinking water that’s been sitting around mineral deposits.
Gather Your Supplies First
Before you start, grab these items. You don’t need fancy equipment—I use stuff most people already have in their kitchen:
- White vinegar (distilled white, nothing fancy)
- Fresh filtered water (for rinsing)
- Soft dish brush or old toothbrush
- Microfiber cloth (or paper towels work fine)
- Dish soap (mild, nothing abrasive)
- Large mug or container (to catch water during cleaning)
That’s it. No expensive cleaning solutions needed. The vinegar does the heavy lifting by dissolving mineral deposits naturally. If your Keurig manual recommends a specific descaling solution, use that instead—some newer models have specific requirements.
The Descaling Process Explained
This is the main event. Descaling removes the mineral buildup that’s hiding inside your machine where you can’t see it. Here’s exactly what to do:
Step 1: Empty everything. Remove the water reservoir and dump out any remaining water. Take out the K-Cup holder and the drip tray. You want the machine completely empty to start.
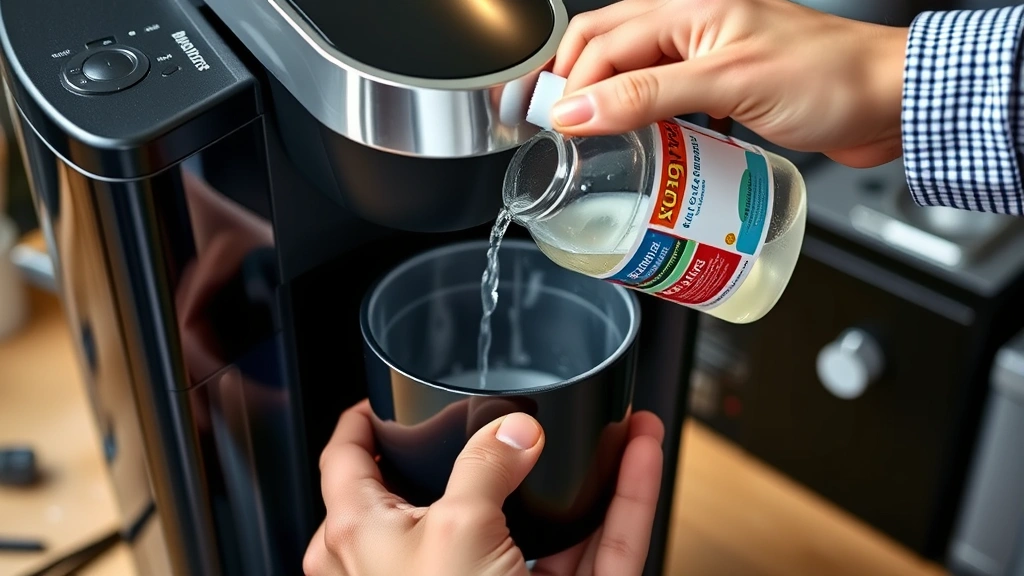
Step 2: Fill with vinegar solution. Mix equal parts white vinegar and fresh water in your reservoir. For a standard Keurig, that’s usually about 16 ounces of each. Fill the reservoir completely and place it back in the machine.
Step 3: Run the vinegar through. Place your large mug under the dispenser—you’ll need it to catch liquid. Press the brew button and let the machine dispense the vinegar solution into the mug. Don’t use a K-Cup; just let it run. Keep going until the reservoir is empty, refilling with more vinegar solution if needed. This vinegar is dissolving the mineral deposits inside the heating chamber and tubes.
Step 4: Let it sit. Once you’ve run vinegar through the machine, let it sit for 30 minutes. This gives the vinegar time to break down stubborn mineral buildup. I usually take a coffee break here—ironic, I know.
Step 5: Repeat the process. After 30 minutes, fill the reservoir with vinegar solution again and repeat the brewing process. This second pass catches any remaining minerals and vinegar residue.
Clean Removable Parts Properly
While the vinegar is sitting, clean the parts you removed. The K-Cup holder and drip tray collect coffee grounds and residue over time. Rinse them under warm water and scrub with your soft brush to remove any stuck-on coffee or mineral deposits. If there’s stubborn buildup, soak them in warm vinegar solution for 10 minutes, then scrub again. Dry them completely before reassembling.
The water reservoir deserves attention too. Even though you’re using filtered water, sediment can accumulate at the bottom. Rinse it thoroughly under warm water and wipe the interior with a damp cloth. If you see any slimy buildup (which indicates mold or bacteria), fill it with vinegar solution, let it sit for 15 minutes, then scrub with your brush and rinse completely.
Flush the System Thoroughly
After you’ve run vinegar through twice, you need to flush out all that vinegar smell and taste. This step is crucial—nobody wants their coffee tasting like a salad dressing. Fill the reservoir with fresh filtered water (no vinegar) and run the machine empty again, just like you did with vinegar. Do this at least twice, maybe three times if you’re sensitive to vinegar smell.
You’ll notice the water coming out might still have a slight vinegar scent at first. That’s normal. Keep flushing until the water runs clear and smells fresh. This usually takes 2-3 full reservoirs of water. I know it seems like a lot of water waste, but trust me—it’s worth it to not have vinegar-flavored coffee.
Filter and Water Tank Care
Now’s a good time to check your water filter if your Keurig has one. Most newer models include a charcoal filter in the reservoir. These filters should be replaced every 2-3 months, depending on your water quality. If you haven’t replaced yours recently, swap it out now. A fresh filter makes a noticeable difference in taste and helps prevent mineral buildup from returning too quickly.
When you reassemble your water reservoir, make sure the seal is tight and the filter is seated properly. A loose filter won’t work effectively, and you’ll end up with mineral buildup happening faster. Also, always use filtered water if possible. Tap water varies wildly depending on where you live, but filtered water has fewer minerals and makes the whole cleaning process less frequent.
Wipe Down the Exterior
The outside of your Keurig probably has fingerprints, dust, and maybe some dried coffee splashes. Mix a small amount of mild dish soap with warm water and use a damp microfiber cloth to wipe down the exterior. Pay attention to the top where the K-Cup holder sits—that area collects dust and residue. For stubborn spots, let the soapy cloth sit on it for a minute before wiping.
Dry everything with a clean cloth to prevent water spots. If your Keurig has a stainless steel exterior, you can use a specialized stainless steel cleaner after washing, but it’s not necessary. I usually just dry it well and call it done.
Maintenance Schedule Tips
Here’s the thing about cleaning your Keurig—consistency beats intensity. It’s better to do a quick monthly maintenance than to let it go six months and then have a disaster. Here’s what I recommend:
- Weekly: Rinse the water reservoir and K-Cup holder with warm water. Takes two minutes.
- Monthly: Run one cycle of vinegar solution through the machine (the full descaling process takes about 30 minutes).
- Every 3 months: Replace the water filter if you have one.
- As needed: Clean the exterior and drip tray when you notice buildup.
If you live in an area with hard water (lots of minerals), you might need to descale every 2-3 weeks instead of monthly. You’ll notice the machine slowing down or the coffee tasting off—that’s your signal to descale again. Some Keurig models have a descaling light that alerts you, which is super helpful.
Troubleshooting Common Issues
Sometimes even after cleaning, you might encounter problems. Here’s what to do:
Machine won’t dispense water: The needle that punctures the K-Cup might be clogged. Remove the K-Cup holder and look for a small hole at the top and bottom. Use a paperclip or thin needle to gently clear any blockage. Run water through it to flush out debris.

Coffee tastes like vinegar: You didn’t flush enough. Run at least two more full reservoirs of fresh water through the machine. Seriously, keep flushing until it tastes normal.
Slow brewing: Mineral buildup is back. Do a full descaling cycle. If it’s been less than a month since your last cleaning, your water is probably very hard and you need to descale more frequently. Consider getting a better water filter or using bottled water.
Leaking from the bottom: The seal on your water reservoir might be damaged, or the machine’s internal seals might be worn. Try reseating the reservoir first. If that doesn’t work, you might need replacement parts or a new machine.
If you’re having issues that persist after cleaning, check your Keurig’s manual or contact the manufacturer. Sometimes the problem is a faulty valve or heating element, not buildup.
Frequently Asked Questions
Can I use apple cider vinegar instead of white vinegar?
I wouldn’t recommend it. Apple cider vinegar is darker and can leave residue or discoloration inside your machine. Stick with plain white distilled vinegar—it’s cheap and does the job perfectly.
How often should I clean my Keurig?
For most people using filtered water, monthly descaling is ideal. If you use tap water or have hard water, every 2-3 weeks is better. Watch for signs like slower brewing or off-tasting coffee—that’s your cue to clean sooner.
Is it safe to use Keurig’s official descaling solution?
Absolutely. Keurig’s descaling solution is designed specifically for their machines and works great. It’s a bit pricier than vinegar, but some people prefer it because there’s no vinegar smell. Either works fine.
Can I put the K-Cup holder in the dishwasher?
Check your manual first, but most K-Cup holders and drip trays are dishwasher safe. Hand washing is gentler and gives you more control, but the dishwasher works in a pinch.
What if my Keurig still tastes bad after cleaning?
Try replacing your water filter if you have one. If that doesn’t help, your water source might be the issue. Try using bottled or filtered water for a few brews to see if the taste improves. If it does, invest in a better water filter.
Do I need to clean a brand new Keurig?
Yes. Run a few cycles of water through it before your first brew to flush out any manufacturing residue. Then follow the regular maintenance schedule.
Final Thoughts
Cleaning your Keurig isn’t complicated, and it’s absolutely worth the 30 minutes every month. You’ll get better-tasting coffee, a machine that works reliably, and you’ll avoid expensive repairs down the road. The whole process comes down to five basic steps: descale with vinegar, clean removable parts, flush thoroughly, maintain your filter, and wipe the exterior. Stick to a simple monthly schedule and you’ll never have to deal with a broken machine or stale-tasting coffee again. Your mornings will be better for it.


