

Learning how to chop green onions is one of those kitchen skills that looks intimidating until you realize it’s dead simple. Whether you’re prepping for a stir-fry, topping tacos, or garnishing a bowl of soup, mastering this basic technique takes about two minutes and transforms how you work in the kitchen. I’m going to walk you through the exact method I use every single time, no fancy knife skills required.
Table of Contents
Why Prep Matters
Before we jump into technique, let’s talk about why this matters. Green onions—also called scallions or spring onions depending on where you live—add brightness and a mild onion bite to dishes. But they’re only good to you if they’re prepped right. A sloppy chop means uneven pieces that cook unevenly, or worse, you end up with chunks when you wanted fine garnish. When you know how to chop green onions properly, you control the texture and flavor distribution in your dish. That’s the difference between a home-cooked meal and something that tastes intentional.
Gather Your Tools
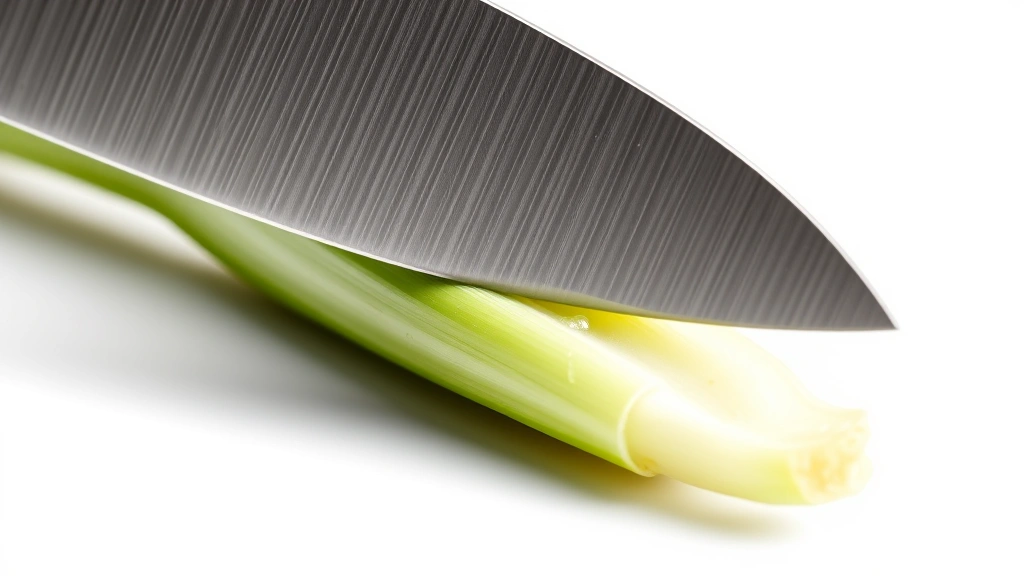
You don’t need much. A sharp chef’s knife—8 inches is ideal—and a cutting board. That’s it. Seriously. I see people fussing with scissors or those tiny kitchen gadgets, but a good knife does the job faster and cleaner. Make sure your knife is actually sharp. A dull blade will crush the onions instead of cutting them, which bruises the cells and releases more sulfur compounds. That means a stronger, harsher flavor. A sharp blade cuts clean and keeps the flavor mild and fresh.
Select Quality Green Onions
Start with fresh green onions. Look for ones that are bright green with no yellowing or wilting. The white bulb at the bottom should be firm and white, not mushy or browning. If they’ve been sitting in your fridge for two weeks, they’re past their prime. Fresh ones have a crisp snap when you bend them. Store them in a plastic bag in the crisper drawer, and they’ll last about a week. The fresher your ingredients, the better your final dish—that’s kitchen rule number one.
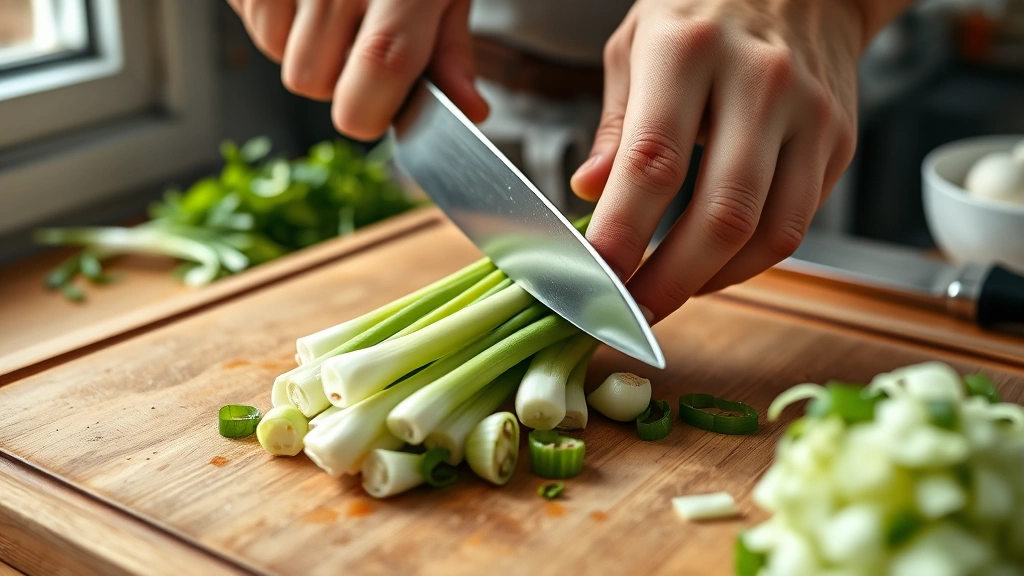
The Three-Step Method
Here’s the system that works every time. First, rinse your green onions under cold water and pat them dry with a paper towel. Wet onions are slippery and harder to control on the cutting board. Second, separate the white and light green parts from the dark green tops. They have different textures and flavors, so they need different treatment. Third, chop each section separately using the technique that works best for that part. This three-part approach is the foundation of professional prep work. You’re not rushing through; you’re being methodical.
Chopping the White Part
The white bulb and light green section are where the real onion flavor lives. This part is firmer and needs a different cut than the tender green tops. Place the white section on your cutting board. Using your chef’s knife, slice crosswise into thin rounds—about a quarter-inch thick. If you want smaller pieces, stack a few rounds and make a couple of cuts through the stack. The white part can handle more aggressive chopping because it’s sturdy. Some recipes call for this part to be minced fine, especially if you’re using it as a flavor base in a dish like our authentic Mexican refried beans recipe. The key is consistency: all pieces roughly the same size so they cook evenly.
Slicing the Green Part
The dark green tops are delicate and are usually used raw as garnish. Here’s where speed matters. Stack the green sections on top of each other, align them on your cutting board, and slice crosswise into thin rings. You want these thinner than the white part—about an eighth-inch thick. The thinner slices look more refined and distribute better across a dish. If you’re adding these to something hot right before serving, keep them separate from the white part. They don’t need cooking; in fact, cooking them makes them mushy and bitter. Save them for the final garnish step. This is why professional cooks plate things in stages—different components, different timing.
Storage Tips
If you’ve chopped your green onions ahead of time, store the white and green parts separately. The white parts stay fresh in an airtight container in the fridge for about three days. The green parts are more delicate and are best used within a day. If you need them to last longer, wrap them loosely in a damp paper towel and place them in a plastic bag. The moisture keeps them from drying out, but you don’t want them soaking wet. When you’re prepping for something like a Cajun boil recipe, you can chop everything the morning of and keep it covered in the fridge until you need it.
Common Mistakes to Avoid
First mistake: using a dull knife. I mentioned this before, but it’s worth repeating. A dull blade is dangerous and produces poor results. Second mistake: not separating the white and green parts. They’re different plants, basically, and treating them the same is a waste. Third mistake: chopping everything at once and letting it sit. The white parts oxidize and turn slightly gray. The green parts wilt. Chop as close to serving time as you can. Fourth mistake: not drying your onions after rinsing. Water on the cutting board makes everything slip around. Fifth mistake: using a rocking motion with your knife instead of a slicing motion. A rocking motion crushes; a slice cuts clean. These little things add up to the difference between sloppy and sharp.
Pro Hacks for Speed
If you’re prepping a bunch of green onions for a large meal, here’s the pro move: line them all up on your cutting board, white parts aligned. Use your knife to slice through the entire bundle at once. You’ll get uniform pieces in half the time. For the green parts, gather them into a tight bunch and use the same technique. It’s called a chiffonade when you’re doing it with leafy herbs, and it works here too. Another hack: if you’re using green onions in something like cilantro chopping, apply the same principles. Keep your knife sharp, work methodically, and don’t overthink it. Speed comes from confidence, and confidence comes from doing it the right way every time.
Frequently Asked Questions
Can I use a food processor to chop green onions?
Technically yes, but I don’t recommend it. A food processor tends to bruise and crush the onions, releasing too much of the harsh sulfur compounds. You end up with a mushy texture and overpowering flavor. A knife takes thirty seconds longer and gives you way better results. Plus, you have more control over the size of the pieces.
What’s the difference between green onions and regular onions?
Green onions are harvested early, before the bulb develops. They’re milder, sweeter, and have a fresher flavor. Regular onions are mature bulbs with a stronger, more complex flavor. They’re different tools for different jobs. You wouldn’t use green onions to caramelize for French onion soup, and you wouldn’t use regular onions as a fresh garnish.
Should I remove the roots?
Yes. Trim off the root end—about a quarter-inch. It’s tough and doesn’t add anything to your dish. Some cooks save the roots and white parts for stock, which is smart if you’re making your own broth. But for eating, trim them off.
Can I chop green onions in advance?
The white parts hold up okay for a few hours. The green parts are best used right away. If you need to prep ahead, chop the white parts and keep them covered. Chop the green parts just before you serve. This is especially important if you’re making something like a blooming onion recipe where presentation matters.
What if my green onions are wilted?
Soak them in ice water for 15 minutes. The cold water plumps up the cells and makes them crisp again. This works for a lot of vegetables. It’s a simple trick that brings sad produce back to life.
How thin should I slice them?
For the white parts, aim for about a quarter-inch thick. For the green parts, go thinner—about an eighth-inch. But honestly, it depends on what you’re making. For a garnish, thin is better. For cooking into a dish, slightly thicker pieces hold their shape better. Use your judgment based on the recipe.
Wrap Up
Learning how to chop green onions is genuinely one of those skills that takes five minutes to learn and makes you feel like you know what you’re doing in the kitchen. It’s not complicated, but it matters. The difference between a rushed, sloppy chop and a clean, intentional one shows up in your finished dish. You get better texture, better flavor, and better presentation. It’s the kind of small detail that separates home cooking from actual cooking. Start with a sharp knife, separate your white and green parts, and take your time. That’s it. You’ve got this. Now go prep some green onions and use them in something delicious. Whether it’s a simple garnish on soup or a key ingredient in your next meal, you’ll notice the difference.


