
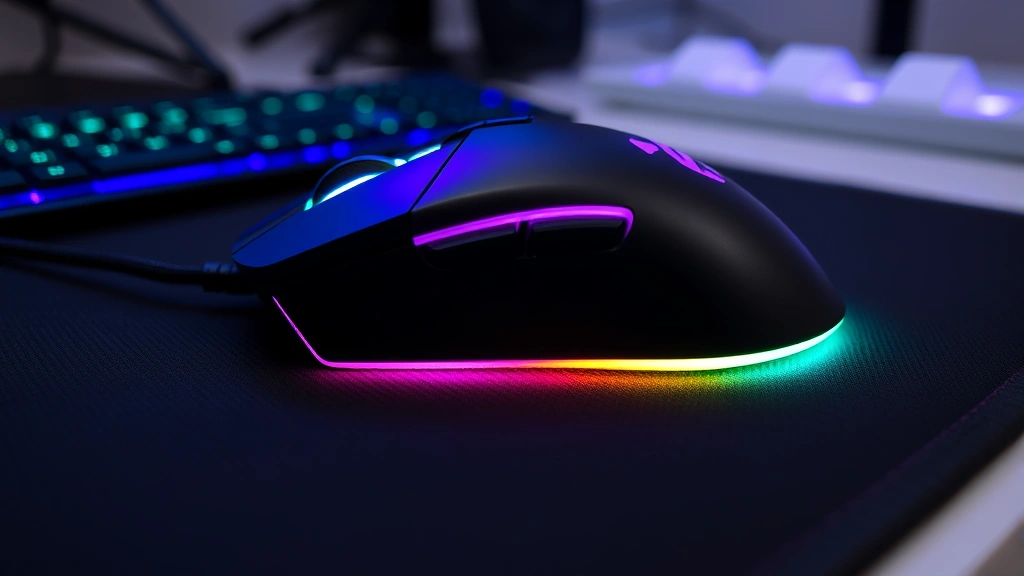
Your mouse polling rate is one of those settings that sounds way more complicated than it actually is. If you game, do design work, or just care about responsiveness, knowing how to change polling rate on mouse can genuinely improve your experience. The good news? It’s not rocket science, and you don’t need special tools or a tech degree.
Let me be straight with you: most people never touch this setting and get along fine. But if you’ve noticed your cursor feeling sluggish or jittery, or if you’re competitive about gaming, this is worth understanding. We’re talking about a simple tweak that takes maybe five minutes once you know where to look.
What Is Polling Rate and Why Does It Matter?
Think of polling rate like how often your mouse “reports in” to your computer. It’s measured in Hertz (Hz), which basically means “times per second.” A 1000 Hz polling rate means your mouse tells your computer its position 1000 times every single second. An 8000 Hz rate? That’s 8000 times per second.
Here’s the real talk: most people won’t notice the difference between 125 Hz and 1000 Hz in everyday use. But if you’re gaming competitively, doing precision work in photo editing, or using drawing tablets, those extra reports per second can reduce input lag—the tiny delay between moving your mouse and seeing it move on screen.
The trade-off is CPU usage. Higher polling rates mean your processor works harder. On modern systems, this is usually negligible, but it’s worth knowing. Some older laptops or budget systems might see a small performance hit at maximum polling rates.
Standard polling rates you’ll encounter are:
- 125 Hz – The baseline, often default on older mice
- 250 Hz – Common middle ground, minimal CPU impact
- 500 Hz – Sweet spot for most gamers
- 1000 Hz – High-end gaming mice, noticeable responsiveness
- 8000 Hz+ – Ultra-high-end, latest gaming mice, rarely necessary
The thing is, if your mouse doesn’t support a particular rate, you can’t force it. Your hardware has limits. A basic office mouse might only offer 125 Hz or 250 Hz, while gaming-focused mice typically go higher.
How to Check Your Current Polling Rate
Before you change anything, let’s figure out what you’re working with. This varies depending on your operating system and mouse type.
On Windows:
- Right-click on your desktop and select Device Manager (or search for it in the Start menu)
- Expand the Mice and other pointing devices section
- Right-click your mouse and select Properties
- Go to the Details tab
- In the Property dropdown, look for Report ID or check the manufacturer’s software (more on that below)
Honestly, the Device Manager method is clunky. Your best bet is using your mouse manufacturer’s software directly—Razer, Corsair, SteelSeries, Logitech, and others all have dedicated apps that show polling rate clearly.
On Mac:
- Go to System Preferences → Mouse
- The standard macOS settings don’t display polling rate directly
- You’ll need the manufacturer’s software (same as Windows)
Mac users have fewer options for tweaking polling rate compared to Windows, but most gaming mice still ship with Mac-compatible software.
Using Third-Party Tools:
If you want a quick, no-nonsense answer, download MouseTester (free, open-source). It shows your polling rate in real time. Just run it and move your mouse around—it’ll display the actual rate your system is detecting.
Change Polling Rate Through Mouse Software
This is the easiest method for most people, and it’s where you’ll spend 90% of your time if you have a modern gaming mouse.
Step 1: Download the Right Software
Check your mouse manufacturer’s website. Here are the big players:
- Razer → Razer Synapse
- Corsair → iCUE
- SteelSeries → SteelSeries GG
- Logitech → Logitech G HUB
- ASUS ROG → Armoury Crate
- Mad Catz → Mad Catz Software
Download directly from the official site, not some random third-party link. Install it and restart your computer if prompted.
Step 2: Connect Your Mouse
Plug in your mouse (or connect via Bluetooth if wireless). The software should detect it automatically. If it doesn’t, unplug and replug, or toggle Bluetooth off and back on.
Step 3: Navigate to Performance or Settings
Open the software. Look for tabs or menu items like Performance, Settings, Polling Rate, or Response Rate. Different manufacturers use different terminology, but it’s always there.
Step 4: Adjust the Slider or Dropdown
You’ll see a dropdown or slider showing available rates. Select your desired rate. Most software shows the current setting clearly.
Step 5: Apply and Test
Click Apply or Save. The change happens instantly in most cases. Move your mouse around and see if it feels different. If you don’t like it, switch back.
Pro Tip: Some mice store polling rate settings in onboard memory. Check if your software has an “onboard settings” or “profile” option. This means the polling rate stays the same even if you unplug the mouse and use it on another computer.
Change Polling Rate Through BIOS/UEFI
This is the nuclear option. Most people don’t need to do this, but it exists.
Some motherboards have USB-specific settings in BIOS that affect polling rate globally. This is useful if you want to lock in a polling rate at the hardware level, before your operating system even loads.
When You’d Do This:
- Your mouse software doesn’t work or isn’t available
- You want the polling rate set before Windows/Mac boots
- You’re troubleshooting hardware-level issues
How to Access BIOS:
- Restart your computer
- During startup (usually before the Windows or Apple logo), press Delete, F2, F10, or F12 (varies by manufacturer—check your motherboard manual or boot screen)
- You’re now in BIOS/UEFI setup
- Look for Integrated Peripherals, Onboard Devices, or USB Settings
- Find USB Polling Rate, USB Device Polling, or similar
- Adjust as needed
- Save and exit (usually F10 or through the menu)
Safety Warning: Don’t change anything else in BIOS unless you know what you’re doing. Stick to USB-related settings only. If you mess up, you can usually reset BIOS by clearing the CMOS battery (consult your motherboard manual).
Real talk: BIOS access varies wildly depending on your motherboard. Some boards have detailed USB settings; others have almost nothing. Check your specific motherboard manual online if you’re unsure.
Troubleshooting Common Issues
The Software Won’t Detect My Mouse
This happens more often than you’d think. Try these steps:
- Unplug and replug the mouse into a different USB port (preferably on the back of the tower if you’re on desktop)
- Update your mouse drivers through Device Manager on Windows or System Report on Mac
- Disable USB Selective Suspend on Windows: Go to Power Options → Change plan settings → Change advanced power settings → USB settings → Set to “Disabled”
- Restart the software and computer
- Reinstall the software completely (uninstall, restart, then install fresh)
Polling Rate Won’t Change or Reverts
If you set it and it keeps changing back:
- Check if the software has auto-save enabled and it’s conflicting with your choice
- Make sure you clicked Apply or Save, not just adjusted the slider
- Some mice require you to create a profile and set the polling rate within that profile
- Update the software to the latest version
- Check if Windows updates reset USB settings (rare, but happens)
High Polling Rate Causes Lag or Stuttering
This is usually a CPU bottleneck or driver conflict, not the polling rate itself. Try:
- Lower the polling rate to 500 Hz or 250 Hz and see if the problem goes away
- Update your chipset drivers from your motherboard manufacturer’s website
- Check CPU usage in Task Manager—if it’s maxed out, something else is the culprit
- Disable other USB devices temporarily (extra keyboards, controllers, etc.) to isolate the issue
Mouse Feels Unresponsive After Changing Polling Rate
Counterintuitive, but sometimes higher polling rates can feel “floaty” if your mouse sensor isn’t calibrated for it. Try:
- Adjust mouse sensitivity slightly lower (polling rate and sensitivity work together)
- Recalibrate the mouse sensor if the software offers this option
- Test different rates (500 Hz, 1000 Hz) to find your sweet spot
- Check your mousepad—a worn or dirty surface can interact poorly with high polling rates
Performance Impact and Real-World Expectations
Let’s be real: changing your polling rate isn’t going to turn you into a pro gamer overnight. But it does matter in specific scenarios.
Gaming
In fast-paced games (FPS, fighting games, MOBAs), a higher polling rate reduces input lag. Studies from gaming peripheral manufacturers show that the jump from 125 Hz to 1000 Hz can reduce perceived lag by 7-8 milliseconds. That’s real, but subtle. You’ll notice it more in competitive play than casual gaming.
Design and Photo Editing
If you’re doing precision work in Photoshop, Illustrator, or CAD software, a higher polling rate gives you smoother cursor movement and more accurate selections. It’s especially noticeable when drawing or making fine adjustments.
General Productivity
Honestly? You won’t notice a difference. Browsing, email, spreadsheets—it doesn’t matter. Save your CPU cycles.
CPU Impact
Modern CPUs can handle 1000 Hz polling rates without breaking a sweat. We’re talking 1-2% CPU usage increase at most on a decent system. Older laptops or budget builds might see slightly more, but it’s rarely a dealbreaker.
For reference, overclocking communities have tested this extensively, and the consensus is that polling rates above 1000 Hz show diminishing returns for most users.
Best Practices and Safety Tips
Start Conservative, Adjust as Needed
Don’t jump straight to 8000 Hz. Start at 500 Hz or 1000 Hz and see how it feels. You can always increase it later. This approach also helps you isolate whether a problem is caused by the polling rate or something else.
Keep Your Mouse Software Updated
Manufacturers release updates to fix bugs, improve compatibility, and sometimes add new polling rate options. Check for updates monthly.
Test One Change at a Time
If you’re adjusting polling rate, don’t also change DPI, acceleration, or button mapping at the same time. You won’t know which change caused any improvement or problem.
Use Wired Mice for Maximum Stability
Wireless mice can achieve high polling rates, but wired connections are more stable. If you’re troubleshooting, switch to wired temporarily to rule out wireless interference.
Check Your USB Hub Quality
Cheap USB hubs can interfere with polling rate. If you’re using an external hub, try plugging directly into your motherboard. High-quality hubs with proper power delivery work better than bargain-bin options.
Document Your Settings
If you find a polling rate that works perfectly for you, write it down. Include your mouse model, software version, and any other relevant settings. This helps if you need to troubleshoot later or set up a new system.
Pro Tip: Many gaming mice let you create and save multiple profiles. Create one profile for gaming (high polling rate) and another for general use (lower polling rate to save power). Switch between them depending on what you’re doing.
Know When to Leave It Alone
If your mouse is working fine, there’s no reason to change the polling rate. Don’t fix what isn’t broken. This setting is a tweak for people who have a specific need, not a mandatory optimization.
Consider Your Monitor’s Refresh Rate
This is subtle, but your monitor’s refresh rate and mouse polling rate should ideally work together. If you have a 60 Hz monitor, going above 500 Hz polling rate is overkill. If you have a 240 Hz monitor, 1000 Hz makes more sense. There’s no hard rule, but it’s worth thinking about.
For more on peripheral optimization and system settings, check out PC Gamer’s guide on reducing input lag, which covers polling rate alongside other factors like mouse acceleration and debounce settings.
Frequently Asked Questions
Will changing my polling rate void my warranty?
– No. Changing polling rate through the manufacturer’s official software is a supported feature. You’re using the tool the way it was designed. BIOS changes are trickier, but simply adjusting USB polling rate settings shouldn’t void anything. Check your warranty terms to be sure, but standard peripheral warranties cover this.
Is 8000 Hz polling rate worth it?
– Not for most people. The jump from 1000 Hz to 8000 Hz is imperceptible for general use and gaming. It’s more of a “because we can” feature. If you’re a professional esports player with a high-end setup, maybe. Otherwise, 500-1000 Hz is the practical sweet spot.
Can I change polling rate on a wireless mouse?
– Yes, but it depends on the mouse. Many wireless gaming mice support polling rate adjustments through their software. The actual polling rate might be slightly less stable than wired due to wireless interference, but it’s still adjustable. Check your mouse manual or software to confirm.
What’s the difference between polling rate and DPI?
– Polling rate is how often your mouse reports its position (125-8000+ times per second). DPI is how far your cursor moves per inch of mouse movement. They’re completely separate settings. You can have a high DPI with low polling rate, or vice versa. Both affect responsiveness, but in different ways.
Why would I want a lower polling rate?
– Lower polling rates use less CPU and battery power (on wireless mice). If you’re on a laptop with limited battery or a very old system, dropping to 250 Hz or 125 Hz can help. Also, some people find very high polling rates feel “twitchy” and prefer the stability of 500 Hz or lower.
Does polling rate affect gaming performance (FPS)?
– No, not directly. Polling rate doesn’t affect your frame rate. It affects input responsiveness—how quickly your mouse movements translate to on-screen actions. Higher polling rate = lower input lag, but your actual FPS stays the same.
Can I use a macro to change polling rate quickly?
– Some gaming mice with onboard profiles support this. You can assign a button to switch between profiles that have different polling rates. It’s a nice feature if your software supports it, but you’ll need to check your specific mouse’s capabilities.
What if my mouse doesn’t have a polling rate option?
– Not all mice support adjustable polling rates. Budget mice and older models often have a fixed rate (usually 125 Hz). If your software doesn’t offer polling rate adjustment, your mouse likely doesn’t support it. You’d need to upgrade to a gaming-focused mouse to get this feature.
Is it bad to leave my polling rate at maximum all the time?
– Not really. Modern systems handle it fine. The only downside is slightly increased CPU usage and battery drain on wireless mice. If neither of those concerns you, leaving it at maximum is harmless. Some people do this permanently without issues.
How do I know if my polling rate change actually worked?
– Use MouseTester (free tool) to verify. It displays your actual polling rate in real time. Move your mouse around and check the numbers. You can also feel the difference in responsiveness, though this is subjective. The software should confirm the change, and MouseTester verifies it at the OS level.

For additional technical deep-dives, TechPowerUp’s peripheral reviews often discuss polling rate in the context of overall performance, which can help you understand how it fits into your broader setup.
Final Thought: Changing your polling rate is a simple tweak that can make a real difference if you game, do design work, or care about responsiveness. But it’s not mandatory, and it won’t fix underlying problems like a bad mouse sensor or outdated drivers. Start with the manufacturer’s software, test different rates, and find what works for your setup. You’ve got this.


