
Your mouse feels sluggish. You’re gaming, designing, or just trying to get work done, and there’s this tiny delay between moving your hand and seeing the cursor respond. It’s maddening. The culprit? Your mouse’s polling rate might be set too low. Learning how to change mouse polling rate is one of the quickest wins for responsiveness, but it’s also one of the most misunderstood tweaks in computing. Most people don’t even know the setting exists. Even fewer understand what it actually does or how to adjust it safely without breaking anything.
Here’s the real talk: changing your polling rate won’t magically turn you into a pro gamer or designer, but it will eliminate a source of lag that’s been bugging you. And the best part? It takes about five minutes, costs nothing, and you can revert it instantly if something goes wrong.
What Is Mouse Polling Rate?
Think of polling rate like a conversation between your mouse and your computer. Your mouse is constantly asking, “Hey, where am I now? Have I moved?” Your computer listens and responds. The polling rate is how many times per second your mouse checks in with your computer.
If your polling rate is 125 Hz (the default on many older mice), your mouse asks only 125 times per second. That means there’s an 8-millisecond window where your computer doesn’t know about your movement. At 1000 Hz, your mouse checks in 1000 times per second, cutting that window down to just 1 millisecond. Higher polling rate = faster feedback loop = less perceived lag.
Common polling rates you’ll encounter:
- 125 Hz – Old USB standard, still default on many mice. Noticeably sluggish if you’re used to higher rates.
- 250 Hz – Middle ground. Fine for office work, noticeable improvement over 125 Hz.
- 500 Hz – Sweet spot for most people. Gaming, design, everyday use all feel responsive.
- 1000 Hz – Premium gaming mice. Overkill for most tasks, but noticeable if you’re picky.
- 8000 Hz – Bleeding edge. Some newer gaming mice support this. Marginal gains, higher CPU load.
Here’s what matters: you probably won’t feel the difference between 500 Hz and 1000 Hz unless you’re a competitive gamer or precision designer. But you will feel the jump from 125 Hz to 500 Hz. It’s night and day.
Why You Should Care About Polling Rate
Not everyone needs to change their polling rate. If you’re happy with your mouse, leave it alone. But if you’re experiencing any of these, it’s worth investigating:
- Cursor feels “floaty” or disconnected from your hand movements
- Precision work (photo editing, CAD, design) feels imprecise
- Gaming feels sluggish even though your frame rate is high
- You upgraded your mouse and want to unlock its full potential
- You switched from a gaming mouse to a budget mouse and noticed a difference
The reason higher polling rates help is simple physics. Your mouse is trying to track your hand’s movement in real time. If it only reports 125 times per second, it’s sampling your movement at wide intervals. Imagine trying to draw a smooth curve by only checking your pen position 125 times per second versus 1000 times per second. The more samples, the smoother the curve.
According to gaming peripheral experts at B&H Photo, the perceived responsiveness jump from 125 Hz to 500 Hz is roughly equivalent to reducing input lag by 6 milliseconds—enough that most people notice it immediately.
How to Check Your Current Polling Rate
Before you change anything, you need to know what you’re working with. The method depends on your mouse type and operating system.
Windows: Using Device Manager
- Right-click the Start menu and select “Device Manager.”
- Expand “Mice and other pointing devices.”
- Right-click your mouse and select “Properties.”
- Go to the “Details” tab.
- In the “Property” dropdown, select “Report Descriptor.”
- Look for the line that says “bInterval” – this is your polling rate. If it says 8, you’re at 125 Hz (1000 ÷ 8 = 125). If it says 4, you’re at 250 Hz. If it says 2, you’re at 500 Hz. If it says 1, you’re at 1000 Hz.
Pro tip: If you can’t find the Report Descriptor, your mouse might not be reporting this information in Device Manager. No worries—most gaming mice come with software that shows the polling rate directly.
Using Mouse Software
If your mouse has manufacturer software (Logitech G Hub, Razer Synapse, SteelSeries Engine, etc.), open it and look for “Polling Rate” or “Report Rate” in the settings. It’s usually under “Performance” or “Advanced Settings.” This is the easiest method and the most reliable.
macOS
Mac doesn’t provide a built-in way to check polling rate in System Preferences. Your best bet is to use the manufacturer’s software if available. If your mouse is generic, you’re stuck—but honestly, most Mac users aren’t pushing their mice hard enough to care about polling rate anyway.
Step-by-Step: How to Change Mouse Polling Rate
The method varies depending on your mouse type. Here’s the breakdown:
Method 1: Using Manufacturer Software (Easiest)
This is the path of least resistance. Most gaming mice come with dedicated software.
- Download the software. Go to your mouse manufacturer’s website (Logitech, Razer, SteelSeries, Corsair, etc.) and download their control software. Make sure it’s the version for your specific mouse model.
- Install and launch. Run the installer and open the software. You might need to restart your computer.
- Connect your mouse. Plug in your mouse via USB (or ensure it’s connected wirelessly). The software should detect it within a few seconds.
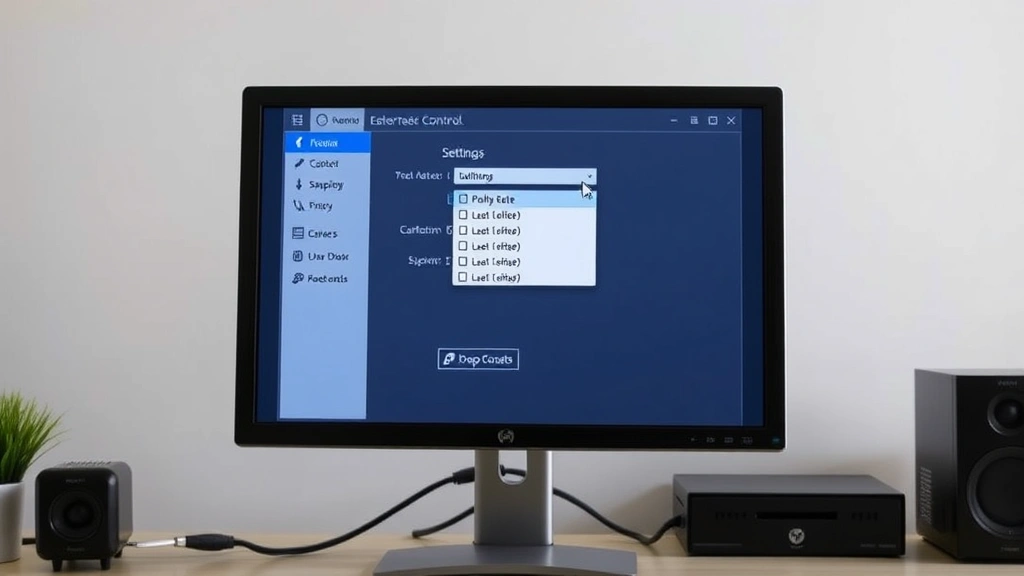
- Find the polling rate setting. Look for tabs or menus labeled “Performance,” “Advanced,” “DPI Settings,” or “Report Rate.” Polling rate is usually grouped with other performance tweaks.
- Adjust the slider or dropdown. Change the polling rate from its current value to your desired rate. Most software uses a simple dropdown: 125 Hz, 250 Hz, 500 Hz, 1000 Hz.
- Apply the change. Click “Apply” or “Save.” The software will usually confirm the change and ask if you want to save it to the mouse’s onboard memory (if it has any).
- Test it. Move your mouse around. You should feel an immediate difference if you jumped from 125 Hz to 500 Hz or higher. If it feels worse, revert the change.
Safety Warning: Some mice have onboard memory that stores your settings. If you enable “onboard profiles,” your polling rate change persists even if you unplug the mouse or use it on another computer. If you disable it, the settings revert when you disconnect. Know which mode you’re in.
Method 2: Windows Device Manager (For Generic Mice)
If your mouse doesn’t have manufacturer software, you can adjust polling rate through Windows, but it’s less intuitive.
- Open Device Manager. Right-click Start and select “Device Manager.”
- Find your mouse. Expand “Mice and other pointing devices.” Right-click your mouse and select “Properties.”
- Go to the Hardware tab. Click “Properties” at the bottom of the dialog.
- Switch to the Advanced tab. Look for a “Device Poll Interval” or “Report Interval” setting. Not all mice expose this setting—if you don’t see it, your mouse doesn’t support polling rate adjustment via Device Manager.
- Adjust the value. The values are usually in milliseconds. Lower = higher polling rate. For example, 8 ms = 125 Hz, 4 ms = 250 Hz, 2 ms = 500 Hz, 1 ms = 1000 Hz.
- Apply and test. Click OK and move your mouse around. If something feels off, revert the change immediately.
Honestly, this method is clunky. If your mouse supports manufacturer software, use that instead. If it doesn’t, your mouse probably isn’t designed for polling rate adjustment anyway.
Method 3: BIOS/UEFI (Advanced, Usually Unnecessary)
Some motherboards let you adjust USB polling rate globally in BIOS. This is overkill for most people and not recommended unless you really know what you’re doing. Stick with Method 1 or 2.
Safe Practices When Adjusting Polling Rate
Here’s the thing: changing polling rate is safe. You can’t brick your mouse or damage your computer. But there are some smart practices to follow.
Start conservative. If you’re at 125 Hz, jump to 500 Hz, not 1000 Hz. Feel the difference. If you like it, you can always go higher. If it feels weird, you can dial it back. Most people find 500 Hz is the sweet spot—higher polling rates have diminishing returns and can actually introduce issues on older systems.
Check your USB hub. Older USB hubs might not support high polling rates reliably. If you’re using a USB hub, try plugging your mouse directly into your motherboard’s USB port. If the high polling rate feels unstable through the hub, that’s your answer—use a different port.
Monitor CPU usage. Higher polling rates mean your CPU has to process more events. On modern systems, this is negligible (we’re talking less than 1% CPU overhead). But on older systems or if you’re already maxed out, bumping from 125 Hz to 1000 Hz might cause subtle stuttering. Check your task manager while adjusting.
Save to onboard memory if available. If your mouse has onboard memory, save your polling rate setting to it. This way, your preference persists even if you unplug the mouse or use it on another computer.
Test across applications. Don’t just test in one game or app. Move your mouse around in your browser, text editor, and a few other places. Make sure the new polling rate feels consistent across the board.
Pro Tip: If you’re a competitive gamer, join your game’s community and ask what polling rate other players use. There’s often a consensus. For example, Counter-Strike players typically use 1000 Hz, while many design professionals find 500 Hz more than sufficient.
Troubleshooting Common Issues
The Mouse Feels Jittery or Twitchy
You bumped the polling rate too high for your system. Revert to the previous setting. This can happen on older systems or if your USB connection is unstable. Try a different USB port first before lowering the polling rate.
The Cursor Freezes or Stutters
This usually means your system can’t keep up with the polling rate you set. Lower it by one step (e.g., from 1000 Hz to 500 Hz) and test again. If the problem persists, check your CPU usage—you might have background processes consuming resources.
The Software Won’t Save the Change
Make sure the mouse is properly connected and detected by the software. Try restarting the software. If that doesn’t work, restart your computer with the mouse plugged in. Sometimes Windows needs a reboot to fully register the change.
I Can’t Find the Polling Rate Setting
Not all mice have adjustable polling rates. Check your mouse’s manual or the manufacturer’s website to confirm it supports this feature. If it doesn’t, you’re out of luck—you’ll need a different mouse to adjust polling rate.
If your mouse should have the setting but you can’t find it, try updating the manufacturer’s software. Older versions sometimes lacked this feature.
The Change Reverted After I Unplugged the Mouse
Your mouse doesn’t have onboard memory, so settings don’t persist when disconnected. You’ll need to set the polling rate every time you plug it in. Some mice let you enable “onboard profiles” to fix this—check the software settings. Alternatively, you could use how to force close on Windows if the software is stuck, then restart it fresh.
Frequently Asked Questions
Will changing polling rate improve my gaming performance?
– It depends on the game and your current polling rate. If you’re at 125 Hz and jump to 500 Hz, you’ll notice improved responsiveness, especially in fast-paced games like shooters or fighting games. The improvement is real but subtle—it won’t suddenly make you a better player. If you’re already at 500 Hz or higher, bumping to 1000 Hz will feel like a marginal gain. The biggest improvement comes from going low to moderate, not from going moderate to high.
Is 1000 Hz always better than 500 Hz?
– Not necessarily. 1000 Hz is objectively faster, but most people can’t perceive the difference between 500 Hz and 1000 Hz in everyday use. Competitive gamers and precision designers might notice, but for general use, 500 Hz is the practical ceiling. Higher polling rates also consume slightly more CPU and power. Unless you have a specific reason to go to 1000 Hz, 500 Hz is the sweet spot.
Does polling rate affect battery life on wireless mice?
– Yes, slightly. Higher polling rates mean the mouse’s receiver is working harder, which drains the battery faster. The difference is usually minor (maybe 5-10% less battery life), but if you use a wireless mouse on batteries, keep this in mind. Some wireless mice let you adjust polling rate to balance responsiveness and battery life.
Can I damage my mouse by changing polling rate?
– No. Polling rate is a software setting, not a hardware adjustment. You can’t physically damage the mouse by changing it. The worst that can happen is the mouse feels weird, and you revert the setting. It’s completely reversible.
What’s the difference between polling rate and DPI?
– DPI (dots per inch) is how far your cursor moves when you move your mouse a certain distance. Polling rate is how often your mouse reports its position to your computer. They’re completely separate settings. DPI affects cursor speed; polling rate affects responsiveness. You can adjust both independently.
Do I need to adjust polling rate if I have a high-refresh-rate monitor?
– Not necessarily, but it helps. A high-refresh-rate monitor (144 Hz, 240 Hz, or higher) can display more frames per second, but if your mouse is only reporting its position 125 times per second, there’s a bottleneck. Matching your mouse polling rate to your monitor refresh rate (or going higher) ensures your monitor always has fresh position data. For example, if you have a 240 Hz monitor, use at least 240 Hz polling rate on your mouse.
Should I enable raw input if I’m adjusting polling rate?
– If your game has a “raw input” option, enable it. Raw input bypasses Windows’ mouse acceleration and pointer precision settings, giving games direct access to your mouse data. This works great with high polling rates. However, raw input is a game-level setting, not related to polling rate adjustment itself.
Can I adjust polling rate on a laptop trackpad?
– Technically, yes, but it’s rarely practical. Trackpad drivers usually don’t expose polling rate settings. Even if they did, the improvement would be minimal because trackpads have other latency sources. If you need better responsiveness on a laptop, use an external mouse instead.
What if my mouse has multiple polling rate profiles?
– Some gaming mice let you create profiles with different polling rates for different applications. For example, you might use 1000 Hz for gaming and 500 Hz for office work. If your mouse supports this, take advantage of it. It’s a nice quality-of-life feature that lets you optimize for each task.
Is there a polling rate that’s “too high”?
– Theoretically, no. But practically, you’ll hit diminishing returns around 1000 Hz. Some newer mice support 8000 Hz or even higher, but most people won’t notice the difference. Additionally, very high polling rates can introduce issues on older systems or with certain USB connections. Start with 500 Hz and go higher only if you have a specific reason.

Do I need to reinstall drivers after changing polling rate?
– No. Polling rate is a setting within the mouse driver, not something that requires driver reinstallation. If you updated your mouse’s firmware or software, that’s different—but just changing the polling rate setting doesn’t require any driver work.
Can I change polling rate on a gaming mouse from a different brand than my motherboard?
– Absolutely. Polling rate is a property of the mouse itself, not the motherboard. A Razer mouse works the same way on an ASUS motherboard as it does on a Gigabyte one. The manufacturer’s software is what matters, not your motherboard.


