
Learning how to build cornhole boards is one of the most rewarding DIY projects you can tackle—and honestly, it’s way easier than most people think. Whether you’re prepping for backyard barbecues, tailgates, or just want to impress your friends with something you built yourself, cornhole boards are the perfect blend of functional and fun. In this guide, I’ll walk you through every step, from picking your materials to nailing the finishing touches.
Table of Contents
Gather Your Materials
Before you fire up your tools, let’s talk about what you actually need. For two regulation cornhole boards, you’ll want to grab a sheet of 3/4-inch plywood (the good stuff, not the cheap warped kind from the clearance bin). You’ll also need 2×4 lumber for the legs and frame—I’d recommend getting four 8-foot boards to give yourself plenty of material to work with.
Don’t forget the fasteners: 1.25-inch wood screws work great for assembly, and you might want some wood glue to reinforce joints. For finishing, grab some 120-grit and 220-grit sandpaper, exterior wood stain or paint (your choice), and polyurethane sealer to protect against the elements. If you’re going fancy, deck stain in a fun color makes these boards really pop.
Cut Plywood to Size
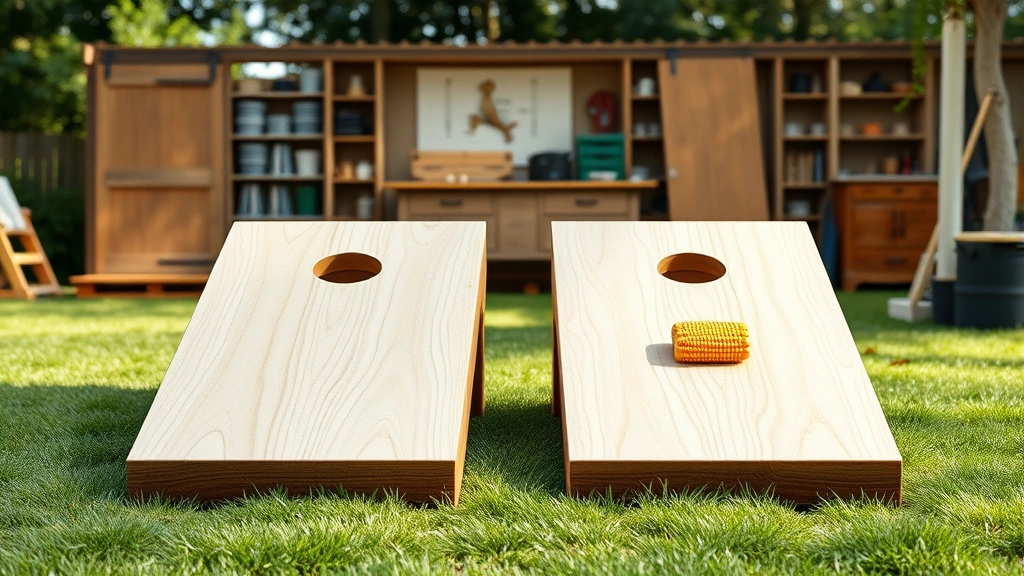
Standard cornhole boards measure 24 inches wide by 48 inches long. Mark these dimensions clearly on your plywood sheet before making any cuts. Use a circular saw with a straightedge guide to keep your cuts clean and square—wonky cuts now mean a frustrating assembly later.
Pro tip: have the store cut your plywood if you’re not confident with a circular saw. Most home improvement retailers will do this for a small fee, and it’s worth the peace of mind. Make sure both boards are cut to identical dimensions, or your game won’t look right when you stand them side by side.
Drill the Cornhole
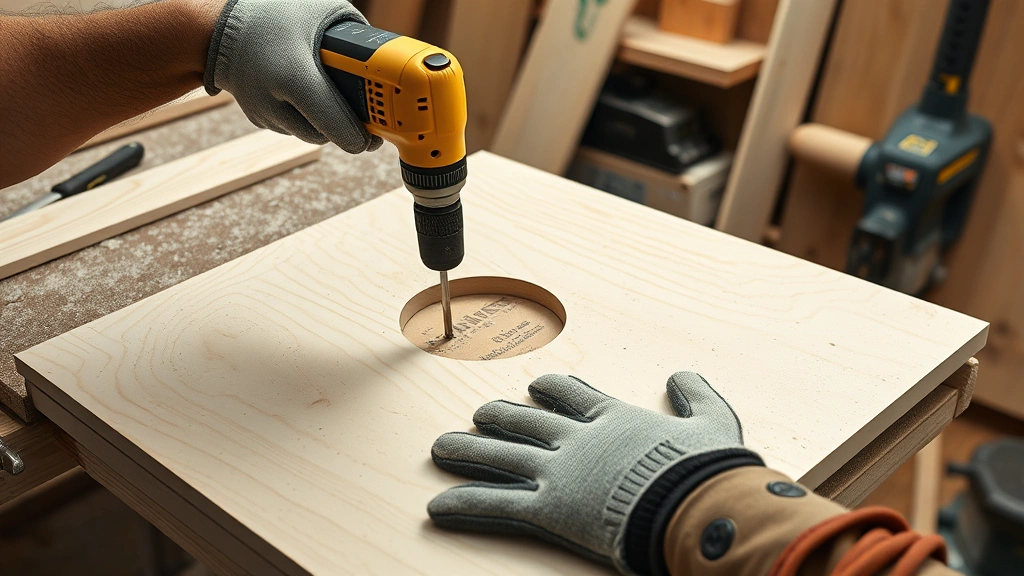
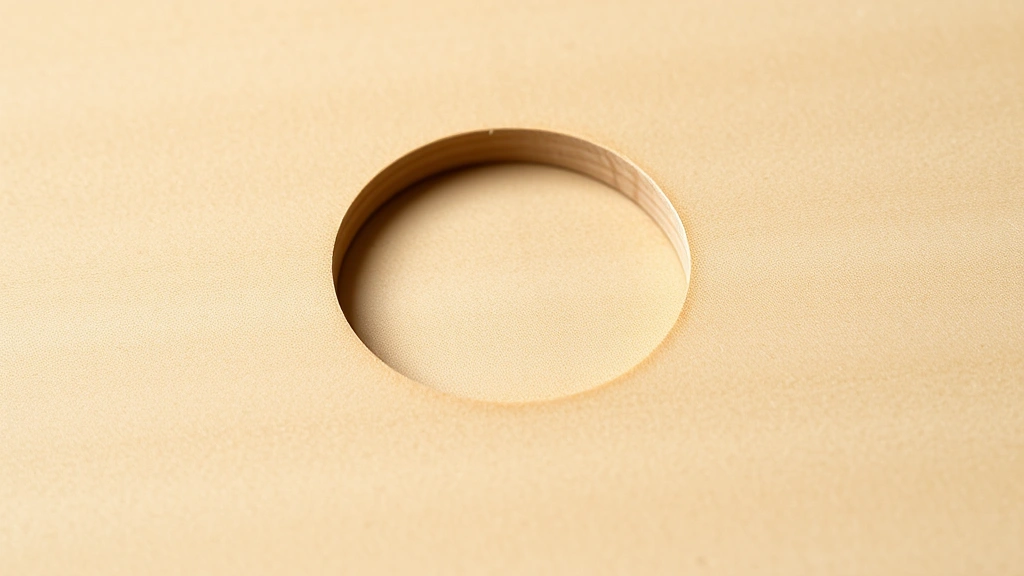
The hole is the star of the show here. You’ll want a 6-inch diameter hole, centered about 9 inches from the top of each board. Mark this spot carefully with a pencil and use a spade bit or hole saw to drill straight through. Take your time with this—a crooked hole ruins the whole aesthetic and messes with gameplay.
If you don’t have a hole saw that large, you can use a jigsaw after drilling a starter hole. Just go slow and let the tool do the work. Sand the edges of the hole smooth afterward; nobody wants splinters on their hands during game time.
Sand Everything Smooth
This step separates the amateurs from the pros. Start with 120-grit sandpaper and work over the entire surface, paying special attention to edges and the hole perimeter. Switch to 220-grit for a final pass to get that silky-smooth finish. Sand in the direction of the wood grain when possible.
Don’t skip this step thinking you’ll just paint over rough spots. Good sanding makes painting easier, protects your hands, and honestly just feels better when you’re playing. Wipe down with a tack cloth after sanding to remove all dust before finishing.
Paint and Finish
This is where your boards go from “functional” to “wow, you made that?” You’ve got two main routes: stain and polyurethane, or exterior paint. If you want that natural wood look, stain is your friend. Apply with a brush or rag, let it dry per the manufacturer’s instructions, then seal with polyurethane. Check out how long spray paint takes to dry if you’re considering that route for detail work.
Paint gives you way more color options. I’ve seen everything from solid colors to team logos to elaborate designs. Use exterior-grade paint and apply at least two coats. Between coats, lightly sand with 220-grit to help the next coat stick. Finish with a clear polyurethane topcoat for durability—these boards will be outside taking abuse from sun, rain, and aggressive tossers.
Build Support Legs
Your boards need to stand at a slight angle—typically 9 to 12 degrees—so the bags roll toward the hole. Cut your 2x4s into legs and supports. A simple frame using 2x4s works great: create an A-frame or box-style support that tilts the board appropriately. The front should be lower than the back, creating that slope.
Attach legs with 2.5-inch wood screws, drilling pilot holes first to prevent splitting. Make sure everything is square and sturdy before moving on. These boards are going to take a beating, so don’t cheap out on the leg construction. You want them rock-solid, not wobbling around like a folding card table.
Assemble the Boards
Now bolt the playing surface (your plywood) to the leg frame using lag bolts or through-bolts. This creates a rock-solid connection that’ll last for years. Make sure the board is level side-to-side but tilted front-to-back as planned. Double-check your angles with a level before fully tightening everything.
Sand any rough spots on the legs and apply the same finish as your playing surface. This keeps everything looking cohesive and protects the wood. You’re almost done—just a couple more steps before you’re throwing bags.
Make Your Toss Bags
You need eight bags total (four per player in a two-player game). Use durable fabric like canvas or duck cloth, cut into 6×6 inch squares. Sew two squares together inside-out, leaving a small opening for stuffing. Turn right-side-out and fill with dried corn, sand, or plastic pellets—about 1 pound per bag.
Stitch the opening closed and you’re golden. Make four bags in one color and four in another so players can distinguish their bags. These don’t need to be fancy; functional is fine. If you want them looking sharp though, add some embroidery or fabric paint with team names or logos.
Test and Adjust
Before you throw your first party, test your boards. Toss some bags, check how they slide, and make sure the hole is positioned right. If bags aren’t rolling smoothly, you might need to adjust the angle or add a thin coat of paste wax to the playing surface for better glide.
Play a few practice rounds and fine-tune the finish if needed. Some people prefer a grippier surface; others want maximum slide. There’s no “wrong” answer here—it’s about what feels right to you. This is also when you’ll figure out if you need to reinforce anything that feels loose or wobbly.
Frequently Asked Questions
What’s the best wood for cornhole boards?
3/4-inch plywood is the standard choice because it’s affordable, durable, and easy to work with. Birch plywood is slightly nicer than standard pine plywood if you want better-looking grain, but honestly, either works great once painted or stained.
How long does it take to build cornhole boards?
You’re looking at a full day project for most people—maybe 6 to 8 hours from start to finish. That includes drying time for stain and paint. If you’re experienced with tools, you could knock it out faster. Take your time though; rushing leads to mistakes.
Do I need to seal cornhole boards?
Absolutely. Outdoor exposure will destroy unsealed wood. Use exterior-grade polyurethane or deck sealer. Reapply every year or two depending on how much sun exposure your boards get. This extends their life significantly.
What angle should cornhole boards be?
The standard is 9 to 12 degrees, with the higher end preferred for casual play. This angle makes bags roll toward the hole without being so steep that they shoot off the back. Use a level to dial in your exact angle during assembly.
Can I use plywood other than 3/4-inch?
Technically yes, but don’t. Half-inch plywood will flex too much and feel cheap. Three-quarter inch is the sweet spot—thick enough to be rigid but not so thick that you’re wasting money. This is one place where the standard exists for good reasons.
How do I make the playing surface less slippery?
Add texture with adhesive-backed grip tape (like skateboard tape) or apply a textured polyurethane finish. You can also check drying times for various finishes to plan your project timeline. Some people prefer a grippier surface for more control.
What’s the official cornhole hole size?
Six inches is regulation. Some casual games use 5 inches for more difficulty, but stick with 6 inches if you want to follow official rules or play with people used to standard boards.
Should I weatherproof the legs too?
Definitely. Paint or stain the legs the same as the playing surface. This protects the wood and makes your boards look like a matched set. Bare wood legs will rot faster than the top, which looks sloppy and shortens the lifespan of your boards.
Final Thoughts
Building cornhole boards is a satisfying project that’ll give you years of entertainment. You’ll have something to be genuinely proud of every time you pull them out for a game. The process teaches you fundamental woodworking skills, and the finished product is something you can use immediately and often.
Take your time with each step, don’t rush the finishing work, and you’ll end up with boards that look professional and play great. Your friends will be impressed, and you’ll have a go-to game setup for every gathering. Plus, once you’ve built your first set, making a second set is even easier.
Now get out there and build something awesome. Your backyard is waiting for some cornhole action, and you’ve got everything you need to make it happen. For more DIY inspiration and timing guides on finishing projects, check out spray paint drying times and other helpful resources. Happy building!


