
Learning how to brine a turkey is the single best move you can make to guarantee juicy, flavorful meat that’ll have everyone asking for your secret. I’ve brined hundreds of birds over the years, and I’m telling you straight—this technique transforms an ordinary holiday dinner into something genuinely special. No fancy equipment needed, no complicated chemistry. Just salt, water, time, and a little patience.
Table of Contents
Why Brine Actually Matters
Here’s the thing about turkey—it’s naturally lean meat. Without help, it dries out faster than you’d think, especially the breast. Brining solves this problem by using salt to break down muscle proteins and help the meat retain moisture during cooking. When salt penetrates the turkey’s tissues, it changes the protein structure so the meat can hold onto water instead of squeezing it out in the oven.
I’ve cooked turkeys both ways, and the difference is night and day. A brined bird stays juicy throughout cooking, even if you accidentally overcook it slightly. The flavor penetrates deeper too—you’re not just seasoning the surface; you’re building flavor from the inside out. This is especially noticeable in the thighs and legs, which stay tender and succulent.
Brining Basics: Salt & Science
The foundation of any brine is salt and water. The ratio matters, but it’s simple: you’re aiming for about 1 cup of salt per gallon of water. That sounds like a lot, but trust the math. The salt concentration needs to be strong enough to actually change the meat’s cellular structure. Too little salt and you’re just soaking the bird; too much and you’ll end up with something inedible.
Beyond salt and water, you can get creative. Sugar balances the salt’s intensity—brown sugar or maple syrup work beautifully. Spices, herbs, citrus, and aromatics add flavor complexity. Bay leaves, peppercorns, thyme, rosemary, garlic, and onion are my go-to additions. Some folks add a splash of apple cider vinegar or soy sauce for depth. The beauty of brining is that you control the flavor profile completely.
The Wet Brine Method
The wet brine is what most people think of first. You’re submerging the entire turkey in a seasoned salt solution. Here’s my straightforward approach:
Basic Wet Brine Recipe (for a 12-16 lb turkey):
- 1 gallon water
- 1 cup kosher salt
- ½ cup brown sugar
- 2 tablespoons black peppercorns
- 4 bay leaves
- 6 cloves garlic, smashed
- Fresh thyme and rosemary sprigs
- 1 onion, quartered
- 2 tablespoons fresh ginger, sliced (optional)
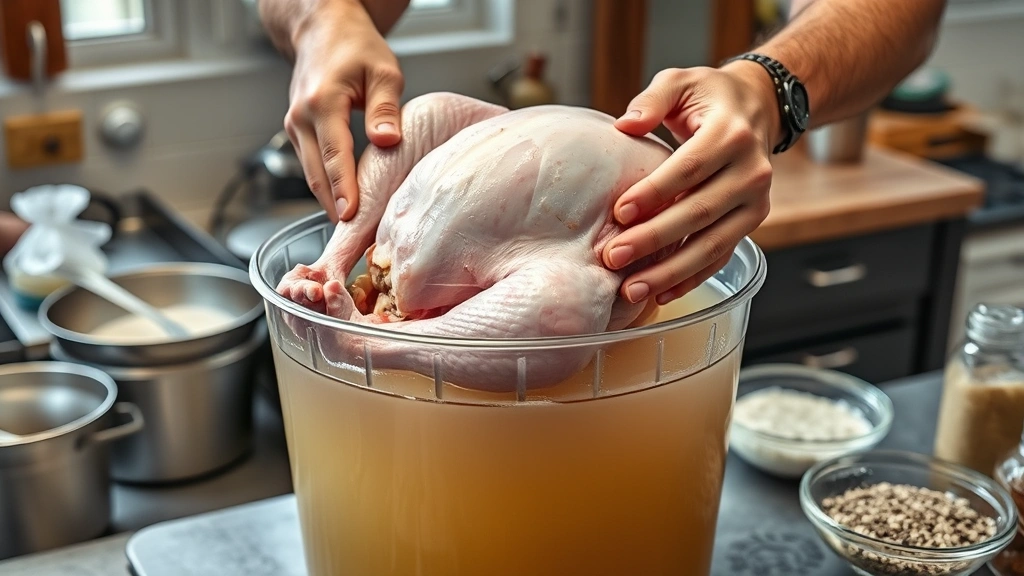
Start by heating half the water with all the salt and sugar. You want it hot enough to dissolve everything completely—about 5 minutes of simmering. Add your spices and aromatics here, let them steep for 10 minutes, then pour the whole thing into a large container. Add the remaining cold water and ice to cool it down. The brine must be completely cold before the turkey goes in, or you’re asking for food safety trouble.
Submerge your thawed turkey completely—this is crucial. The bird needs to stay under the liquid the entire time. I use a plate weighted with a can to keep it submerged. Cover everything and refrigerate. The timing depends on the turkey’s size: 12-16 pounds needs 12-24 hours; 16-20 pounds needs 24 hours; over 20 pounds can go up to 48 hours, but I don’t recommend going longer than that.
Dry Brine Approach
If you’re short on space or prefer not to deal with a massive container, dry brining is your answer. It’s essentially a seasoned salt rub that you apply and let sit. The salt draws out moisture initially, then the meat reabsorbs it along with the seasonings. It’s faster than wet brining and takes up way less fridge real estate.
Mix your salt with ground spices, dried herbs, sugar, and any other dry seasonings you like. I typically use about 2-3 tablespoons of salt per 12-16 pound bird, mixed with garlic powder, onion powder, paprika, thyme, and black pepper. Rub this mixture all over the bird—under the skin, inside the cavity, everywhere. Let it sit uncovered in the fridge for 24 hours. The turkey will look a bit wet initially, but that’s the osmosis doing its job. By the end, the skin will be drier, which actually helps it crisp up beautifully in the oven.
Dry brining produces slightly crispier skin than wet brining, which some folks prefer. The trade-off is that wet brining tends to keep the meat even more moist. Honestly, you can’t go wrong either way.
Timing and Prep Work
The biggest mistake people make is starting too late. Plan backward from your cooking time. If you’re roasting the turkey at 325°F, a 12-16 pound bird needs about 3-3.5 hours. Add your brining time, and you’re looking at needing to start 1-3 days before dinner, depending on which method you choose.
Before brining, make sure your turkey is completely thawed. This is non-negotiable for food safety. If you’re working with a frozen bird, check out how long does chicken take to thaw for thawing guidelines—the principles are the same. Allow about 24 hours of thawing time in the refrigerator for every 4-5 pounds of turkey.
Remove the giblets and neck from the cavity before brining. You’ll want these for gravy anyway. Pat the turkey dry on the outside before it goes into the brine—this helps the salt penetrate more effectively.
Container Choices Matter
You need something big enough to hold your turkey and enough brine to cover it completely. A 5-gallon food-grade bucket works perfectly and is my go-to. You can also use a large stockpot, a brining bag (if you can find one), or even a clean cooler with ice packs to maintain temperature. The key is that whatever you use needs to fit in your refrigerator or stay cold somehow.
I’ve used a brining bag in a pinch, and it works fine, but I prefer a bucket because you can see what’s happening and it’s easier to manage. If you use a bag, double-bag it to prevent leaks. If you go the cooler route, you’ll need to change the ice regularly to keep the temperature below 40°F.
Whatever container you choose, make sure it’s food-safe and thoroughly clean. This is raw poultry we’re talking about—cleanliness matters.
After Brining: Rinsing & Drying
When your brining time is up, remove the turkey from the brine and rinse it thoroughly under cold running water. This step is important—you’re washing away excess salt from the surface so the bird doesn’t end up too salty. Rinse the cavity too. Pat it completely dry with paper towels. A wet turkey won’t brown properly in the oven, so don’t skip this.
Here’s a pro tip: place the rinsed turkey on a rack over a baking sheet and let it air-dry in the refrigerator for 8-24 hours before roasting. This extra drying time produces incredibly crispy skin. If you don’t have time for this step, at least get it as dry as possible with towels.
You can season the outside of the turkey after rinsing if you want additional flavor, but be conservative with salt since the meat is already seasoned throughout from the brine. Fresh herbs, butter, and spices on the outside are perfect.
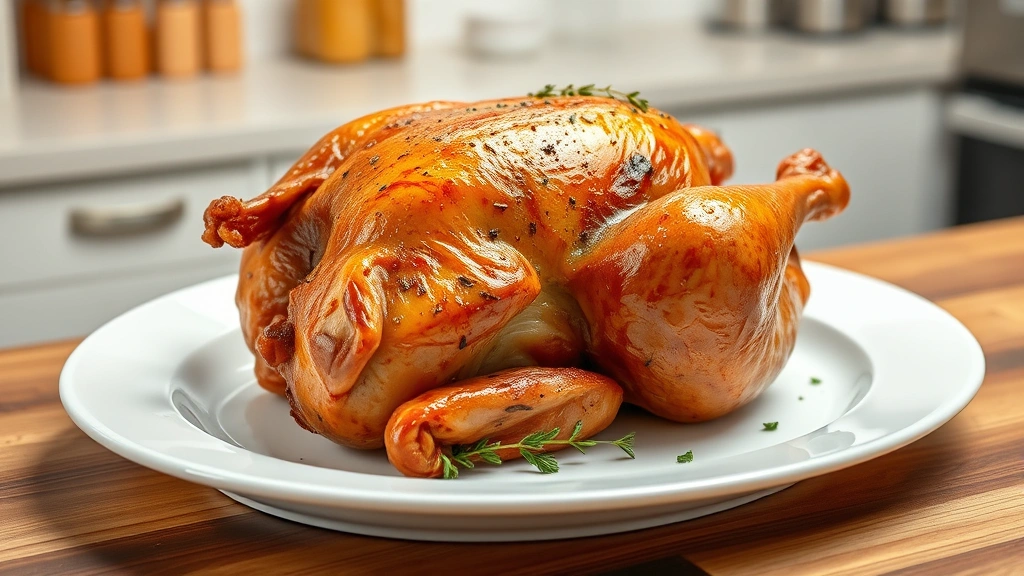
Roasting Your Brined Turkey
A brined turkey cooks slightly faster than an unbrined one because it retains moisture better and conducts heat more efficiently. Start checking for doneness about 30 minutes earlier than you normally would. The thickest part of the thigh should reach 165°F on an instant-read thermometer—that’s your target.
Roast at 325°F, breast-side up. Tent with foil for the first 2-3 hours to prevent over-browning, then remove the foil to let the skin finish crisping. Baste every 45 minutes or so if you want, but honestly, a brined bird stays moist enough that basting is optional. I usually skip it to avoid opening the oven and losing heat.
Let the turkey rest for at least 20-30 minutes after it comes out of the oven before carving. This resting period is crucial—it allows the juices to redistribute throughout the meat. If you cut into it immediately, all those juices run out onto the cutting board instead of staying in your meat.
Common Brining Mistakes
The biggest error I see is using a frozen turkey in the brine. It won’t thaw evenly, and the brine won’t penetrate properly. Always start with a completely thawed bird.
Another common problem is brining too long. More than 48 hours and the meat can start getting mushy from over-salting. It’s a real thing. Stick to the recommended timeframes.
Some people forget to keep the brine cold. If the temperature rises above 40°F for more than a couple of hours, you’re risking bacterial growth. Keep it refrigerated or use ice packs in a cooler.
Not rinsing thoroughly after brining is another mistake. Your turkey will taste overly salty if you skip this step. Rinse it well.
Finally, some folks try to add too many flavors to the brine and end up with something that tastes muddy and confused. Keep your brine flavor profile focused. A few complementary flavors are better than throwing everything at it.
Frequently Asked Questions
Can I brine a frozen turkey?
No. Your turkey must be completely thawed before brining. A frozen bird won’t thaw evenly in the brine, and the salt won’t penetrate properly. Thaw it in the refrigerator first, allowing about 24 hours per 4-5 pounds.
How long can I brine a turkey?
For wet brining, aim for 12-24 hours for smaller birds (12-16 lbs) and up to 48 hours maximum for larger ones. Dry brining works best at 24 hours. Don’t exceed 48 hours with wet brining, or the meat can become mushy.
Do I need to rinse the turkey after brining?
Yes, absolutely. Rinse it thoroughly under cold water inside and out. This removes excess surface salt so your turkey doesn’t taste overly salty.
Can I use table salt instead of kosher salt?
You can, but you’ll need less. Table salt is denser than kosher salt, so use about 3/4 cup table salt for every 1 cup kosher salt called for in a recipe. Better yet, just grab kosher salt—it’s inexpensive and gives more consistent results.
What’s the difference between wet and dry brining?
Wet brining submerges the turkey in a salt solution and takes 12-48 hours. Dry brining uses a salt rub applied directly to the bird and takes about 24 hours. Wet brining produces slightly juicier meat; dry brining produces crispier skin. Both work great.
Can I brine a turkey that’s already seasoned?
If it’s been injected with butter or seasonings at the store, you can still brine it, but reduce the salt in your brine slightly to avoid over-salting. Check the package to see what’s already in there.
Do I need to adjust cooking time for a brined turkey?
Yes, slightly. Brined turkeys cook about 25% faster because they retain moisture better. Start checking for doneness 30 minutes earlier than you normally would.
Can I save and reuse the brine?
No. Once raw poultry has been in it, the brine is contaminated and should be discarded. Always start with fresh brine for food safety.
Final Thoughts
Brining a turkey isn’t complicated, but it absolutely transforms the final result. Whether you go with a wet brine or dry brine, you’re making a choice that guarantees better moisture retention and deeper flavor. The time investment is minimal compared to the payoff—juicy, tender, flavorful turkey that makes you look like a culinary genius.
Start your brine 1-3 days before dinner, keep everything cold, and follow the timing guidelines. That’s really all there is to it. Your holiday table will thank you, and your guests will be asking what your secret is. You can tell them it’s brining, or you can keep the mystery alive—either way, you’ve got this.
If you’re planning a full holiday spread, don’t forget to check out how long to cook pot roast in oven for side dishes, or explore crockpot recipes for make-ahead options. And if you want to get fancy with your seasonings, creole seasoning recipe can add a fun twist to your brining spice mix. For finishing touches, garlic parmesan sauce recipe and cilantro how to chop techniques can round out your meal beautifully.


