
Learning how to brew beer at home is one of the most rewarding DIY projects you can tackle, and honestly, it’s way simpler than most people think. Whether you’re dreaming of crafting your own IPA, lager, or stout, this guide will walk you through everything you need to know to go from zero to beer hero in your own kitchen or garage.
Table of Contents
Understanding Beer Basics
Before you start brewing beer, you need to understand what you’re actually making. Beer is fundamentally a fermented beverage created from four ingredients: water, grain (usually malted barley), hops, and yeast. That’s it. The magic happens when yeast eats sugars from the grain and converts them into alcohol and carbon dioxide.
There are two main brewing styles you’ll encounter: ale and lager. Ales ferment at warmer temperatures (65-75°F) and ferment faster, making them perfect for beginners. Lagers need cooler temps (50-60°F) and take longer, so save those for when you’ve got experience under your belt. Most home brewers start with ales because they’re forgiving and produce great results quickly.
The brewing process itself breaks down into distinct phases: mashing, lautering, boiling, cooling, fermenting, and conditioning. Each step serves a purpose, and understanding why you’re doing each one will make you a better brewer.
Essential Equipment You’ll Need
Starting simple is your best bet. You don’t need fancy gear to make excellent beer. Here’s what every beginner should have:
The Core Kit: A large stainless steel or food-grade plastic pot (at least 5-10 gallons), a fermentation vessel (glass carboy or food-grade plastic bucket), an airlock, a thermometer, a hydrometer for measuring gravity, a siphon with tubing, and bottles with caps or a capping tool. Many homebrew shops sell starter kits that bundle these together for $75-150, which is a solid investment.
You’ll also need a large spoon for stirring, a strainer, sanitizing solution (Star San is the industry standard), and measuring cups. Don’t skip the sanitizing gear—contamination is the enemy of good beer. Like learning how to use a diffuser for aromatherapy, proper technique matters more than fancy equipment.
Optional but helpful: a wort chiller speeds up cooling time dramatically, a grain mill lets you crush your own grain for fresher flavor, and a temperature-controlled fermentation chamber gives you precise control over your brew’s development.
Ingredients That Matter
Quality ingredients make quality beer. Your grain bill—the combination of malts you use—determines the beer’s color, body, and flavor foundation. For beginners, start with recipe kits that include pre-measured grains and hops. As you progress, you’ll experiment with different varieties.
Malted Grains: These are grains that have been specially processed to convert their starches into fermentable sugars. Two-row pale malt is the workhorse grain in most beers. You’ll also use specialty grains like caramel malt for sweetness, chocolate malt for color and roasted flavor, and others depending on your style.
Hops: These cone-shaped flowers add bitterness, flavor, and aroma. Bittering hops go in early during the boil, flavor hops mid-boil, and aroma hops at the end. Different varieties create vastly different character—Cascade hops are floral and citrusy, while Centennial brings a more herbal punch. Understanding how big is 1.5 L to oz helps you measure liquid ingredients precisely.
Yeast: This living organism does all the work. Safale US-05 and Wyeast 1056 are bulletproof ale yeasts that beginners love. Keep your yeast healthy by storing it properly (cold for liquid, cool for dry) and using it before the expiration date.
Water: Don’t overthink it. Filtered tap water works fine for most homebrewers. If your water is heavily chlorinated, let it sit overnight or use a carbon filter.
The Brewing Process Explained
Here’s where the actual work begins. Most homebrewers use one of two methods: extract brewing (easier, faster, less equipment) or all-grain brewing (more control, slightly more complex). We’ll focus on extract brewing since it’s perfect for beginners.
Step One: Prepare Your Workspace Clean and sanitize everything that will touch your beer. This is non-negotiable. Mix your sanitizer according to directions and soak your equipment for at least 15 minutes. Don’t rinse with water afterward—the sanitizer residue is food-safe and won’t hurt your beer.
Step Two: The Mash (if using grains) Heat water to around 150-160°F, add your crushed specialty grains in a mesh bag, and let them steep for 30 minutes. This extracts flavor and color. Remove the grain bag and bring the water to a boil.
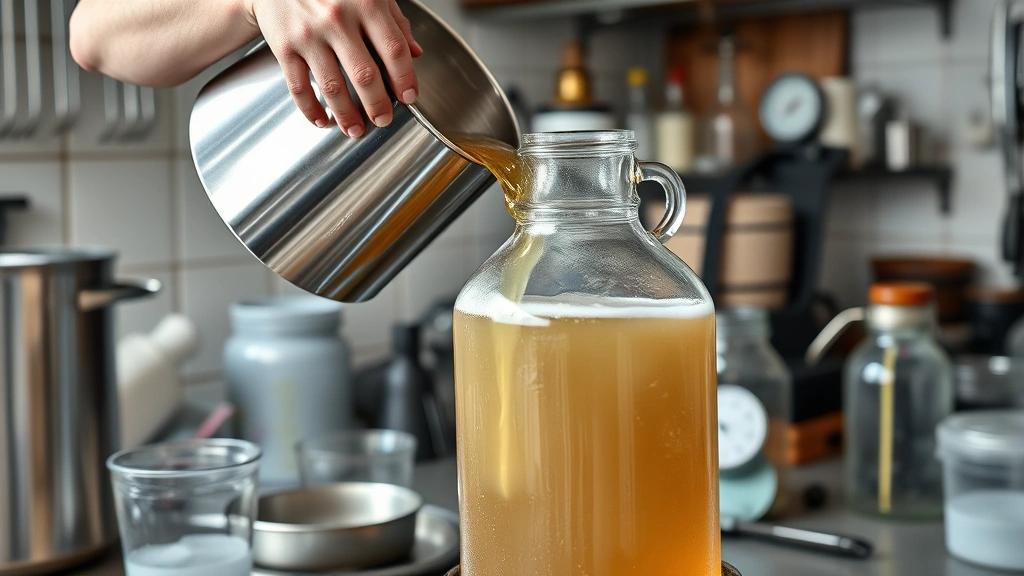
Step Three: Add Your Extract Once boiling, remove from heat and stir in your malt extract. This is concentrated wort—basically the sugar solution that yeast will eat. Stir well to avoid clumping, then return to heat.
Step Four: The Boil Bring to a rolling boil and maintain it for 60 minutes. This is where you add hops on a schedule. At 60 minutes remaining, add your bittering hops. At 15 minutes remaining, add flavor hops. At 5 minutes, add aroma hops. This timing controls how much bitterness versus flavor and aroma you get.
Step Five: Cool It Down After the boil, you need to cool the wort to around 70°F before pitching yeast. A wort chiller does this in 15 minutes; without one, you’re looking at 30-45 minutes of waiting in an ice bath. Patience here prevents wild yeast contamination.
Fermentation: Where Magic Happens
Once cooled, transfer your wort to your sanitized fermentation vessel. Pour it gently to avoid splashing and oxidation. You want to aerate the wort at this point—shake the carboy or bucket for 30 seconds to add oxygen, which yeast needs to get started.
Now pitch your yeast. This means adding it to the wort. If using dry yeast, sprinkle it on the surface. If using liquid yeast, gently pour it in. The yeast doesn’t need to be stirred in; it’ll find its way.
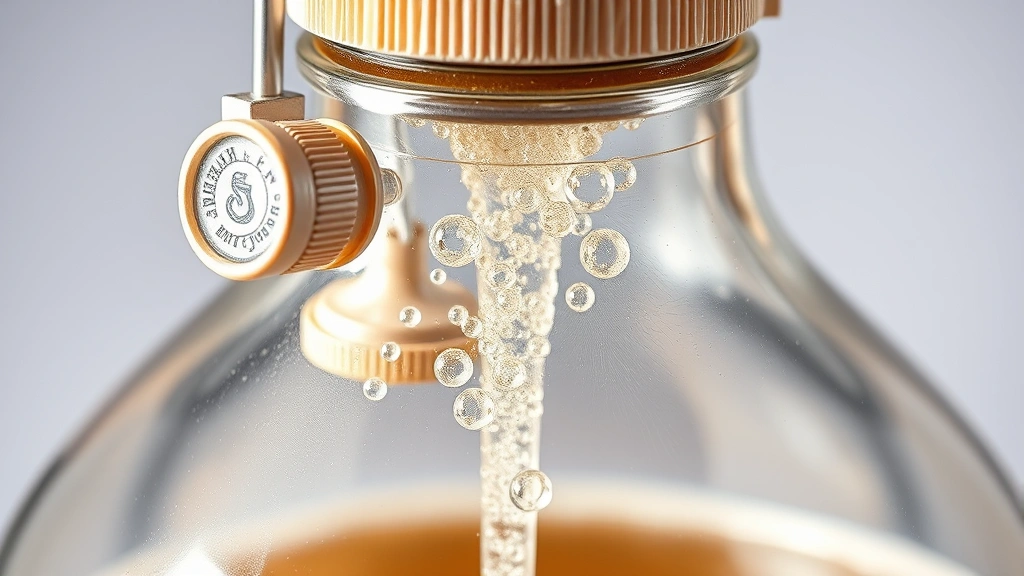
Seal your vessel with an airlock—this one-way valve lets CO₂ escape while keeping contaminants out. Within 12-24 hours, you should see bubbling as fermentation kicks off. This is the yeast eating sugars and producing alcohol. The vigorous activity lasts 3-7 days, then slows down. Let it sit for 2-3 weeks total for ales. Don’t peek constantly; just let it work.
Temperature control is crucial here. Keep your fermentation vessel in a spot that stays around 65-70°F for ales. Too warm and you get off-flavors; too cold and fermentation stalls. A basement corner or closet usually works perfectly.
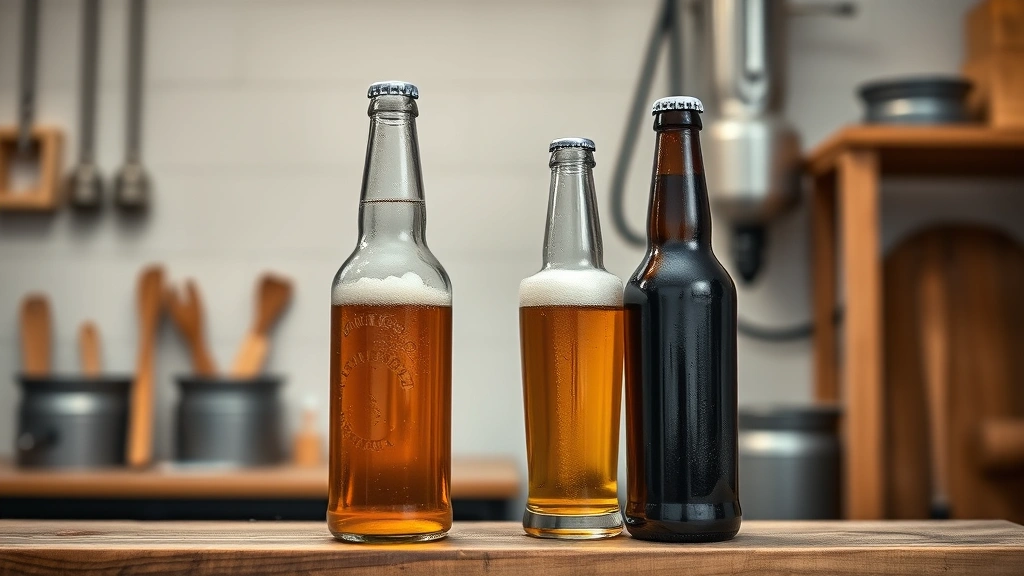
Bottling and Carbonation
After fermentation slows to barely-there bubbling (usually 2-3 weeks), it’s time to bottle. This is where your beer gets fizzy and ready to drink. Sanitize all your bottles and caps first—this is your last chance to prevent infection.
Siphon your beer into a bottling bucket that has a spigot at the bottom. Add priming sugar (usually 3/4 cup of corn sugar dissolved in boiling water and cooled) to the bucket and gently stir. This sugar gives the yeast one last meal, producing CO₂ that carbonates your beer in the bottle.
Fill each bottle to about an inch from the top using the spigot, cap immediately, and store at room temperature (65-75°F). The carbonation process takes 2-4 weeks. You’ll know it’s done when the bottles feel firm and fizzy when you open one.
Store finished beer in a cool, dark place. Avoid direct sunlight—it causes “skunky” flavors. Properly stored homebrew lasts 3-6 months easily, though most gets drunk long before that.
Common Beginner Mistakes
Nearly every homebrewer makes these early on. Learning from others’ experiences saves batches.
Skipping Sanitation: This is the number-one killer of batches. Bacteria and wild yeast will ruin your beer faster than you can say “infected.” Treat sanitization like it’s the most important step—because it is.
Temperature Swings: Moving your fermentation vessel around or fermenting in a warm kitchen causes stress on yeast and off-flavors in your beer. Find a stable spot and leave it alone.
Not Taking Gravity Readings: Your hydrometer tells you when fermentation is actually done. Many beginners bottle too early, creating bottle bombs (over-carbonated bottles that explode). Take readings on day 3, 5, and 7 of fermentation. When gravity stays the same for two consecutive days, you’re done.
Over-Oxygenating After Pitching: Oxygen is good before yeast goes in, but bad after. Don’t shake your carboy after pitching yeast—this causes oxidation and stale flavors.
Using Old Ingredients: Old yeast won’t ferment properly. Old hops lose their punch. Use fresh ingredients, and store them correctly. Much like cherry jam recipe success depends on fresh fruit, beer depends on fresh ingredients.
Troubleshooting Your Brew
No Fermentation After 24 Hours: Check your temperature. If it’s below 60°F, move the carboy somewhere warmer. If it’s warm enough, your yeast might be dead. Next time, store yeast in the fridge and use before the date.
Fermentation Stopped Too Early: This is usually temperature-related. Move the carboy to a warmer spot (aim for 68-70°F) and wait another week. If gravity readings confirm it’s stuck, you may need to pitch more yeast.
Cloudy or Hazy Beer: This is usually just yeast and proteins settling. Bottle anyway—it clears in the bottle over time. If it stays cloudy after a month, you might have a contamination issue, but cloudiness alone isn’t a deal-breaker.
Flat Beer: You either didn’t add enough priming sugar, or your bottles weren’t sealed properly. Next time, measure the sugar carefully and cap firmly. Store bottles upside-down occasionally to ensure the cap stays wet and sealed.
Sour or Vinegary Taste: This indicates bacterial infection, usually from poor sanitation. It’s still drinkable (it’s basically sour beer), but prevention is key. Don’t repeat this batch without improving your sanitation protocol.
Taking Your Skills Further
Once you’ve successfully brewed 2-3 batches of extract beer, you’re ready to level up. All-grain brewing gives you complete control over your beer’s character. You’ll do a process called mashing where you steep crushed grain in hot water to convert starches to sugar, then lauter (filter) the liquid through the grain bed.
Invest in better equipment: a larger kettle, a mash tun (insulated vessel for mashing), a false bottom or manifold for lautering, and a wort chiller. You’ll also want to dial in water chemistry and understand how mineral content affects your beer’s flavor profile.
Join a local homebrew club. These groups meet monthly, share recipes, taste each other’s beers, and offer mentorship. You’ll learn more from experienced brewers in person than from any article. Plus, the community is genuinely welcoming—brewers love sharing their passion.
Experiment with recipe variations. Once you understand the fundamentals, try different yeast strains, hop combinations, and grain bills. Keep detailed notes on every batch. Temperature, timing, ingredients, gravity readings—write it all down. This becomes your brewing journal and your best learning tool.
Frequently Asked Questions
How much does it cost to start brewing beer?
A basic starter kit runs $75-150. Your first batch of ingredients costs $30-50. So your first beer costs around $100-200 total, but subsequent batches only need new ingredients ($30-50 each), making it cheaper than buying craft beer at a bar.
How long until I can drink my beer?
From start to finish, expect 4-6 weeks for ale. Two weeks of fermentation, two weeks of carbonation, plus a week of prep and bottling. Lagers take 6-8 weeks due to longer fermentation times. It’s worth the wait.
Can I brew beer in an apartment?
Absolutely. Fermentation produces minimal smell if done right. The biggest challenge is finding a cool, stable spot. A closet, basement corner, or even a cabinet works. You don’t need much space—a 5-gallon carboy is only 12 inches wide.
What’s the difference between extract and all-grain brewing?
Extract brewing uses pre-made malt extract (concentrated wort), skipping the mashing step. All-grain brewing starts with whole grains and does the mashing yourself. Extract is faster, simpler, and cheaper to start. All-grain gives more control but requires more equipment and time.
Is homebrewed beer safe to drink?
Yes, absolutely. The fermentation and alcohol content kill pathogens. The only real risk is over-carbonation from improper bottling, which could cause a bottle to explode. Proper technique eliminates this risk entirely. Like understanding aeropress recipe precision, brewing requires attention to detail but is perfectly safe.
Can I reuse yeast from one batch to another?
Yes, and many brewers do. After fermentation, yeast settles at the bottom of your carboy. You can harvest it, store it in the fridge in a sanitized container, and pitch it into your next batch within a couple of weeks. This saves money and you already know this yeast works.
What if my beer tastes bad?
Bad taste usually means one of three things: infection (sour, vinegary), oxidation (stale, papery), or off-flavors from temperature stress (hot, fruity, solvent-like). Take notes on what went wrong, improve that specific area, and brew again. Every bad batch teaches you something crucial.
Final Thoughts
Learning how to brew beer is genuinely one of the most satisfying hobbies you can start. There’s something magical about taking raw ingredients, understanding chemistry and biology, and producing something delicious that you made with your own hands. The first time you crack open a bottle of your own beer and it’s actually good? That feeling is unforgettable.
Start simple with extract brewing, follow sanitation religiously, keep detailed notes, and don’t stress about perfection. Every brewer—from homebrewers to professionals—has made mistakes. The difference is they learned from them and brewed again. Your second batch will be better than your first, your third better than your second, and soon you’ll be the person teaching someone else how to brew.
Grab a starter kit, pick up some ingredients, and get brewing. The hardest part is getting started. Once you do, you’ll be amazed at what you can create. Welcome to the homebrew community—we’re glad you’re here.


