
Learning how to bleed brakes is one of those skills that separates the confident DIYer from someone stuck at the shop dropping serious cash. Air bubbles in your brake lines kill your stopping power, and bleeding them out is honestly simpler than most folks think. I’ve done this job hundreds of times in my workshop, and I’m going to walk you through every step so you can do it right the first time.
Table of Contents
Why Bleed Your Brakes
Your brake system is a hydraulic marvel. Brake fluid transmits pressure from your pedal to the calipers, creating the friction that stops your vehicle. But here’s the thing: brake fluid is hygroscopic, meaning it absorbs moisture from the air. Over time, this moisture creates tiny air pockets in your lines. Those air pockets compress instead of transmitting pressure, and suddenly your brake pedal feels spongy or goes straight to the floor. That’s when you know it’s time to bleed the system. You might also need to bleed brakes after replacing brake pads, rotors, or any component in the hydraulic system. If you’re doing general maintenance, many mechanics recommend bleeding your brakes every two to three years as part of your routine upkeep.
Tools and Materials Needed
Before you crawl under the car, gather these essentials. You’ll need a wrench set (usually 8mm or 10mm for bleeder valves), a clear plastic tubing that fits snugly over the bleeder valve, a container to catch old brake fluid, fresh DOT 3 or DOT 4 brake fluid (check your owner’s manual), jack stands, a jack, and optionally a brake bleeding kit or vacuum pump. I always keep a turkey baster or old syringe handy for refilling the master cylinder. A friend makes this job easier—one person pumps the pedal while the other opens and closes the valve—but you can do it solo with a bit of patience. Some folks use a one-person bleeder kit, which works great if you’re flying solo. Have some shop rags nearby because brake fluid stains like nobody’s business, and it’ll eat through your car’s paint if you spill it.
Safety Considerations
Safety isn’t negotiable when you’re working on brakes. Always park on level ground and engage the parking brake. Use jack stands—never trust a jack alone. Brake fluid is caustic and will damage paint, plastic, and skin, so wear nitrile gloves and eye protection. Keep a fire extinguisher nearby because brake fluid is flammable. Never reuse old brake fluid; it’s contaminated and won’t give you reliable stopping power. If you’re not confident about your ability to bleed brakes properly, this is the one job where paying a professional might be worth it. Bad brakes are a safety issue, not just a comfort thing. That said, if you follow this guide carefully, you’ll nail it. Your family’s safety depends on your brakes working perfectly, so take your time and don’t rush.
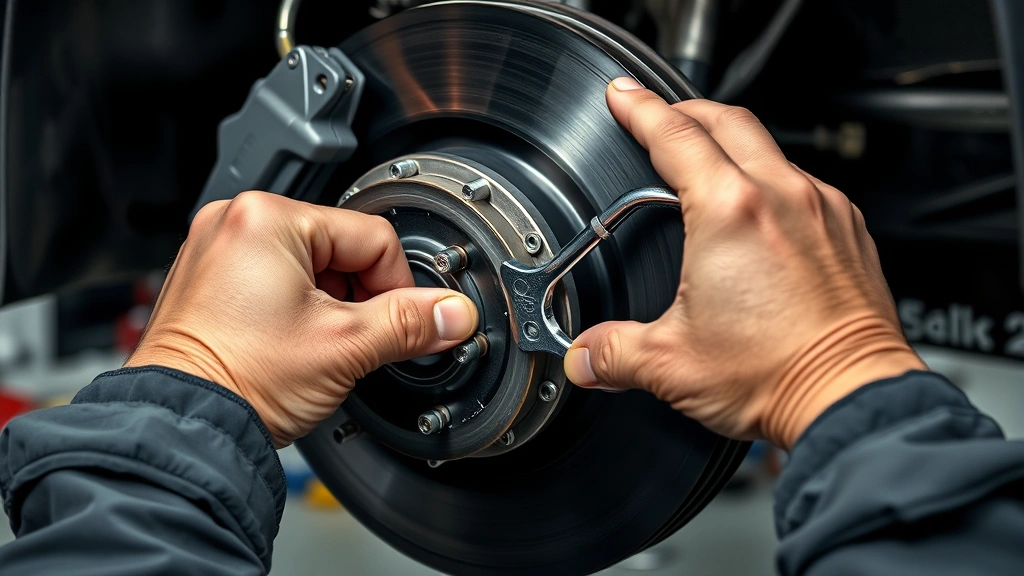
Locating Bleeder Valves
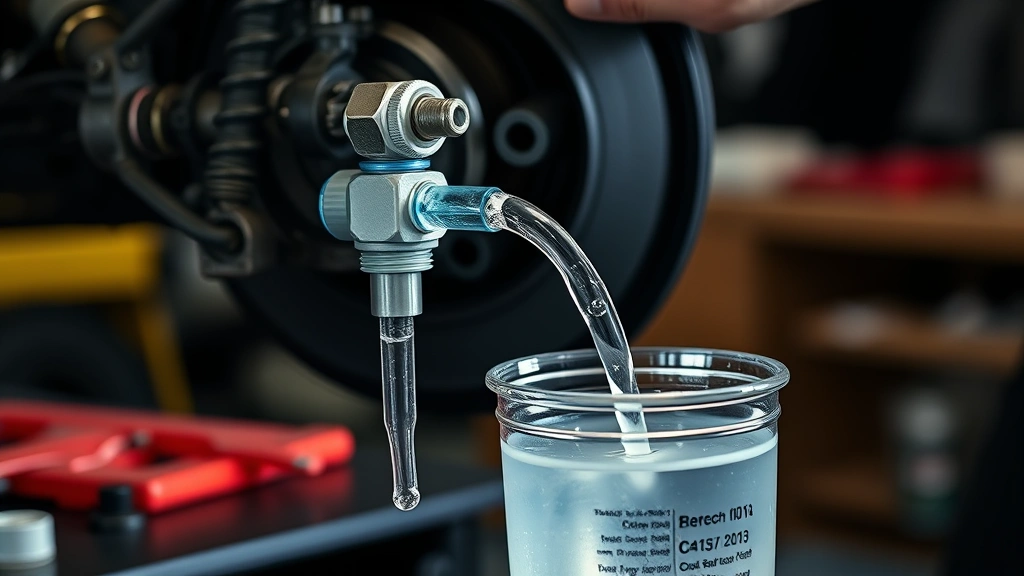
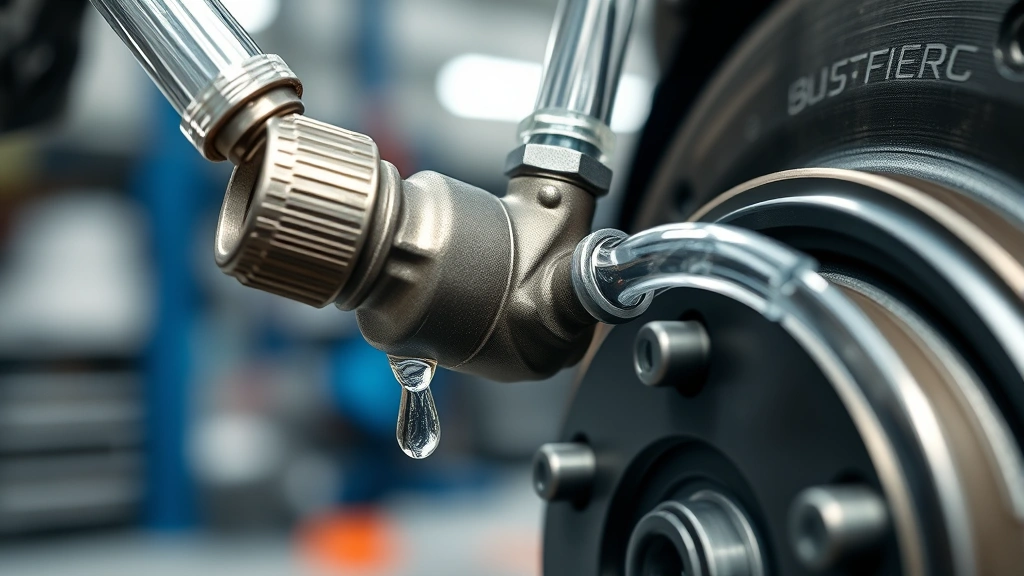
Bleeder valves are small nipples on each brake caliper (or wheel cylinder on drum brakes). You’ll find them tucked behind the wheels, usually on the back side of the caliper. They’re typically brass and have a small hex head. Some are easier to access than others—front calipers are usually straightforward, while rear calipers on some vehicles require removing the wheel and maybe some trim. Consult your service manual to identify the exact locations on your vehicle. The bleeder valve is where brake fluid escapes when you open it, allowing air to be pushed out of the system. On most vehicles, you’ll bleed all four wheels, starting from the one farthest from the master cylinder and working your way back. The typical sequence is right rear, left rear, right front, left front, though your manual might specify differently.
Step-by-Step Bleeding Process
Here’s where the rubber meets the road. First, remove the master cylinder cap and check the fluid level—it should be near the top. Fill it with fresh brake fluid if needed. Now, jack up the vehicle safely using jack stands. Remove the wheels for better access. Locate the bleeder valve on the first wheel (right rear). Attach your clear plastic tubing to the bleeder valve—it should fit snugly. Run the tubing into your container. Have your helper sit in the driver’s seat with the engine off. Open the bleeder valve about three-quarters of a turn using your wrench. Your helper should slowly press the brake pedal all the way to the floor, then hold it there. As they hold pressure, you’ll see fluid and air bubbles flow through the tubing. Once the pedal hits the floor, tell your helper to hold steady while you close the bleeder valve. Your helper then releases the pedal slowly. Repeat this process five to ten times per wheel until you see only clear fluid with no air bubbles in the tubing. Check the master cylinder frequently and top it off—running it dry introduces more air. Move to the next wheel and repeat. After finishing all four wheels, do a final check of the master cylinder level, then test your brakes on a safe, empty road before driving normally.
Common Mistakes to Avoid
The biggest mistake I see is letting the master cylinder run dry. Once it empties, you’re pulling air into the system, and you’ll have to start over. Keep checking that fluid level constantly. Another common error is bleeding in the wrong order—always start from the wheel farthest from the master cylinder. Some folks reuse old brake fluid, which is a recipe for disaster because it’s already contaminated with moisture and particles. Never use old fluid; it’s cheap insurance to buy fresh. Don’t rush the process. Air moves slowly through brake lines, and hurrying means you’ll trap bubbles. Take your time, be methodical, and you’ll get clean fluid all the way through. Some people forget to close the bleeder valve before releasing the pedal, which sucks air right back in. Always close the valve while the pedal is held down. Finally, don’t assume your brakes are good until you’ve tested them thoroughly in a safe location. Spongy brakes mean there’s still air in the system.
Troubleshooting Tips
If your brake pedal still feels spongy after bleeding, air is still trapped somewhere. Repeat the bleeding process, being extra patient with each wheel. Sometimes air hides deep in the system and takes multiple cycles to work out. If one wheel won’t bleed properly, the bleeder valve might be stuck or corroded. Try penetrating oil and let it soak for a few minutes before attempting to open it. If that doesn’t work, you might need to replace the caliper. If you’re getting no fluid flow at all, check that the master cylinder has fluid and that the brake lines aren’t kinked or blocked. If only one wheel is problematic, suspect a clogged brake line on that circuit. For stubborn air, some folks use a pressure bleeder or vacuum pump, which can be more effective than manual bleeding. These tools cost thirty to fifty bucks and make the job faster and easier. If you’re still having trouble after multiple attempts, don’t ignore it—get professional help. Your brakes are too important to guess on.
Brake Maintenance Schedule
Bleeding your brakes isn’t a one-time deal. Most manufacturers recommend flushing and bleeding your entire brake system every two to three years, even if there’s no obvious problem. This removes accumulated moisture and keeps your fluid fresh. If you notice a soft pedal, reduced stopping power, or any brake warning light, bleed immediately. After replacing brake pads or rotors, you should bleed to ensure no air entered the system during the work. If you drive in wet climates or use your brakes heavily, consider bleeding more frequently. Some high-performance drivers bleed their brakes before track days to ensure maximum stopping power. Keep records of when you last bled your brakes so you can stay on schedule. Regular maintenance prevents emergency brake failures and keeps your vehicle safe. Think of it like changing your oil—it’s preventive maintenance that pays dividends in reliability and safety.
Frequently Asked Questions
How long does it take to bleed brakes?
Plan on one to two hours if you’re doing it solo, or thirty minutes to an hour with a helper. The actual bleeding goes fast; the setup and access time takes longer. Don’t rush—a thorough job beats speed every time.
Can you bleed brakes without a helper?
Yes, but it’s tougher. You’ll need to use a one-person bleeder kit or repeatedly get in and out of the driver’s seat. A helper makes it smoother and faster, but it’s doable alone if you’re patient.
What type of brake fluid should I use?
Check your owner’s manual—most modern vehicles use DOT 3 or DOT 4. Never mix types, and always use fresh fluid from a sealed container. Old fluid absorbs moisture and loses effectiveness.
Why is my brake pedal still soft after bleeding?
Air is still in the system. Repeat the bleeding process, paying special attention to the wheels that seem problematic. Sometimes you need multiple cycles to fully purge all air.
Can I drive immediately after bleeding brakes?
No. Test your brakes in a safe, empty area first—a parking lot or quiet road. Make sure you have firm pedal pressure and confident stopping before driving normally.
What’s the correct order to bleed brakes?
Start with the wheel farthest from the master cylinder (usually right rear), then left rear, right front, left front. This ensures air is pushed out systematically.
How often should brake fluid be changed?
Every two to three years as part of routine maintenance. If you notice soft brakes or have done brake work, bleed immediately regardless of schedule.
Is brake bleeding dangerous?
Brake fluid is caustic and flammable, so treat it with respect. Wear gloves and eye protection, work in a well-ventilated area, and never ignore signs of brake problems. Beyond that, it’s a straightforward maintenance task.
Final Thoughts
Bleeding your brakes is a fundamental skill that saves money and builds confidence in your mechanical abilities. The process is logical, the tools are simple, and the results are immediately noticeable—a firm brake pedal and confident stopping power. Start with good preparation, take your time, and don’t skip steps. If you’re nervous about doing this on your own, there’s no shame in watching some video tutorials or having a pro show you the first time. Once you’ve done it, you’ll realize it’s not nearly as intimidating as it seemed. Your brakes are critical to your safety and your family’s safety, so whether you do this yourself or have it done professionally, make sure it gets done right. Keep your brake system maintained, bleed regularly, and you’ll enjoy years of reliable, confident stopping. Now get out there and tackle this job with the same workshop confidence you bring to everything else.


