
Learning how to blanch green beans is one of those kitchen skills that takes five minutes to master but pays dividends for years. Whether you’re prepping vegetables for freezing, creating restaurant-quality side dishes, or getting ahead on meal prep, blanching is your secret weapon. It locks in that vibrant green color, keeps the beans crisp-tender, and removes any dirt or surface grime in one simple step.
Table of Contents
What Is Blanching Exactly?
Blanching is a two-step cooking process: you briefly boil vegetables in salted water, then immediately plunge them into ice-cold water to stop the cooking. Think of it as giving your green beans a quick spa treatment. The hot water softens them slightly and activates enzymes that brighten their color, while the ice bath locks everything in place. It’s simple, reliable, and produces consistent results every single time.
The whole process takes about 5-7 minutes from start to finish, making it perfect for busy weeknight prep or large-batch cooking projects.
Why Blanch Green Beans?
There are several solid reasons to blanch instead of just steaming or roasting. First, blanching preserves that brilliant green color—the kind you see in professional kitchens and restaurant plates. Second, it stops enzymatic activity, which means your beans stay fresher longer in the freezer (we’re talking 8-12 months versus 3-4). Third, blanching removes surface dirt, pesticide residue, and any bugs hiding in the pod ends.
If you’re planning to freeze green beans for winter use, blanching is non-negotiable. Without it, your frozen beans turn mushy and lose their vibrant color. With proper blanching, they’ll taste almost as good as fresh when you thaw them months later.
Equipment You Need
You don’t need fancy gear for this job. Here’s what actually matters:
- Large pot: At least 4-6 quarts capacity. You need enough water to maintain a rolling boil when beans hit it.
- Colander or slotted spoon: For fishing beans out of boiling water safely.
- Large bowl: Filled with ice water for the shock bath.
- Cutting board: For trimming bean ends if needed.
- Kitchen timer: Crucial for nailing the timing. Even 30 seconds matters.
- Salt: For seasoning the blanching water (about 1 tablespoon per quart).
That’s it. No special equipment required. If you’ve got a pot, colander, and bowl, you’re ready to go.
Step-by-Step Blanching Process
Step 1: Prep Your Beans
Rinse fresh green beans under cold running water, rubbing them gently to remove dirt. Trim the stem ends with a knife or simply snap them off by hand—most people trim about a quarter-inch from the stem end. You can leave the pointy tail ends alone; they add character and there’s nothing wrong with them. Pat the beans dry with a clean towel to prevent water splashing when they hit the boiling pot.
Step 2: Bring Water to a Rolling Boil
Fill your large pot with water—about 4-6 quarts depending on how many beans you’re blanching. Add salt generously; the water should taste like seawater. Bring it to a hard, rolling boil over high heat. This is important: you need the water hot enough that it returns to boiling quickly after adding the cold beans. If the water temperature drops too much, your beans will steam instead of blanch, and you’ll lose that bright color.
Step 3: Add Beans to Boiling Water
Once the water is at a full rolling boil, carefully add your prepared green beans. Stir them gently with a wooden spoon to ensure they’re fully submerged and cooking evenly. The water will stop boiling momentarily—this is normal. Maintain high heat so it returns to boiling within 30-60 seconds.
Step 4: Time It Precisely
Set your kitchen timer the moment the water returns to a rolling boil after adding beans. For standard-size green beans, blanch for 3-4 minutes. Thinner, younger beans need only 2-3 minutes. Thicker beans might need 4-5 minutes. The beans should be bright green and fork-tender, but still have a slight snap when you bite them. This is the sweet spot between raw and mushy.
When you’re learning, pull out one bean at the 3-minute mark, run it under cold water, and taste it. You’ll quickly develop a feel for the perfect texture.
The Ice Bath Shock Method
This is where the magic happens. While your beans are blanching, prepare an ice bath in a large bowl. Fill it with ice and cold water—aim for about equal parts ice and water. You want it genuinely cold, not just cool.
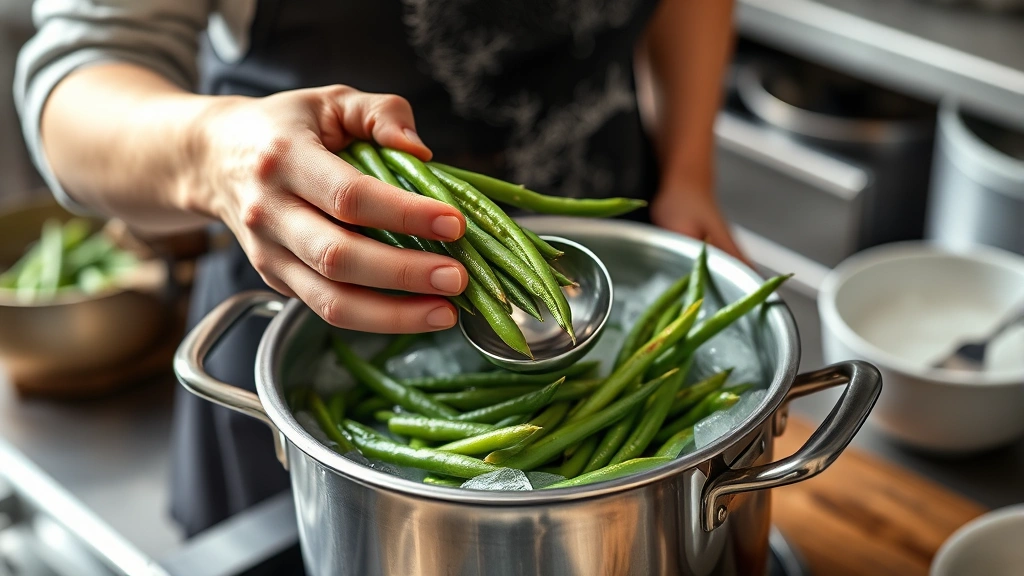
The moment your timer goes off, use a slotted spoon or colander to transfer the beans directly from boiling water into the ice bath. Work quickly but carefully—you’re not in a race, but you do want to stop the cooking immediately. Gently stir the beans in the ice water for 1-2 minutes until they’re completely cooled. This stops the cooking process dead and locks in that vibrant green color.
Once cooled, drain the beans thoroughly in a colander. Pat them dry with a clean kitchen towel or paper towels. Excess water will cause ice crystals to form during freezing, which damages texture.
Seasoning & Serving Ideas
Blanched green beans are your blank canvas. You can serve them immediately with just butter and salt, or get creative. Toss warm blanched beans with garlic butter and fresh herbs. Try them with a drizzle of sesame oil and soy sauce. Mix them into your best mac and cheese recipe for added nutrition and color. They’re excellent alongside how long to cook whole chicken in oven for a complete dinner plate.
If you’re building a vegetable medley, blanched green beans pair beautifully with how long to roast broccoli at 400 and how long to cook diced potatoes in oven. Each vegetable can be blanched separately, then combined with your choice of seasonings.
For something different, try tossing blanched beans with toasted nuts, dried cranberries, and a light vinaigrette. Or keep it simple with just good olive oil, minced garlic, and fresh lemon juice.
Freezing Your Blanched Beans
Proper freezing is where blanching really shines. After cooling and drying your beans, spread them in a single layer on a sheet pan and freeze for 2-3 hours until solid. This prevents them from clumping together into one frozen block. Once frozen solid, transfer them to freezer bags, removing as much air as possible. Label with the date—blanched green beans keep for 8-12 months frozen.
When you’re ready to use them, you can cook from frozen. No thawing needed. Simply add them to soups, stir-fries, or sauté them in a hot pan with butter for 3-4 minutes. They’ll thaw and finish cooking in minutes.
Common Blanching Mistakes
Skipping the Ice Bath
This is the biggest error. Without shocking the beans in ice water, they continue cooking from residual heat and turn mushy. The ice bath is non-negotiable—it’s what separates perfect blanched beans from overcooked mush.
Using Insufficient Water
If you don’t have enough water relative to beans, the temperature drops too much when you add them, and they steam instead of blanch. Use at least 4 quarts of water per pound of beans.
Blanching Too Long
Even 1-2 minutes too long makes a difference. Set a timer and stick to it. When in doubt, underblanch slightly—you can always cook them longer later, but you can’t undo overcooking.
Not Drying Beans Before Freezing
Excess water creates ice crystals that damage texture. Pat your beans completely dry before freezing.
Overcrowding the Pot
If you blanch too many beans at once, the water temperature drops too much and recovery takes too long. Work in batches if necessary.
Blanching Time Guide
Timing depends on bean size and your texture preference:
- Thin, young beans: 2-3 minutes
- Standard green beans: 3-4 minutes
- Thick, mature beans: 4-5 minutes
- For freezing: Blanch 1 minute less than you’d serve them fresh—they’ll finish cooking when you reheat them later
The beans should be bright green and fork-tender with a slight snap. If they bend without any resistance, you’ve gone too far.
Frequently Asked Questions
Can I blanch green beans without an ice bath?
Technically yes, but you’ll lose the vibrant color and texture. The ice bath is what makes blanching special. Without it, you’re just boiling vegetables, which produces a dull color and mushy texture. The ice bath is the entire point of the process.
How much salt should I add to blanching water?
Use about 1 tablespoon of salt per quart of water. The water should taste like seawater. This seasons the beans and helps maintain their color and texture. Don’t skip the salt thinking you’ll season later—it’s part of the blanching process itself.
Can I reuse the blanching water?
You can reuse it for another batch of the same vegetable, but strain out any debris first. After blanching different vegetables, start fresh water. Each vegetable can leave different compounds in the water that affect flavor and color of the next batch.
What if my beans are still hard after blanching?
You either underblanched or your beans were unusually thick. Thicker beans need 4-5 minutes. Next time, start checking at 3 minutes and adjust based on what you find. Remember, you can always cook them longer, but you can’t undo overcooking.
Do I need to blanch fresh beans before cooking?
No, blanching is optional if you’re cooking and eating them immediately. It’s most useful for freezing or when you want that restaurant-quality bright green color. For everyday cooking, you can simply steam, roast, or sauté fresh beans directly.
How long do blanched beans last in the refrigerator?
Properly blanched and cooled green beans last 3-5 days in an airtight container in the fridge. They’re best eaten within 2 days for optimal texture and flavor. If you’re storing longer, freeze them instead.
Can I blanch other vegetables the same way?
Absolutely. Broccoli, cauliflower, carrots, asparagus, and snap peas all blanch beautifully using the same method. Adjust timing based on vegetable size and thickness—leafy greens need only 1-2 minutes, while denser vegetables like carrots might need 3-5 minutes.
Why do my blanched beans taste salty?
You likely used too much salt in the blanching water or didn’t rinse the beans thoroughly after the ice bath. Rinse blanched beans under cool water for 30 seconds after they’ve cooled to remove excess salt if needed.
The Bottom Line
Mastering how to blanch green beans takes about five minutes of practice and opens up a world of possibilities. You’ll get vibrant, perfectly textured beans every single time. Whether you’re meal prepping for the week, freezing a harvest, or just trying to impress yourself with restaurant-quality vegetables at home, blanching is your reliable technique. The process is simple: boil, shock in ice water, dry, and you’re done. Once you’ve blanched your first batch, you’ll understand why professional kitchens rely on this method. It’s that good, and it’s that easy.


