How to Allocate More RAM to Minecraft: Easy & Essential Guide
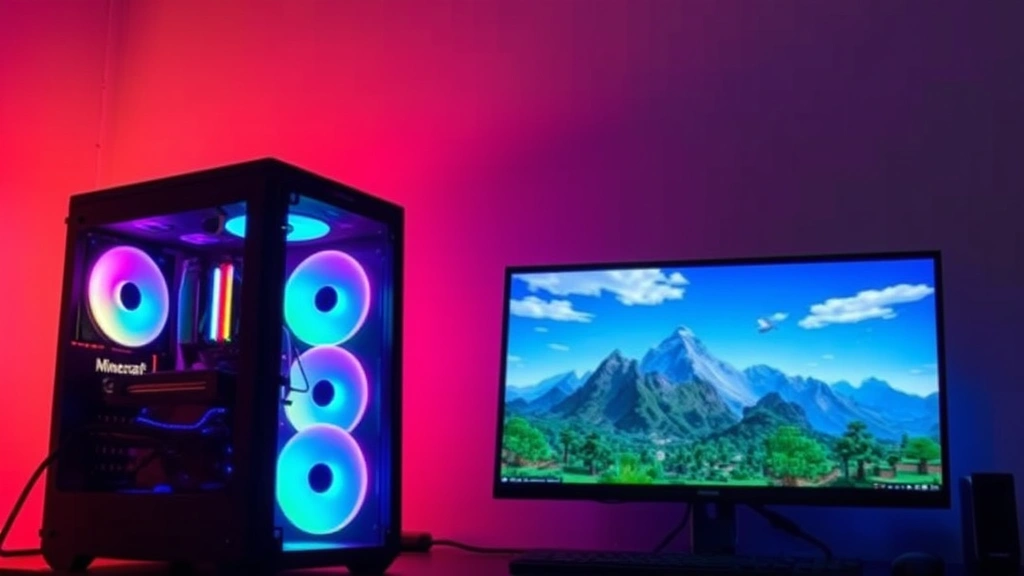
Minecraft runs sluggish and crashes frequently? The solution is often simpler than you think. Learning how to allocate more RAM to Minecraft can dramatically improve your gaming experience, eliminate lag, and prevent those frustrating mid-game freezes. Whether you’re playing vanilla Minecraft or running resource-heavy mods, proper RAM allocation is essential for smooth gameplay.
Quick Answer: You can allocate more RAM to Minecraft by opening the launcher, navigating to Installation settings, editing the JVM arguments, and changing the -Xmx value to your desired amount (e.g., -Xmx4G for 4GB). For the Java Edition, this takes about 2-3 minutes. The Bedrock Edition uses automatic RAM allocation, but Java Edition gives you full control over memory usage.
Tools & Materials You’ll Need
- Minecraft Launcher (Java Edition)
- Computer with sufficient RAM (8GB minimum recommended)
- Administrator access to your system
- A text editor (usually built into the launcher)
- Internet connection for launcher updates
- Optional: Task Manager or Activity Monitor to monitor RAM usage
Understanding RAM and Minecraft Performance
Random Access Memory (RAM) is your computer’s short-term memory, and Minecraft is notoriously memory-hungry. When you play Minecraft, the game loads chunks, textures, mobs, and entities into RAM for quick access. Without sufficient allocation, your system struggles to keep up, causing stuttering, lag spikes, and crashes. How to allocate more RAM to Minecraft directly impacts your frame rates and overall gaming stability.
By default, Minecraft’s Java Edition allocates only 1GB of RAM—barely enough for vanilla gameplay. If you’re using mods, shader packs, or playing on larger servers, you need significantly more. Most players find 4-6GB optimal, though this depends on your system’s total RAM and what you’re running. Allocating too much RAM can actually harm performance, so balance is key.
According to WikiHow’s comprehensive gaming guides, proper memory management is fundamental to gaming stability. Think of RAM allocation like giving Minecraft a larger desk to work on—more space means fewer dropped papers and faster operations.
Check Your System’s Available RAM
Before you allocate RAM to Minecraft, determine how much your computer actually has. This prevents over-allocation, which can freeze your entire system.
On Windows:
- Right-click “This PC” or “My Computer” on your desktop
- Select “Properties”
- Look for “Installed RAM” under System
- Note the total amount (e.g., 16GB)
- Open Task Manager (Ctrl+Shift+Esc) and click the “Performance” tab to see current usage
On Mac:
- Click the Apple menu and select “About This Mac”
- Check “Memory” to see total RAM
- Open Activity Monitor (Applications > Utilities) to monitor real-time usage
- Click the “Memory” tab to see what’s currently consuming resources
On Linux:
- Open Terminal
- Type
free -hto display total and available RAM - Use
toporhtopto monitor live memory consumption
A practical rule: allocate no more than 50-75% of your total RAM to Minecraft. If you have 16GB, allocate 4-8GB. If you have 8GB, stick with 4GB maximum. This leaves enough for your operating system and background applications to run smoothly. HowStuffWorks explains that system stability depends on never maxing out your available resources.
How to Allocate RAM via Minecraft Launcher
This is the most straightforward method for Java Edition players. The official launcher provides a user-friendly interface for how to allocate more RAM to Minecraft without touching code.
Step-by-Step Instructions:
- Open Minecraft Launcher – Launch the official Minecraft application
- Navigate to “Installations” – Click the Installations tab at the top
- Select Your Profile – Find the version you play (e.g., Latest Release) and hover over it
- Click the Pencil Icon – This opens the installation editor
- Scroll Down to “JVM Arguments” – This is where memory allocation happens
- Find the “-Xmx” Parameter – It typically looks like
-Xmx1G(1GB default) - Change the Value – Replace the number with your desired amount. Examples:
-Xmx4G= 4GB-Xmx6G= 6GB-Xmx8G= 8GB
- Save Changes – Click “Save” at the bottom
- Launch Minecraft – Start the game normally; changes take effect immediately
You’ll also notice -Xms in the arguments, which sets minimum RAM allocation. You can leave this at 512MB or match it to your -Xmx value for consistency. The difference is minimal for most players, but matching them prevents stuttering during startup.

Allocate RAM Using MultiMC Launcher
MultiMC is a popular third-party launcher that gives advanced users more control. If you use mods extensively, MultiMC streamlines how to allocate more RAM to Minecraft and manages multiple instances.
MultiMC Allocation Process:
- Open MultiMC – Launch the application
- Right-Click Your Instance – Select “Edit Instance”
- Click “Settings” – On the left sidebar
- Find “Memory” – Usually in the first section
- Set Maximum Memory – Enter your desired amount (e.g., 4096 for 4GB)
- Set Minimum Memory – Typically 512-1024MB
- Apply and Close – Changes save automatically
MultiMC’s advantage is per-instance memory management. You can allocate 4GB to a vanilla instance and 8GB to a modded one, all from the same launcher. This flexibility makes MultiMC ideal for players running multiple Minecraft setups. Instructables’ tech guides recommend MultiMC for users who want granular control over their gaming environment.
Allocate RAM via Command Line
For advanced users, command-line allocation offers maximum flexibility. This method works across all operating systems and doesn’t require the official launcher.
Windows Command Line Method:
- Download Minecraft Server JAR – Get the latest version from minecraft.net
- Create a Batch File – Right-click in a folder, select “New > Text Document”
- Enter This Command:
java -Xmx4G -Xms1G -jar minecraft_server.jar nogui - Save as “.bat” – Change the filename to
start.bat - Run the File – Double-click to launch with allocated RAM
Mac/Linux Terminal Method:
- Open Terminal – Applications > Utilities (Mac) or directly (Linux)
- Navigate to Your Minecraft Folder – Use
cdcommand - Run This Command:
java -Xmx4G -Xms1G -jar minecraft_server.jar nogui - Press Enter – Server launches with 4GB allocated
This method is particularly useful for running Minecraft servers or using custom launchers. The -Xmx flag sets maximum memory, while -Xms sets initial allocation. Separating these values can improve startup speed.
Optimize Other Game Settings
Allocating more RAM is crucial, but it’s only part of the optimization puzzle. Complementary settings significantly boost performance.
In-Game Graphics Settings:
- Render Distance – Start at 8-12 chunks; higher values demand more RAM
- Particles – Set to “Minimal” or “Decreased” for smoother gameplay
- Graphics Mode – “Fast” uses less memory than “Fancy”
- V-Sync – Enable to prevent screen tearing and reduce CPU load
- Mipmap Levels – Set to 2-4 for texture quality without excessive RAM usage
Launcher Optimization:
- Disable Unused Mods – Each mod consumes additional RAM
- Remove Unnecessary Resource Packs – High-resolution packs demand significant memory
- Close Background Applications – Discord, browsers, and streaming software consume RAM
- Update Java – Newer versions are more memory-efficient
You might also want to check your CPU temperature while gaming to ensure your system isn’t overheating due to increased resource usage. Proper cooling prevents thermal throttling, which can actually reduce performance despite higher RAM allocation.
Troubleshooting Common Issues
Problem: Game Still Crashes After Allocating More RAM
Solution: Check if you allocated too much. If your system has 8GB total and you allocated 8GB to Minecraft, your OS has no memory left. Reduce allocation to 4-5GB and restart. Also verify that you’re using a 64-bit Java installation, as 32-bit Java has a 2GB allocation limit.
Problem: Minecraft Won’t Start or Gives “OutOfMemoryError”
Solution: This indicates insufficient RAM allocation. Increase the -Xmx value incrementally (try 2GB, then 3GB, then 4GB). If you’re still getting errors with 4GB allocated, your system may not have enough total RAM for your current setup. Disable mods or reduce render distance.
Problem: Entire Computer Freezes When Playing Minecraft
Solution: You’ve over-allocated RAM. Your operating system needs at least 2-3GB free to function. If you have 8GB total, don’t allocate more than 4-5GB to Minecraft. Monitor RAM usage in Task Manager while playing to find your system’s sweet spot.
Problem: Performance Didn’t Improve After Allocation
Solution: RAM isn’t your bottleneck. The issue might be your GPU, CPU, or internet connection (for multiplayer). Consumer Reports’ tech reviews note that gaming performance depends on multiple components working in harmony. Check your GPU drivers, close CPU-intensive background apps, or test with a wired internet connection for multiplayer.
Problem: “Could Not Create Java Virtual Machine” Error
Solution: Your JVM arguments contain a syntax error. Ensure there’s a space between -Xmx4G and the next parameter. Also verify your Java installation is intact by reinstalling Java from java.com.
FAQ
Q: How much RAM should I allocate to Minecraft?
A: For vanilla Minecraft, 2-3GB is sufficient. For modded Minecraft, allocate 4-6GB. If you’re running shaders and large mod packs simultaneously, 6-8GB is ideal. Never exceed 75% of your total system RAM.
Q: Is allocating more RAM always better?
A: No. Over-allocation harms performance because your OS needs free RAM to function. Allocate the minimum amount that eliminates lag and crashes, then stop. More isn’t always better.
Q: Can I allocate RAM on Minecraft Bedrock Edition?
A: Bedrock Edition (Windows 10/11, console versions) automatically manages RAM and doesn’t allow manual allocation. Only Java Edition permits custom memory allocation.
Q: Will allocating more RAM reduce lag on servers?
A: Only partially. Server lag depends on the server’s hardware, internet connection, and player count. Allocating more RAM to your client improves your experience but doesn’t fix server-side issues.
Q: What’s the difference between -Xmx and -Xms?
A: -Xmx sets the maximum RAM allocation (hard limit). -Xms sets the initial RAM allocation (starting point). Most players set -Xms to 512MB and -Xmx to their desired amount.
Q: Do I need to reinstall Minecraft after changing RAM allocation?
A: No. Changes take effect the next time you launch the game. Simply close Minecraft completely, modify the JVM arguments, and restart.
Q: Can I allocate RAM on a Mac?
A: Yes. Use the official Minecraft Launcher’s Installations tab (same as Windows) or use MultiMC. The process is identical across operating systems.
Q: What if I don’t know my Java version?
A: Open Command Prompt (Windows) or Terminal (Mac/Linux) and type java -version. Ensure you’re running Java 8 or newer for optimal Minecraft performance.
Learning how to allocate more RAM to Minecraft is one of the most impactful optimizations you can make. In just a few minutes, you’ll transform your gaming experience from frustrating lag to smooth, uninterrupted gameplay. Whether you’re building elaborate structures, exploring vast modded worlds, or playing with friends on servers, proper RAM allocation ensures your computer can handle it all. Start with 4GB, monitor your performance, and adjust from there. Your Minecraft adventure deserves a well-tuned system.
For additional gaming optimization tips, check out Lifehacker’s technology guides and CNET’s comprehensive tech reviews for system-wide performance improvements beyond just Minecraft.