

Learning how to aerate lawn is one of the best investments you can make for your yard’s long-term health. If your grass looks thin, compacted, or struggles to bounce back after foot traffic, your soil is probably suffocating. Aeration punches tiny holes through that hard-packed earth, letting air, water, and nutrients reach the roots where they actually matter. It’s not complicated, and you don’t need fancy equipment—just the right approach and a little elbow grease.
Table of Contents
Why Aerate Your Lawn
Soil compaction is the silent killer of healthy grass. Every time you walk across your yard, your kids play, or rain settles the earth, the soil gets denser. That compaction blocks oxygen from reaching grass roots, prevents water from soaking deep, and stops nutrients from penetrating the soil profile. Your grass roots are basically gasping for air, which is why aeration works like opening a window in a stuffy room.
When you aerate, you’re creating pathways for the good stuff to flow down. Think of it like unclogging a drain—suddenly everything moves freely again. The grass responds by developing deeper, stronger roots, which makes it more drought-resistant and disease-resistant. You’ll notice thicker growth, better color, and a lawn that actually thrives instead of just surviving.
Best Time to Aerate
Timing matters more than most people realize. For cool-season grasses (fescue, bluegrass, ryegrass), aerate in early fall or spring when the soil is moist but not waterlogged. Fall is ideal because the grass has time to recover before winter sets in, and you can overseed right after for maximum results.
If you’ve got warm-season grass (zoysia, bermuda, st. augustine), late spring or early summer is your window. You want to aerate when the grass is actively growing so it can heal quickly. Never aerate during dormancy—that’s just wasting effort. Also skip aeration during drought stress; your grass needs moisture to recover from the process.
Tools & Equipment Needed
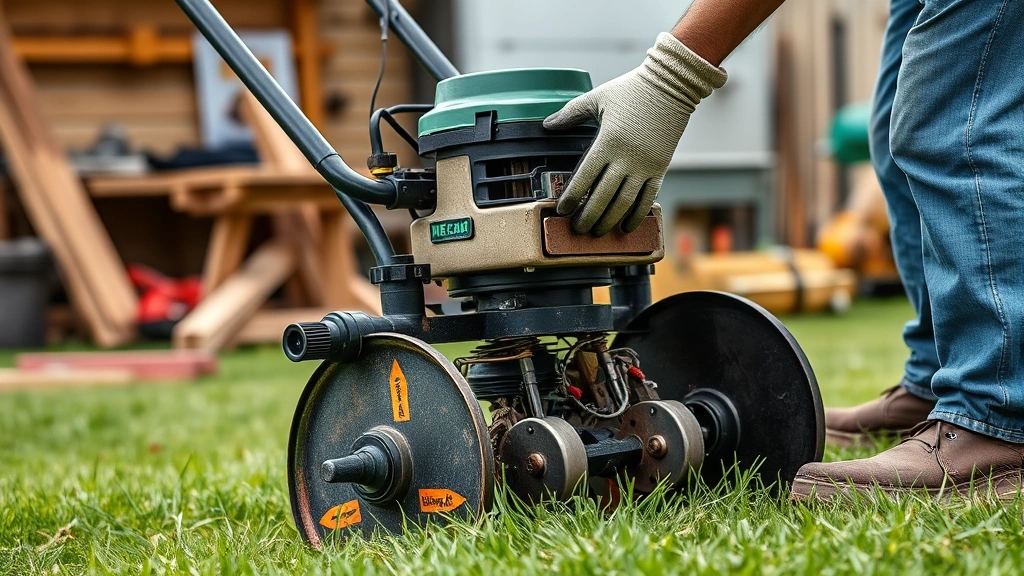
You’ve got options here, and your choice depends on yard size and budget. For small yards (under 5,000 square feet), a manual spike aerator works fine—it’s basically a tool with long spikes you step down into the soil. For medium yards, a core aerator (also called a plug aerator) is worth renting. This machine pulls out actual plugs of soil, which is more effective than just poking holes.
For large properties, rent a tow-behind aerator that hooks to your mower or ATV. If you’re serious about lawn care and have a decent-sized yard, investing in your own aerator makes sense—they run $1,500-$3,000 but last for years. Most people rent though, and that’s perfectly smart. A day rental usually costs $75-$150, which is way cheaper than hiring a pro.
Prep Your Yard First
Don’t just fire up the aerator and go to town. Preparation is half the battle. First, mow your grass shorter than normal—about 2-2.5 inches. This gives the aerator better access to the soil and lets you see what you’re doing.
Next, water your lawn thoroughly 24-48 hours before aeration. You want the soil moist enough to be workable but not soggy. Soggy soil clogs the aerator and doesn’t give you clean plugs. If it hasn’t rained, set up sprinklers and let them run for a few hours.
Mark any underground utilities before you start. Call 811 or your local utility locating service—they’ll mark gas lines, electrical, and water lines for free. It takes a few days, but it’s absolutely worth avoiding a catastrophe. Also walk your yard and remove any sticks, rocks, or debris that could jam the machine.
The Aeration Technique
Start at one corner and work in straight, overlapping passes like you’re mowing. Aim for 50-75% overlap on your passes—that means going over the same area multiple times to ensure good coverage. Most people don’t do enough passes and end up with spotty aeration.
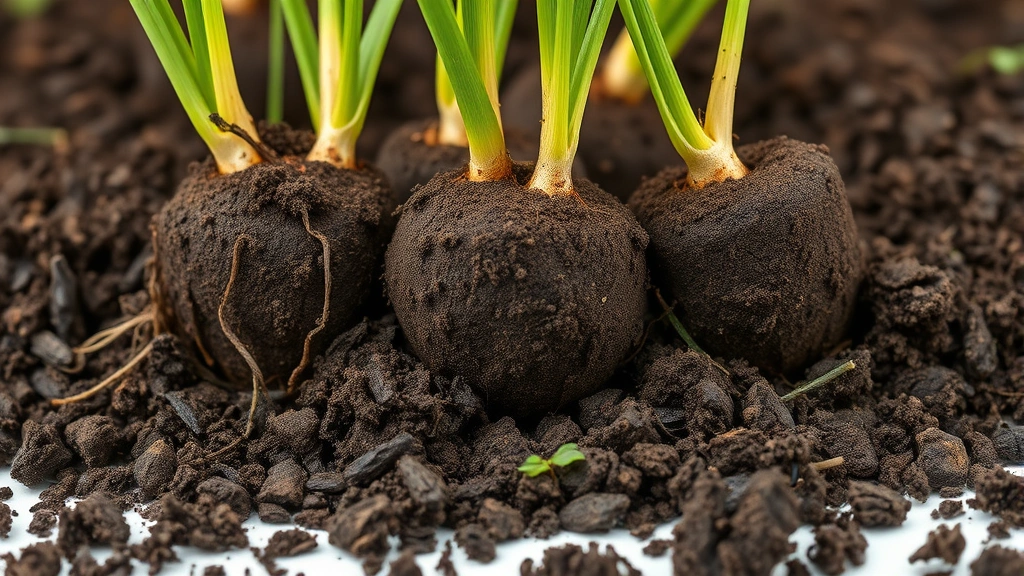
If you’re using a core aerator, you’ll see plugs of soil being pulled up and dropped on the surface. Don’t rake these up immediately; let them sit for a few days so they dry out and break apart naturally. These plugs are actually beneficial—they contain soil microorganisms that help rebuild soil health. As they break down, they fill in the holes and improve your soil structure.
Keep a steady, even pace. Don’t rush it. The machine does the work; you’re just guiding it. Make sure you’re hitting the problem areas—usually high-traffic zones and compacted spots need extra attention. If your yard has severe compaction, consider two passes in perpendicular directions.
Post-Aeration Care Matters
After aeration, your lawn is primed for improvement, but you need to follow through. Water your grass within 24 hours and keep it consistently moist for the next 2-3 weeks. The grass is stressed and needs moisture to recover and fill in those holes.
This is the perfect time to overseed if you want to thicken up thin spots. The aeration holes give seed direct contact with the soil, so germination rates skyrocket. Apply seed immediately after aeration while the soil is still exposed. You can also apply fertilizer or compost at this time—the open soil absorbs nutrients way better than it would normally.
Hold off on heavy foot traffic for at least a week. Your grass roots are vulnerable, and compacting the soil again defeats the whole purpose. If you have kids or pets, try to keep them on a different area of the yard temporarily.
Common Aeration Mistakes
The biggest mistake is aerating at the wrong time of year. Aerating dormant grass is pointless—the grass can’t recover because it’s not actively growing. You’re just creating holes and stress for nothing.
Another common error is not aerating thoroughly enough. One light pass isn’t sufficient. You need multiple overlapping passes to actually improve soil conditions. Skipping this step means you paid for the rental but didn’t get the benefits.
People also neglect to water after aeration. Your grass needs moisture to heal those holes and establish new root growth. Skipping post-aeration watering is like doing surgery and then ignoring wound care.
Finally, don’t rake up all those soil plugs immediately. They’re not trash—they’re beneficial. Let them break down naturally over a week or two. If they really bother you aesthetically, wait until they’re dry and crumbly, then rake lightly.
How Often Should You Aerate
Most lawns benefit from aeration once per year, ideally in fall for cool-season grasses. If your soil is severely compacted or you have heavy clay, twice yearly (spring and fall) might be necessary for the first couple of years to really improve things.
Once your soil health improves and you’re maintaining good lawn care practices, you might only need aeration every other year. Pay attention to how your grass responds. If it’s thick, healthy, and resilient, you’re good. If it starts looking thin or struggling again, that’s your signal to aerate.
Frequently Asked Questions
Can I aerate my lawn myself without renting equipment?
Yes, for small yards. A manual spike aerator costs $30-$60 and works fine for under 1,000 square feet. Just be prepared for a workout—it’s physically demanding. For anything larger, renting a core aerator makes way more sense than manual labor.
What if my lawn is already dead or dying?
Aeration alone won’t fix a dead lawn, but it’s part of the recovery plan. You’ll need to address the underlying cause (poor drainage, disease, wrong grass type) and then aerate to help new grass establish. Sometimes it’s better to overseed or resod after fixing the core problem.
Is aeration the same as dethatching?
No, they’re different processes. Dethatching removes dead grass buildup on the soil surface. Aeration punches holes to improve soil structure. Both are beneficial, but they serve different purposes. You can do them in the same season but on different dates.
Can I aerate in summer?
Not recommended for cool-season grasses—the heat stress combined with aeration stress is too much. For warm-season grasses, late spring or early summer is actually ideal. Check your grass type first.
How long does it take to see results?
You’ll notice improved water absorption within days. Grass growth improvement takes 3-4 weeks. Full soil structure improvement takes several months of consistent care. Patience is key—this is a long-term investment, not an instant fix.
Do I need to hire a professional?
Not unless your yard is massive or you’re uncomfortable with equipment rental. Most homeowners can handle aeration themselves. It’s straightforward work, and renting is affordable. Professionals charge $150-$400 depending on yard size, so DIY saves money if you’re willing to put in effort.
What about aerating in wet conditions?
Avoid it. Wet soil clogs the aerator and doesn’t produce clean plugs. Plus, you’ll compact the soil more by walking on it when it’s saturated. Wait until the soil is moist but workable—firm enough that your footprint doesn’t sink in more than an inch.
Getting your lawn healthy takes consistent effort, but aeration is one of those tasks that pays dividends year after year. Once you understand how to aerate lawn properly, you’ll see why professionals prioritize it. Your grass will thank you with thicker growth, better color, and real resilience against stress. Start this fall if you’re in a cool-season zone, or next spring if you’ve got warm-season grass. Your yard’s transformation begins with those first holes in the ground.
Like mastering any skill, lawn care gets easier with practice. Just as learning how long it takes to learn guitar requires patience and consistency, developing a healthy lawn is about regular maintenance and understanding the fundamentals. Once you nail the basics, everything else falls into place.


