
Learning how to add coolant to car is one of the most straightforward maintenance tasks you can tackle in your driveway, and it’ll save you serious cash compared to a shop visit. Your engine’s cooling system works hard to keep things from overheating, and keeping it topped up with the right coolant is absolutely critical for engine longevity. In this guide, we’ll walk through the entire process step-by-step so you can handle it like a pro.
Table of Contents
Why Coolant Matters
Your engine generates tremendous heat during operation. Without proper coolant circulation, that heat would cook your engine faster than you can say “blown head gasket.” Coolant absorbs heat from the engine block and transfers it through the radiator where it dissipates into the air. When coolant levels drop below the minimum line, your engine loses its ability to regulate temperature effectively. This can lead to overheating, warping of engine components, and catastrophic failure. Think of it this way: checking and maintaining coolant levels is preventative medicine for your vehicle.
Gather Your Supplies
Before you pop that hood, make sure you’ve got everything within arm’s reach. You’ll need:
- The correct coolant type for your vehicle (check your owner’s manual)
- A clean funnel (preferably one designated for coolant only)
- A clean rag or paper towels
- Distilled water (if you need to dilute concentrate)
- Safety glasses (coolant can splash)
- Work gloves to keep your hands clean
Having everything ready before you start means you won’t be fumbling around with the engine bay open, which is good practice for safety and efficiency. If you’re planning to handle any battery-related work while you’re under the hood, consider reviewing our guide on how to change car battery for reference.
Locate Coolant Reservoir
Pop your hood and look for the coolant reservoir tank—it’s usually a translucent plastic container mounted on the side of the engine bay. The reservoir will have a cap with a coolant symbol (typically a thermometer or radiator icon) and will be connected to hoses that run to your radiator. On most vehicles, it’s clearly labeled “Coolant” or “Engine Coolant.” If you can’t find it immediately, check your owner’s manual for the exact location specific to your vehicle model. The reservoir is separate from the radiator itself, which is the larger metal unit usually mounted at the front of the engine bay.
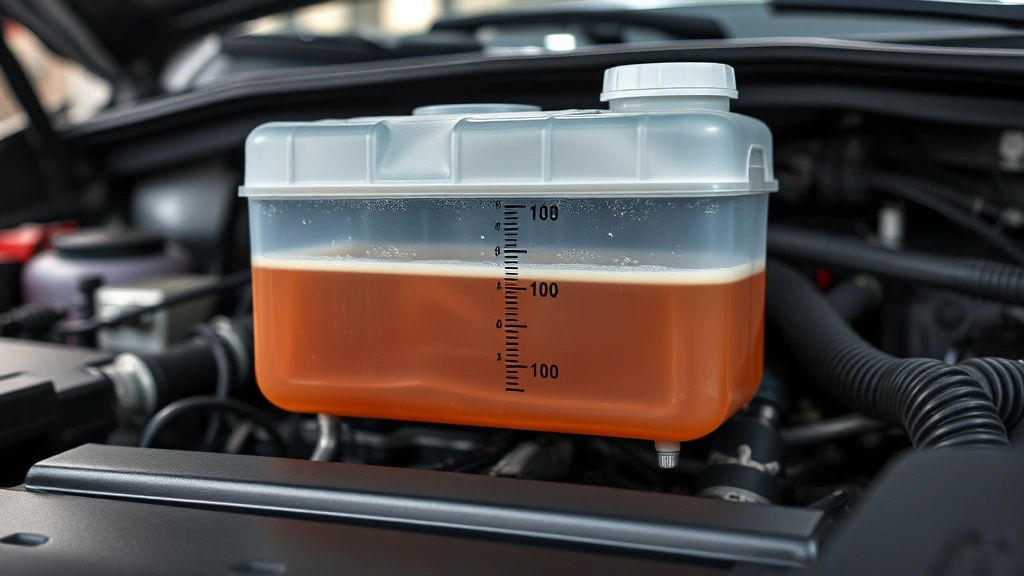
Check Coolant Level
This is where you assess what you’re working with. Look at the translucent sides of the coolant reservoir—you’ll see minimum and maximum fill lines. The coolant level should sit between these two marks. If it’s at or below the minimum line, it’s time to top it off. Important note: Never open the coolant cap when the engine is hot. Pressurized coolant can spray out and cause severe burns. Wait at least 15-20 minutes after shutting off the engine, or better yet, check coolant levels when the engine is completely cold in the morning. If the coolant looks discolored (brown or murky instead of bright green, orange, or pink depending on type), you may need a full coolant flush, which is a more involved procedure.
Choose Correct Coolant
This is critical: using the wrong coolant type can cause serious problems. Coolants come in different formulations—traditional green, extended-life orange, pink, and others—and they’re not interchangeable. Your owner’s manual will specify exactly which type your vehicle requires. If you’ve lost your manual, you can check the existing coolant cap or the reservoir label. When you’re at the parts store, tell them your vehicle’s year, make, and model, and they’ll point you to the correct coolant. Many people buy pre-mixed coolant (coolant plus distilled water already combined), which is convenient and eliminates guesswork. If you buy concentrate, you’ll need to mix it with distilled water at the proper ratio, usually 50/50.
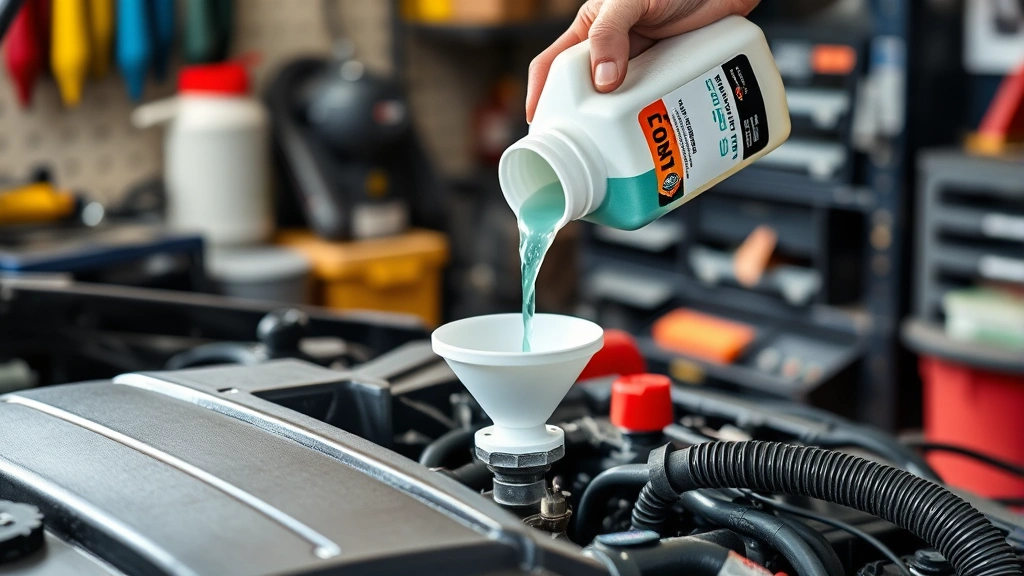
Add Coolant Safely
With the engine cold and your supplies ready, unscrew the coolant reservoir cap by turning it counterclockwise. Place your funnel in the opening—this prevents spills and mess. Slowly pour the coolant into the funnel, watching the reservoir level rise. Add coolant until the liquid reaches just below the maximum fill line. Don’t overfill; excess coolant will just spill out when the engine warms up and the system pressurizes. Once you’ve added the right amount, carefully remove the funnel and screw the cap back on clockwise until it’s snug. Wipe away any spills with your rag. If you’ve spilled coolant on the ground, clean it up promptly—it’s toxic to animals and the environment.
Bleed Air Pockets
Air trapped in the cooling system can prevent proper coolant circulation and cause overheating. After adding coolant, you’ll want to bleed out any air pockets. Start the engine and let it idle for a few minutes with the coolant cap off (yes, really—this allows air to escape). You might see small bubbles rising in the reservoir; that’s exactly what you want. Watch the coolant level as the engine warms up; it may drop slightly as trapped air is released. Once bubbles stop appearing and the coolant level stabilizes, turn off the engine, let it cool for a minute, and top off the level one more time if needed. Then replace the cap securely.
Test Your Work
Take your vehicle for a short test drive—about 10-15 minutes—to let the cooling system reach operating temperature. Pay attention to your temperature gauge; it should stay in the normal range (usually the middle of the gauge). Listen for any unusual sounds like coolant boiling or hissing. When you return home, let the engine cool completely, then check the coolant level one final time. It should still be between the minimum and maximum lines. If the level has dropped significantly, you may have a leak somewhere in the system, which would require further investigation. If everything looks good, you’re done! Make a note of the date and coolant type in your maintenance log.
Common Mistakes to Avoid
Don’t open the coolant cap on a hot engine—this is the number one mistake people make. The pressurized system can spray boiling coolant everywhere. Never mix different coolant types; stick with what your manual specifies. Don’t ignore leaks; if your coolant level drops quickly after topping off, there’s a problem that needs attention. Avoid overfilling the reservoir; the system needs room to expand as it heats up. Don’t assume all coolant is the same—that orange coolant won’t work in your green-coolant vehicle. And finally, don’t neglect this maintenance task; running low on coolant is a fast track to engine damage. If you’re also doing other engine bay work like how to disconnect car battery, make sure you handle each task safely and in the right order.
Maintenance Schedule
Most vehicles need coolant topped off annually or checked every season. Some modern vehicles use extended-life coolant that lasts 100,000 miles or more, while older vehicles might need a complete coolant flush every 30,000-50,000 miles. Check your owner’s manual for the recommended schedule specific to your vehicle. Setting a calendar reminder to check coolant levels before winter and summer is a smart habit that prevents breakdowns. Many shops will check your coolant for free during routine service, but knowing how to do it yourself gives you independence and saves money.
When to Call a Professional
If you notice coolant leaking from hoses, the radiator, or the water pump, that’s a job for a professional mechanic. If your temperature gauge regularly runs hot even after topping off coolant, there may be a thermostat issue or more serious problem. If the coolant is discolored or has a milky appearance (indicating oil contamination), you need professional diagnosis. And if you’re uncomfortable working in the engine bay at any point, there’s no shame in taking it to a shop. Your safety and your vehicle’s longevity are worth the investment.
Frequently Asked Questions
Can I use water instead of coolant?
In an absolute emergency, you can use distilled water to get your vehicle to a repair shop, but never as a permanent solution. Water freezes in winter and boils at a lower temperature than coolant, providing no corrosion protection and damaging your engine. Always use proper coolant as soon as possible.
What if I add the wrong coolant type?
If you’ve already added the wrong coolant, don’t panic. Stop driving immediately and take your vehicle to a mechanic. Mixing incompatible coolants can cause chemical reactions that clog your cooling system. A professional can perform a coolant flush to resolve the issue.
How often should I check coolant levels?
Check coolant levels at least monthly, or before any long road trip. It takes 30 seconds and can prevent catastrophic engine damage. Many people check it during their seasonal vehicle maintenance routine.
Is coolant the same as antifreeze?
Coolant and antifreeze are often used interchangeably, but technically antifreeze is the additive that prevents freezing and boiling. Coolant is the complete mixture of antifreeze, water, and corrosion inhibitors. For our purposes, when we say “add coolant,” we mean the finished product you buy at the store.
Why is my coolant level dropping?
Small drops over time can be normal as some coolant evaporates. However, significant drops indicate a leak in hoses, the radiator, water pump, or gaskets. If you’re losing coolant faster than normal, have a mechanic inspect your cooling system for leaks.
Can I drive with low coolant?
You can drive short distances with slightly low coolant, but it’s risky. Running low on coolant reduces your engine’s ability to shed heat, and overheating can cause severe engine damage in minutes. If your coolant is low, top it off before driving.


