
Knowing how long to smoke a ham is the difference between impressing your guests and serving dried-out disappointment. I’ve smoked enough hams to know that timing isn’t just about throwing meat on a smoker and hoping for the best—it’s about understanding temperature, ham type, and those crucial finishing techniques that separate backyard barbecue from competition-level results.
Table of Contents
Ham Types Matter Most
Before you even fire up the smoker, you need to understand what kind of ham you’re working with. A pre-cooked spiral-cut ham from the grocery store behaves completely differently than a fresh ham (which is actually uncured pork leg). Pre-cooked hams are already done—you’re just reheating and adding smoke flavor. Fresh hams, on the other hand, require full cooking time.
Pre-cooked hams typically need 10-15 minutes per pound at 225-250°F. A fresh ham needs 20-25 minutes per pound. This distinction alone will save you from rookie mistakes that ruin holiday dinners. I learned this the hard way when I treated a fresh ham like a pre-cooked one and ended up with an undercooked center.
Bone-in hams take slightly longer than boneless varieties because bone conducts heat differently. A 10-pound bone-in ham will smoke longer than a 10-pound boneless ham, even at identical temperatures. Factor in roughly 10% additional time for bone-in cuts.
Temperature Basics
Your smoker temperature is non-negotiable. Most pitmasters keep their smoker between 225-250°F for ham. This range allows the meat to absorb smoke without drying out. Too hot (above 275°F) and you’ll lose moisture. Too cool (below 200°F) and you’ll extend cooking time dangerously and risk bacterial growth.
I prefer 240°F as my sweet spot. It’s hot enough to keep things moving but cool enough to let smoke penetrate deeply. Use a reliable thermometer—not the one that came with your smoker. Those built-in gauges are often off by 25-50 degrees, which throws everything off.
The internal temperature target for ham is 140°F for pre-cooked and 160°F for fresh ham. Use an instant-read meat thermometer inserted into the thickest part without touching bone. This is your only real way to know when you’re done.
Smoking Time Calculation
Here’s the basic math: multiply your ham’s weight by the minutes per pound, then add 30 minutes as a buffer. For a pre-cooked 12-pound ham at 240°F, calculate 12 × 12 minutes = 144 minutes, plus 30 minutes = 174 minutes total, or about 3 hours.
For fresh ham, that same 12-pounder would be 12 × 22 minutes = 264 minutes, plus 30 = 294 minutes, or roughly 5 hours. These are estimates—every smoker runs differently. Variables like outside temperature, wind, and smoker design all affect actual cooking time.
Start checking internal temperature about 30 minutes before your estimated finish time. This prevents overshooting and gives you a realistic window. I’ve found that most hams finish 10-15 minutes faster than calculations suggest, so building in that buffer prevents the stress of wondering if you’re done.
Preparation Steps
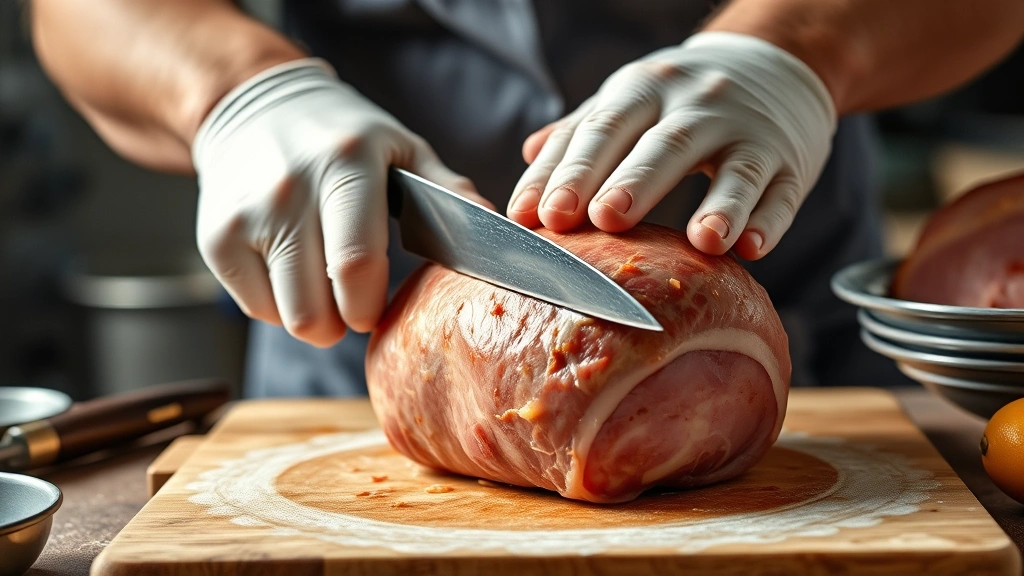
Don’t skip prep work. Start by removing your ham from the refrigerator 1-2 hours before smoking. Room temperature meat cooks more evenly than cold meat straight from the fridge. Score the fat cap in a crosshatch pattern, cutting about ¼-inch deep. This allows smoke and seasonings to penetrate.
Apply your dry rub generously. I use a simple mix of brown sugar, paprika, black pepper, garlic powder, and a pinch of cayenne. The brown sugar caramelizes during smoking and creates an incredible bark. Don’t be shy—coat every exposed surface.
If you’re smoking a pre-cooked ham, consider scoring and applying rub the night before. Let it sit uncovered in the fridge so the rub adheres better. For fresh hams, apply rub just before putting it on the smoker.
Wood Selection Guide
Wood choice dramatically affects flavor. Hickory is my go-to for ham—it’s bold without being overpowering. Applewood gives a sweeter, milder smoke that complements ham’s natural saltiness. Oak is neutral and reliable. Avoid softwoods like pine or cedar; they impart resinous flavors that ruin meat.
Use a 50/50 mix of hickory and apple for balanced flavor. Start with a full smoker box of wood, then add chunks every 45 minutes to maintain smoke. If you’re using a tube smoker or offset firebox, adjust accordingly—tube smokers need less wood, offset boxes need more frequent additions.
Soak wood chunks for 30 minutes before use. This extends smoke production and prevents flare-ups. Wet wood smolders longer than dry wood, which is exactly what you want for low-and-slow cooking.
Monitoring Progress
Check your ham every 60-90 minutes. Look for color development—you want a deep mahogany exterior, not black. If it’s darkening too fast, lower your smoker temperature by 10-15 degrees or wrap the ham in foil to slow color development.
The bark (exterior crust) should feel firm and slightly tacky, not wet or mushy. If it looks wet after 2 hours, your smoker is running too cool or your wood isn’t burning hot enough. Adjust your air vents to increase temperature slightly.
Don’t rely on color alone. I’ve seen hams look perfect on the outside but remain undercooked inside. This is where your meat thermometer becomes your best friend. Check temperature in at least three spots: the thickest part, near the bone (if bone-in), and near the surface.
Glaze Application Timing
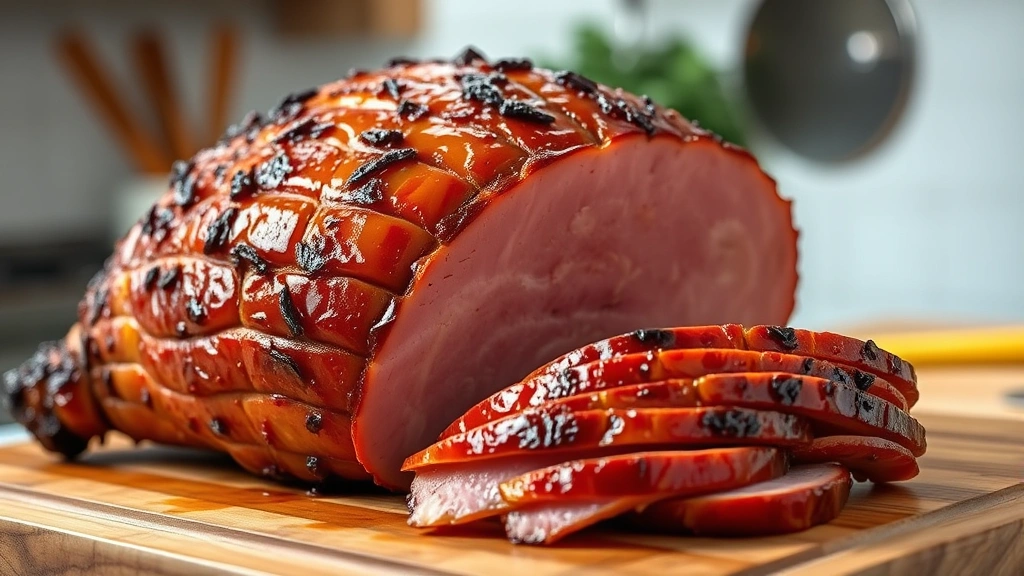
Glazes should go on during the final 30-45 minutes of smoking. Earlier application burns the sugar and creates bitter flavors. A simple glaze of brown sugar, mustard, and honey works beautifully. Some folks use maple syrup, molasses, or even bourbon-based glazes.
Apply glaze with a brush every 15 minutes during the final stage. This builds layers and creates a glossy, caramelized finish. The last application should happen 10 minutes before removing the ham from heat, so it sets slightly but doesn’t burn.
If your ham is already darkening heavily, skip the glaze entirely. A good bark doesn’t need additional color. The glaze’s purpose is flavor enhancement and appearance, not mandatory coverage.
Resting and Slicing
This step gets overlooked constantly, and it’s a huge mistake. Let your ham rest for 15-20 minutes after removing it from the smoker. Resting allows juices to redistribute throughout the meat. Cut into it immediately and you’ll lose those juices to the cutting board.
Tent the ham loosely with foil during resting. This keeps it warm without trapping steam, which would soften that beautiful bark you worked to develop. Set your kitchen timer—it’s easy to forget about resting when you’re busy with other dishes.
Slice against the grain for maximum tenderness. For spiral-cut hams, follow the existing spiral. For fresh hams, identify the grain direction and slice perpendicular to it. Thicker slices (½-inch) hold together better than thin slices and showcase the smoke ring.
Troubleshooting Common Issues
If your ham finishes too fast, your smoker is probably running hotter than you think. Invest in a quality oven thermometer placed on the grate next to your meat. Built-in thermostats lie. If it’s consistently 20+ degrees hotter than you set it, adjust your air vents or find a cooler spot in your smoker.
Dry ham usually means overcooking. Pre-cooked hams are especially prone to this since they only need reheating. Set your target temperature to 140°F and pull it immediately when you hit that mark. Don’t cook to 150°F thinking you’re being safe—you’re just drying it out.
Uneven cooking suggests temperature hot spots in your smoker. Rotate your ham 180 degrees halfway through cooking. If one end consistently cooks faster, position future hams with the cooler end toward the hottest area.
Lack of smoke flavor often means insufficient smoke or weak wood. Use fresh wood (not old, dried-out chunks), soak it properly, and add it more frequently. If your smoker is very large, you might need double the wood to maintain visible smoke throughout cooking.

Frequently Asked Questions
Can I smoke a pre-cooked ham?
Absolutely. Pre-cooked hams need only 10-15 minutes per pound at 240°F. You’re reheating and adding smoke flavor, not cooking from raw. Many people prefer this because it’s faster and more forgiving than fresh ham.
What’s the difference between smoking and baking ham?
Smoking introduces wood smoke flavor and requires lower temperatures (225-250°F vs. 350-400°F for baking). Smoking takes longer but creates superior bark and deeper flavor. For comparison, check out our guide on how long to bake ribs in oven to see how dry-heat cooking differs.
Should I wrap my ham in foil?
Only if it’s darkening too quickly. Foil slows bark development and traps steam. If your ham looks perfect at the 2-hour mark, skip foil entirely. If it’s getting dark spots, wrap loosely for the final hour.
Can I smoke a ham overnight?
Not recommended. Smoking at low temperatures (below 225°F) for extended periods creates food safety risks. Keep your smoker above 225°F and plan for day-time smoking. If you’re smoking a fresh ham that takes 5+ hours, start early morning.
How do I know when my ham is done?
Internal temperature is the only reliable indicator. Pre-cooked ham reaches 140°F, fresh ham reaches 160°F. Don’t trust color or firmness alone. Check temperature in multiple spots, especially the thickest section.
What if my ham isn’t done by dinner time?
Wrap it tightly in foil and place it in a 300°F oven to finish. This isn’t ideal, but it’s better than serving undercooked meat. Add 5-10 minutes per pound in the oven. Check temperature every 20 minutes.
Can I use the same timing for different ham sizes?
Use the per-pound calculation as a starting point, but always verify with a meat thermometer. A 6-pound ham might finish 15 minutes faster than predicted. A 15-pound ham might take 20 minutes longer. Smoker variables matter more than size alone.
Is smoking ham easier than smoking pork butt?
Yes. Ham is more forgiving because pre-cooked options are readily available, and even fresh ham is less prone to drying out than pork shoulder. If you’re new to smoking, ham is an excellent starting point. Check out our guide on cooking pork butt to see how it compares.
Final Thoughts
Smoking ham is straightforward once you understand the fundamentals: know your ham type, maintain consistent temperature, use quality wood, and rely on a meat thermometer. Most backyard cooks overcomplicate it by adding unnecessary steps or second-guessing themselves.
Start with a pre-cooked ham if you’re new to smoking—it removes variables and guarantees success. Once you’ve nailed that, graduate to fresh ham and experience the difference. The timing might be longer, but the flavor payoff is worth it.
Keep detailed notes on your first attempt: smoker temperature, actual cook time, wood type, and final results. These notes become invaluable reference material for future smokes. Every smoker is unique, and your notes will help you dial in the perfect timing for your specific setup.
Remember, the best smoked ham comes from patience, attention to detail, and not being afraid to adjust on the fly. Your guests will taste the difference between rushed barbecue and thoughtfully executed smoking. That’s the real payoff.


