
Learning how long to roast garlic is one of those kitchen skills that transforms your cooking from ordinary to genuinely impressive. Roasted garlic isn’t just a side dish—it’s a game-changer that turns harsh, pungent raw garlic into something sweet, creamy, and almost buttery. Whether you’re spreading it on crusty bread, stirring it into mashed potatoes, or using it as a base for sauces, getting the timing right makes all the difference between perfectly caramelized cloves and burnt, bitter disappointment.
Table of Contents
Roasting Time Basics
The straightforward answer: roast garlic for 35 to 45 minutes at 400°F. That’s your sweet spot for whole heads. But here’s where it gets interesting—timing varies based on how you’re preparing your garlic. If you’re roasting individual cloves or halved heads, you’re looking at 25 to 30 minutes. The key is that the cloves should be completely soft, almost creamy when you squeeze them out of their papery skin.
I’ve found that most home cooks undershoot the time. They pull the garlic out after 30 minutes, expecting it to be done, only to find the cloves still have some firmness to them. That’s not roasted garlic—that’s just warm garlic. You need those cloves to collapse when you press them with a fork. The longer cooking time allows the sugars in the garlic to caramelize, which is what gives roasted garlic its distinctive sweet, mellow flavor.
Prep Your Garlic Right
Before you even think about timing, preparation is everything. Start with firm, fresh garlic bulbs—avoid any that feel soft or have sprouted green shoots. Cut off the top quarter-inch of the head to expose the cloves inside. This isn’t just for looks; it allows heat to penetrate evenly and lets steam escape.
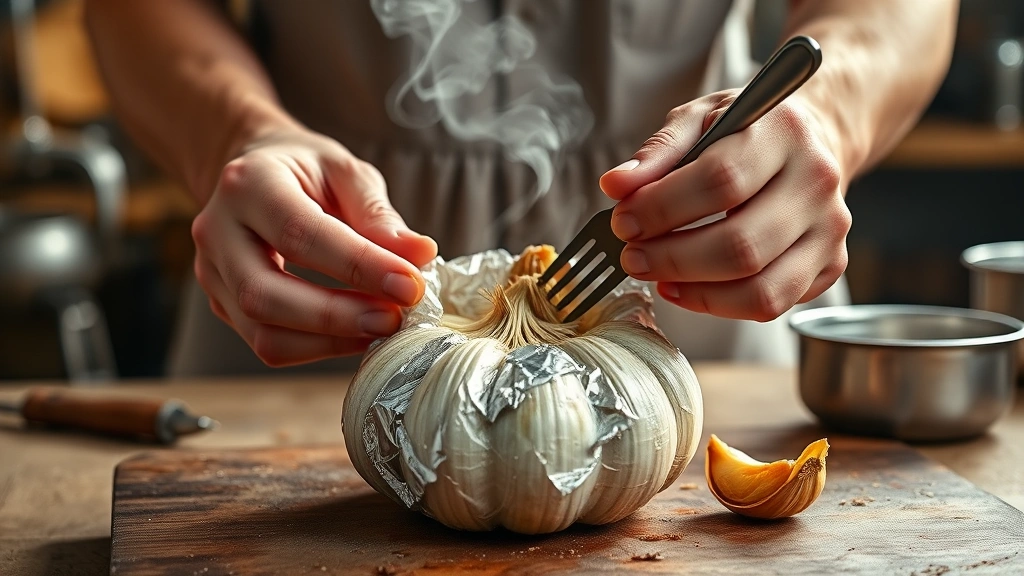
Drizzle the exposed cloves generously with olive oil—don’t be shy here. The oil conducts heat, keeps the cloves moist, and contributes to that creamy texture you’re after. Sprinkle with salt and pepper, then wrap the whole head loosely in foil. Some people skip the foil, and that works too, but foil keeps things from drying out and makes cleanup easier. If you’re roasting multiple heads, arrange them cut-side up on a baking sheet.
Temperature Matters Most
Temperature control is where most people go wrong. 400°F is the standard, and I’d stick with it unless you have a specific reason not to. At 375°F, you’re looking at closer to 50 minutes. At 425°F, you might be done in 30 minutes, but you risk burning the outer cloves while the inner ones stay firm.
The reason 400°F works so well is that it’s hot enough to caramelize the sugars without scorching the garlic. Your oven needs to be fully preheated before the garlic goes in—this ensures consistent cooking from the moment those heads hit the rack. If you’re using a convection oven, reduce the temperature by 25°F and check at the 30-minute mark, since hot air circulation speeds things up.
Signs Your Garlic Is Done
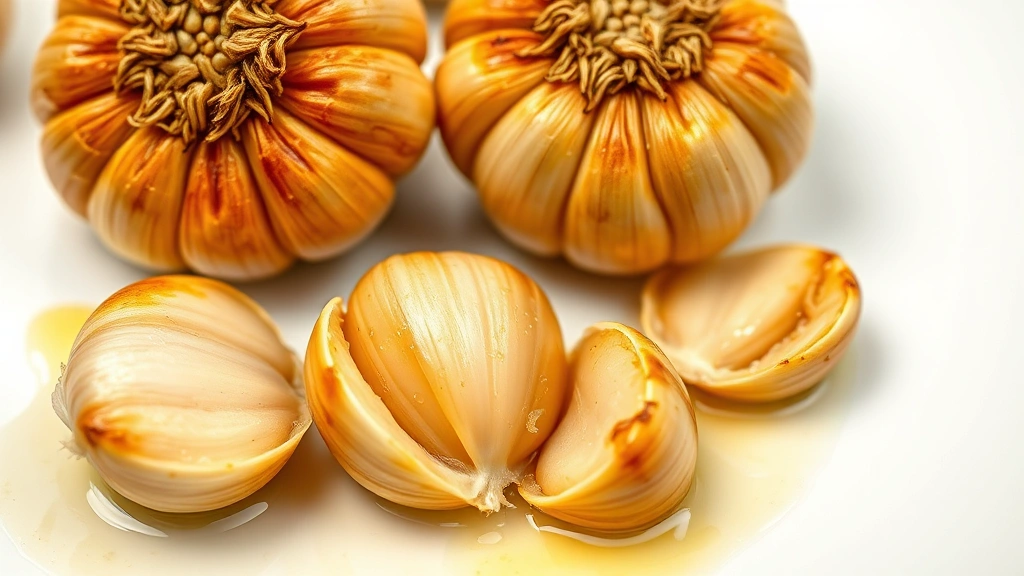
Forget about setting a timer and walking away. The best indicator is visual and tactile. When roasted garlic is ready, the papery skin will be slightly browned or caramelized, and the cloves inside will have collapsed. If you unwrap the foil carefully (watch out for steam), you should be able to pierce a clove with a fork with almost no resistance—it should feel like soft butter.
The cut surface of the garlic should look golden and slightly caramelized around the edges. If it still looks pale and firm, it needs more time. If the outer cloves look dark brown or blackened, you’ve gone too far. That bitter, burnt flavor is nearly impossible to mask. The smell is another clue—you want a rich, sweet, almost nutty aroma, not a harsh or burnt smell.
Common Roasting Mistakes
The biggest mistake I see is skipping the oil. Garlic needs fat to roast properly. Without it, the cloves dry out and become tough rather than creamy. The second mistake is wrapping too tightly in foil. You want some steam to escape, which helps concentrate flavors and allows browning. Wrap it loosely or leave one corner slightly open.
Another common error is crowding the baking sheet. Leave space around each head so heat circulates evenly. If you’re stacking them or packing them tightly, the ones in the middle will cook slower than the ones on the edges. Also, don’t skip the salt and pepper. These seasonings aren’t optional—they enhance the natural sweetness of the roasted garlic.
Temperature fluctuations are sneaky troublemakers too. If your oven runs hot or cold, you need to know this. Invest in an oven thermometer if you don’t have one. It’s one of the cheapest kitchen tools that actually matters for consistent results.
Storage and Keeping
Roasted garlic keeps for about a week in the refrigerator when stored in an airtight container. I like to squeeze the cloves out of their skins and store them in a small jar covered with olive oil. This way, you can grab a spoonful whenever you need it, and the oil adds extra flavor to whatever you’re making.
You can also freeze roasted garlic for up to three months. Freeze the cloves on a baking sheet first, then transfer them to a freezer bag. This prevents them from clumping together. Thaw them in the refrigerator before using, or just toss them directly into warm dishes where they’ll thaw naturally.
Uses for Roasted Garlic
This is where roasted garlic shines. Spread it on crusty bread with a little fleur de sel and you’ve got an appetizer that beats most restaurant starters. Stir it into mashed potatoes, pasta, soups, or salad dressings. Mix it with cream cheese for an incredible dip. Blend it into authentic bolognese sauce for deeper flavor, or use it as a base for garlic butter to top steaks or roasted vegetables.
Roasted garlic also works beautifully in aioli, hummus, or any creamy sauce where you want garlic flavor without the bite. It’s mild enough to use generously without overpowering a dish. If you’re making cajun boil, roasted garlic cloves can be added to the seasoning mix for a more complex flavor profile.
Variations to Try
Once you’ve mastered basic roasted garlic, experiment with variations. Roast garlic with fresh herbs—rosemary and thyme work beautifully. Add a splash of balsamic vinegar before wrapping. Roast garlic alongside other vegetables like onions or bell peppers. You can also roast individual cloves without the papery skin, which cuts the time down to about 20-25 minutes and gives you more caramelized surface area.

Some people roast garlic on a pizza stone for even heat distribution, which can yield slightly more consistent results. Others roast it in a cast iron skillet with a little water in the bottom, creating a hybrid roast-steam situation that takes about 40 minutes. The key is understanding the fundamentals—heat, time, and fat—so you can adapt based on what you’ve got available.
Frequently Asked Questions
Can I roast garlic at a lower temperature for longer?
Yes, absolutely. You can roast at 350°F for about 60 minutes, or even 325°F for 75 minutes. Lower temperatures take longer but produce slightly more even caramelization. The trade-off is more time in the kitchen. Most people find 400°F for 35-45 minutes hits the sweet spot between speed and quality.
What if my garlic turns black?
That means it’s burnt. The cloves will taste bitter and acrid. You can’t salvage it. Next time, reduce your oven temperature by 25°F or start checking at the 30-minute mark. Black garlic (which is intentionally fermented garlic) is a different thing entirely—that’s a controlled process, not accidental burning.
Do I have to use foil?
No, but it helps. Without foil, you’ll need to watch more carefully to prevent the outer cloves from drying out. If you skip foil, brush the exposed cloves with oil every 15 minutes or so. Some people prefer roasting without foil because they like more browning on the outside, but it requires more attention.
Can I roast garlic in a toaster oven?
Yes, with the same temperature and timing. Just make sure there’s enough space for heat to circulate. Toaster ovens have hot spots, so you might need to rotate the baking sheet halfway through cooking.
How do I know if my garlic is fresh enough to roast?
Squeeze it gently. Fresh garlic should feel firm and heavy for its size. Avoid bulbs that feel papery-light, have soft spots, or show green sprouts. Those are past their prime and won’t roast as well.
Can I roast garlic ahead of time?
Definitely. Roast it a day or two before you need it, store it in the fridge, and reheat gently before using. Or use it cold—roasted garlic is delicious straight from the fridge spread on bread or stirred into cold dishes.


