
Getting the timing right when you’re cooking country style ribs in the oven is the difference between fall-apart tender meat and tough, chewy disappointment. I’ve spent years perfecting this in my own kitchen, and I’m going to walk you through exactly what works.
Table of Contents
Oven Temperature Matters
The temperature you choose sets the entire pace for how long to cook country style ribs in oven. Most home cooks fall into two camps: the fast method at higher heat, or the slow method at lower temperatures. I prefer the slower approach because it gives you more control and better results, but both work if you understand the trade-offs.
At 275°F, you’re looking at a sweet spot that’s hot enough to render fat without drying out the meat. At 325°F, things move faster but you risk overshooting tenderness. Below 250°F and you’re in true low-and-slow territory, which takes longer but produces incredible results. The smoking method for pork butt uses similar low-temperature principles if you want to explore other pork cooking techniques.
Basic Cooking Time
Here’s the straightforward answer: at 275°F, plan for 2.5 to 3 hours for country style ribs. At 325°F, you’re looking at 1.5 to 2 hours. These times assume you’re cooking bone-in ribs of average thickness, roughly 2 to 2.5 inches thick.
The variation in time comes down to individual rib size, bone density, and how much meat you’re actually cooking. A pan with six ribs cooks differently than a pan with twelve. Thickness matters too—thicker ribs need more time. I always start checking at the lower end of the range and adjust from there rather than guessing.
The Low and Slow Method
If you’ve got time and want restaurant-quality results, set your oven to 250°F and plan for 3 to 4 hours. This method is forgiving because the low heat gives you a wider window before you overcook things. The connective tissue breaks down more completely, and the meat gets that signature tender texture that makes people ask for your recipe.
The low and slow approach works beautifully for batch cooking too. You can start ribs early in the day and have them ready by dinner without stressing about timing. Wrap them in foil during the last hour if the surface is browning too fast, which keeps the meat moist while the interior finishes cooking.
Preparing Your Ribs
Before the ribs hit the oven, spend five minutes prepping them properly. Remove the membrane from the back—that thin, papery layer that nobody wants to chew through. Slide a butter knife under it, grab it with a paper towel, and peel it off. This single step makes a noticeable difference in texture.
Pat the ribs dry with paper towels. Moisture on the surface steams the meat instead of browning it. Apply your dry rub generously—salt, pepper, paprika, garlic powder, brown sugar, whatever your preference. Let them sit uncovered in the fridge for at least 30 minutes, or up to overnight. This seasoning penetrates deeper and develops better flavor than last-minute rubbing.
Glazing and Finishing
Save your sauce or glaze for the last 30 minutes of cooking. Apply it too early and it burns. Apply it at the end and it stays sticky and flavorful. Brush it on generously, let it caramelize for 20 minutes, then add another coat and finish cooking.
For a more traditional approach, cook uncovered for the first two hours, then cover with foil for the remaining time. This gives you browning on the surface while the foil traps moisture for the final push. If you’re not using a glaze, this method keeps things from drying out while still developing good color and crust.
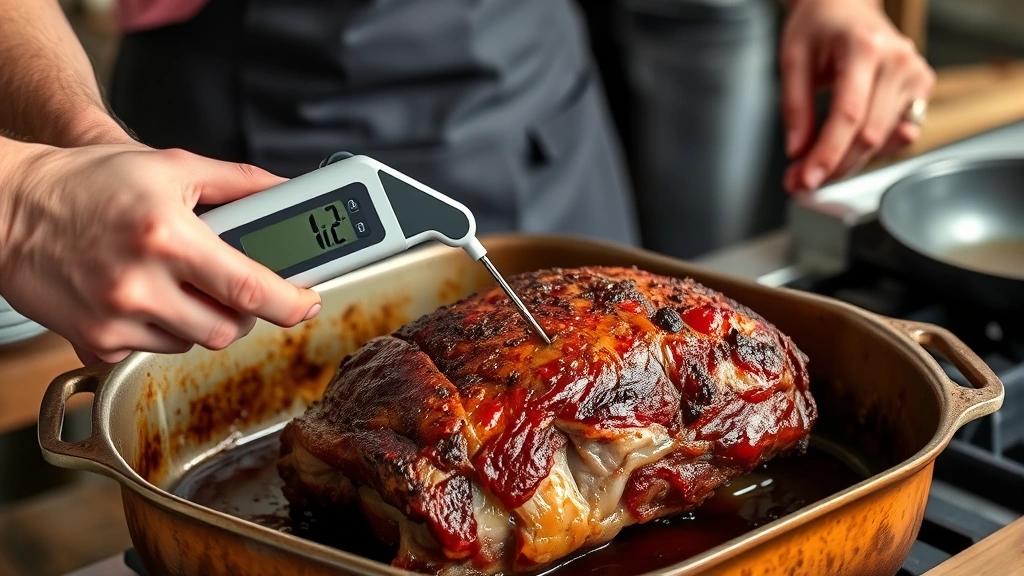
Testing for Doneness
Temperature is your best friend here. Pork is safely cooked at 145°F internal temperature, but country style ribs benefit from going a bit higher—aim for 190°F to 203°F for that tender, pull-apart texture. Use an instant-read thermometer and check the thickest part of the meat, away from bone.
The bend test works too: pick up a rib with tongs. If it bends easily and nearly breaks apart, you’re there. If it’s still stiff, give it more time. The toothpick test—a skewer should slide through the meat like butter—is another reliable indicator. Don’t rely on color alone; the meat can look done while still being tough.
Common Mistakes to Avoid
The biggest mistake is cooking too hot and too fast. High heat dries out the meat and toughens it. You end up with ribs that look cooked but taste like shoe leather. Stick with 275°F or lower and you’ll avoid this trap.
Second mistake: opening the oven door constantly. Every time you peek, heat escapes and cooking time extends. Open once to flip and check progress, not five times to see how things are going. Third mistake: skipping the resting period. This is covered in the next section, but it’s critical enough to mention twice.
Fourth mistake: cooking ribs that are too thin or too thick for the time you’ve allocated. Know your rib size before you start. If you grab whatever’s on sale without checking thickness, adjust your timing accordingly. Thinner ribs (under 2 inches) need 30 to 45 minutes less time.
Resting Your Meat
After cooking, let the ribs rest for at least 10 minutes before serving. This allows the juices to redistribute throughout the meat instead of running out onto the plate when you cut into them. Ten minutes is the minimum; 15 to 20 is better if you have the patience.
Tent them loosely with foil during resting. This keeps them warm while the internal temperature stabilizes. The meat continues cooking slightly during this rest period, so if your thermometer hit 200°F, it’ll climb a couple degrees more—which is fine.
Frequently Asked Questions
Can I cook country style ribs at 350°F?
Yes, but you’re pushing it. At 350°F, plan for 1 hour to 1.5 hours, and watch carefully. The higher heat means less margin for error. You’ll get decent results, but the meat won’t be as tender as the low-and-slow method produces. If you’re in a hurry, it works, but understand you’re trading quality for speed.
Should I cover the ribs while cooking?
I recommend covering with foil for at least part of the cooking time. Uncovered for the first hour or two to develop browning, then covered for the remainder to keep moisture in. If you’re using a glaze, apply it during the last 30 minutes uncovered so it caramelizes properly.
What’s the difference between country style and regular ribs?
Country style ribs come from the shoulder end of the rib section and have more meat and fat than baby back or spare ribs. They’re thicker, meatier, and take longer to cook. They’re also more forgiving because the extra fat keeps them moist even if you slightly overcook them.
Can I cook frozen country style ribs?
You can, but thaw them first for best results. Frozen ribs cook unevenly—the outside gets done while the inside stays cold. Thaw overnight in the refrigerator, then proceed as normal. If you’re in a true emergency, thaw in cold water for 2 to 3 hours, changing the water every 30 minutes.
How do I know if my ribs are overcooked?
Overcooked ribs fall apart completely when you pick them up—the meat separates from the bone too easily and becomes mushy. Properly cooked ribs bend and nearly separate but still hold together enough to pick up. If you’ve gone too far, the damage is done, but it’s still edible. Next time, reduce cooking time by 15 to 20 minutes.
What temperature should the ribs reach?
Target 190°F to 203°F for fall-apart tenderness. At 145°F they’re safely cooked but still firm. Most people prefer them in the 190 to 200°F range where the meat is tender but not mushy. Use an instant-read thermometer in the thickest part of the meat, away from bone.
Final Thoughts
Cooking country style ribs in the oven isn’t complicated once you understand the basic principles: lower temperature for more tender results, adequate time for the connective tissue to break down, and proper testing for doneness. Start with 2.5 to 3 hours at 275°F and adjust based on your oven’s quirks and rib thickness. Rest them when they’re done, and you’ll have ribs that rival anything from a restaurant kitchen.
The beauty of this method is consistency. Once you nail it once, you can repeat it reliably. Keep notes on your timing and results, and you’ll develop an intuition for exactly how your oven behaves. Pair these ribs with boiled potato recipes for a classic comfort meal, or explore fall recipes that complement slow-cooked pork. For other slow-cooking inspiration, check out crockpot recipes that use similar low-temperature cooking principles.


